


It’s tough to beat the look and workability of the classic American hardwoods like oak, maple, cherry, walnut, and others. And most experienced woodworkers quickly learn the ins and outs of how to cut, plane, and sand these woods for the best finished appearance.
But each of these species can also be found with unusual figure. Sometimes it’s just the result of where the board came from in the tree. Crotch wood is a good example. Other woods reveal interesting patterns depending on how the log is sawn, like the beautiful medullary rays of quartersawn oak.
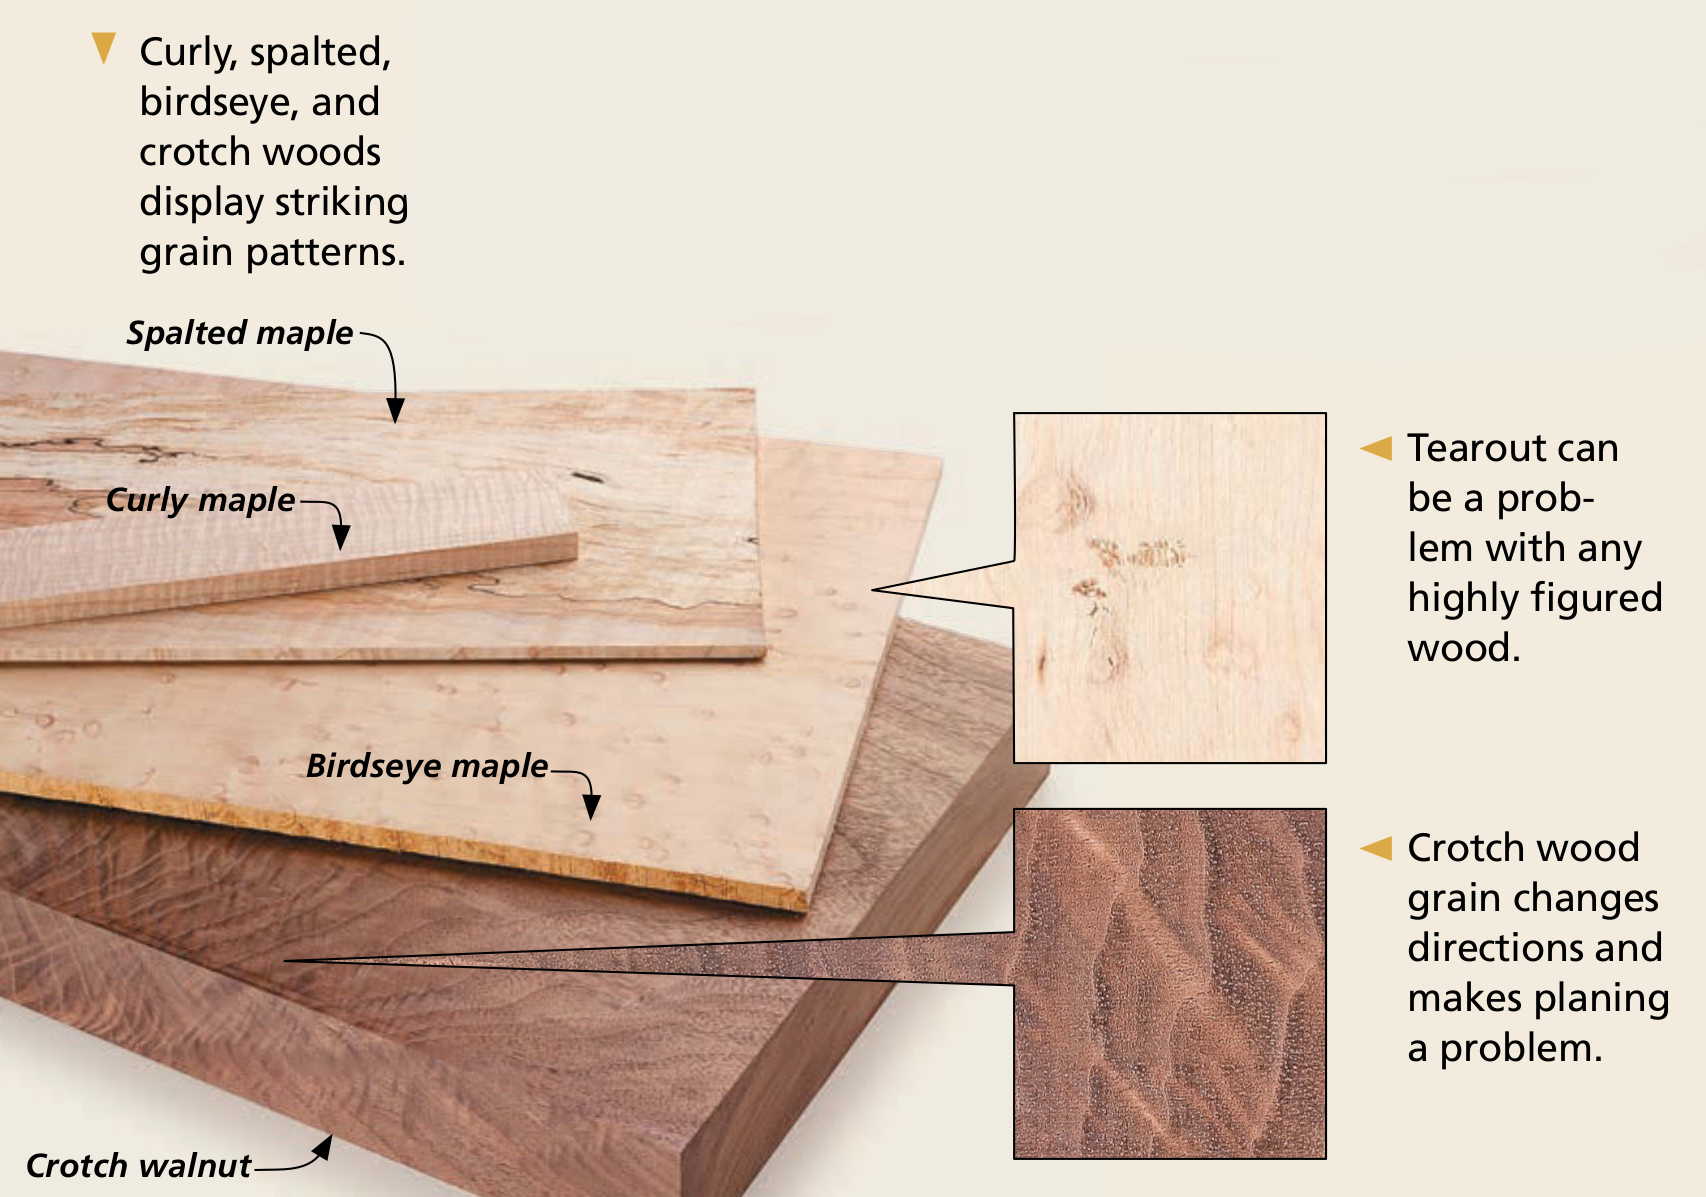
For these woods, the difficulty usually comes when surfacing and thicknessing the stock. In birdseye blanks, the small knots that form the eyes are prone to tearing out under a planer or jointer knife. You’ll also often see tearout in a curly or quilted workpiece. The curly grain, which changes direction with every inch, will inevitably be going the wrong direction through the knives at some point. The swirling grain in crotch wood presents the same challenge. You can see examples of each of these problems in the photo above.
SOLUTIONS. There’s no single solution for dealing with the problems associated with working figured woods. That’s mostly because each board can present a unique challenge. However, there are a few techniques that can get you going. You’ll usually find you can solve most of the problems using these approaches and a little patience.
LAY OUT & EXPERIMENT. Probably the best way to start is by laying out the parts you need. Normally, I like to plane all the wood for a project before cutting parts to length. But when using figured woods, this isn’t the best approach. Instead, lay out each of the figured workpieces and cut them to rough size. This way, you not only identify the right grain for each part, but you also minimize the extra effort of working on areas you won’t use in the project. You’ll also want to determine which side of a workpiece will be visible in the finished piece.

With the good face of each piece identified, try jointing or planing the opposite face to see how the wood will react. Sometimes you can get a good result by slowing the feed rate. You can also try a light mist of water on the surface to soften the fibers temporarily while you run it through a planer.
HAND PLANES. If your power tools don’t give you the results you’re looking for, then it’s time to turn to hand tools. I find that a good smoothing plane (with a freshly sharpened iron) is often the answer. The nice thing about this approach is that you can change the direction of the cut to match the changes in grain direction. Set it to take the finest shaving you can and give it a try, again using the back face of the workpiece to make your test cuts.

SCRAPER PLANE. If a smoother still leaves tearout, you can try a scraper plane (Figure 1). The high angle this blade presents to the workpiece is often the key to smoothing these woods. If the workpiece is really stubborn, you might try resharpening the iron without burnishing a hook on the edge.
HAND SCRAPER. In addition to smoothing the surface, a hand scraper can be the best way to bring out the beauty in a figured workpiece. Unlike the scraper plane, you’ll want to burnish a fresh hook on the edge of a hand scraper before getting started. You can vary the angle of the hand scraper to get the best results (Figure 2). It’s also sometimes helpful to change the direction of your stroke to find the best approach.

SANDING. Unfortunately, there are some workpieces that simply can’t be worked with any of these tools. In these cases, you’ll have to break out the sanders and get started. A random-orbit sander is great for the initial smoothing out of the rough spots, but I like to finish up with a sanding block (Figure 3) for the finest surface. This way, you can follow the grain on a stubborn workpiece.
Although they can be tough to work, the good news is that the spectacular look of figured wood more than justifies the effort.
Shop Safety: Spalted Wood

Although most figured woods are prized for their grain there’s one other type often used in fine furniture — spalted wood. Spalting is simply a discoloring of some of the grain due to fungal growth. And while this discolored pattern can make an attractive workpiece (especially when resawn and bookmatched) the spores can cause breathing problems for some woodworkers. To be on the safe side, wear a dust mask whenever you sand or work with spalted woods.


