

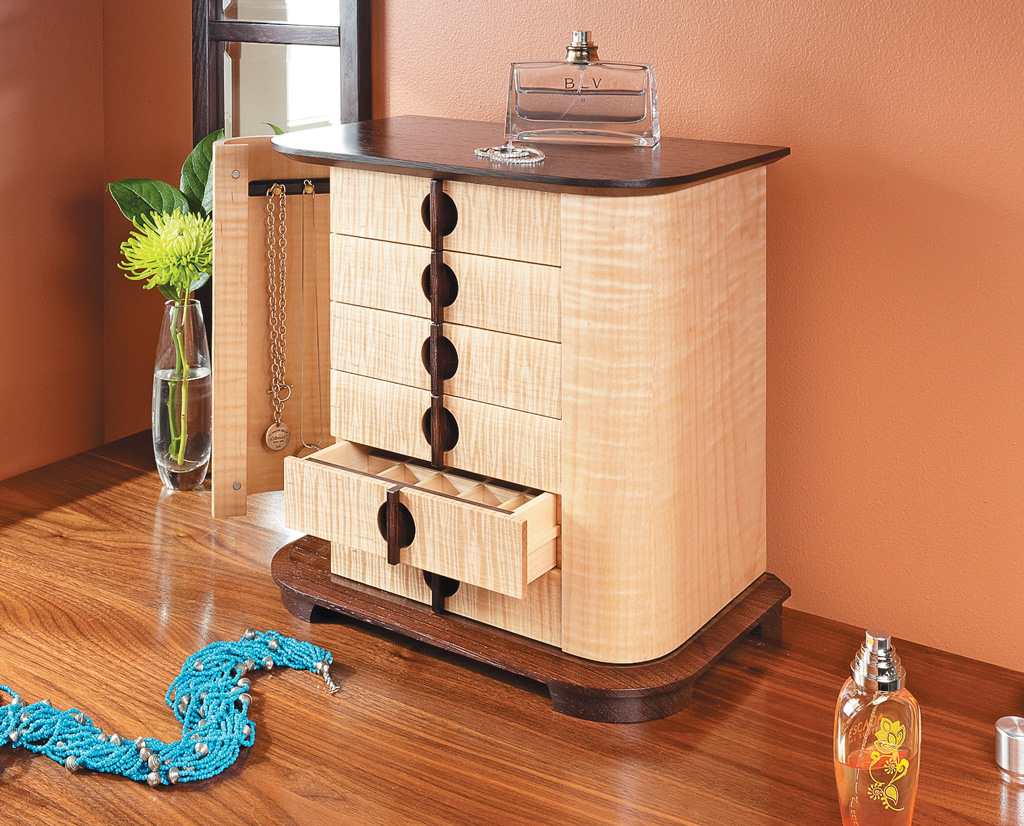
Often projects like jewelry chest you see below features a pair of attractive curved-front doors. It's a good example of the dramatic effect adding curves to a project can have. For that project, I laminated bending plywood around a form. But there are other options for adding bends and curves to your work. Here's a quick look at a few of the different techniques you can put to use in your shop.
BENT LAMINATION
Bending plywood is a great choice for wide project parts, like the doors on the jewelry chest. But a similar technique can be used to bend thin laminations of hardwood in a bending form. By resawing hardwood stock into very thin slices, usually 1/16 to 1/8 thick, you can stack the individual pieces and glue them together to retain the desired shape.
The bent lamination technique can be used for all sorts of applications. It's perfect for making small parts like simple, curved door handles. But it can also be adapted for more complex shapes.
BENEFITS. One big advantage of a laminated part over one simply cut to shape is the strength of the laminated piece. With a part made using this technique, you're always assured of strong, long-grain wood throughout the length of the part.
Another reason to choose bent lamination over other options is the variety of shapes you can create. For instance, if you need a very tight-radius curve all you need to do is reduce the thickness of the plies to accommodate just about any bend. Making a 1"-radius bend is difficult with any other technique. But it's a breeze with thin laminations.
Finally, when it comes to making multiple parts, there's no other method that comes close. Once you've built a form, you can turn out identical parts in whatever quantity you need.

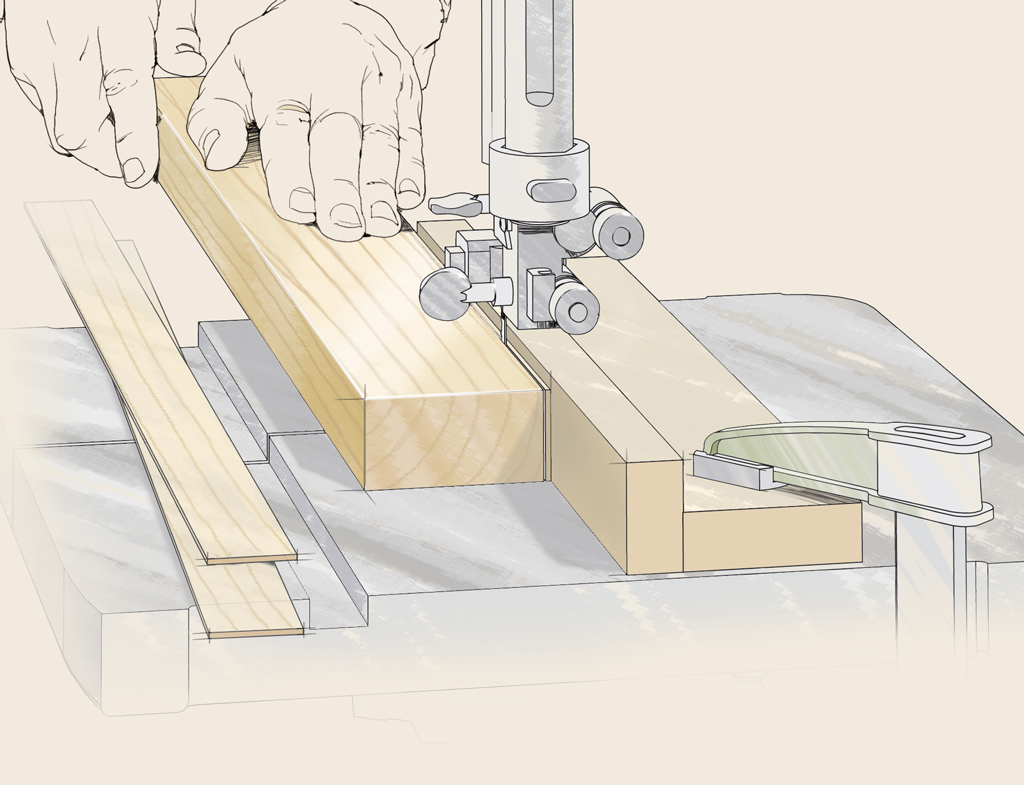
HOW IT'S DONE. It all starts with cutting the thin strips. I prefer to cut the plies for bent laminations on the band saw, like in the drawing at the top. But you can also cut the pieces at the table saw. The goal is to keep them a uniform thickness. A simple mark on the end or edge of the workpiece helps you reassemble the strips in sequence to preserve the grain pattern.
Now, all you need is a bending form. I like to use MDF to make the forms because it's easy to work with and has no grain direction. This is a big plus when shaping curved forms.
Using inside and outside forms, like those shown in the drawing just above, almost guarantees a gap-free lamination. They apply equalized clamping pressure to the whole length of the lamination. It's also a good idea to wax the forms to prevent the glue from sticking.
KERF BENDING
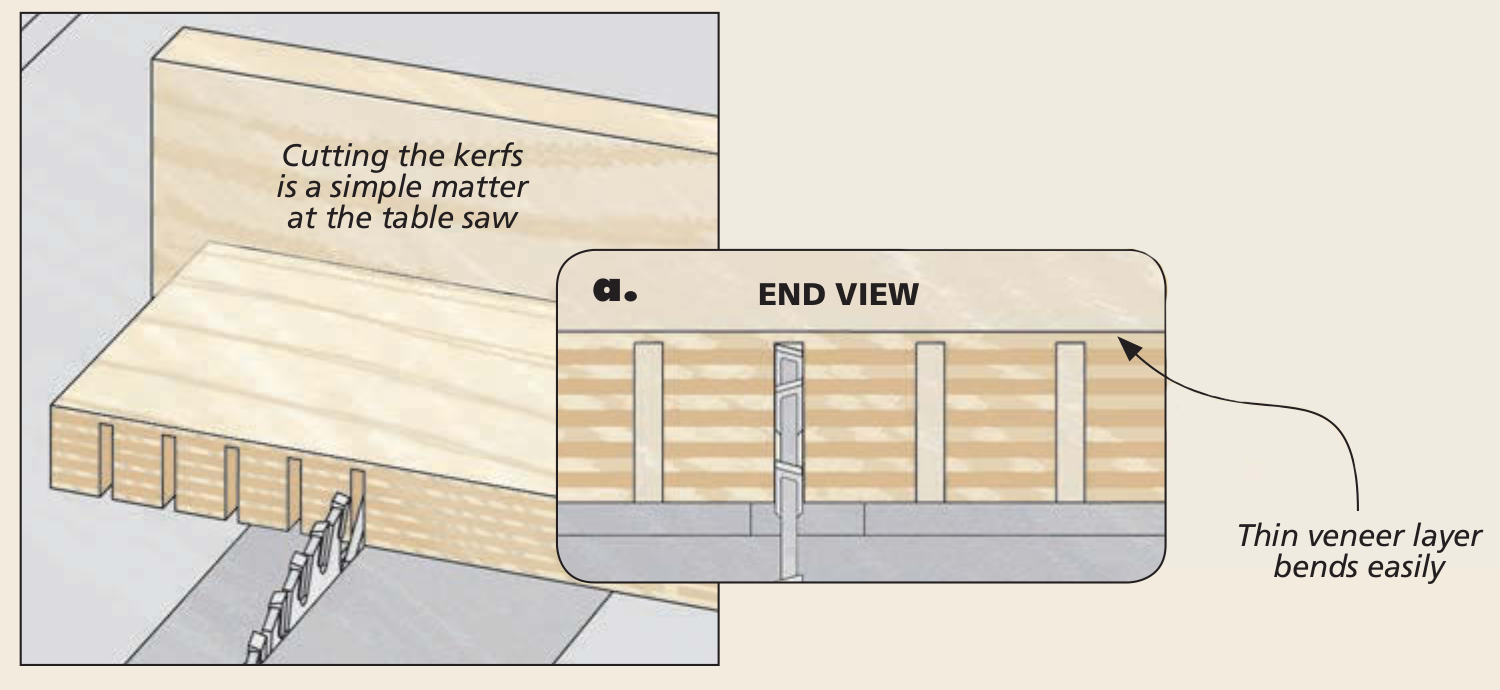
A popular technique for making curves in plywood is kerf bending. As the name implies, a series of saw kerfs are cut on the inside face of the section to be bent. The kerfs are cut nearly through the final core ply, stopping just short of the veneer. This creates a relief space which allows the veneer to bend.
This technique borrows a page from the finish carpenter's book. It's often used in custom-made built-ins or stairways. But it also has a place in furniture building. You'll often find kerf-bent pieces in large furniture like wardrobes and credenzas. It's also a popular technique for making table aprons.
CONSIDERATIONS. Kerf bending is probably the easiest way to add curves to a project. It doesn't require any special equipment or complicated jigs. All you need is a table saw and some cabinetgrade plywood.
On the down side, the inside of the kerf-bent piece will show the unattractive kerfs. Of course, you can cover that face with veneer or a number of other options, but it does add to the work.
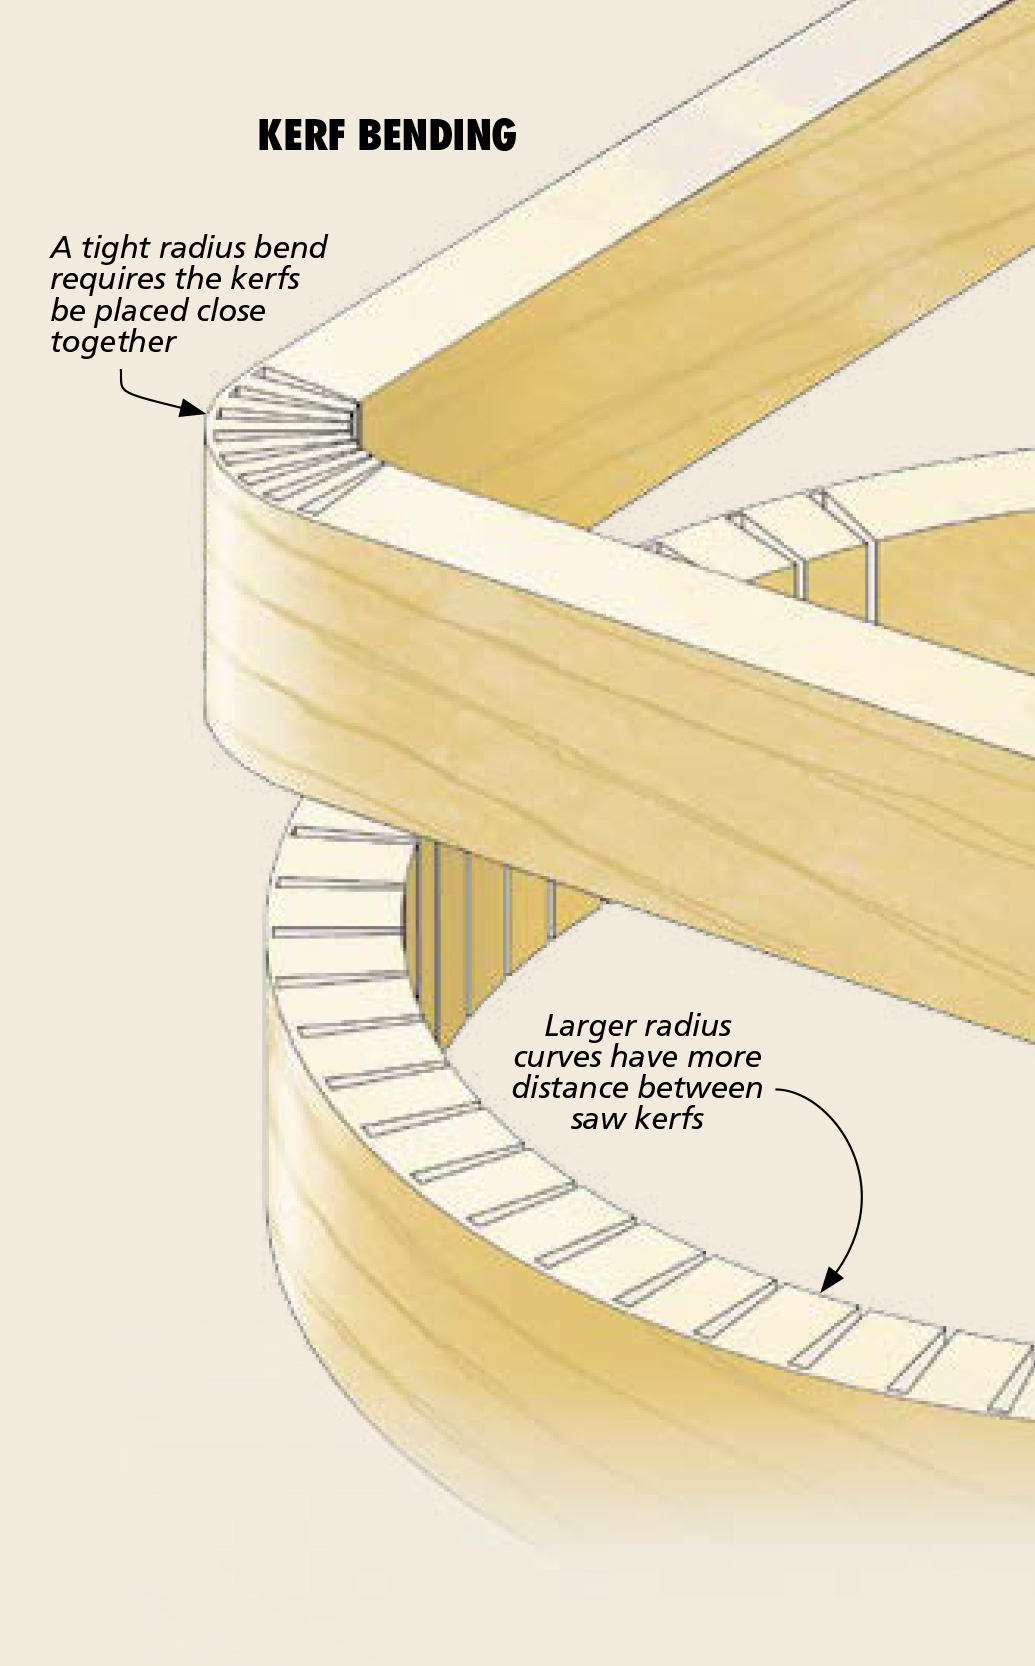
SPACING. How far apart you cut the kerfs depends on the radius of the curve you want to create. The drawing above gives you an idea of how the radius of the bend affects the spacing of the kerfs.
FIXING THE BEND. Unlike bent laminations, kerf-bent pieces won't retain their shape. To fix the curved piece in position I usually attach it to a curved framework or other pieces in the case.
Kerf bending and bent laminations both have a variety of uses in furniture making. But if your project requires bending solid wood, the box below describes how to do it with steam.
Worth a Look: Steam Bending

Steam bending has a long tradition in woodworking. The concept is to heat up and add moisture to the wood until the cells become elastic enough to bend in a form.
The most popular method is to enclose the workpiece in a steam chamber. As the drawing shows, a fairly simple setup can be made from common kitchen items like a tea kettle and a hotplate. But there are also dedicated steamers available if you intend to do a lot of bending.
This technique is used to bend along the long grain of the wood. The choice of wood is also important. Some woods like oak and ash bend very well. Others, like maple, are a little more stubborn.


