


There are several ways to cut tenons on a table saw, and the technique you choose can make a big difference in how quickly and accurately the job goes. A simple stub tenon may only require a few passes with a standard saw blade, while larger tenons or more demanding furniture joinery can benefit from a dado blade or a dedicated tenoning jig.
The right method depends on the project. How many tenons do you need to cut? How long are they? Do you need exceptionally smooth cheeks, or will a little cleanup with a chisel or sandpaper be acceptable?
Let's take a closer look at three common table saw tenoning methods, including how each one works, its advantages, and when you might choose it for your next woodworking project.
Method 1: Cutting Stub Tenons with a Standard Table Saw Blade
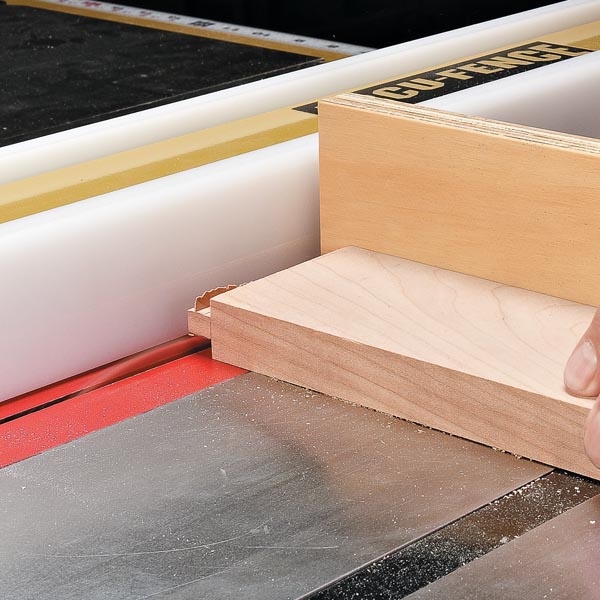
For short, simple tenons, you may not need to change your table saw setup at all. A standard saw blade can be used to cut the shoulders and remove the waste from the cheeks, making this a convenient option for occasional joinery.
This method is particularly useful for stub tenons with only two cheeks, such as those used in some cabinet and frame assemblies. Because the tenon is relatively short, the narrow kerf of a standard blade isn't a major disadvantage.
How It Works
Start by setting the blade height to establish the tenon thickness. With the workpiece supported by a miter gauge, position the rip fence as a length stop to establish the shoulder location. Use an appropriate stop-block arrangement that provides clearance before the workpiece reaches the blade.
Make the shoulder cut first, then remove the remaining waste with a series of additional passes. Move the workpiece incrementally away from the shoulder until you've removed most of the material from the cheek.
The individual cuts may leave small ridges between passes. Once the waste is removed, use a sharp chisel to pare away any remaining material and smooth the cheek. Repeat the process on the opposite face to complete the tenon.
Advantages and Limitations
The biggest advantage of this method is convenience. You don't need to install a dado blade or set up a dedicated jig, making it a practical choice when you only have a few short tenons to cut.
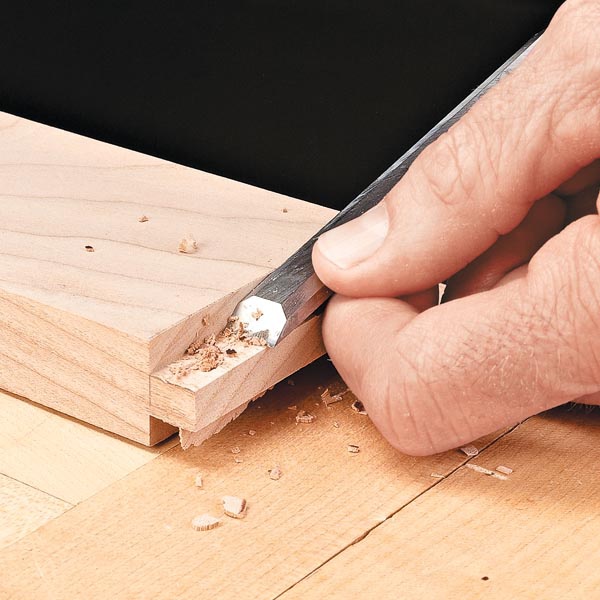
The drawback is the amount of cleanup required. Because a standard blade removes only a narrow strip of material with each pass, cutting longer tenons can be time-consuming. The resulting cheeks may also require additional work to achieve a smooth, consistent surface.
When to use it: Short stub tenons, occasional joinery, and projects where you want to avoid changing your table saw setup.
Method 2: Cutting Tenons with a Dado Blade
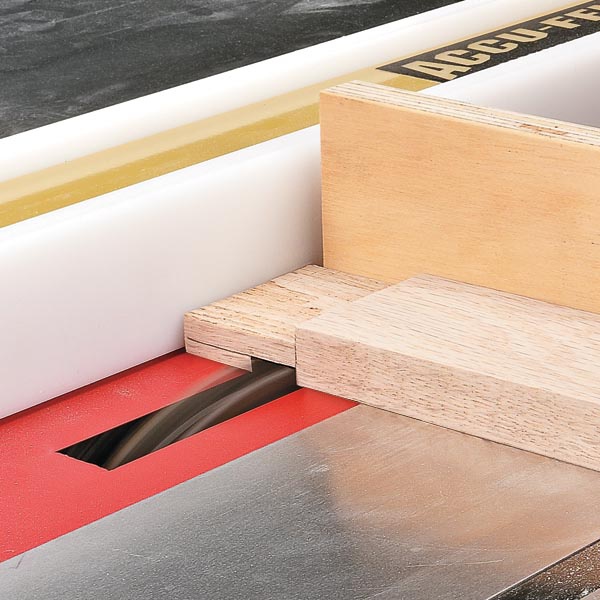
When you're cutting longer tenons or making a large number of identical joints, a stacked dado blade can save considerable time. Its wide cutting surface removes more waste with each pass, allowing you to establish the shoulders and form the cheeks much more quickly than with a standard blade.
You don't need a dado stack that's as wide as the entire tenon length. Even a narrower setup can remove the waste efficiently with a series of overlapping passes.
How It Works
Install a stacked dado blade with an appropriate throat plate, then set the blade height to establish the tenon thickness. Use a miter gauge with an auxiliary fence to support the workpiece during the cut.
Position the rip fence to establish the tenon length, using a safe stop arrangement that prevents the workpiece from becoming trapped between the fence and blade.
Make the shoulder cut first, then work toward the end of the tenon with additional passes over the dado blade. Repeat the process on the opposite face, checking the fit against the mortise as you go.
Because the dado blade removes a wider section of material, you'll have fewer ridges to clean up. However, depending on the blade and cutting conditions, some scoring or small imperfections may remain on the cheeks.
Advantages and Limitations
A dado blade makes quick work of longer tenons and is especially convenient when you have several identical joints to cut. Once the blade height and fence position are established, you can produce consistent tenons with relatively little additional setup.
The primary drawback is the initial setup time. You'll need to remove the standard blade, install the dado stack, and use a suitable throat plate. The cheeks may also require light sanding or other cleanup if the blade leaves ridges.
When to use it: Longer tenons, batches of identical joints, and general furniture construction where speed and repeatability are important.
Method 3: Cutting Tenons with a Table Saw Tenoning Jig
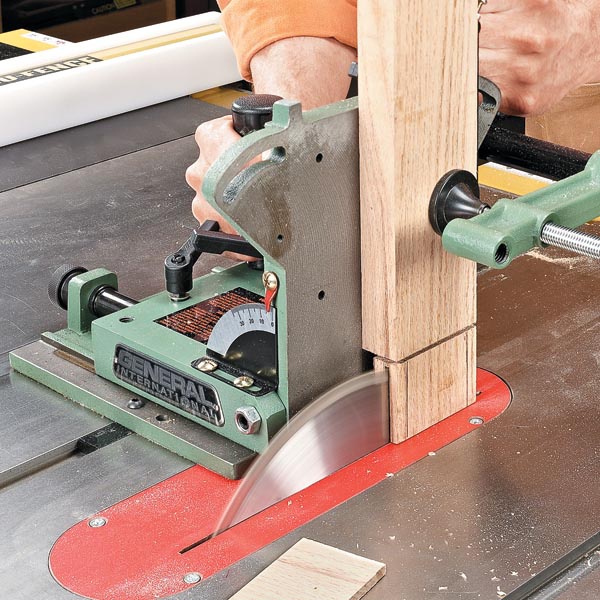
For woodworkers who regularly make mortise-and-tenon joints, a dedicated tenoning jig is another option worth considering. Unlike the previous methods, which remove the cheek waste with the workpiece lying flat on the saw table, a tenoning jig holds the workpiece vertically.
This allows a standard saw blade to cut the entire cheek in a single pass. The result is a smooth, straight surface that typically requires very little cleanup.
A tenoning jig is particularly useful for larger tenons and joinery where the cut surfaces will remain visible, such as through-tenons and bridle joints.
How It Works
A typical tenoning jig rides in the table saw's miter gauge slot and holds the workpiece upright with a clamping mechanism. Adjustable fences and stops allow you to position the workpiece accurately relative to the blade.
Before using the jig, cut the tenon shoulders with the workpiece lying flat on the saw table. These cuts establish the tenon length and provide a reference for the cheek cuts.
Next, clamp the workpiece vertically in the jig and adjust its position to establish the tenon thickness. Make a cheek cut, then reposition the workpiece to cut the opposite cheek. Be sure the jig is configured so the waste falls freely to the outside of the blade.
After cutting both cheeks, test the tenon against the mortise. Make any necessary adjustments before cutting the remaining joints.
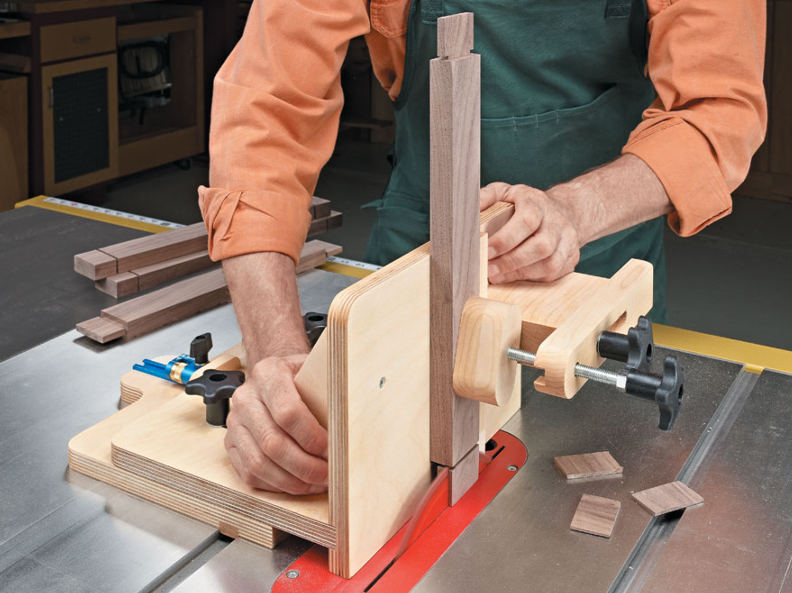
Advantages and Limitations
The main advantage of a tenoning jig is the quality and consistency of the cuts. It can handle a wide range of tenon sizes, and the resulting cheeks are generally smoother than those produced by removing waste with a dado blade.
It also eliminates the need to change blades when switching between ordinary table saw work and tenoning.
The trade-off is the jig itself. Commercial versions require an additional investment, while a shop-built jig takes some time to construct and adjust. You'll also need to account for the jig's capacity when working with unusually large or long workpieces.
When to use it: Frequent mortise-and-tenon joinery, larger tenons, through-tenons, bridle joints, and projects where smooth, accurate cheeks are a priority.

Build Your Own Adjustable Tenoning Jig
If you regularly make mortise-and-tenon joints, a shop-built tenoning jig can be a useful addition to your table saw. It provides a dedicated way to hold workpieces vertically and make repeatable cheek cuts without investing in a commercial jig.
The Woodsmith Adjustable Tenoning Jig is designed to provide the support and adjustability needed for accurate table saw tenoning. It's a practical shop project that can save time on future furniture builds.
GET THE PLANS: Adjustable Tenoning Jig at WoodsmithPlans.com
Comparing the Three Table Saw Tenoning Methods
Each method has its place in the workshop. Here's a quick comparison to help you decide which setup makes sense for your project.

For a handful of short tenons, a standard blade may be all you need. If you're building a table or cabinet with numerous matching joints, the dado blade method can make the work go more quickly. And if you regularly cut tenons or need particularly smooth cheeks, a tenoning jig provides another useful option.
The important thing is to understand how each technique works and choose the setup that suits the size, quantity, and requirements of your joinery.
Learn More About Cutting Accurate Tenons
Once you've selected a method, the next step is getting the table saw setup dialed in. Small adjustments to blade height, fence position, and workpiece support can make a significant difference in how accurately the tenon fits its mortise.
For detailed instructions, see our Woodsmith article, How to Cut Tenons on a Table Saw: 2 Proven Methods. It walks through the dado blade and tenoning jig techniques, including shoulder cuts, cheek cuts, and tips for fine-tuning the fit.
And if you're looking for a simple introduction to making the complete joint, check out How to Make a Mortise and Tenon Joints in 3 Simple Steps, which covers drilling the mortise and cutting the matching tenon with common workshop tools.


