


Half-blind dovetails are a classic woodworking joint, especially when building drawers for fine furniture. Unlike through dovetails, which are visible from both sides of a corner, half-blind dovetails conceal the joinery on the front of the drawer while leaving the distinctive dovetail pattern visible along the sides.
Cutting these joints by hand may seem intimidating, but the process is straightforward once you understand the layout and a few important techniques. With a dovetail saw, sharp chisels, and a little patience, you can create strong, attractive joints without a router or expensive dovetail jig.
In this tutorial, I'll walk you through the process of cutting half-blind dovetails by hand, from laying out the tails and pins to removing waste, fitting the joint, and making a few adjustments for a clean final assembly.
What Is a Half-Blind Dovetail Joint?
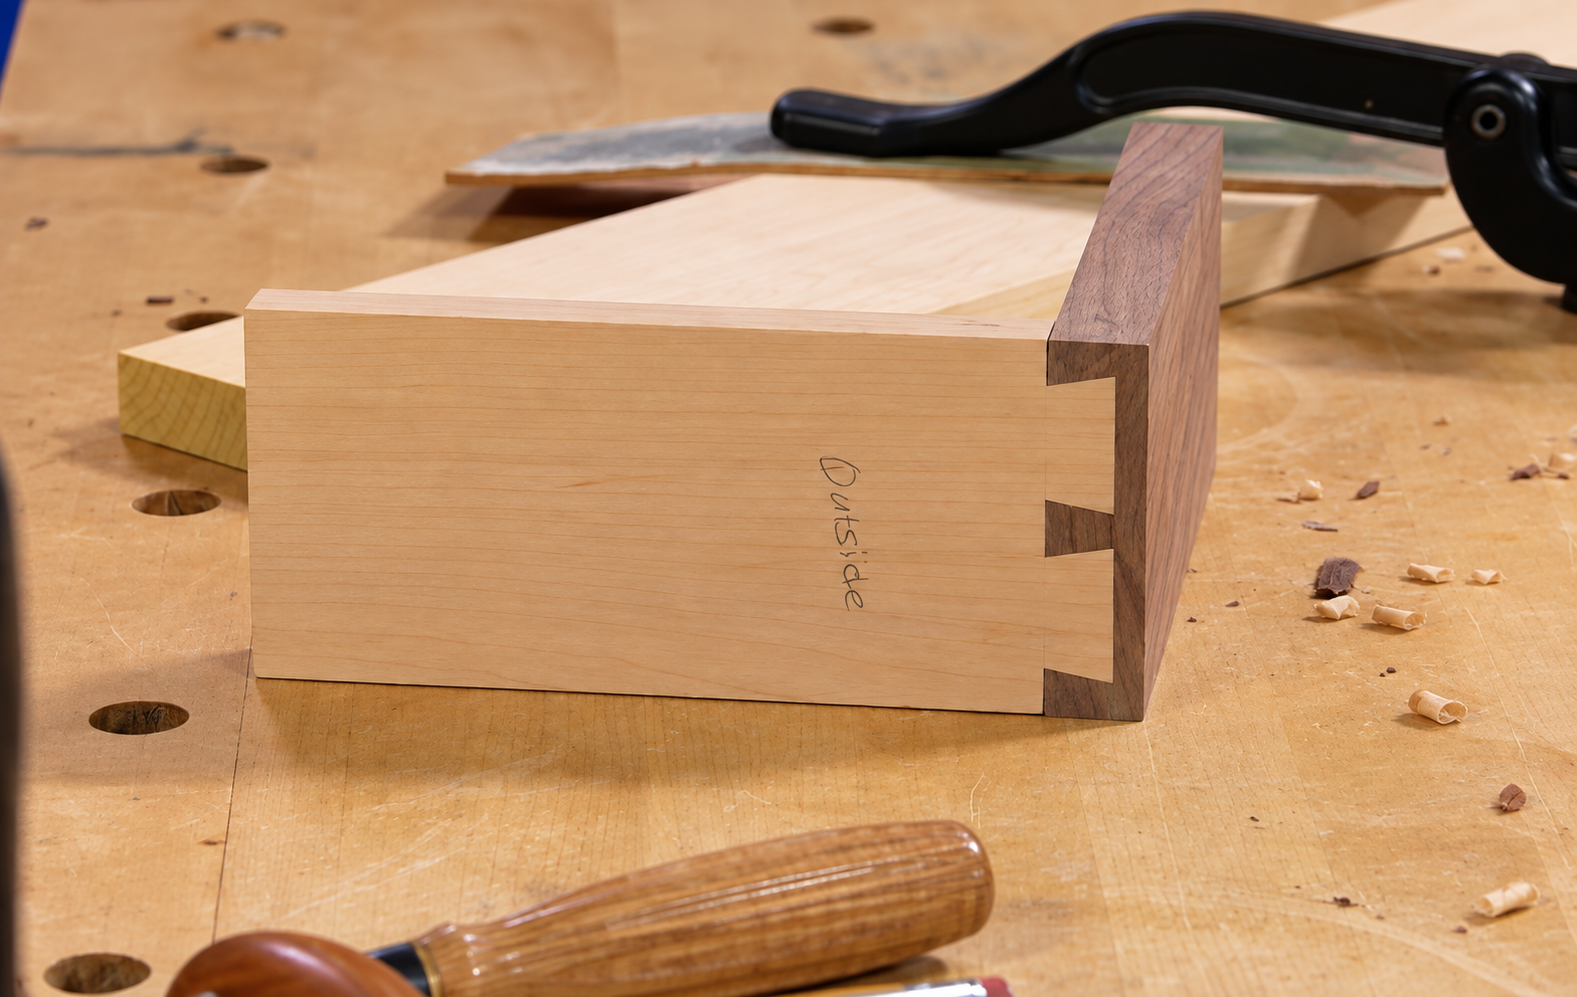
A half-blind dovetail is a variation of the traditional dovetail joint in which the tails fit into sockets cut into the adjoining board but don't extend all the way through it. This leaves a solid, uninterrupted face on one side of the joint.
That's why half-blind dovetails are commonly used to attach drawer sides to drawer fronts. The joint provides the mechanical strength of interlocking tails and pins while preserving the appearance of the drawer front.
The difference between through dovetails and half-blind dovetails is primarily in how the sockets are cut. With through dovetails, you can saw completely through both workpieces. With half-blind dovetails, the sockets stop short of the outside face, requiring a little extra work with a chisel to remove the waste.
Tools Needed to Cut Half-Blind Dovetails
You don't need a large collection of specialized tools to cut half-blind dovetails by hand. Most of the work can be completed with basic hand tools you may already have in your shop.
For this demonstration, I'll use a marking gauge and dividers for layout, a dovetail saw with a magnetic cutting guide, and a coping saw to remove waste between the tails. A marking knife, several sharp chisels, and a mallet handle the remaining work.
I'll also use a drill press with a Forstner bit to remove most of the waste from the blind sockets. This speeds up the process, although you can remove the waste entirely by hand.
Finally, I'll show you a handy trick using a modified card scraper to extend the saw kerfs into the blind sockets. It's a simple technique that makes cleaning out the sockets much easier.
Step 1: Lay Out the Half-Blind Dovetails
Accurate layout is the foundation of a well-fitting dovetail joint. Before making any cuts, establish the depth of the tails, mark the shoulder lines, and determine the spacing of the pins and tails.
For this demonstration, I'm using a thicker piece of walnut for the drawer front and a thinner piece of cherry for the drawer side.
Mark the Shoulder Lines
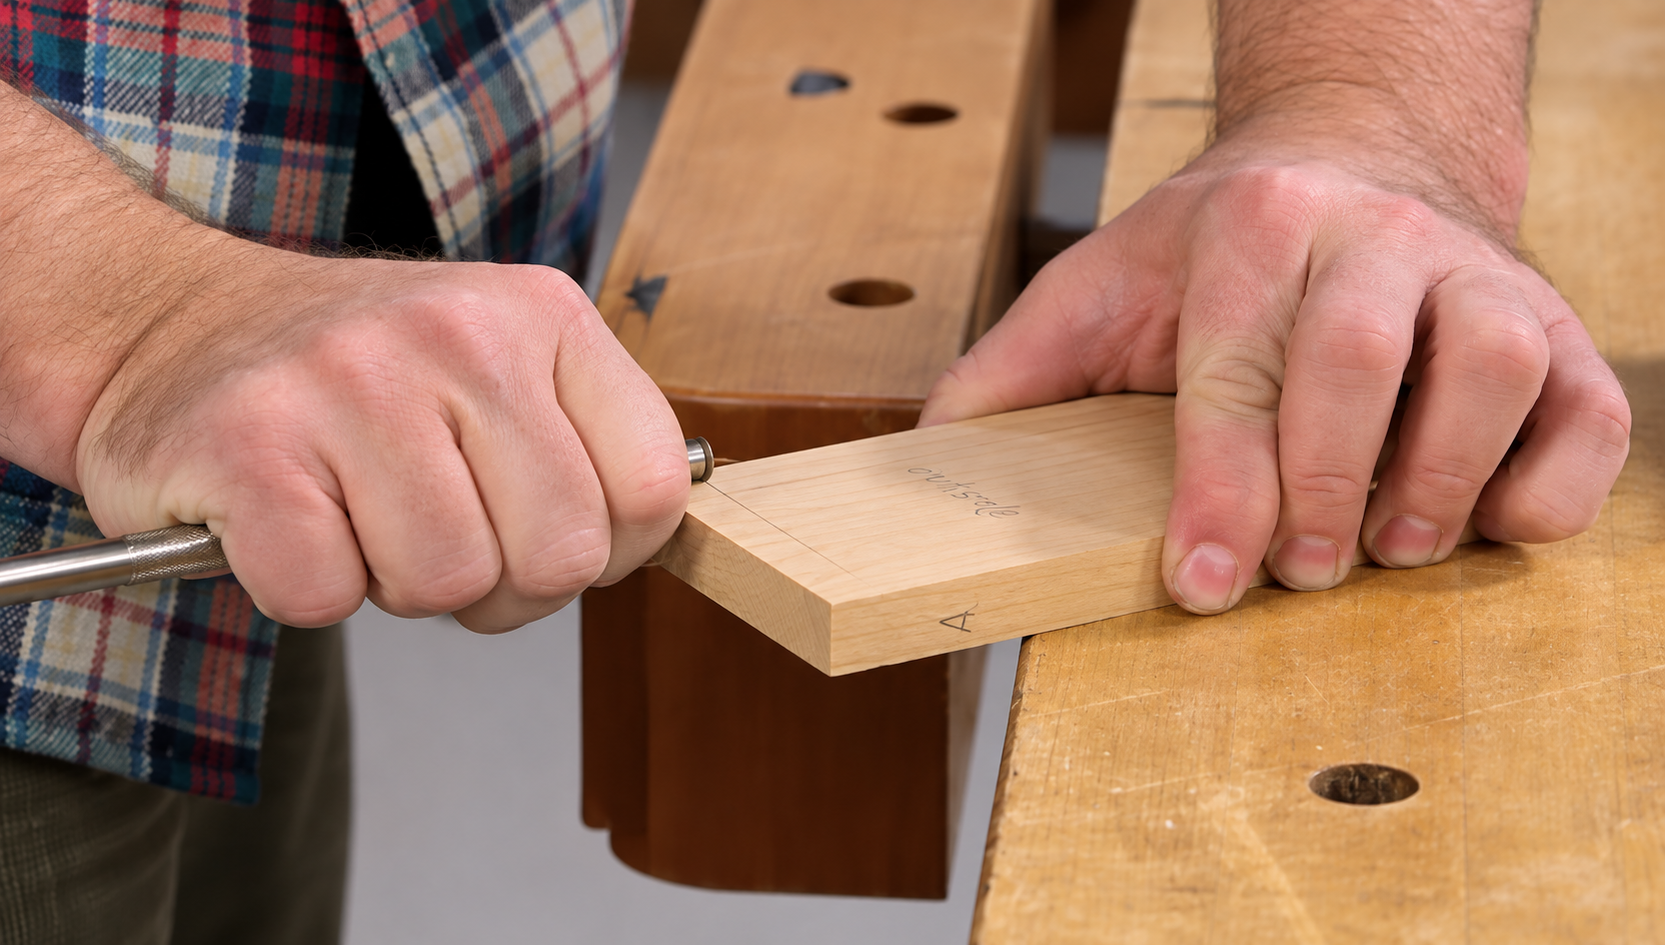
Start by setting your marking gauge slightly wider than the thickness of the drawer side. Transfer this measurement to the inside face of the drawer front. This establishes the shoulder line where the drawer side will meet the front.
Next, determine how deeply you want the tails to extend into the drawer front. I typically aim for approximately two-thirds of the front's thickness. This leaves enough material on the outside to conceal the joint while providing plenty of depth for the tails.
Set the marking gauge to this depth and mark the end and faces of the drawer side. Then transfer the same depth to the end of the drawer front.
Make these marking-gauge lines distinct enough that you can register a chisel in them later. A clear, crisp baseline makes it much easier to clean up the joint accurately.
Determine the Number and Spacing of the Tails
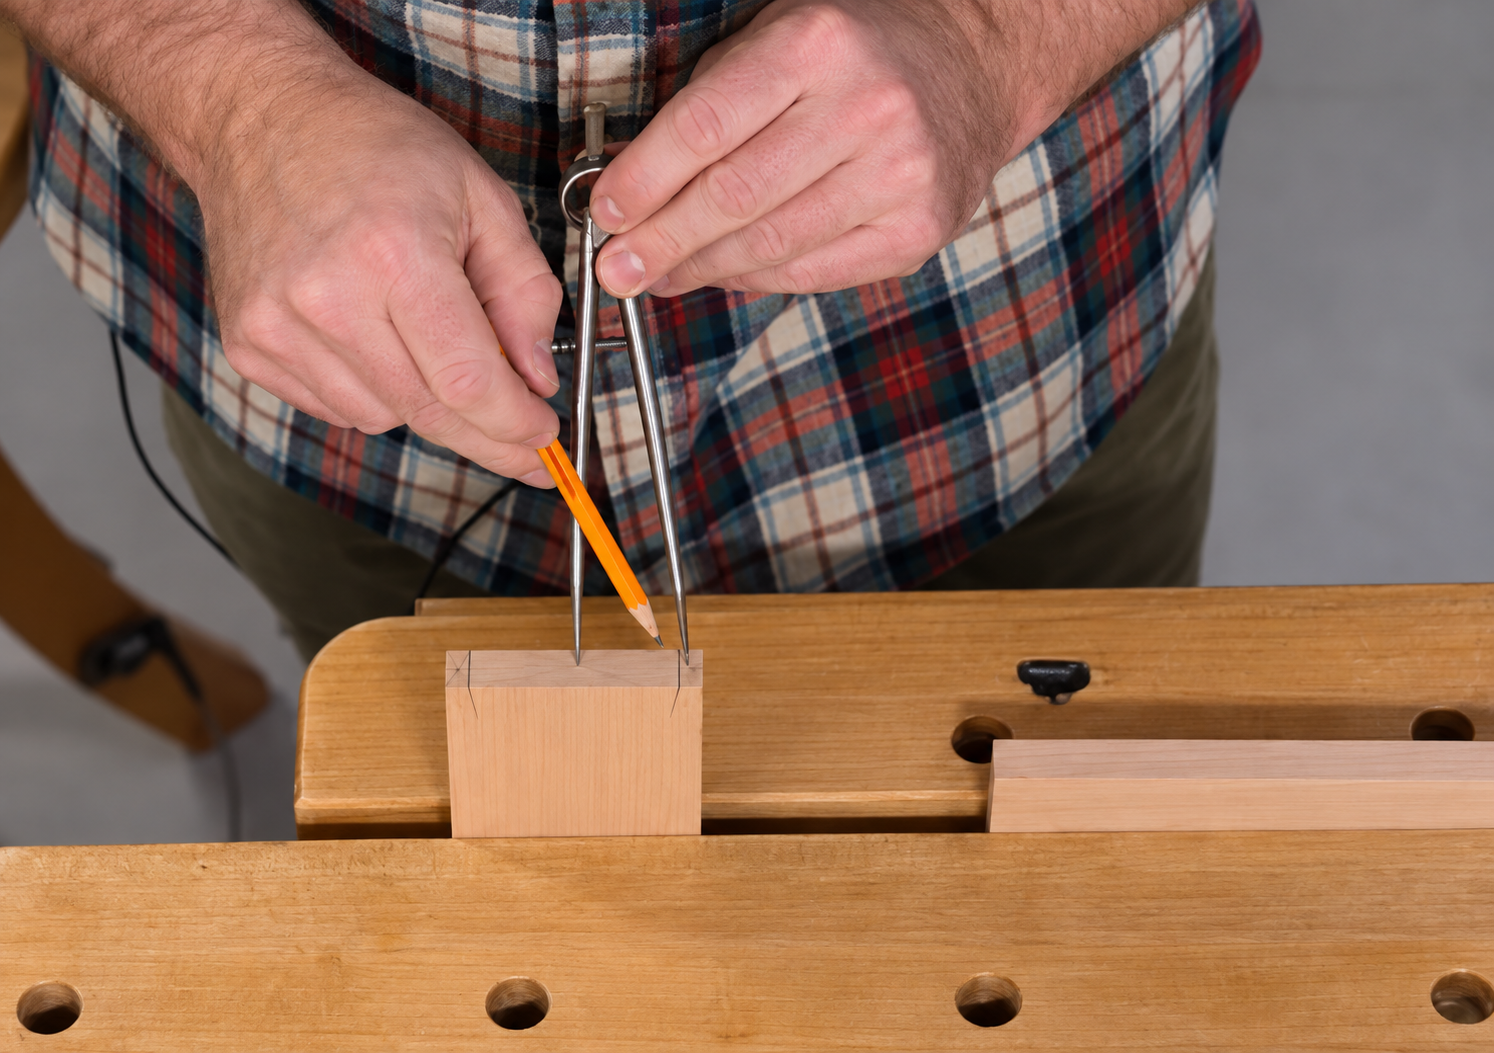
For a typical drawer that's approximately 3" to 4" tall, I generally use two tails. A taller drawer may call for additional tails, but two provide a good balance of appearance and strength for most smaller drawers.
I also like to make the half-pins at the top and bottom approximately half the thickness of the drawer side. Once those are established, I use dividers to space the two tails and the center pin.
The dividers make it easy to adjust the spacing without having to calculate every measurement. Once I'm satisfied with the layout, I mark the waste areas so there's no confusion about which material needs to be removed.
Step 2: Cut the Dovetail Tails
When cutting dovetails by hand, there's always a discussion about whether to cut the pins or tails first. I prefer cutting the tails first because it makes transferring the layout to the mating workpiece easier.
Secure the drawer side vertically in a vise with its outside face toward you. A spacer in the vise helps keep the jaws from racking.
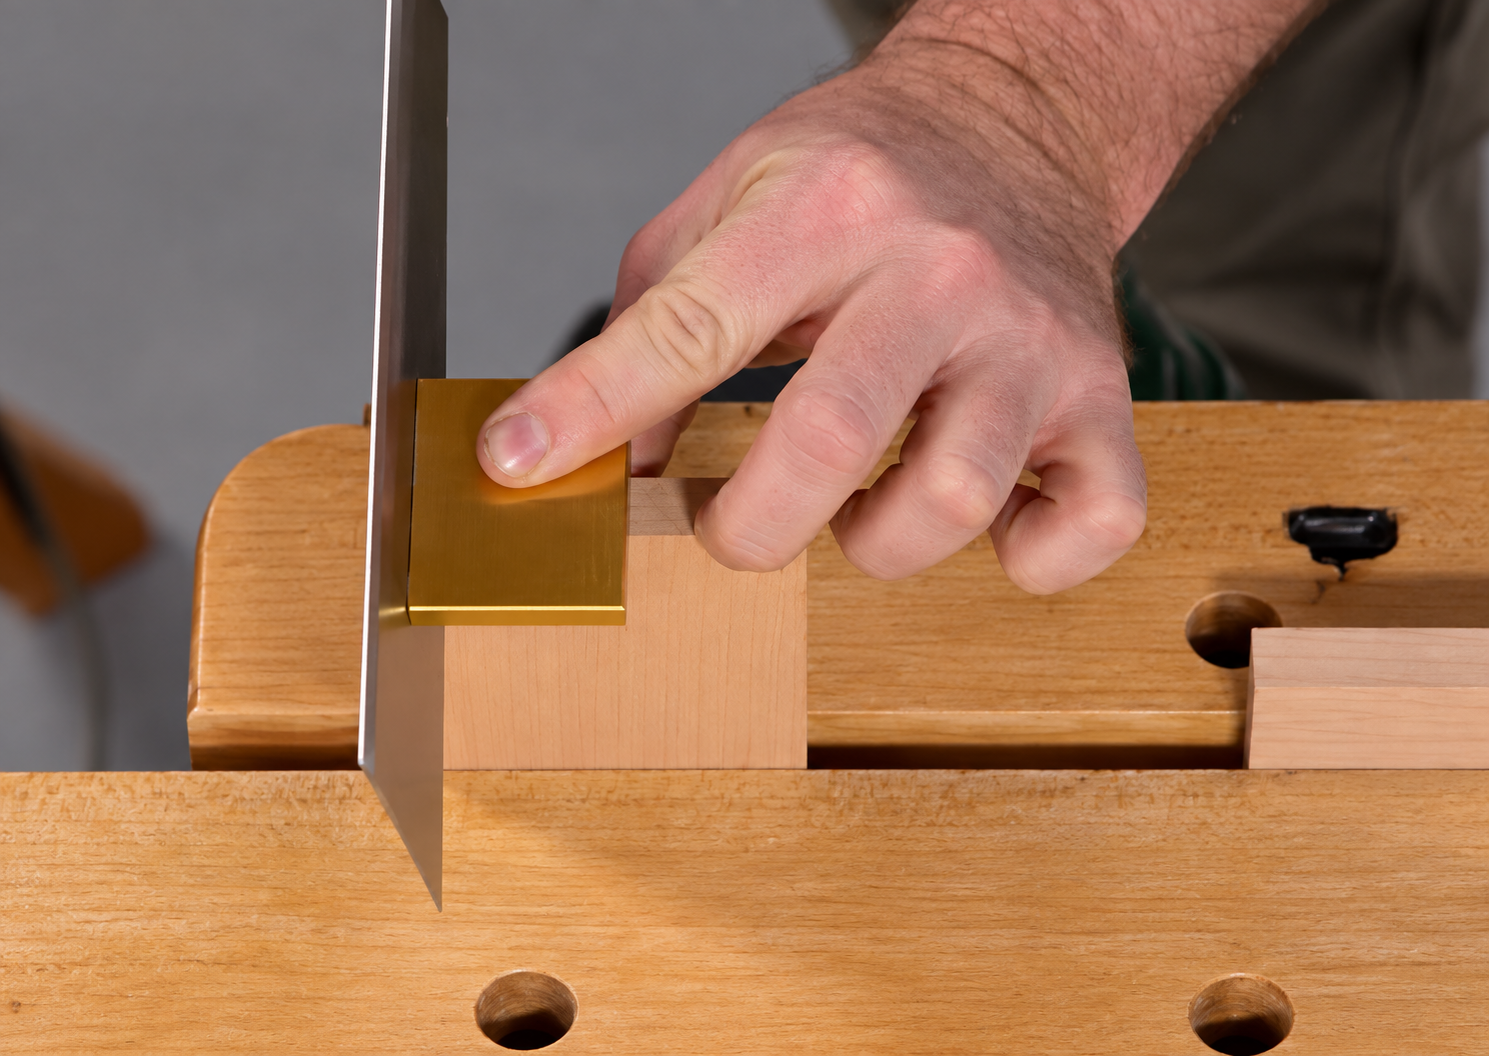
Using a dovetail saw and guide, cut along the layout lines, keeping the saw on the waste side of each line. The magnetic guide I'm using has a 1:6 dovetail angle, which works well for this joint.
As you saw, watch the layout line on the face of the board. Start the cut carefully, lower the handle to establish the kerf, and continue until you reach the baseline on both sides.
After cutting the angled sides of the tails, turn the workpiece on its edge and make the straight cuts that establish the outside shoulders.
Remove the Waste Between the Tails
With the saw cuts complete, use a coping saw or fret saw to remove most of the waste between the tails.
Stay slightly away from the baseline. The goal is to remove the bulk of the material while leaving a small amount for the chisel to clean up.
Once the center waste is loose, you can carefully break it free rather than risk cutting into the adjacent tail.
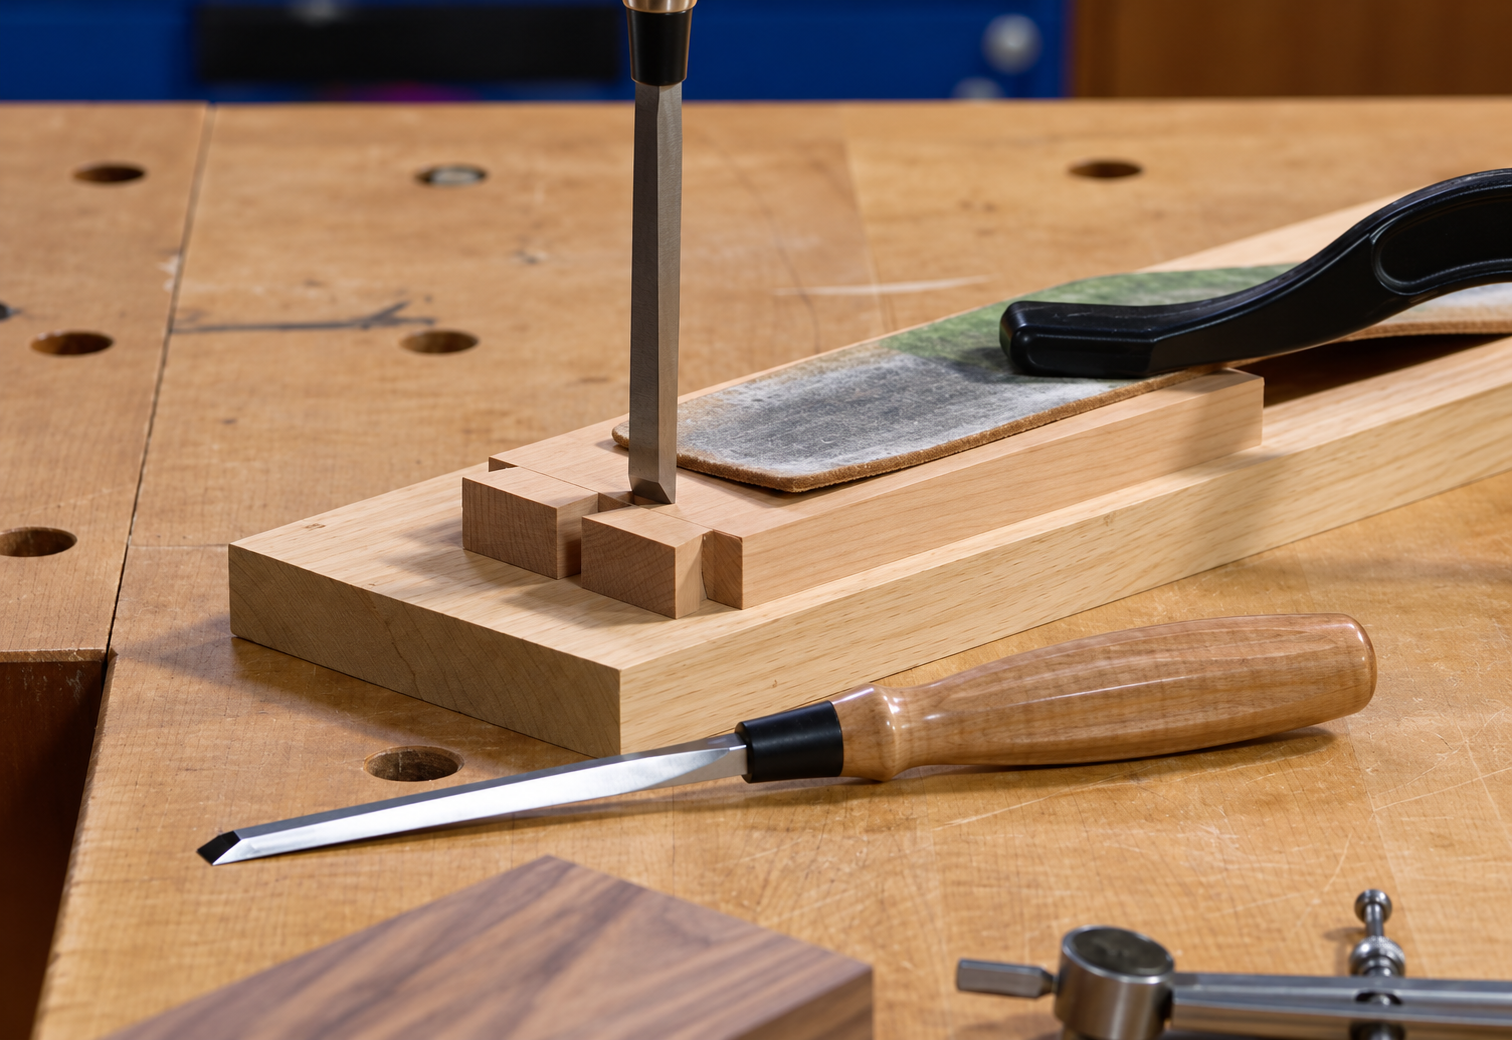
Now secure the workpiece flat on the bench and use a sharp chisel to pare the remaining waste back to the baseline.
I like to start with the outside shoulders, keeping those surfaces square and flat. For the center waste, I make the final cuts with the widest chisel that fits between the tails. A wider chisel helps create a straighter shoulder.
Work from both faces of the board and slightly undercut the center of the waste area. A degree or two of undercutting provides some clearance during assembly without affecting the visible edges of the joint.
Pay particular attention to the corners. Small bits of waste left in these areas can prevent the joint from seating completely.
Step 3: Transfer the Tails to the Drawer Front
Once the tails are cut and cleaned up, use them as a template to lay out the matching sockets in the drawer front.
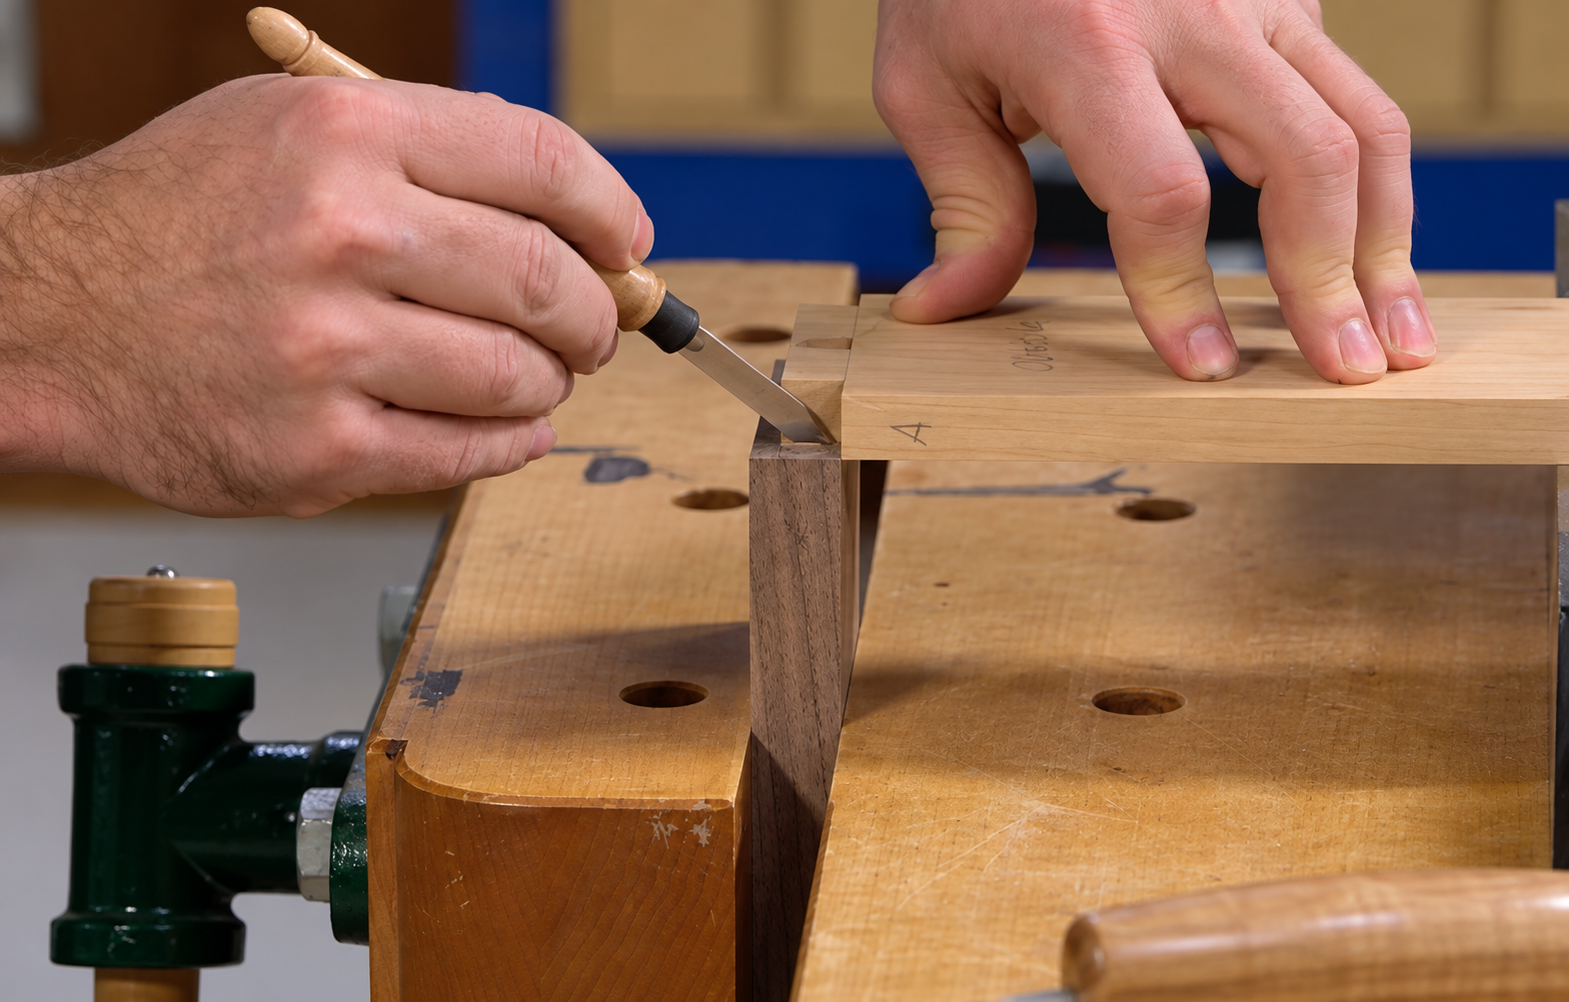
Secure the drawer front vertically in the vise. Position the drawer side on top, aligning its shoulder with the inside face of the drawer front. I like to use a bench plane as a temporary support to help keep the drawer side steady while marking.
Carefully align the top edges and outside faces of both workpieces. Then use a sharp marking knife to trace along each side of the tails.
These knife lines establish the exact position of the mating sockets, so take your time. A precise transfer will make fitting the joint much easier later.
Before removing the drawer side, mark the waste areas on the drawer front. This is a simple habit that helps prevent accidentally cutting into the pins.
Step 4: Cut the Half-Blind Dovetail Sockets
Cutting the sockets is where half-blind dovetails differ most from through dovetails. Because the joint doesn't extend through the drawer front, you can't simply saw straight down through the workpiece.
Instead, you'll make angled saw cuts and then remove the remaining material with a chisel.
Make the Angled Saw Cuts
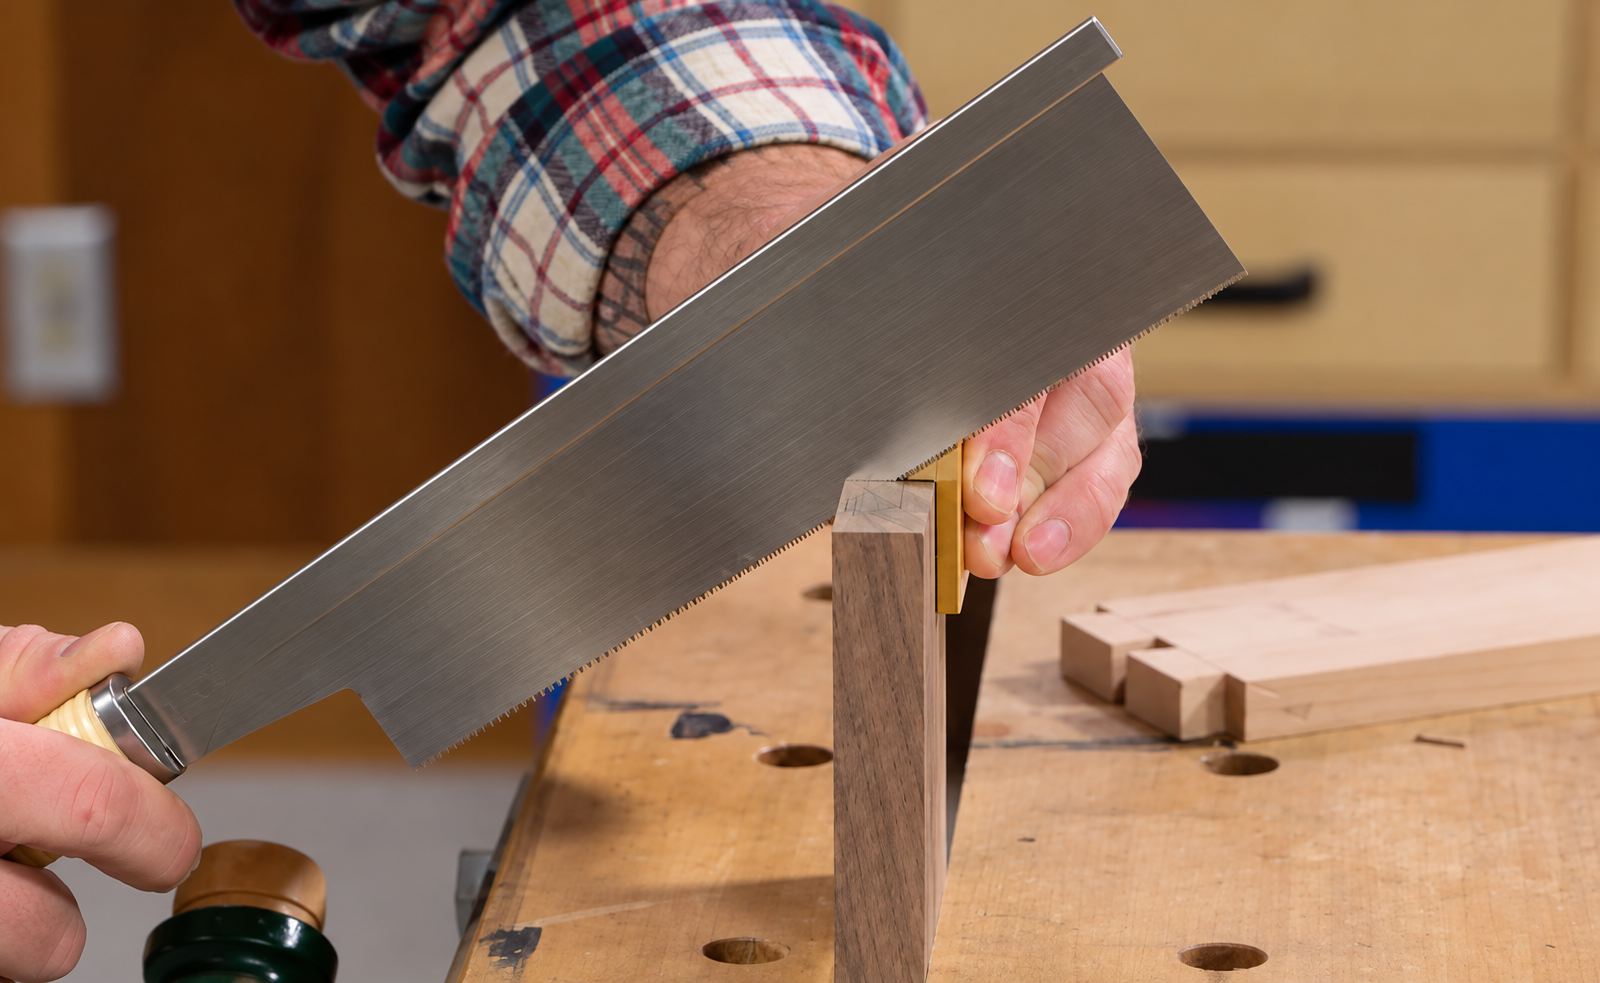
With the drawer front secured in the vise, use the dovetail saw to cut along the knife lines that define the sockets.
Keep the saw kerf on the waste side of each line. Angle the saw approximately 45° so the cut connects the depth line on the end of the drawer front with the baseline on its inside face.
Watch both lines as you cut. You want to approach each baseline without crossing it.
Repeat the process for the remaining socket walls.
Extend the Saw Kerfs with a Modified Card Scraper
Here's a useful trick for cutting half-blind dovetails.
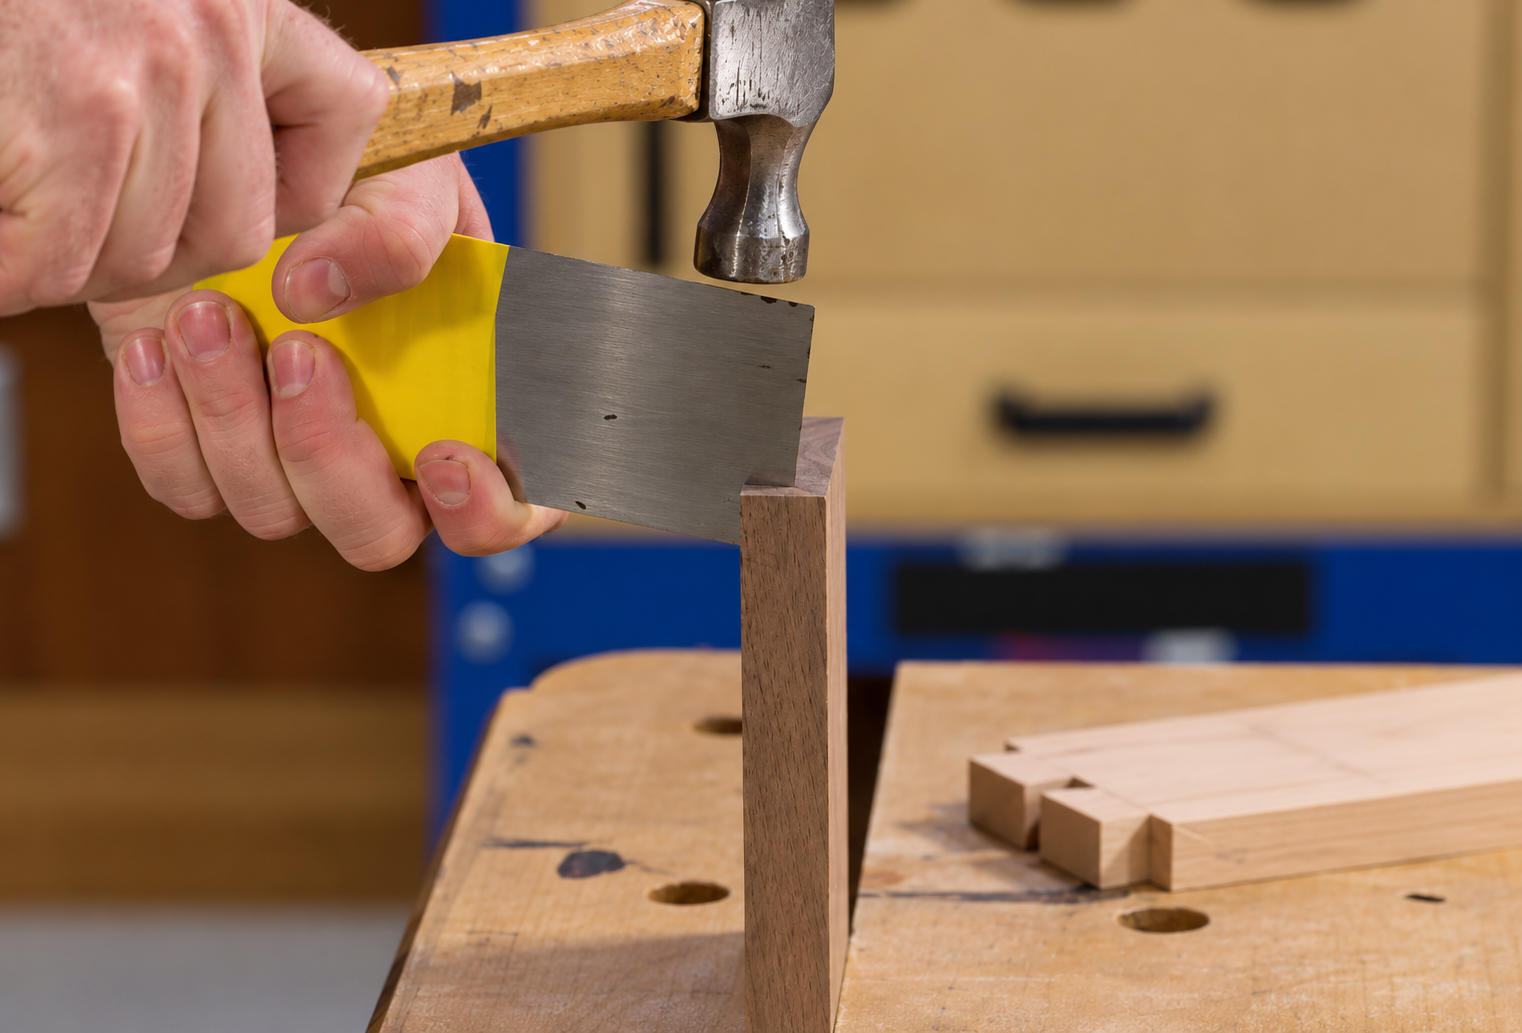
The angled saw cuts don't reach all the way into the bottom corners of the sockets. To help establish those corners, I use an old card scraper that I've modified by grinding a sharp edge along approximately 1½" of one end.
The scraper is thin enough to fit into the saw kerf. Once it's positioned, I can tap it downward with a mallet to extend the kerf to the baseline.
This establishes the remaining portion of the socket wall and makes removing the waste much easier.
Be aware that driving the scraper into the kerf can occasionally split the wood, particularly in kiln-dried stock. Work carefully and watch for splitting. If a small split occurs, it may be possible to close it with a clamp during assembly.
Step 5: Remove the Waste from the Blind Sockets
With the socket walls established, it's time to remove the waste.
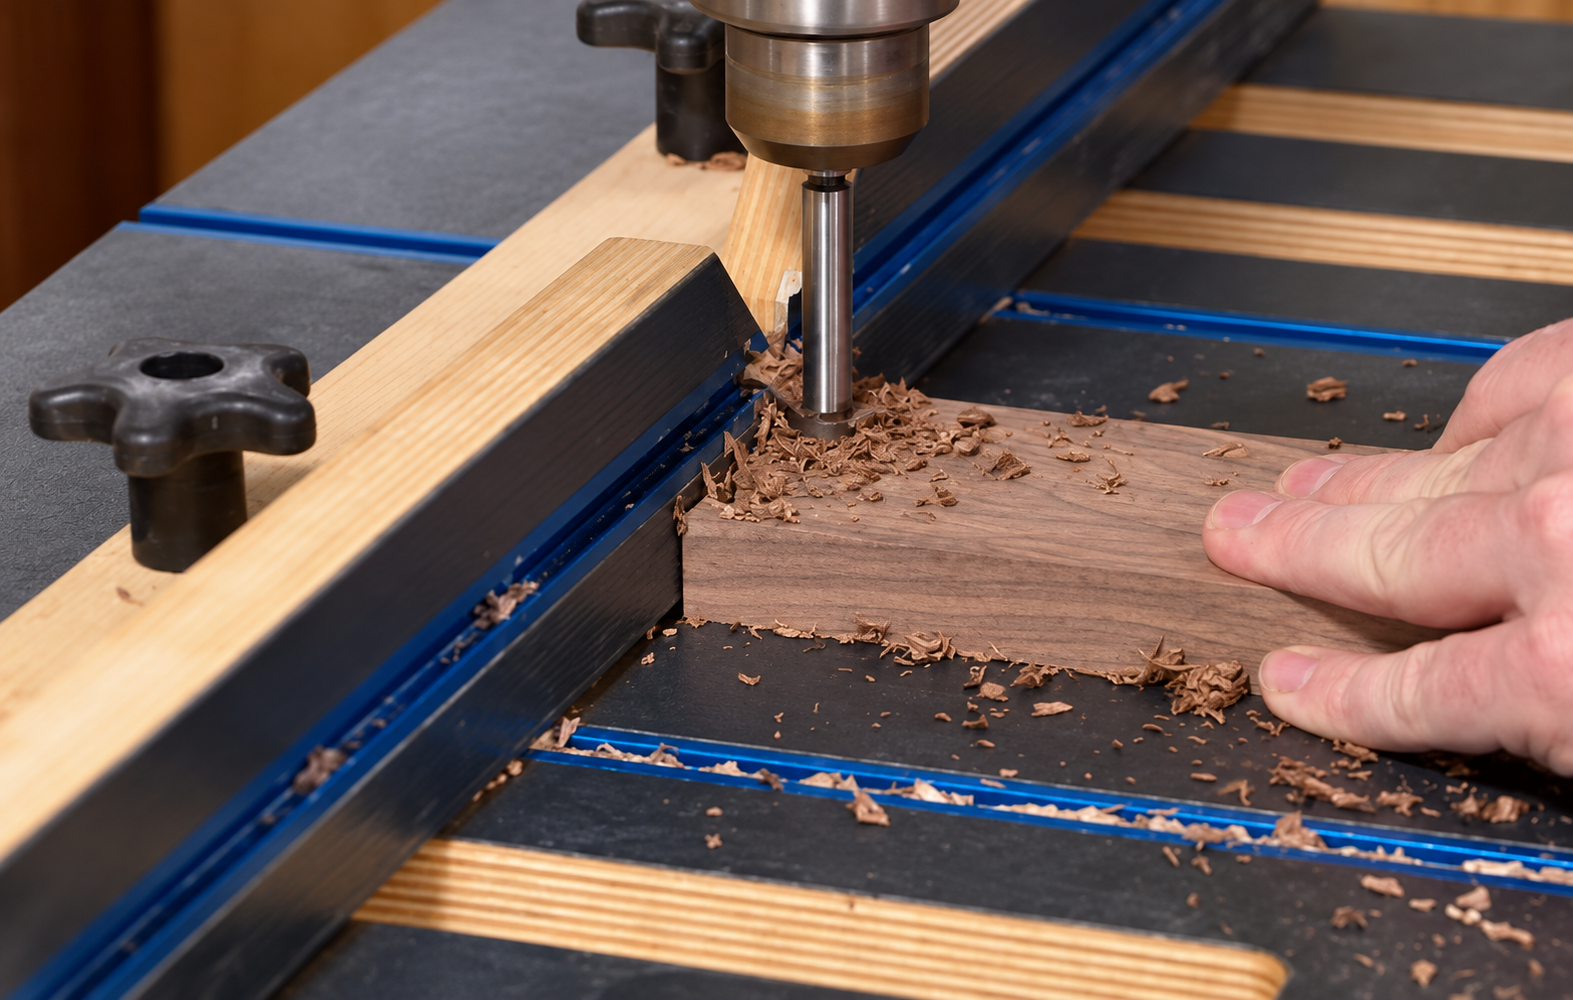
You can do this entirely with chisels, but I prefer to remove most of the material at the drill press first. It saves time and leaves less material to chop out by hand.
Using a Forstner bit, drill out the bulk of the waste between the socket walls. Set the depth stop approximately ⅛" shy of the final depth, and position the fence so the bit stays slightly away from the baseline.
Be careful not to drill too deeply. The point of the Forstner bit must not break through the outside face of the drawer front.
Clean Up the Sockets with a Chisel
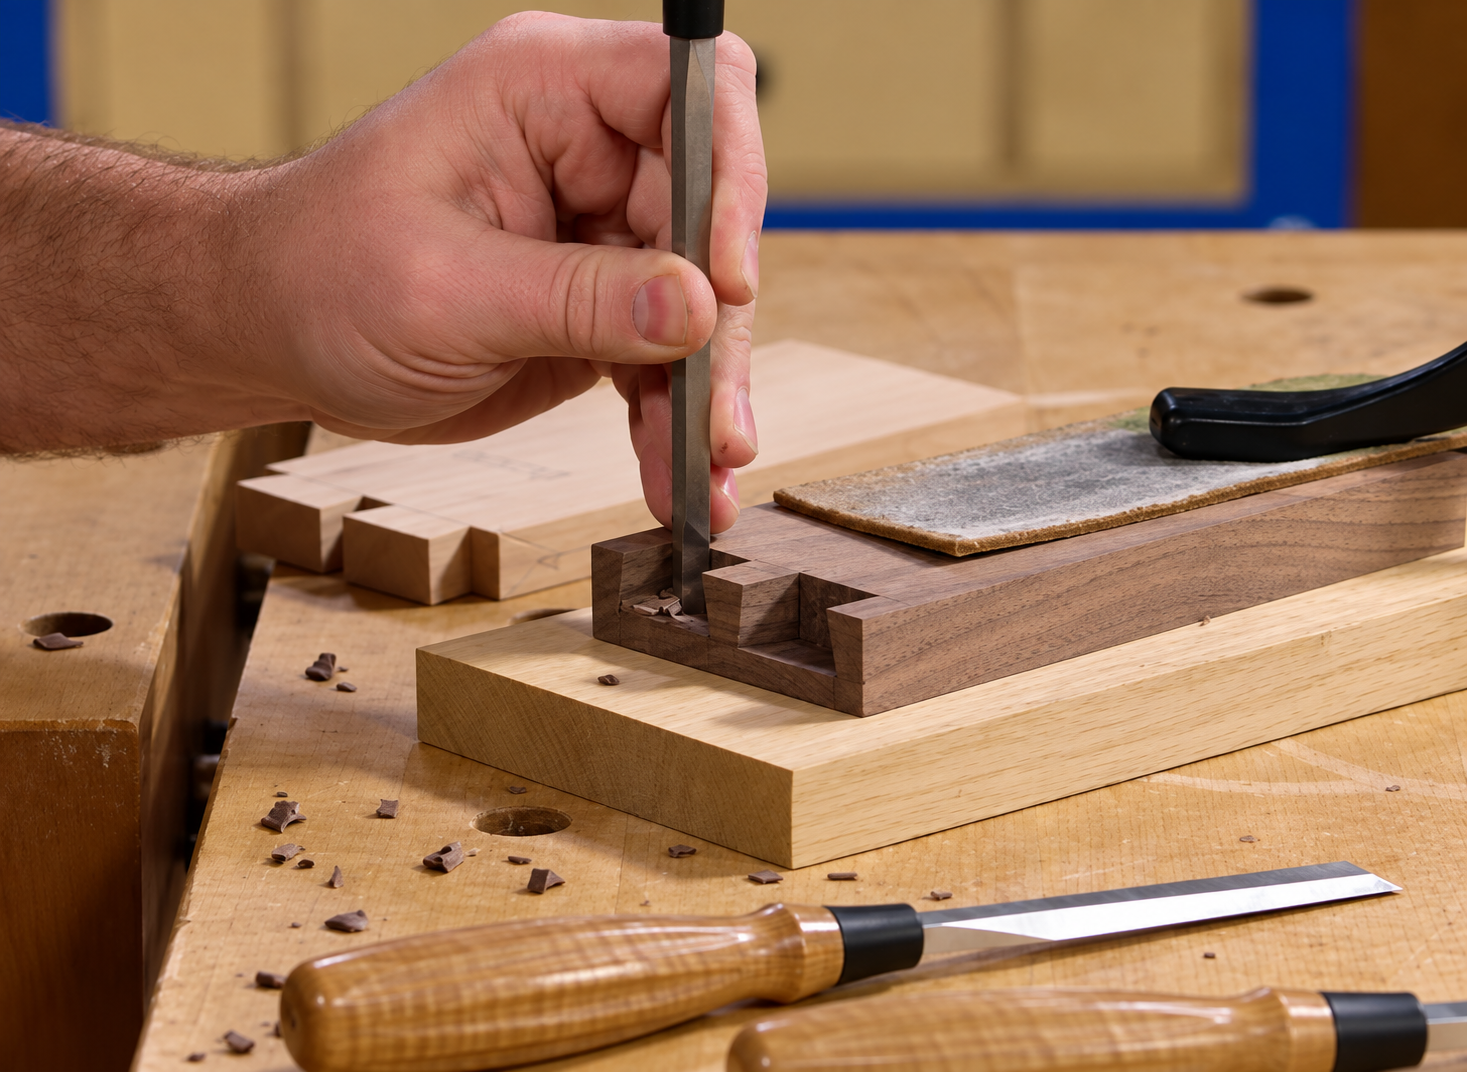
After drilling, use a sharp chisel to remove the remaining waste and work down to the baseline.
Take shallow cuts rather than trying to remove too much material at once. The wedging action of the chisel can push the cut beyond the layout line if you take an overly aggressive bite.
The angled walls of the sockets make the corners a little tricky to reach. A fishtail chisel would be handy here, but a standard narrow chisel will work with a little patience.
As you approach the final depth, make a square cut at the baseline and then slightly undercut the interior of the socket. This creates a small amount of clearance for assembly while preserving the visible edges.
Avoid levering the chisel against the socket walls. Doing so can bruise or dent the edges and leave visible gaps in the finished joint.
Finally, inspect the inside corners and remove any remaining waste. These small areas are often what prevent a dovetail joint from closing completely.
Step 6: Fit and Assemble the Half-Blind Dovetail Joint
Before assembling the joint, I like to make a few small adjustments that improve the chances of getting everything together without splitting the workpieces.
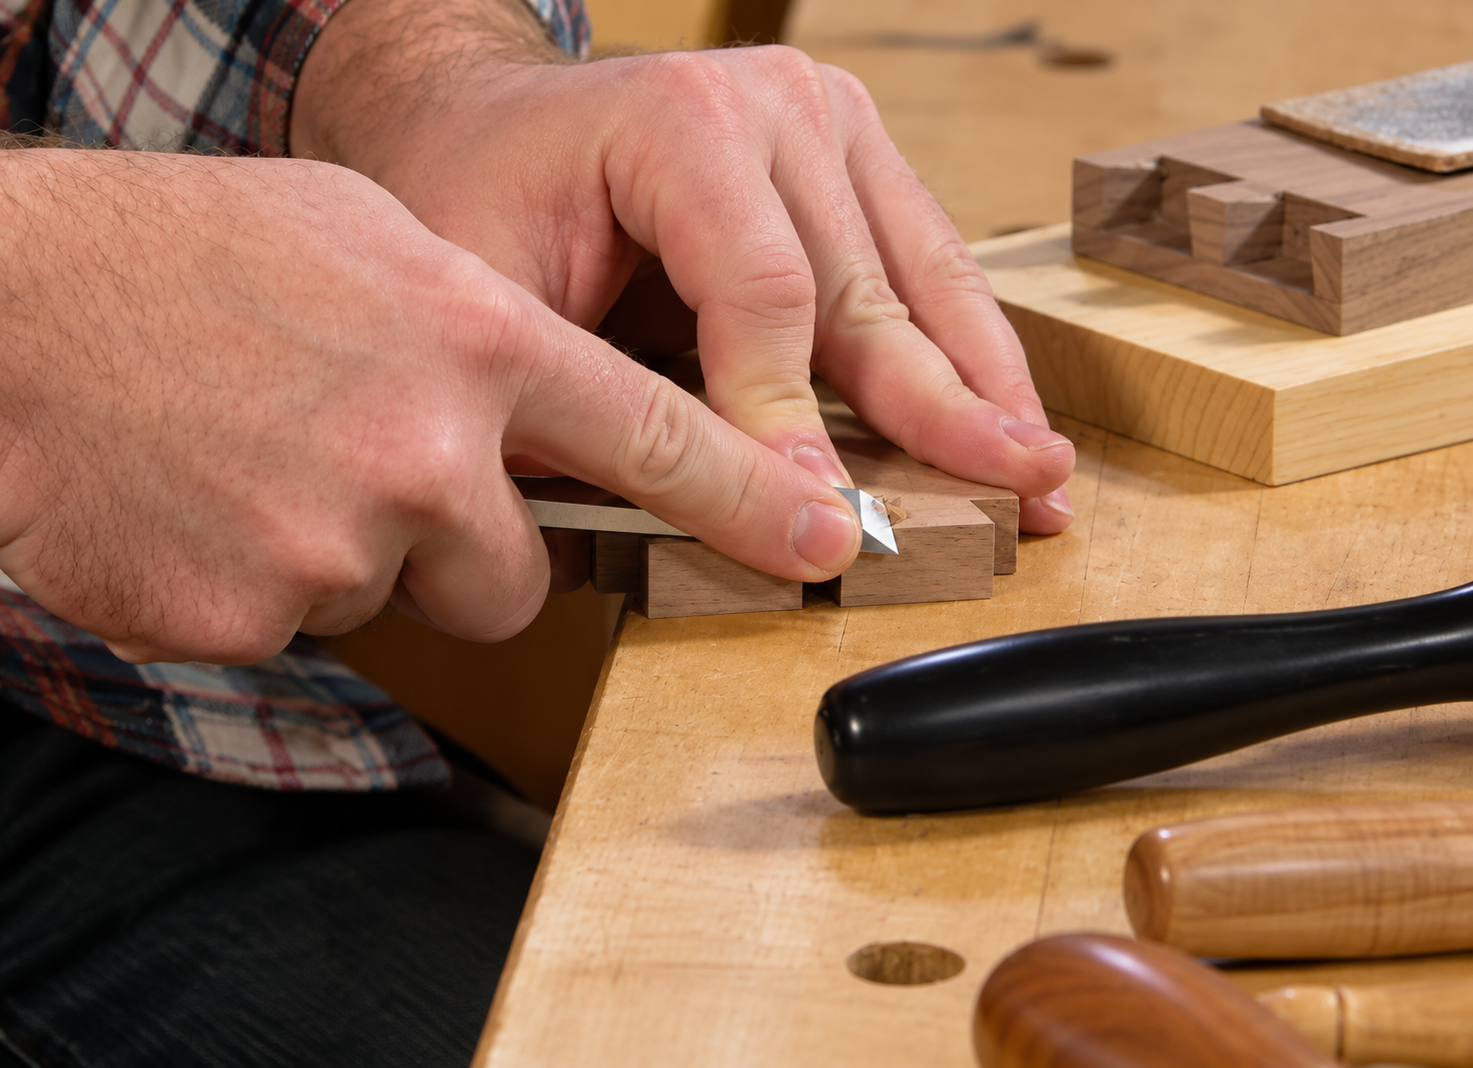
Start by adding a slight chamfer to the inside edges of the pins. Begin approximately 3/16" back from the ends and taper the chamfer toward the baseline.
Then add a similar chamfer to the hidden inside edges of the tails.
These chamfers provide clearance for any small bits of waste remaining in the corners and help guide the joint together during assembly. Since the chamfered areas will be concealed, they won't affect the finished appearance.
Test the Fit and Make Final Adjustments
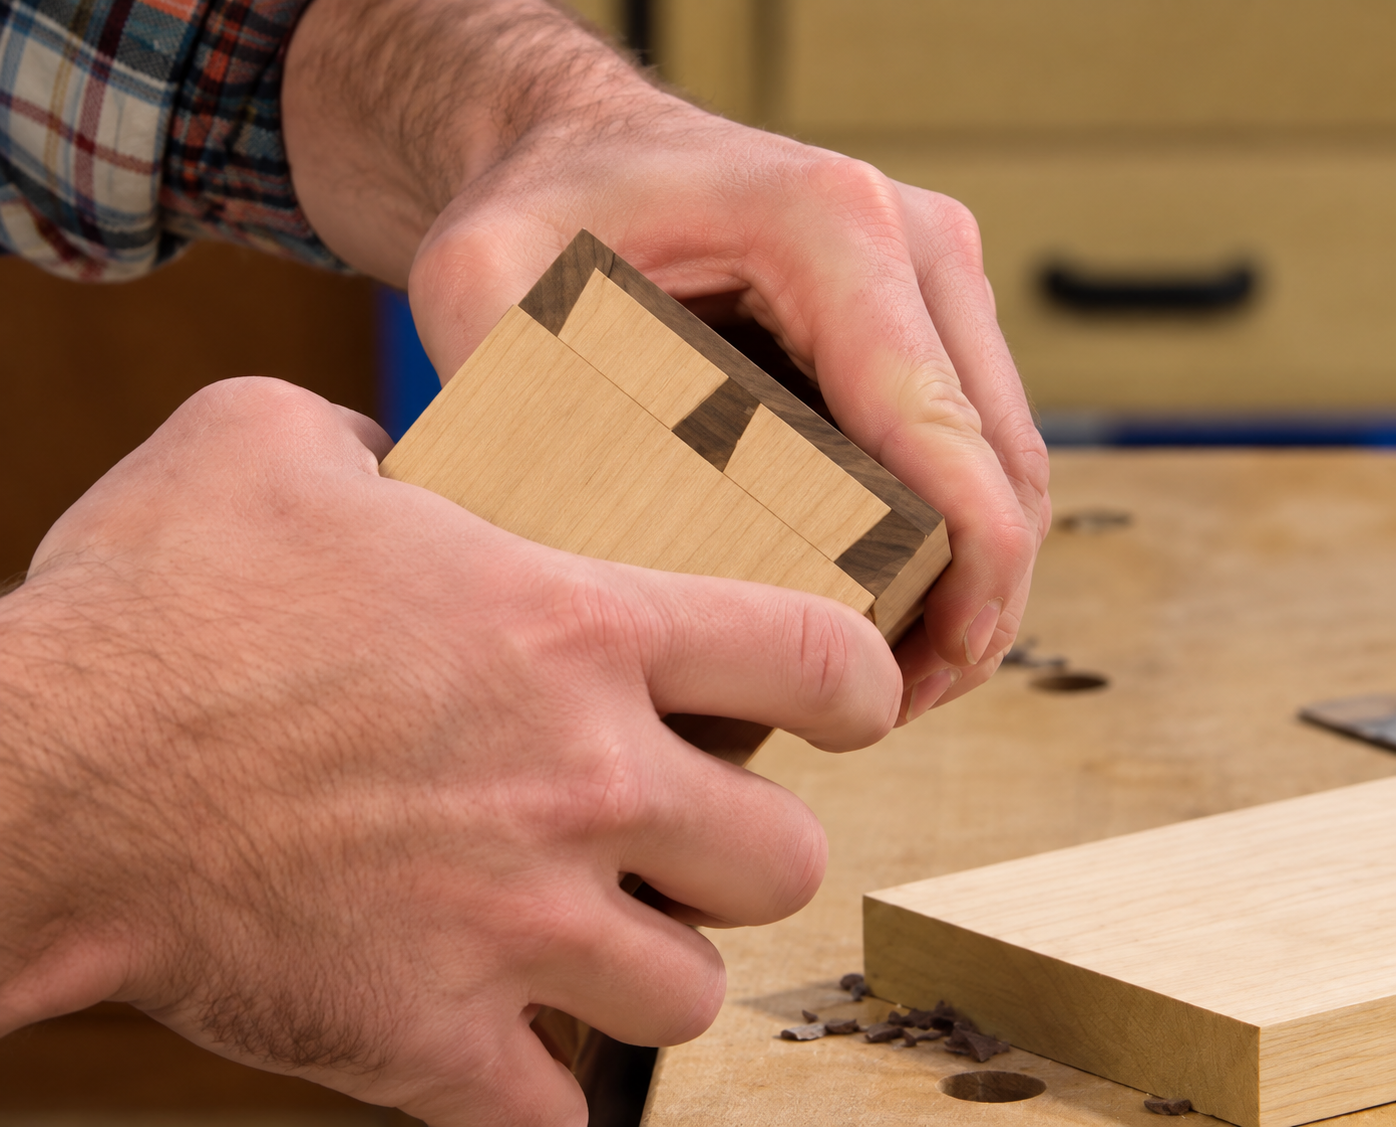
With the chamfers complete, align the drawer side and front, making sure the outside faces and top edges are oriented correctly.
Carefully bring the two workpieces together. If the joint stops short of fully seating, don't force it. Back it apart and look for areas where the wood is binding.
Often, a little additional paring or undercutting at the shoulder is all that's needed to get the joint to close.
For the final adjustment, I like to leave the outermost 1/16" to ⅛" of the shoulder square and undercut only the hidden portion. This maintains a clean visible edge while providing clearance inside the joint.
Tips for Better Hand-Cut Dovetails
One of the things I appreciate about hand-cut dovetails is that they don't need to look machine-made to be attractive or functional.
A small gap here or there isn't necessarily a problem. A little glue and sanding can help disguise minor imperfections, and the interlocking geometry of the joint provides mechanical strength when it's properly oriented.
The important things are to keep your layout accurate, make clean saw cuts, and pay attention to the corners when removing waste. Those are the areas that have the greatest effect on how well the joint fits.
And don't be discouraged if your first attempt isn't perfect. Cutting dovetails is a skill that improves with practice. The more joints you make, the more comfortable you'll become with the saw, chisel, and layout process.
Half-blind dovetails are a great way to add traditional craftsmanship to a drawer or furniture project. Once you've mastered the technique, you'll have another useful joinery method to draw on whenever you want a strong connection with a clean, uninterrupted front.


