


Spline joinery is one of the most versatile ways to connect pieces of wood. By cutting matching grooves in adjoining workpieces and inserting a thin strip of wood or plywood, you can create a joint that helps keep parts aligned during assembly while providing additional gluing surface where it's needed.
One of the things I like about splines is that they work with tools you probably already have in your shop. A router with a slot-cutting bit or a table saw can make the matching grooves, and the splines themselves can be cut from plywood, hardboard, or solid wood. There's no need to make complicated tenons on the ends of your project parts.
In this video excerpt from our Woodsmith Education course, Power Tool Joinery, we'll look at three ways to put splines to work: aligning boards during panel glueups, assembling frame-and-panel doors, and reinforcing miter joints. Each application uses the same basic principle, but the purpose of the spline and the way it's installed are a little different.

What Is Spline Joinery?
A spline is a thin strip of material that fits into matching grooves cut into two adjoining workpieces. Once the spline is installed, it bridges the joint, helping keep the parts aligned and, in many applications, creating additional glue surface.
Splines can be made from several materials, including plywood, hardboard, and solid wood. The best choice depends on the type of joint, the thickness of the material, and whether the finished project will be used indoors or outdoors. For many furniture-sized projects, I like using a 1/4"-wide slot because it's a versatile size for a variety of assemblies.
The important thing is matching the spline to the groove. You want a snug fit without excessive play, but the spline shouldn't be so tight that it prevents the joint from closing completely. It's worth making a few test cuts and checking the actual thickness of your material before cutting all the grooves.
1. Using Splines to Align Boards During a Panel Glueup
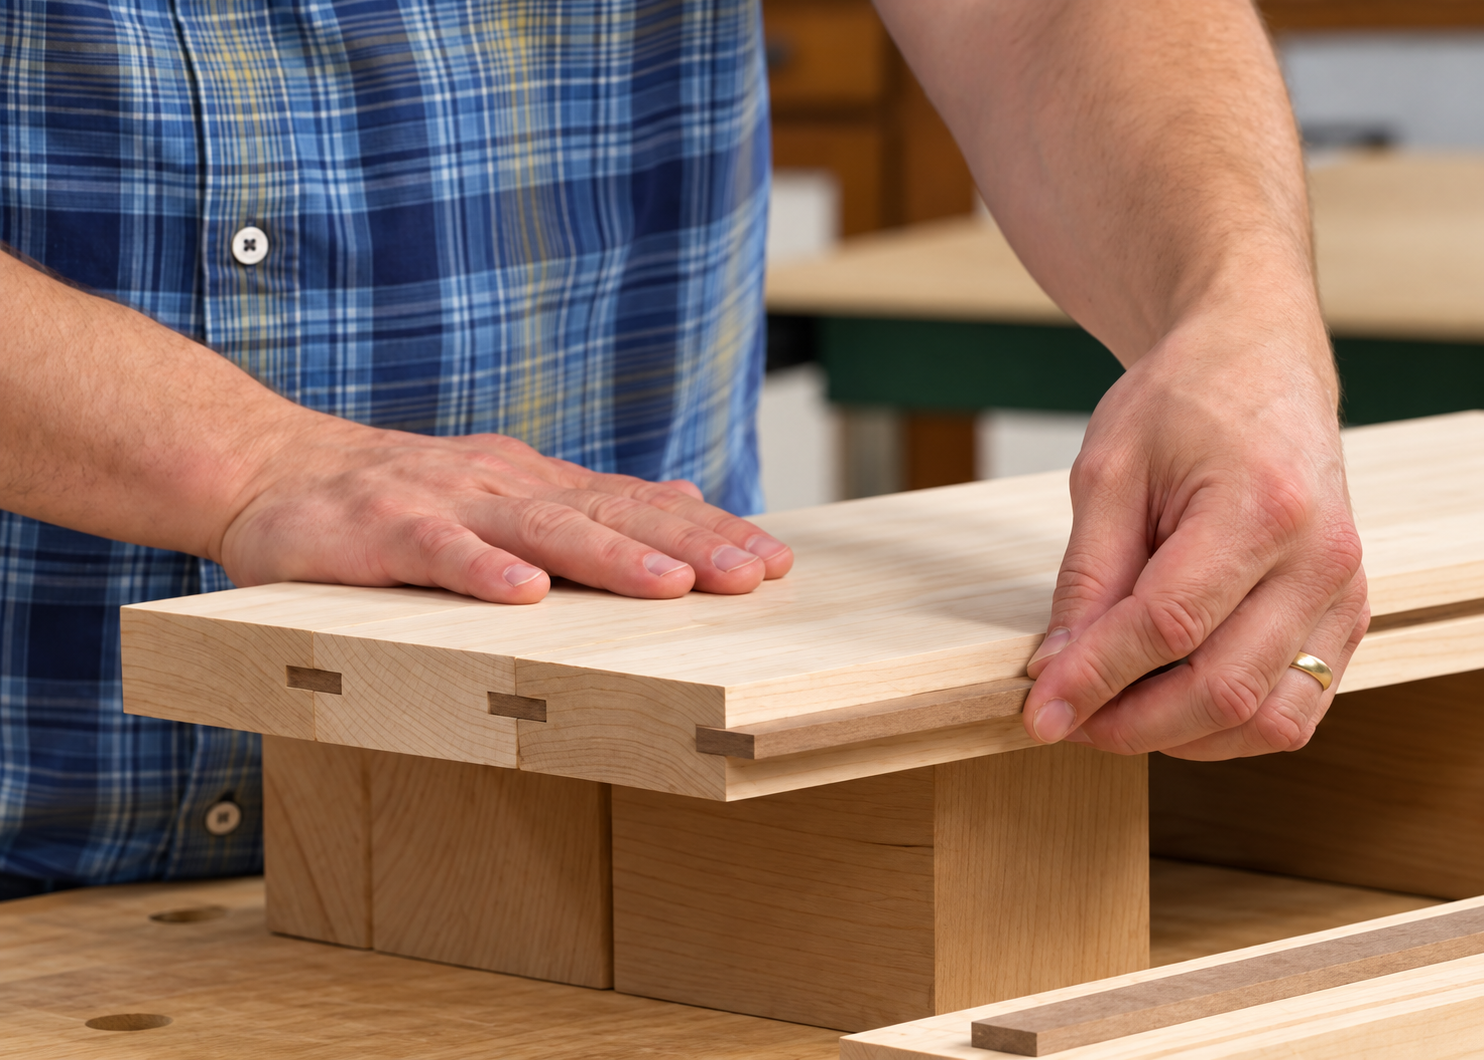
One of the simplest applications for spline joinery is gluing up a wide panel from several narrower boards. Whether you're making a tabletop, workbench top, or butcher-block-style assembly, keeping the boards flush while tightening the clamps can be a challenge. Once the glue is applied, the pieces have a tendency to slide up and down, leaving uneven surfaces that require additional flattening or sanding.
In this application, the spline's primary purpose isn't to strengthen the joint. The long-grain glue surfaces between the boards already provide a strong connection. Instead, the spline acts as an alignment aid, helping prevent the boards from shifting as the clamps are tightened.
To make the joint, I use a slot-cutting bit in a handheld router to cut matching grooves along the mating edges of the boards. By referencing the router from the top surface of each workpiece, the grooves remain consistently positioned. When the spline is inserted and the boards are brought together, their top surfaces line up.
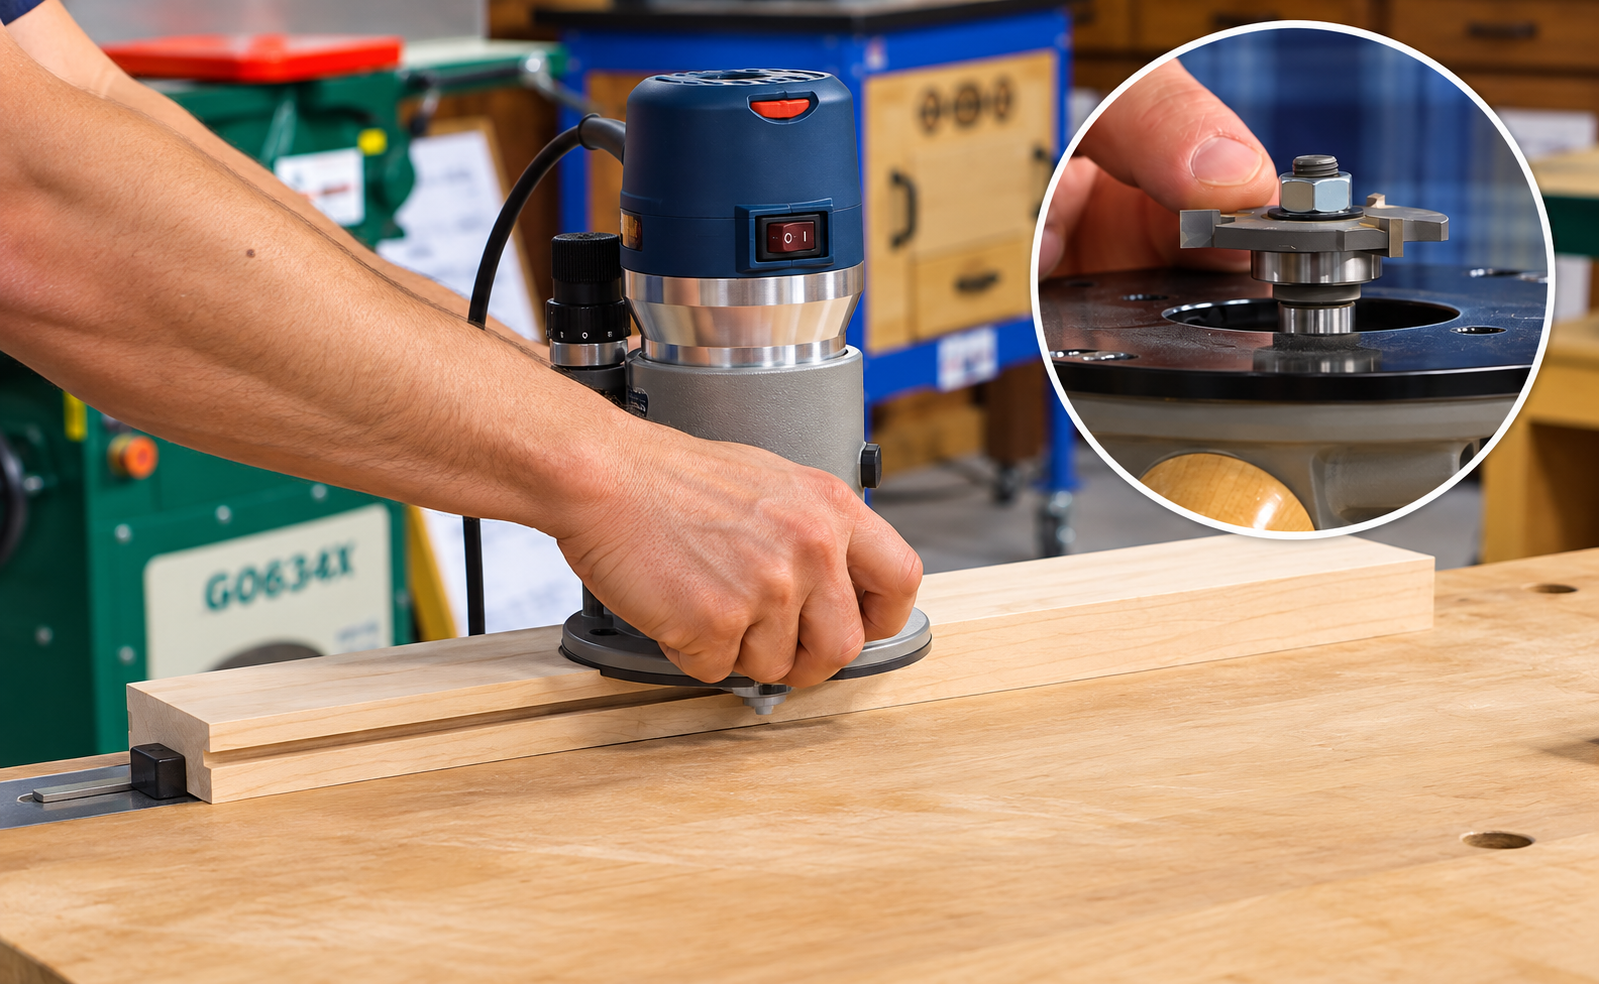
For the demonstration, I'm using 1/4" hardboard for the spline. I've also found that 1/4" MDF-core plywood can be a good fit for this size groove. Regular veneer-core plywood sometimes measures a little thinner, so it's important to check the fit before assembly.
After the glue dries and the clamps come off, the result is a smooth, even panel that requires minimal final sanding. It's a simple technique that can save considerable cleanup time, especially when you're working with a large glueup.
Adding a Solid-Wood Apron with a Spline
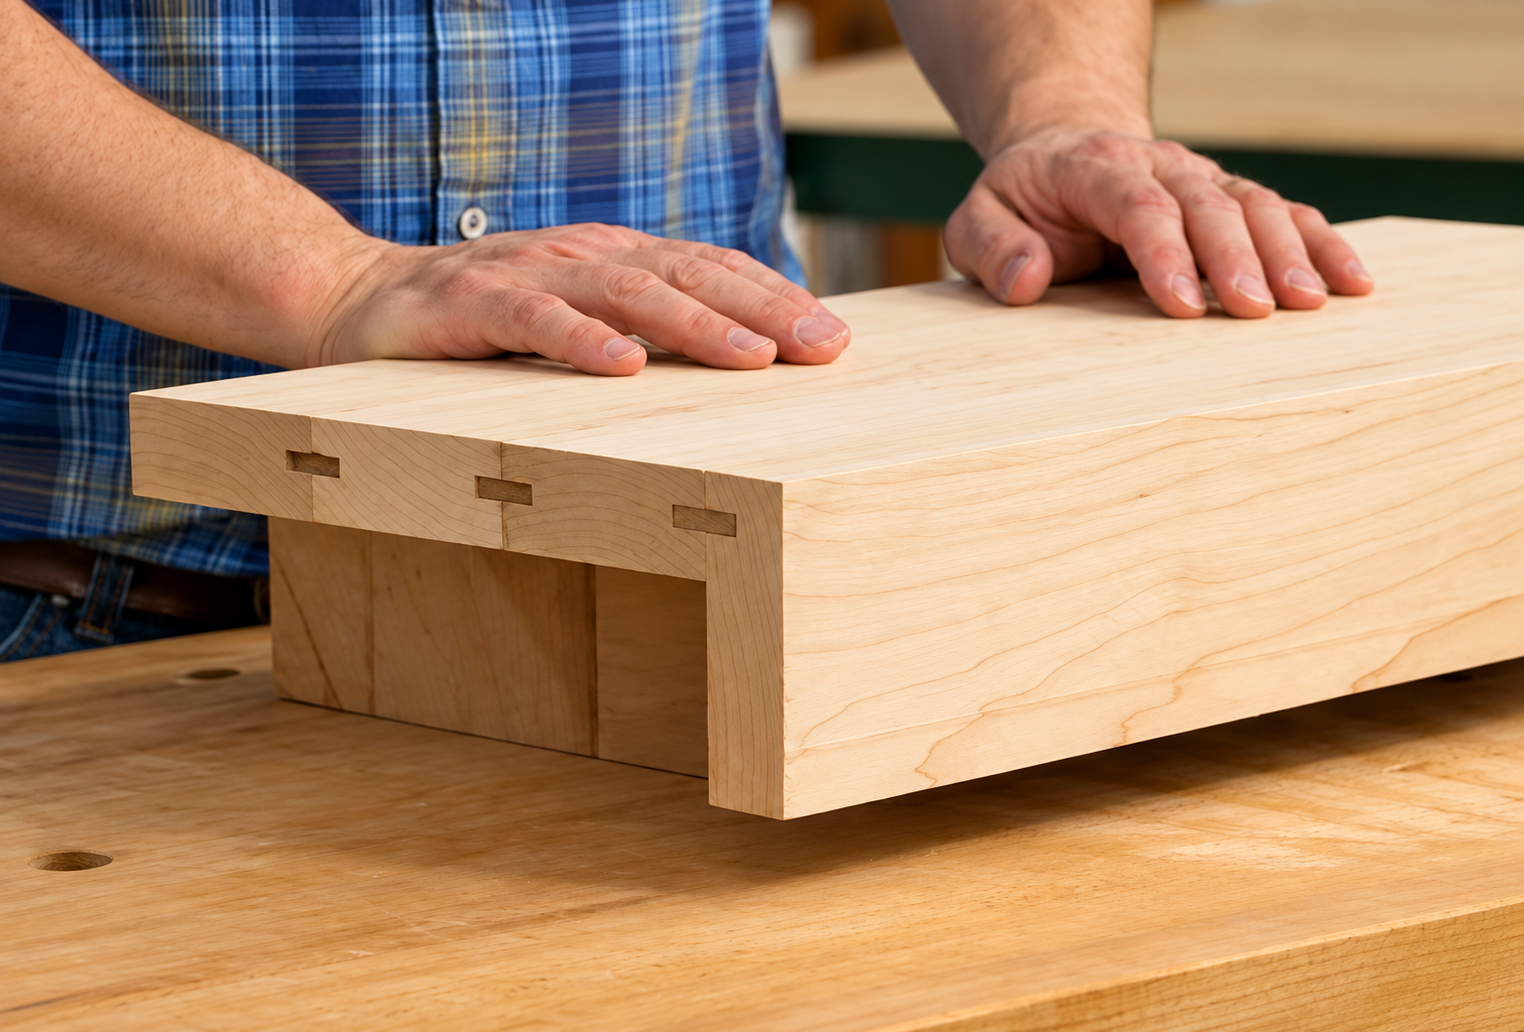
The same slot-cutting setup can also be used to attach a wide apron along the edge of a tabletop or workbench. A matching groove is cut into the apron, allowing a spline to bridge the joint between the apron and the panel.
This helps align the apron with the tabletop during assembly and provides additional gluing surface. The result is a clean transition between the two pieces, with the apron adding depth and rigidity to the assembly.
2. Using Plywood Splines for Frame-and-Panel Joinery
Frame-and-panel construction is another application where spline joinery can simplify the process. Traditionally, a frame-and-panel door uses grooves along the inside edges of the rails and stiles to capture the center panel. The corners are typically connected with mortise-and-tenon or stub-tenon-and-groove joinery.
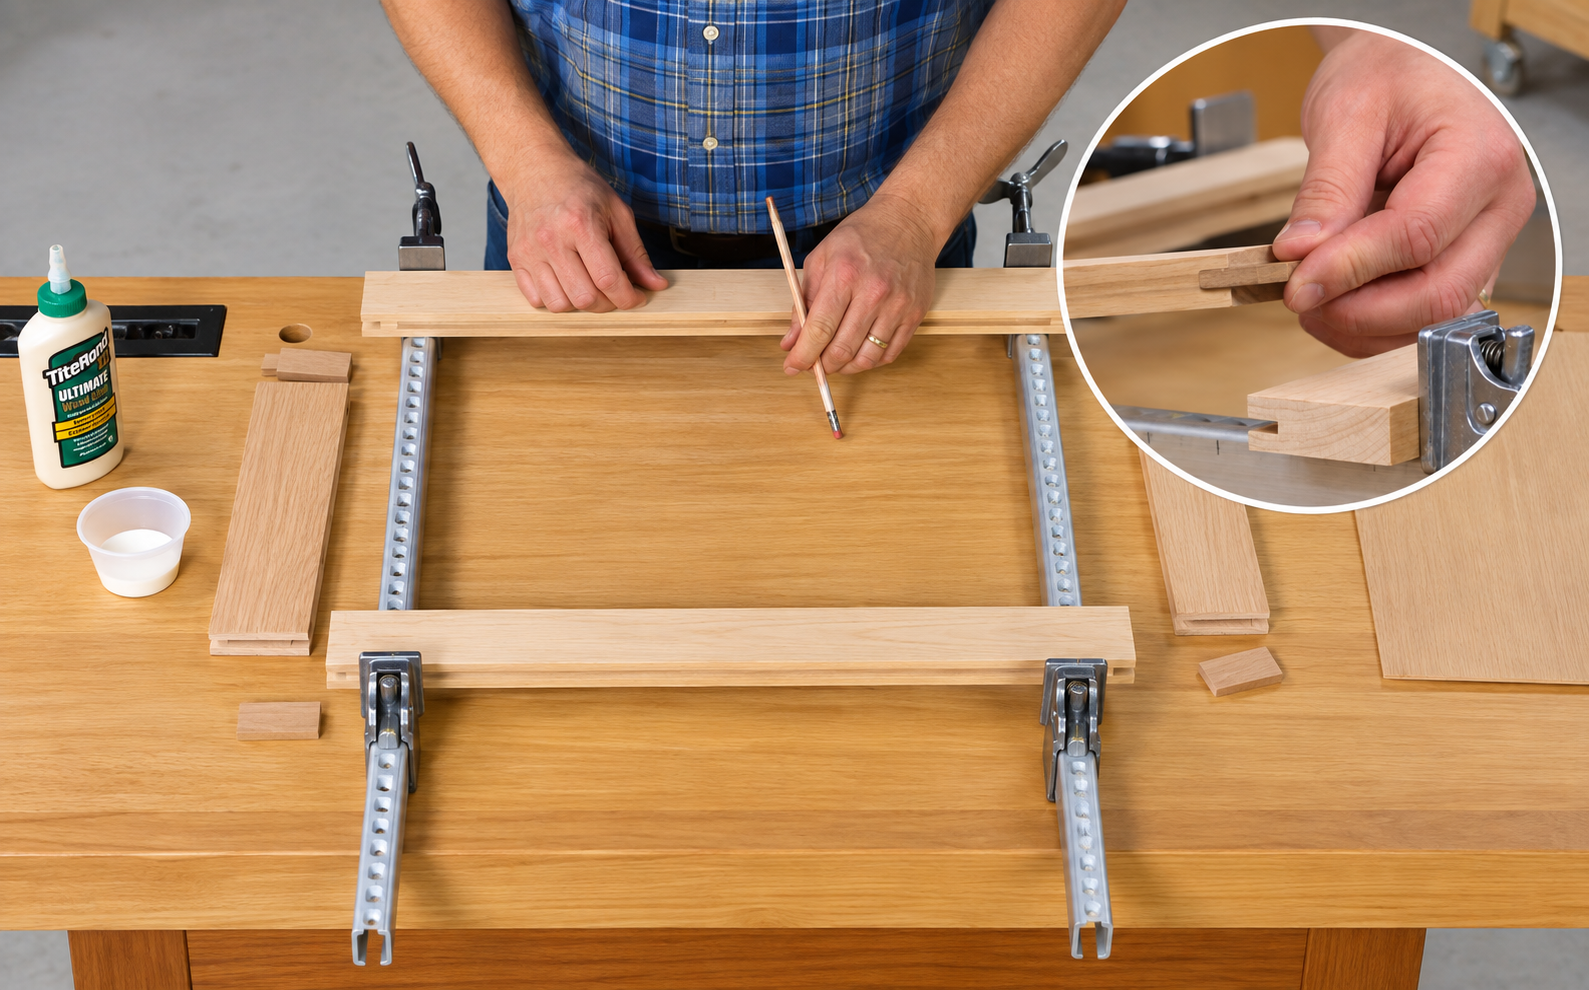
With splines, you can take a slightly different approach. Instead of cutting tenons on the ends of the rails, cut matching grooves in the rails and stiles. Then use plywood splines to bridge the corner joints. This allows you to create the frame using the same basic groove-cutting operation throughout the assembly.
For this technique, I cut grooves along the inside edges of the rails and stiles, then use a backer block to support the rails while cutting matching slots across their ends. The splines can be cut from the same plywood material used for the center panel, helping keep the joinery consistent.
Sizing the Splines and Assembling the Frame
The fit of the splines is important, particularly at the ends of the rails where the joints may be visible. You want the spline to fit snugly from side to side without leaving a noticeable gap. At the same time, it shouldn't be so wide that it prevents the rail and stile from coming together completely.
A few test cuts at the table saw will help you dial in the spline dimensions. Once the fit is established, apply glue to the splines and install them in the ends of the rails. Then add glue to the appropriate grooves and bring the frame together, capturing the center panel as required by the project design.
In this application, the splines do more than keep the parts aligned. They also create additional gluing surface between the rails and stiles, resulting in a strong frame assembly without the need to cut traditional tenons.
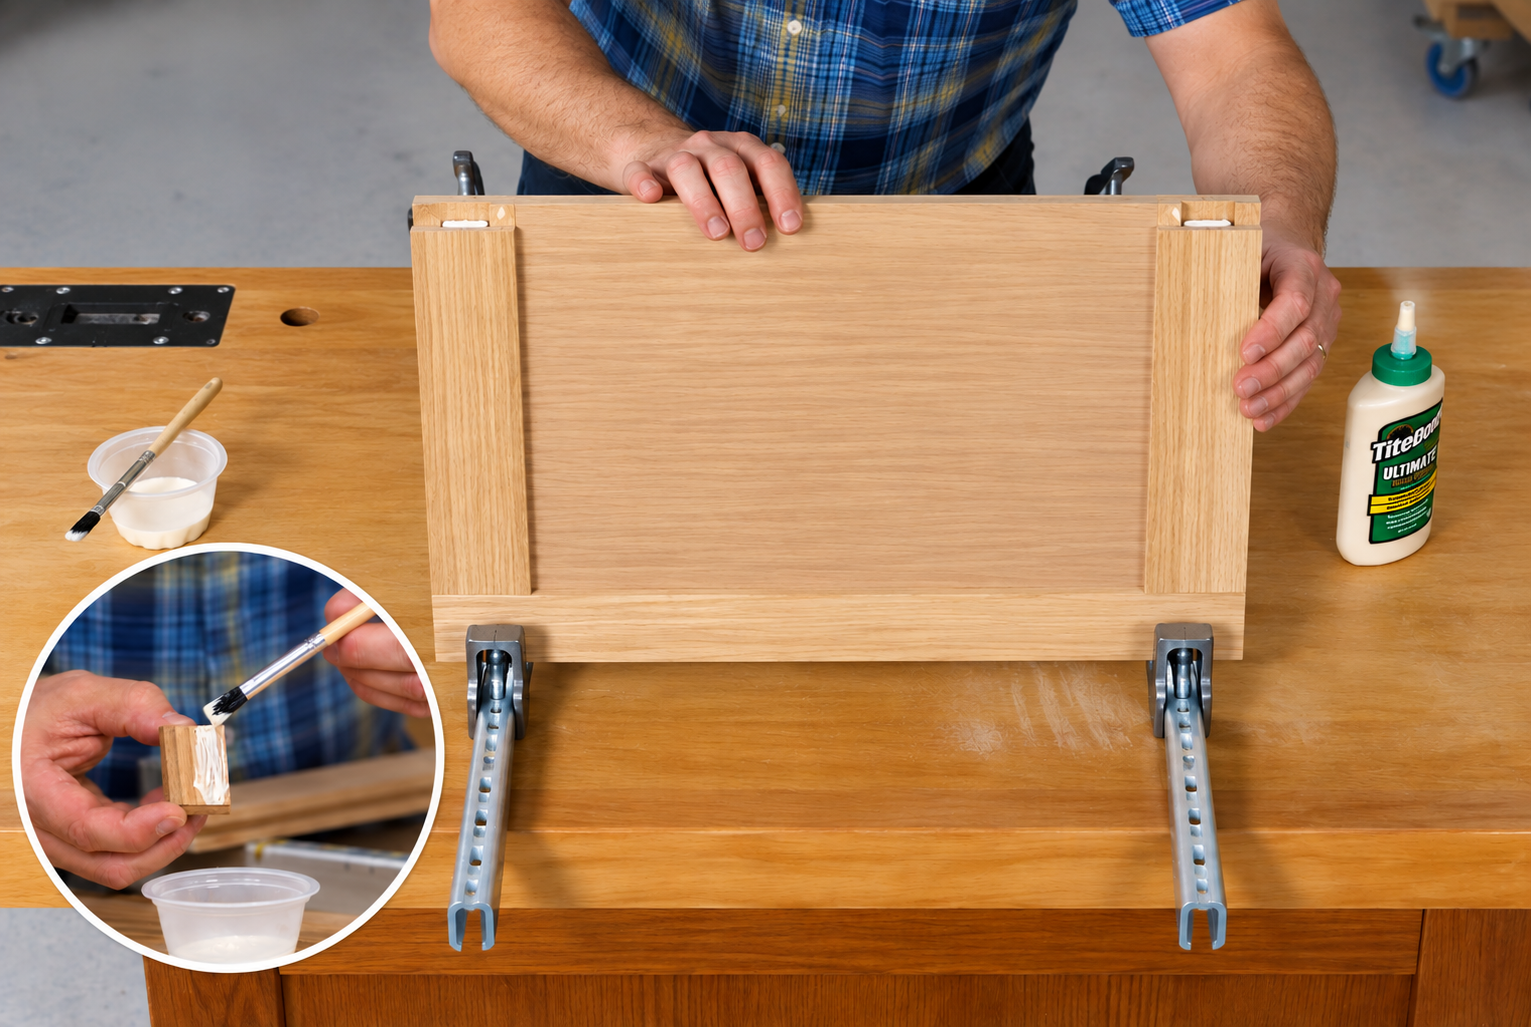
Woodsmith Tip: If you're using a solid-wood center panel rather than plywood, leave the panel free to expand and contract within the frame. Glue the structural spline joints, but don't glue a solid-wood panel continuously into its surrounding grooves.
3. Reinforcing Miter Joints with Solid-Wood Splines
Miter joints create a clean, continuous appearance, making them popular for picture frames, boxes, and other woodworking projects. But the angled mating surfaces can produce a relatively weak glue joint, particularly when the assembly is subjected to stress.
A spline helps reinforce the connection by bridging the two mitered pieces and providing additional gluing surface. It also helps keep the parts aligned during assembly.
In the video, I'm building a round frame for an outdoor planter using cedar. Because the project will be used outdoors, I want to make the splines from solid wood rather than plywood or hardboard.
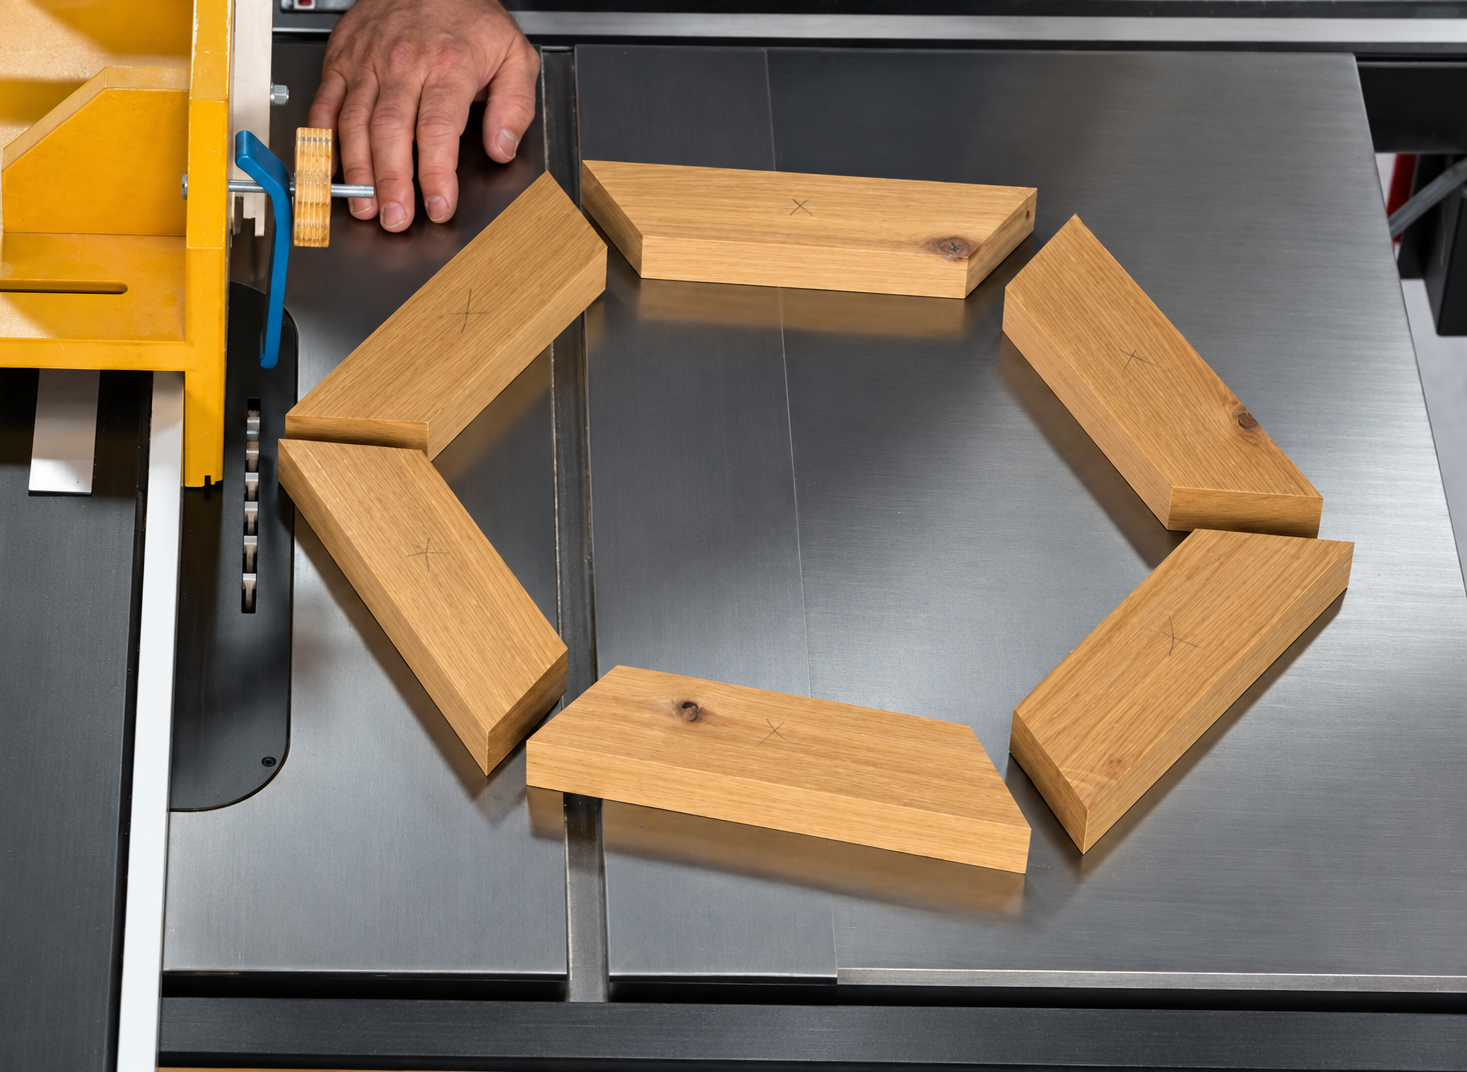
Cutting the Spline Grooves on the Table Saw
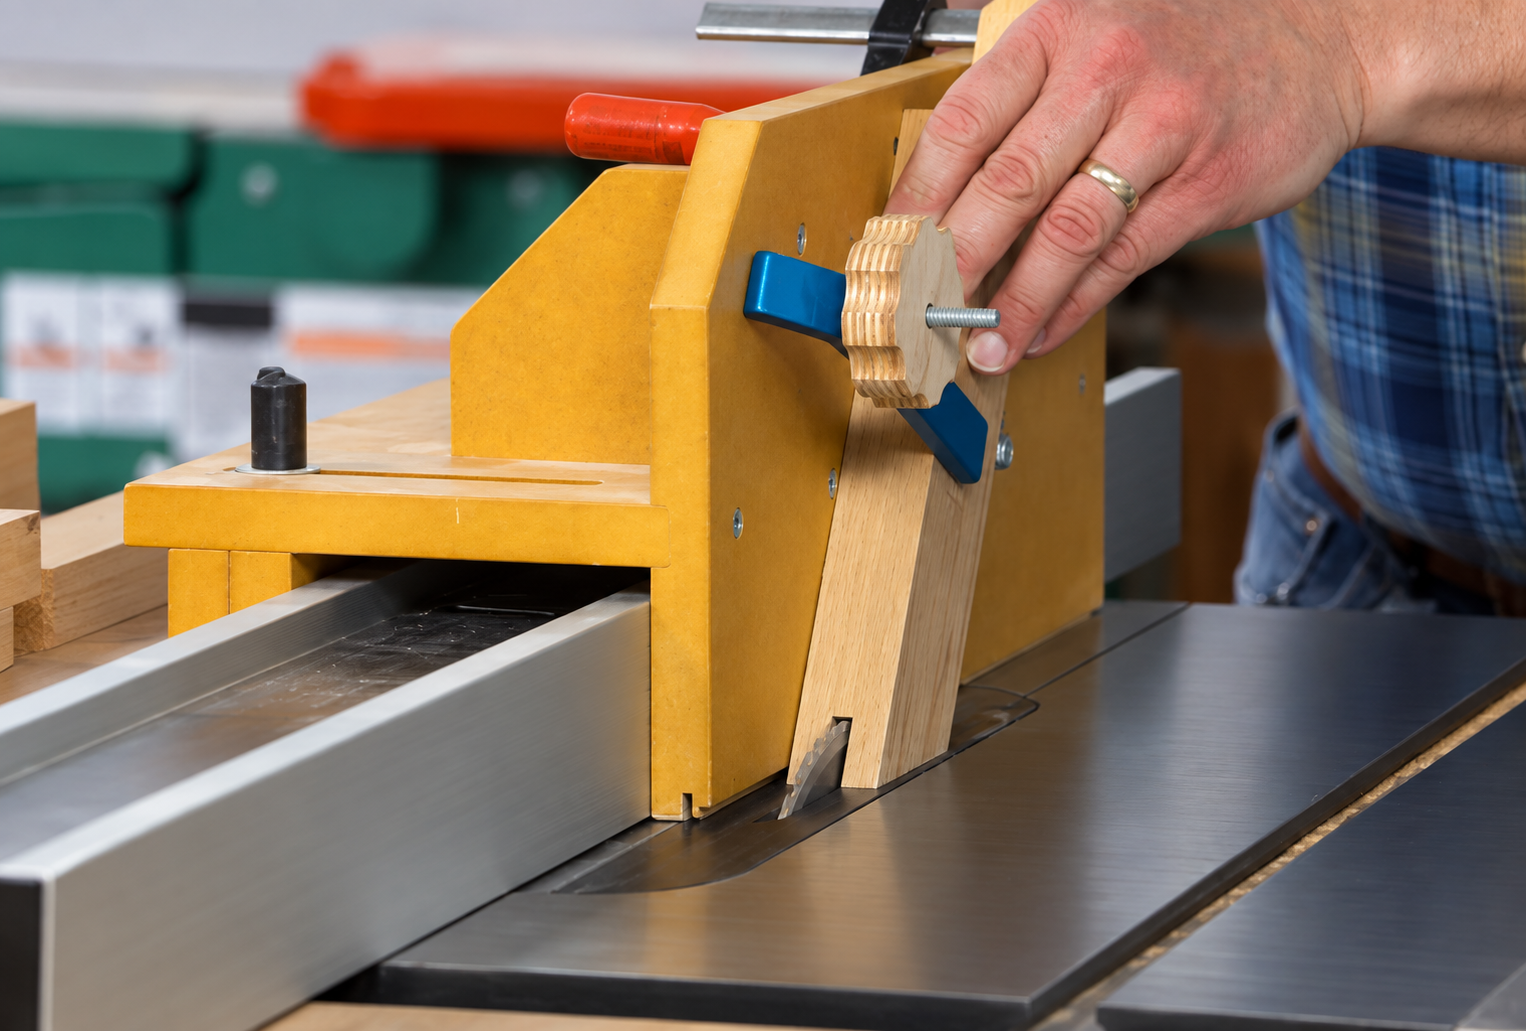
To cut the grooves across the angled miter faces, I use a simple tenoning jig on the table saw. The jig supports the workpiece vertically and provides a fence to keep it positioned accurately as it passes over the blade.
For this setup, I'm using a dedicated 1/4"-wide blade, although a dado blade can accomplish the same task. The key is to reference the same face of each workpiece against the jig's fence so the grooves will align when the mitered pieces are brought together.
Depending on the orientation of the parts, you may need to rearrange the support and make some cuts in the opposite direction. Once the setup is established, however, cutting the matching grooves goes quickly.
Choosing the Right Grain Direction for Solid-Wood Splines
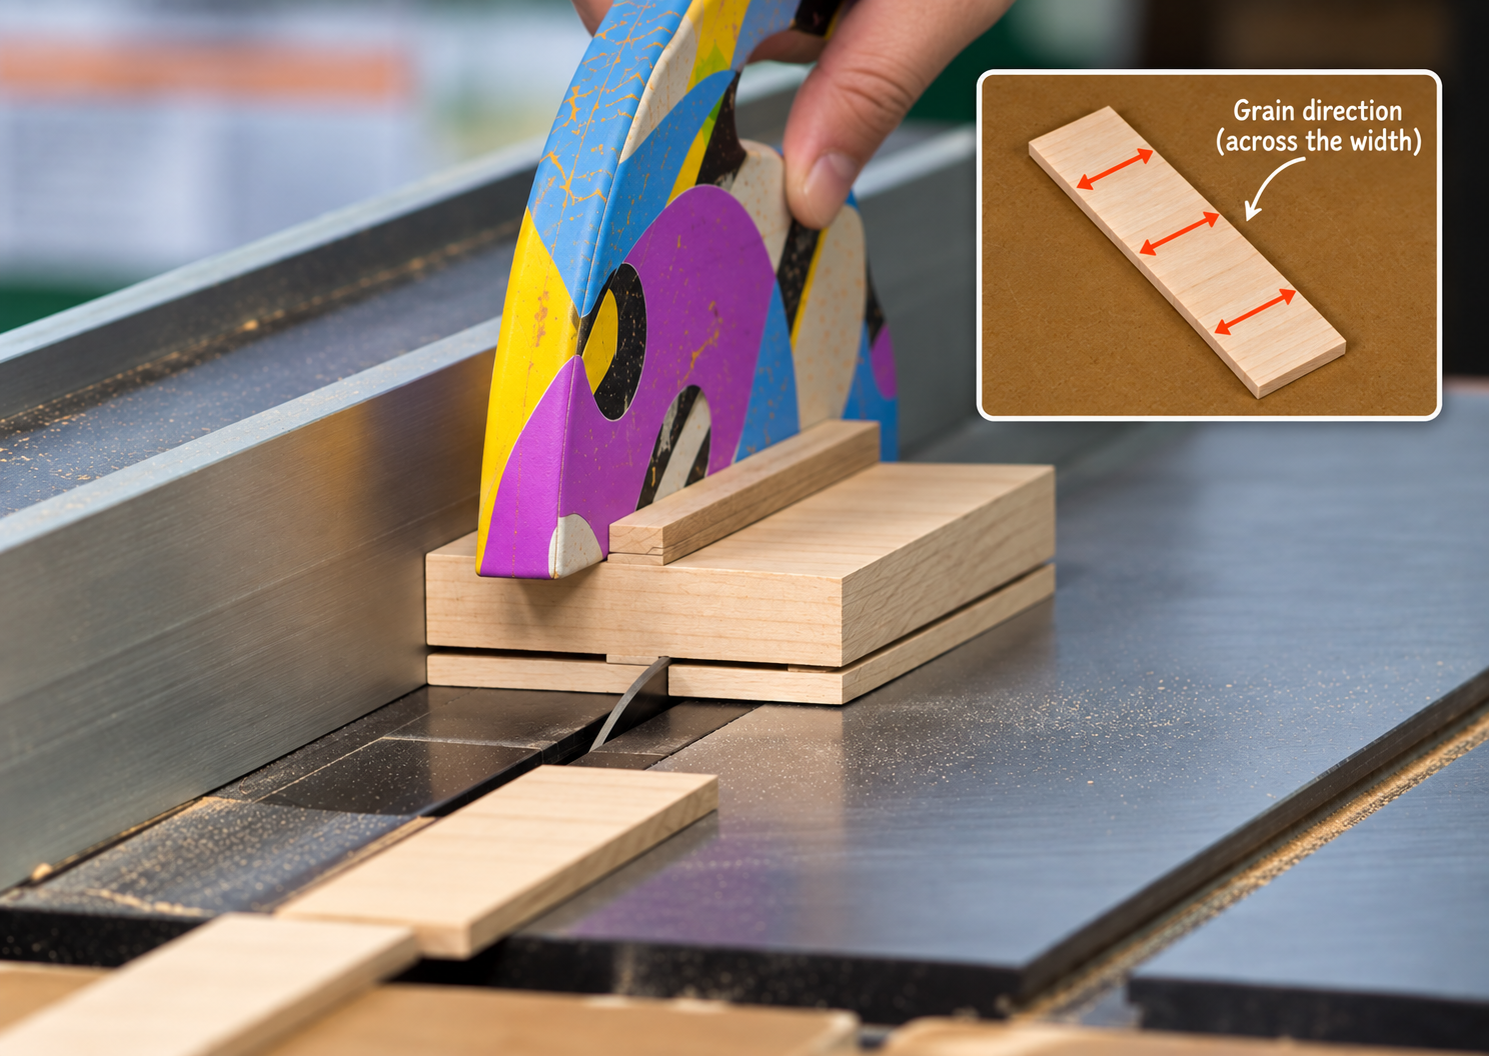
When making solid-wood splines, grain direction is just as important as the fit. A spline with its grain running in the wrong direction can split along the joint when the assembly is stressed. It can also create problems with seasonal wood movement if the grain orientation conflicts with the adjoining workpieces.
For the cedar frame, I start with a blank oriented so the finished splines will have grain running in the appropriate direction relative to the mitered pieces. This provides a more reliable connection while accounting for the movement of the solid wood.
The splines are cut at the table saw using a spacer block to establish the rip fence position. By making matching cuts along the faces of the blank, I can produce four splines from a single piece. A second series of cuts separates the individual splines, leaving them ready for assembly.
Gluing Up the Mitered Assembly
When assembling a mitered frame with several pieces, I like to work in pairs. This makes it easier to bring the parts together accurately before completing the full assembly.
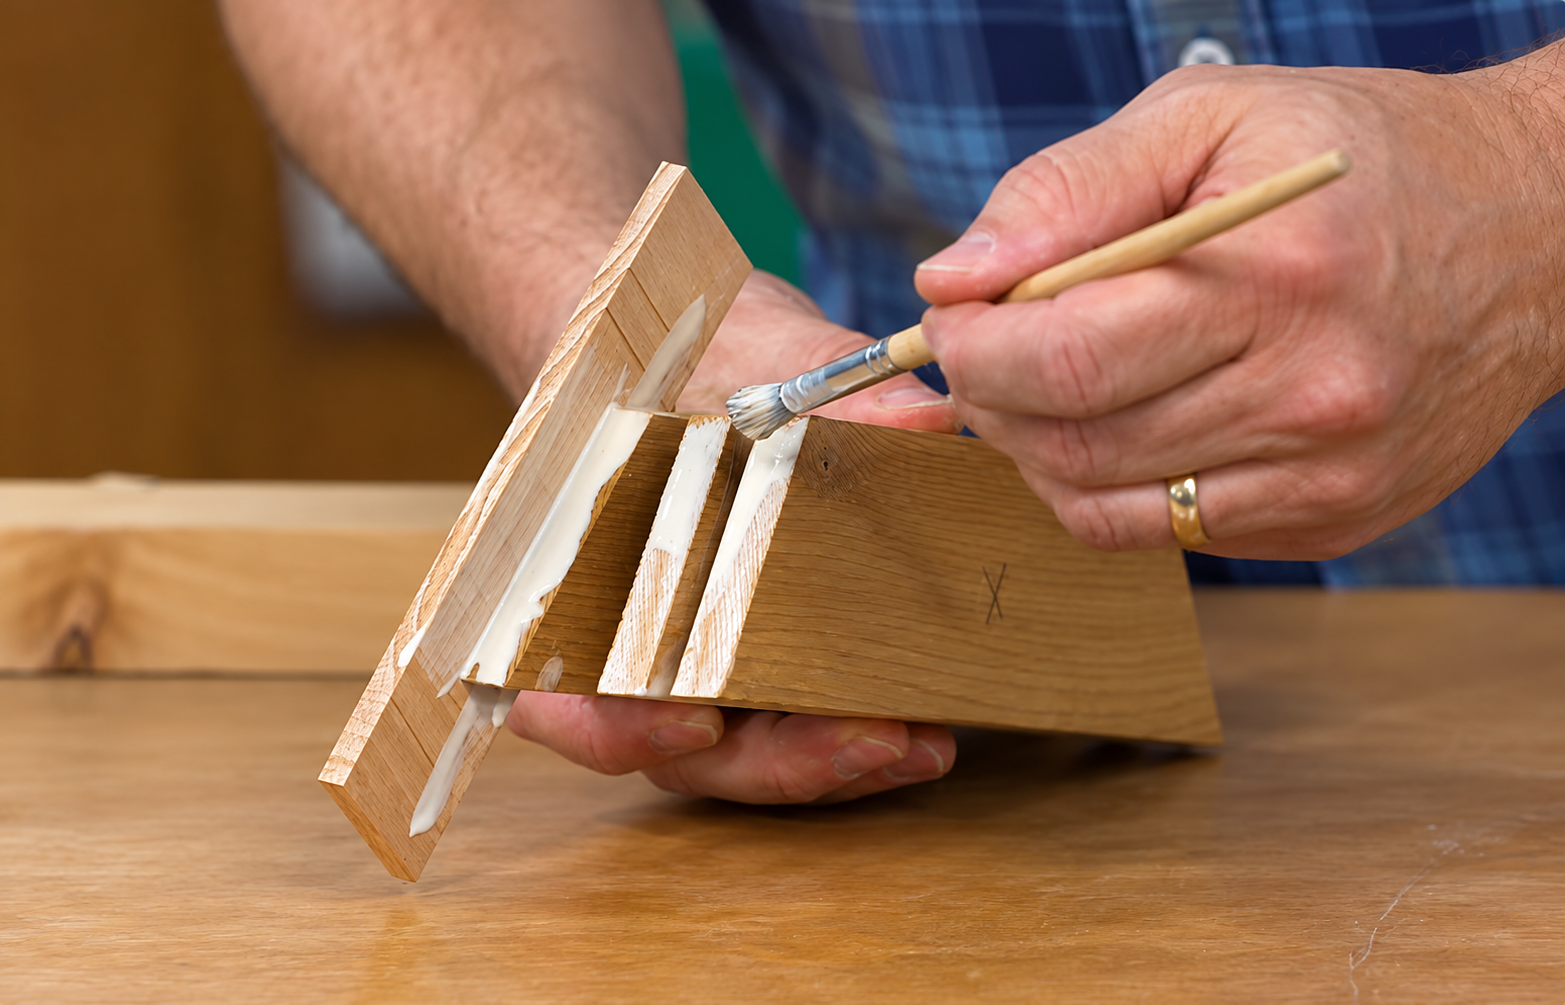
Start by brushing a thin coat of glue onto the mating miter faces. These surfaces can absorb a considerable amount of glue, so allowing the first coat to soak in helps prepare them for the final assembly.
Next, apply glue inside the spline grooves and insert the splines. I like to cut them slightly oversized so I don't have to worry about getting their exposed edges perfectly flush during glueup. Once the glue dries, the excess can be trimmed away.
Apply a fresh coat of glue to the miter faces, bring the two pieces together, and make sure the joint closes tightly. Repeat the process for the remaining sections, then join those assemblies to complete the frame.
Learn More Woodworking Joinery Techniques with Woodsmith Education
Spline joinery is a great introduction to using power tools for strong, accurate woodworking joints. As we've seen, the same basic technique can help align boards during a panel glueup, simplify frame-and-panel construction, and reinforce mitered assemblies. By changing the spline material and the way the grooves are cut, you can adapt the method to a wide variety of projects.
But splines are just one of several options for connecting woodworking project parts. In our Woodsmith Education course, Power Tool Joinery, we explore four practical joinery methods that use premade wood connectors: dowels, splines, biscuits, and loose tenons, including Dominoes.
The course focuses on making accurate project parts first, then using power tools and specialized jigs to create the joinery. This approach simplifies the process and opens up new possibilities for furniture, cabinets, and other woodworking projects.


