

 Projects often require multiple pieces cut to the same length. And the best way to accomplish this is to set a stop block. For setting a stop block on my miter saw, I use an old radial arm saw trick that my uncle showed me years ago. It works just as well today.
As the photos below show, all you have to do is make a partial cut in a scrap that’s clamped to the fence (on the opposite side of the stop block setup). Then, hook your tape in that kerf to locate and clamp the stop block.
Projects often require multiple pieces cut to the same length. And the best way to accomplish this is to set a stop block. For setting a stop block on my miter saw, I use an old radial arm saw trick that my uncle showed me years ago. It works just as well today.
As the photos below show, all you have to do is make a partial cut in a scrap that’s clamped to the fence (on the opposite side of the stop block setup). Then, hook your tape in that kerf to locate and clamp the stop block.
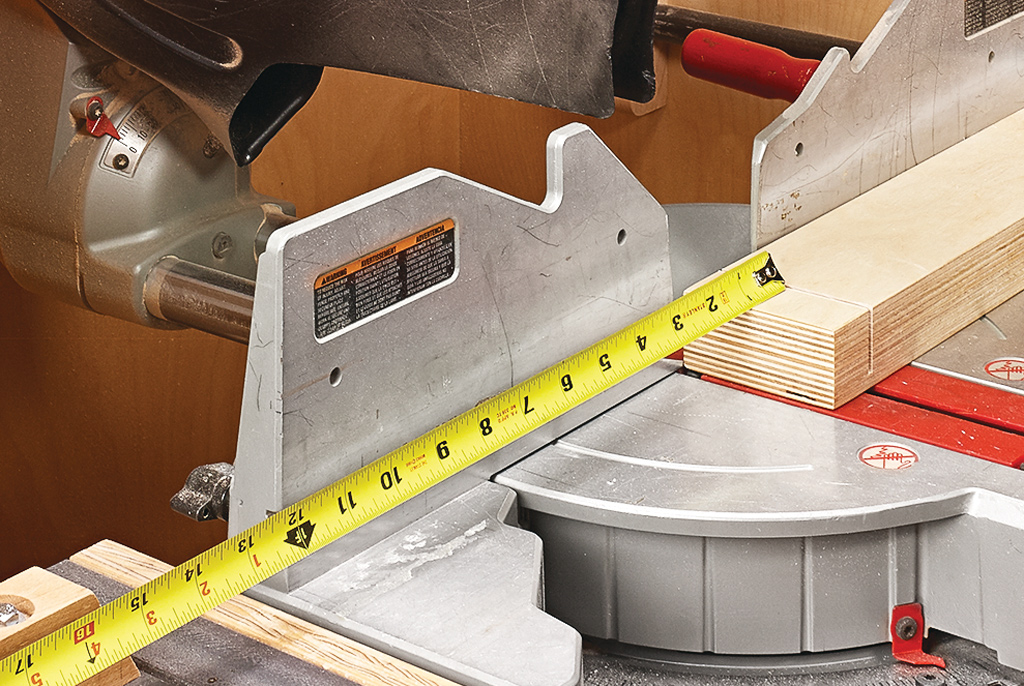 This “live” kerf cut is a more accurate reading of the blade
location, rather than just bumping the end of your tape into the blade.
This “live” kerf cut is a more accurate reading of the blade
location, rather than just bumping the end of your tape into the blade.
A Shallow Cut.
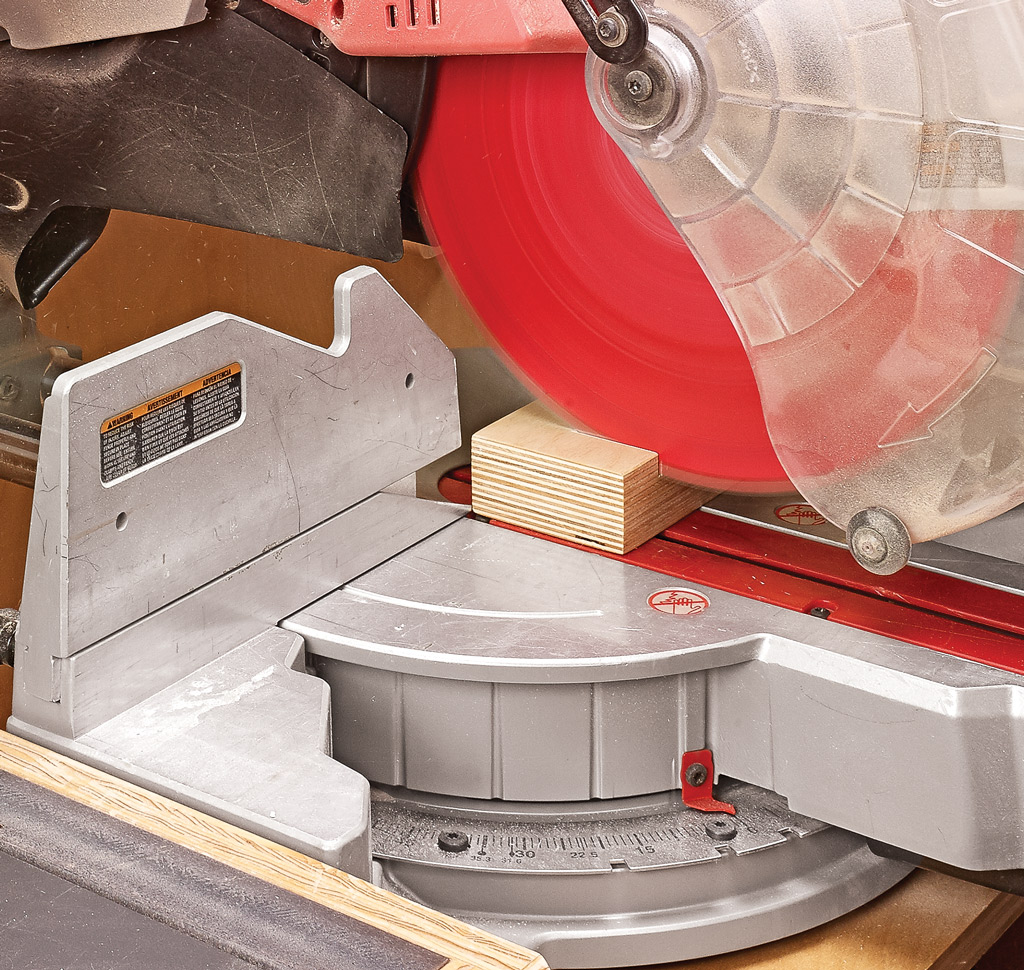 Cut a shallow kerf into a scrap that’s clamped to the saw fence. Do not cut all the way through the piece.
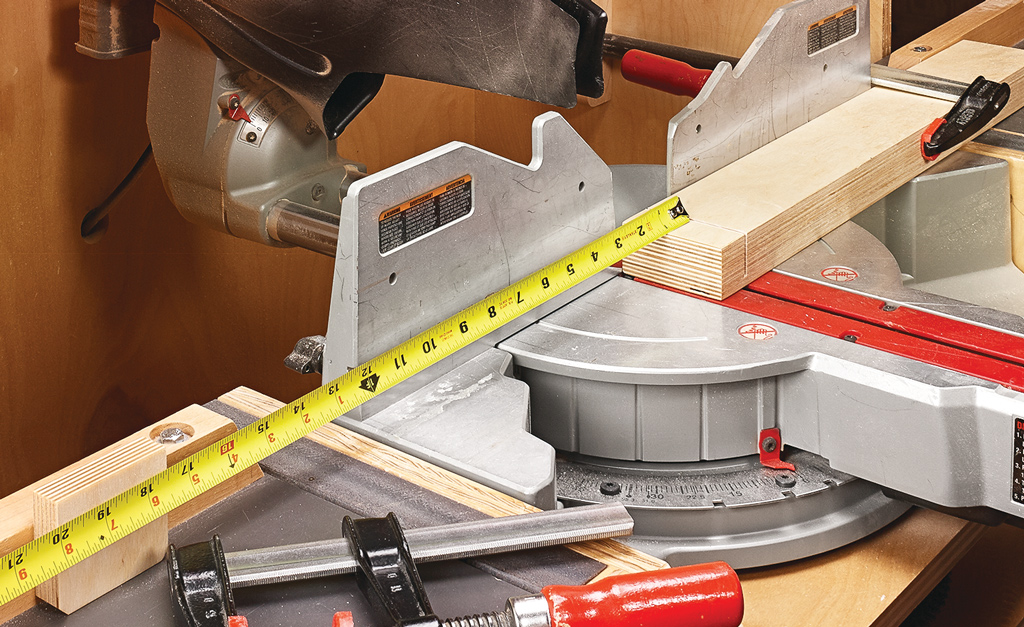
Set the Stop Block.
Hook your tape measure into the kerf created by the blade. Then position the stop block and clamp it in place.
Make the Cut.
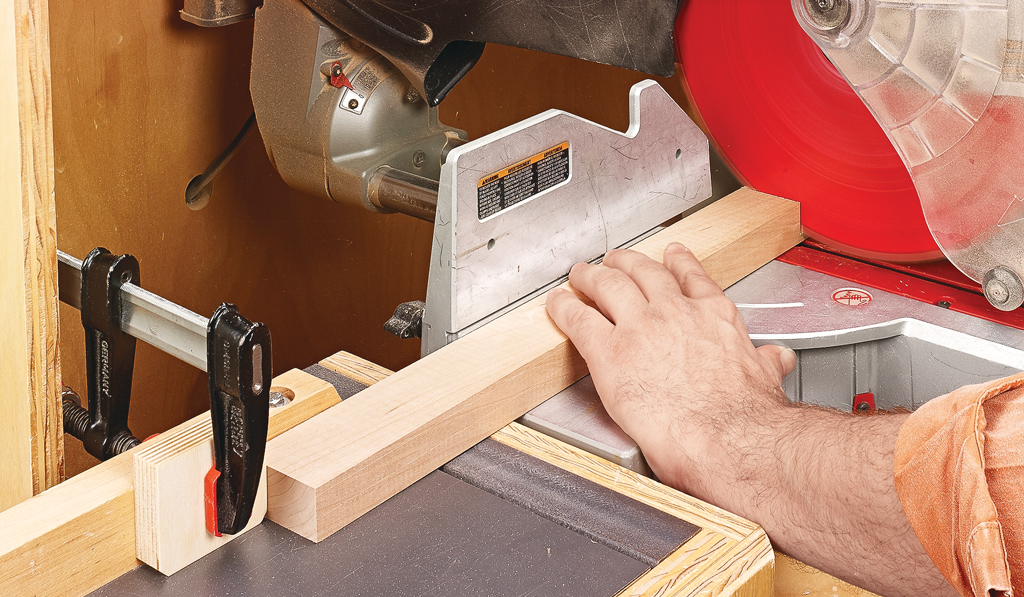 Remove the scrap that was clamped to the miter saw. Now you can use the setup to make as many repeat cuts as needed.


