

 Like most woodworkers, many of my early projects were built from pine. After all, it's inexpensive and readily available. But once I started working with hardwoods, I all but abandoned pine and the problems of knots, pitch pockets, and blotchy staining. However, in spite of its limitations, for some styles of furniture it's the perfect choice. This coffee table is a good example. Once you've learned a few "workarounds" and a couple of easy techniques, you can overcome the problems and make your pine projects look great.

START AT THE LUMBERYARD. A successful pine project begins with a careful inspection of the wood at the lumberyard. In addition to piles of construction-grade two-by stock, you’ll see grades like: select , # 2 common , C & better , and clear . The grades are established in accordance with the American Softwood Lumber Standards. These standards are necessary for lumber producers and wholesale buyers in the construction industry. They strictly define the nominal sizes, acceptable measures of moisture content, and the nature and number of defects in a particular grade of timber.

But for woodworkers, these standards only tell part of the story. The more important concern when selecting lumber for a project is uniformity of color and grain. Another drawback of the grading system is that it usually lumps spruce, pine, and fir together under the “SPF” label. And the large chain home centers add to the confusion by simply labeling a number of softwoods as “whitewood.”
So, instead of getting too caught up looking at a particular grade (or even species), I search for a batch of wood that displays a consistent color and even grain.
I’m also very concerned about the price. What I mean is, you can find beautiful clear pine at most lumberyards and home centers, but you’ll likely pay a premium price for it, negating one of the biggest benefits of using pine.
For this reason, I prefer to stick to the lower grades and accept the fact that I’ll need to buy a little extra so I can work around the problem areas. If you avoid twisted stock, you can flatten and straighten pine easily.
Another important step in the process is to make sure you give pine plenty of time to dry and acclimate to your shop. Then it’s just a matter of careful layout work.
LAY OUT THE PARTS. Since most pine is flatsawn, laying out project parts requires careful consideration. For example, you’ll probably want to use straight-grained pieces for the rails and stiles of a cabinet door, but cathedral grain for the door’s panel. This can be achieved with pine because wide boards are easy to find. The main photo shows how to lay out straight-grained parts from mid-grade stock. KNOTS. The next concern is whether to eliminate or include the inevitable knots. When used judiciously, knots can add character to a project. Of course, you wouldn’t want to put a knot anywhere in a joint or other structurally important part of a project. But by being careful as you lay out the project parts, you can easily intersperse them in the larger fields.

Your first task here is to make sure any knots that will be included in the part are stable. The photos above show you how I use a little epoxy to fill the voids in a knot that is mostly stable. As a general rule, I avoid knots that are loose or falling out.
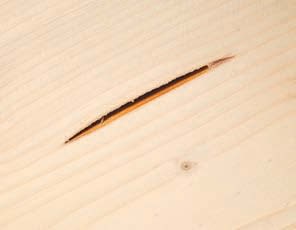

PITCH POCKETS. You’ll also need a method of dealing with pitch pockets, those annoying splits in the wood filled with sappy resin. The photos above show one way to handle this problem.
USE THE RIGHT SCREWS. Another common frustration about working with pine is that it doesn’t hold screws as well as most hardwoods, often resulting in the failure of joints secured with screws. But you can dramatically improve the holding power simply by selecting the right screw for the job. The key is to use a woodscrew with deep, coarse threads. This allows the threads to grab more of the wood.
These strategies for working with pine might seem like a lot of work. But once you get busy building a project, you’ll remember the best thing about pine — the wonderful smell of freshly cut boards.
How-To: Staining Pine Without Blotching
If you’ve ever stained a pine project, chances are you’ve experienced the frustration of a blotchy result. Blotching can occur in many hard and softwoods, but it’s almost guaranteed to happen in pine if you don’t take some preventative measures.
 WHY IT HAPPENS.
If you take a close look at the growth rings of a pine board, you’ll notice the very pronounced differences in the early and late-growth wood. The lighter-colored early wood is much softer then the dark, lategrowth wood.
These variations affect the way [a stain](https://www.woodsmith.com/review/best-wood-stain/) is absorbed into the wood. Most of the time the result is ugly blotching.
WHY IT HAPPENS.
If you take a close look at the growth rings of a pine board, you’ll notice the very pronounced differences in the early and late-growth wood. The lighter-colored early wood is much softer then the dark, lategrowth wood.
These variations affect the way [a stain](https://www.woodsmith.com/review/best-wood-stain/) is absorbed into the wood. Most of the time the result is ugly blotching.

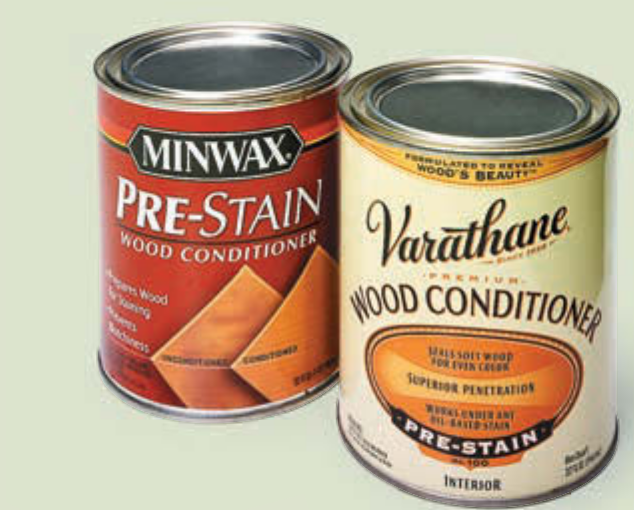
WHAT’S THE FIX? To prevent the uneven absorption, the key is to seal the wood. One easy way to seal the surface is to use a wood conditioner. While manufacturers are tight-lipped about their exact formulas, these conditioners are basically a thinned varnish. The extra solvent allows for deeper penetration into the wood, forming an effective seal.
APPLICATION. All you need to do is wipe the conditioner on, let it sit for a few minutes, and wipe off the excess. Then you can stain the workpiece without it blotching.


