


Driving through the countryside or stopping at flea markets, you’re bound to come across large white sharpening wheels. You know, the big ones that you imagine a cartoon character sitting at, sharpening an axe.
In reality, there’s a reason that these water-trough stones are so common — they simply work. That’s as true today as it was a hundred years ago. A water sharpening system, like the Tormek shown here, is still a great way to get a razor sharp edge on a variety of tools. In this article, I’ll give you the basics of a water sharpening system, and some of the jigs and attachments that I find useful.
 The T8 comes with a wheel dressing jig, flat blade jig, angle setting jig, and a leather strop for a final honing.
The system I’m using here is one made by Tormek, a Swedish company that’s known for making some of the highest-quality sharpening systems and jigs around. The T8 grinder comes with various accessories in the set. You can see these in the photo to the left. Older models of the Tormek grinders, such as the Supergrind 2000, are quality machines and can be picked up secondhand for a reasonable price.
 The water reservoir holds several cups of water. However, once you start to add water to a dry stone, you’ll need to let the stone saturate itself before topping off the water tank.
SETUP
Now, sharpening with a wet grinder takes different setup steps than other systems. You can see these steps shown here. Once you have the steps figured out, the entire process goes quickly. H20. Obviously, with this being a wet grinding system, there’s some form of water bath. With this particular system, the water bath is under the wheel and is raised and lowered with a knob.
When you first fill up the water bath, you’ll notice the stone starts wicking up a lot of water. I continually add water until the water level stays close to the “Maximum Fill” line in the trough. Once you flip the grinder on, you may notice that the water level drops a bit more — that’s okay, just top it off.
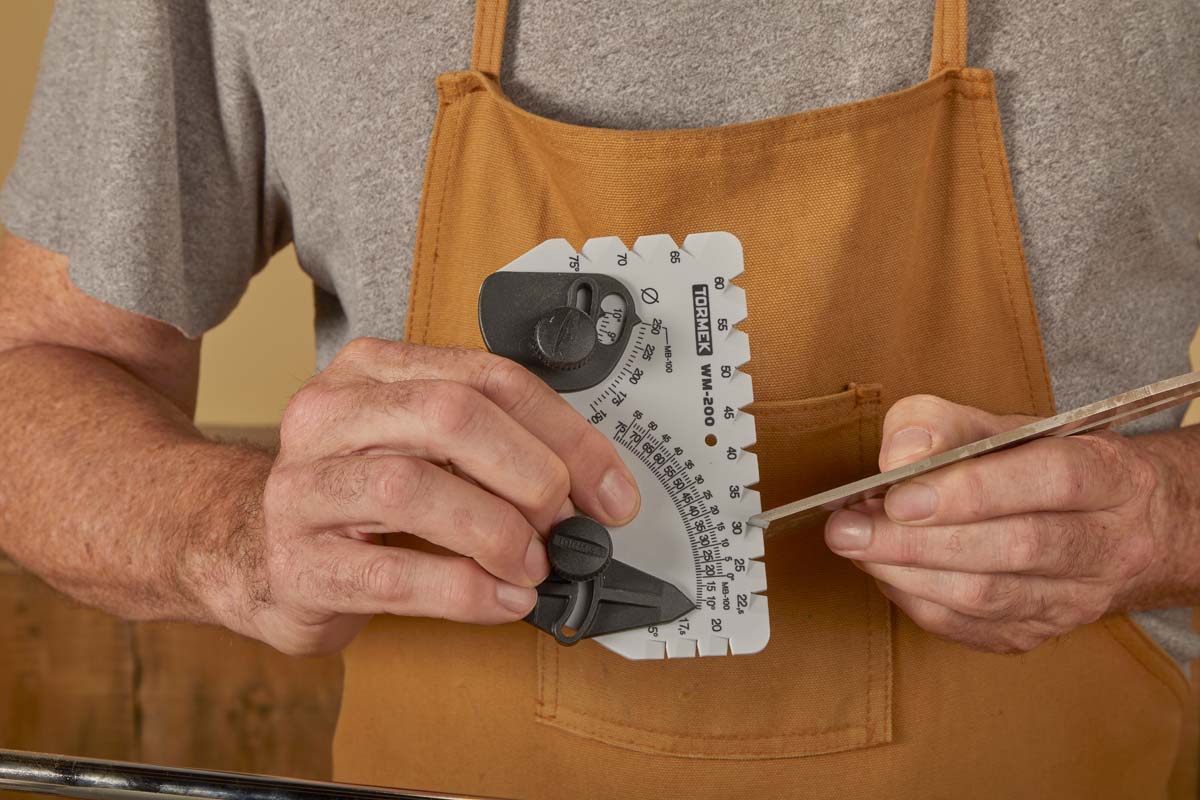
 The angle setting jig features an angle gauge to measure existing angles, as well as two dials — one for setting the diameter of the stone, and the other that’s set to your desired bevel angle.
 The angle setting gauge packs in a lot of features. It helps you find the current angle of your tool, and gives a visual reference that the angle you’re grinding is what you wanted.
As the stone wears, you’ll need to readjust the stone diameter knob.
The angle setting gauge packs in a lot of features. It helps you find the current angle of your tool, and gives a visual reference that the angle you’re grinding is what you wanted.
As the stone wears, you’ll need to readjust the stone diameter knob.
SET YOUR ANGLE.
The Tormek, and other wet grinders, utilize an adjustable support arm to help you guide your cutter. The height of the support, combined with the protrusion of the tool out of your jig, will determine the angle that your bevel is sharpened at. The included angle setting jig will help you get a consistent angle every time.
As you can see in Photo 2, you first start by measuring the current angle of your tool (30°). Then, you dial in the two knobs on the angle setting gauge. One knob is set in accordance with the current wheel diameter (this compensates for the wear that takes place on the grinding wheel). The second knob is dialed to your desired angle (30°) and has a foot that extends below the angle setting jig.
At this point, you can insert your cutter into the proper sharpening jig (more on that in a bit), and fit it over the support arm. Resting the edge of the tool on the stone, place the angle finding gauge on the wheel, and check the angle between the “Angle foot” and the back of your tool.
The goal here is for the foot of the angle jig to rest flush with the back of the cutter/tool. Photo 3 shows what it looks like when it’s set up properly. An alternative is to color the bevel of your cutting edge with a marker and turn the wheel by hand. The stone will wear away the marker, revealing which direction you’ll need to adjust the angle.
All of the adjustments are done with a thumb nut that’s on the support arm. Adjusting it up or down will adjust the distance between the support and the wheel. Now it’s a matter of turning the grinder on, letting the wheel pick up water, and grinding your tool. Some grinders have a direction switch, but most experts agree that sharpening to or away from the edge doesn’t really make a difference.
 With the grinder running, apply mineral oil to the leather strop (Tormek supplies some with the kit). The oil helps soften and open up the grain of the leather.
One of the cool things about a wet grinder is that you can re-grade the stone for different grits. (This is different than truing up the stone as it wears). The included grading stone allows you to get as coarse as about 220-grit, and as fine as 1000-grit. The 1000-grit finish is perfect for almost everything in my shop.
For those woodworkers that want to get an even finer edge, you can hone the freshly-ground edge using the leather strop on the opposite side of the grinder. As you can see in the photos above, the strop is first soaked in mineral oil— this opens up the grain of the leather a bit and makes it more accepting of the stropping paste.
The stropping paste is applied and spread around the wheel. Now, you’ll flip the support arm around so that your stropping is away from the edge (trust me on this). The honing process only takes a few seconds, but sure makes a big difference in the edge produced.
 The buffing compound is applied to the oiled strop. The paste is spread with the tool you’re honing before turning the wheel on. Just a small amount (2" line) is all that is needed for the entire wheel.
 As you strop the edge of the tool, the compound will begin to remove a small amount of steel and turn the compound grey. I occasionally stop and smear any built-up compound back onto the wheel from the edge of the tool.
GRINDER ACCESSORIES
The wet grinders on the market today have a variety of jigs available for them. From axe grinding and scissor sharpening jigs, to kitchen knife jigs, you can sharpen almost anything with a wet grinder. Here are a few of my must-have jigs for my shop sharpening needs.
FLAT BLADE JIG.
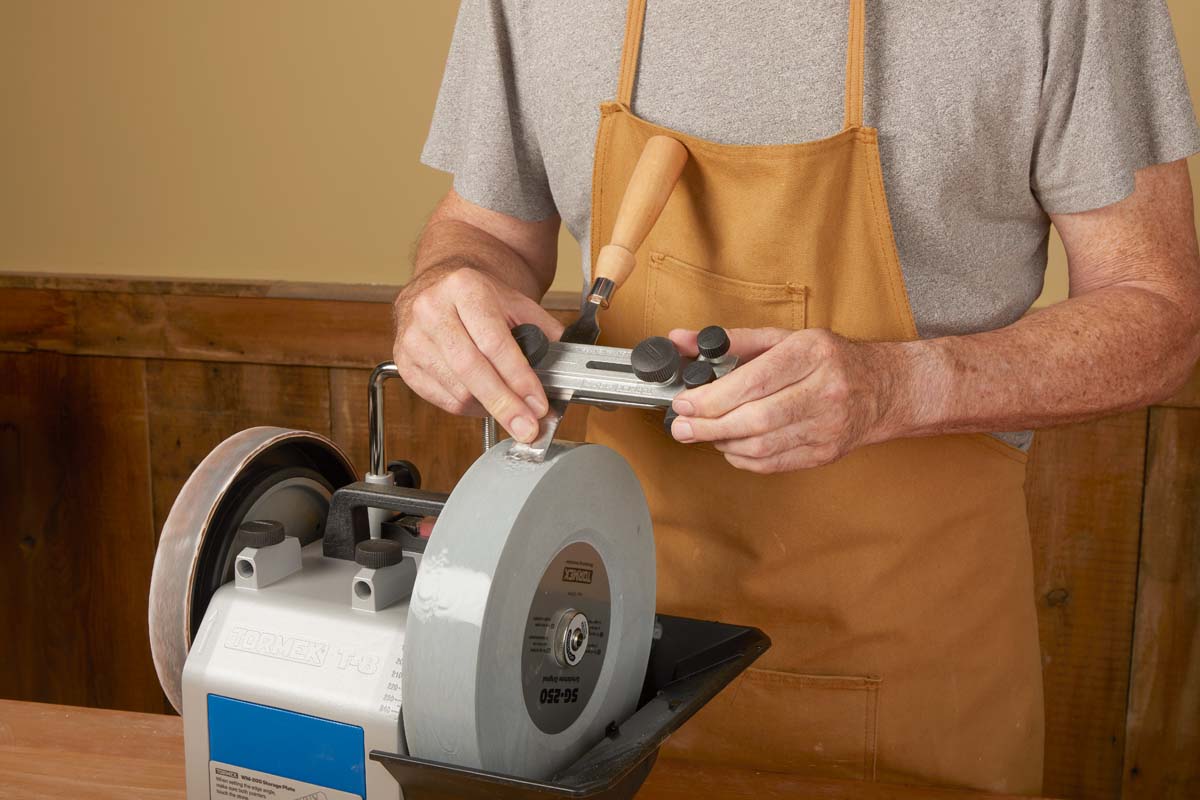
 The flat blade jig will be most peoples go-to jig. It’s the ticket for accurate chisel and plane iron sharpening.
The jig shown on the previous page and above is the one that is included with the T8 — the flat blade jig. This is what is used for sharpening chisel blades and plane irons. It clamps the blade between two jaws and slides over the support arm. Sliding the tool back and forth as the grinder is running will hone the entire edge, and keep wear on the stone even.
THE MULTI JIG.
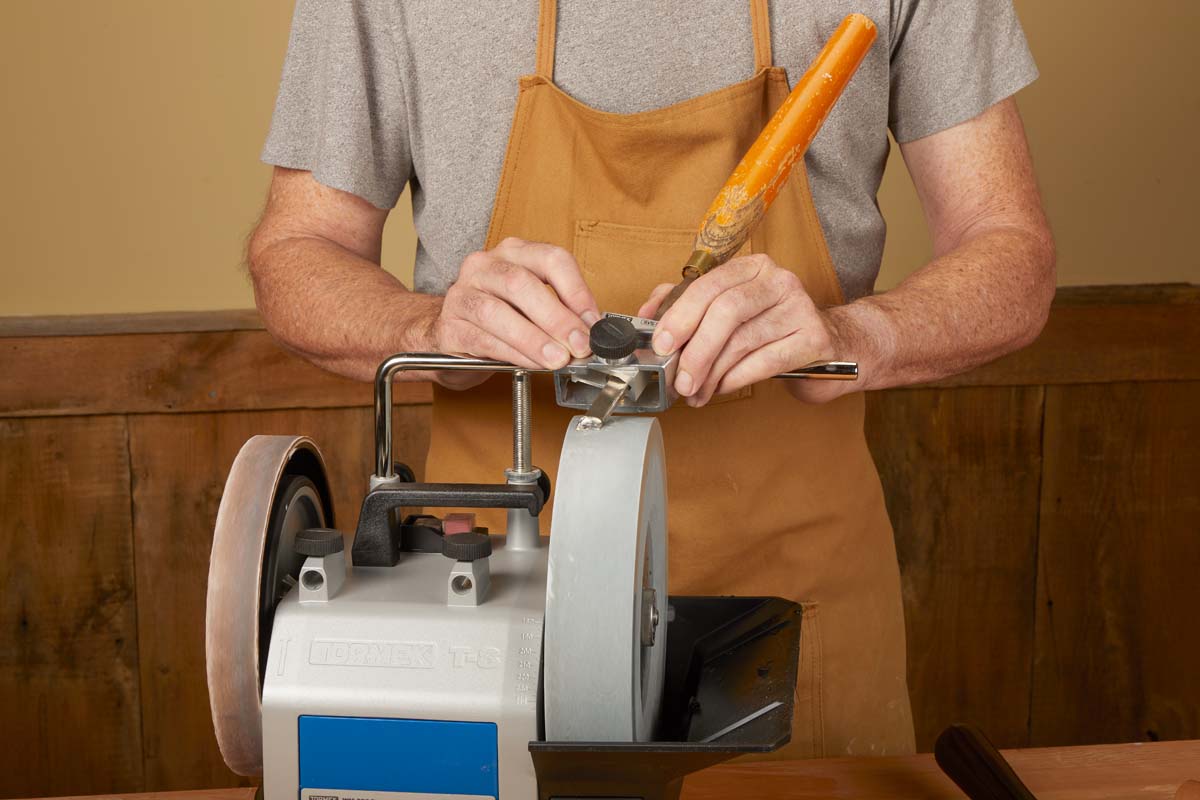
 The multi jig has a few functions, but I’m guilty of setting it up for my skew chisel only.
The Tormek SVS-50 is a universal jig, that allows you to sharpen standard “gouge” shaped tools, such as a bowl gouge or spoon carving gouges. However, my favorite feature of this jig is the ability to pivot the blade within it.
With this, I can get a razor-sharp edge on my skew chisel for turning (see bottom left photo on the previous page). The skew chisel is the one turning tool that needs to be as sharp as possible (not that they all don’t, it’s just more critical with this one). The SVS-50 stays set at 30° in my shop to always sharpen my skews.
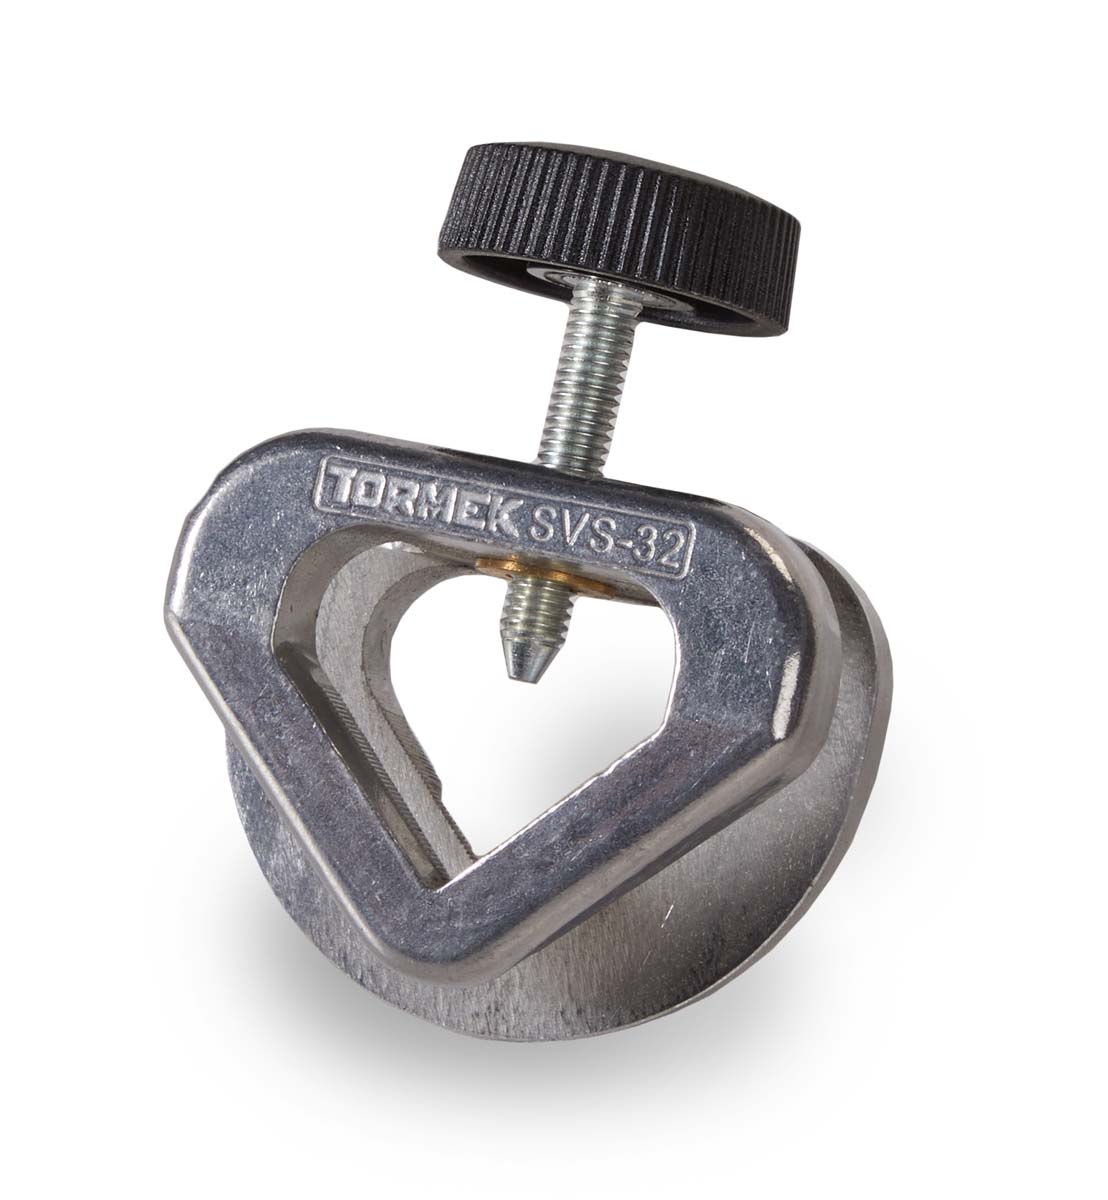
 The SVS-32 is a small tool jig. This simple jig lets you to hold the tool at a fixed length but still allow you to roll the tool left and right, sharpening the complete bevel. This is a must-have jig for sharpening many of my carving tools.
SMALL TOOLS.
Speaking of gouges, my carving tools are one thing that I’ve always struggled to sharpen. I’m sure it’s because I don’t actually carve enough to “need” to get good at it. The SVS-32 small tool jig (shown to the right) covers almost all of the common carving tools that I use.
It’s simply a collar that slips over the tool, and the rings of the collar slip over the tool support. You can use this jig to grind carving tools, but I mainly use it for honing. The rule of thumb is for every one sharpening of a carving tool, you should hone it 20 times!
SWEPT GOUGES.
If I had to choose only one tool to sharpen on my wet grinder, my bowl and spindle gouges (for turning) would be it. These swept-wing tools are traditionally sharpened at a high-speed grinder.
However, this can quickly overheat the tool, and it’s easy to mess up the profile of the tools if you’re not careful. Because the grinding wheel on the wet grinder is soaked in water and moves slower, you cannot overheat your tool. Plus, it produces a much keener edge, which I appreciate when I go to make my final cut on the lathe.
The SVD-186 is the jig for these type of swept-wing tools. You can see the jig below. The jig slides over the support arm and has two pivot points. One allows you to adjust the “pitch” of the head in relation to the stone. The other is the pivot that allows you to roll the tool left and right as you’re sharpening.
Sharpening with this jig is similar to other style sharpening systems for high-speed grinders. You can see the steps in photos 1 through 3 below. In short, you start with the tool rolled to one side.
As the grinder turns, you roll the tool from left to right and back. This sharpens the entire profile of the cutting edge. I will often, especially when making a finishing cut on a bowl, take the time to use the SVD-186 on the leather strop as well. There is never such a thing as too sharp.Sharpening always seems to be a hot topic with woodworkers.
The number of times I’ve been asked what’s the simplest, most universal sharpening system is unbelievable. A wet grinding system like this ticks more boxes than most other setups. I think that making the switch over to a wet grinding system in your shop will save you time and get you more consistent results.
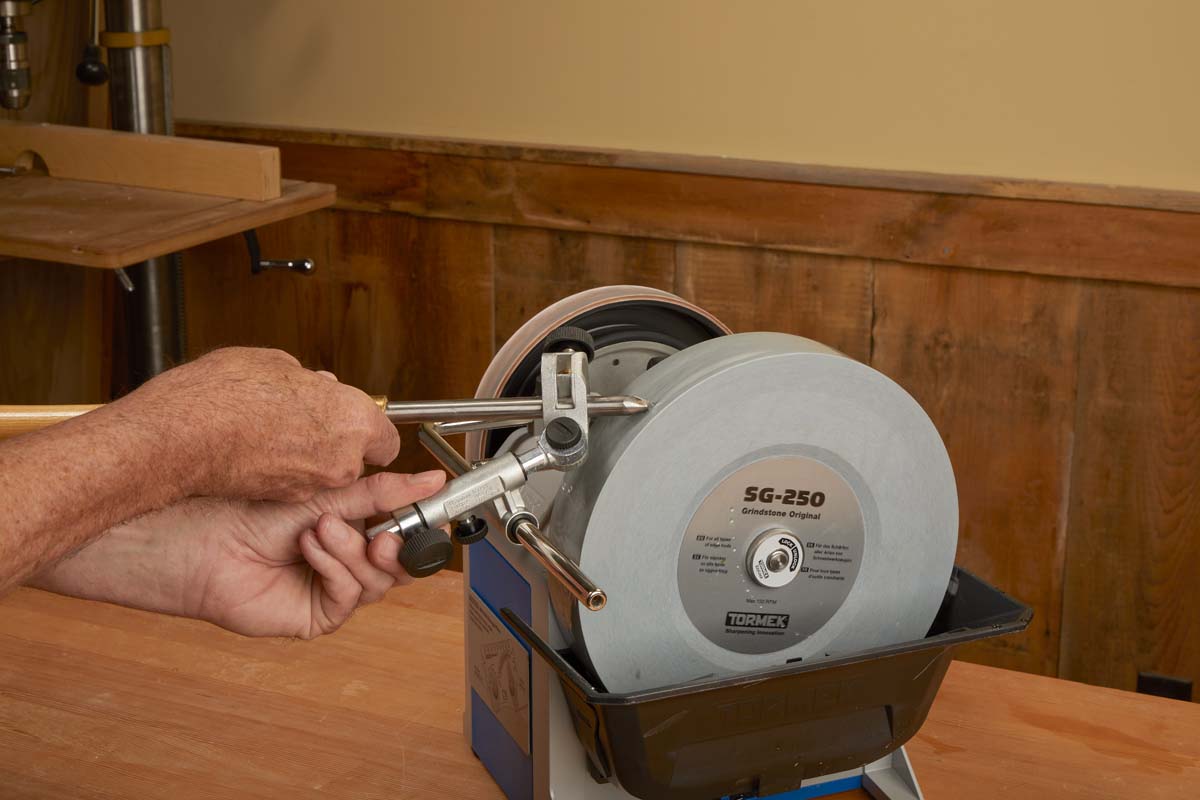
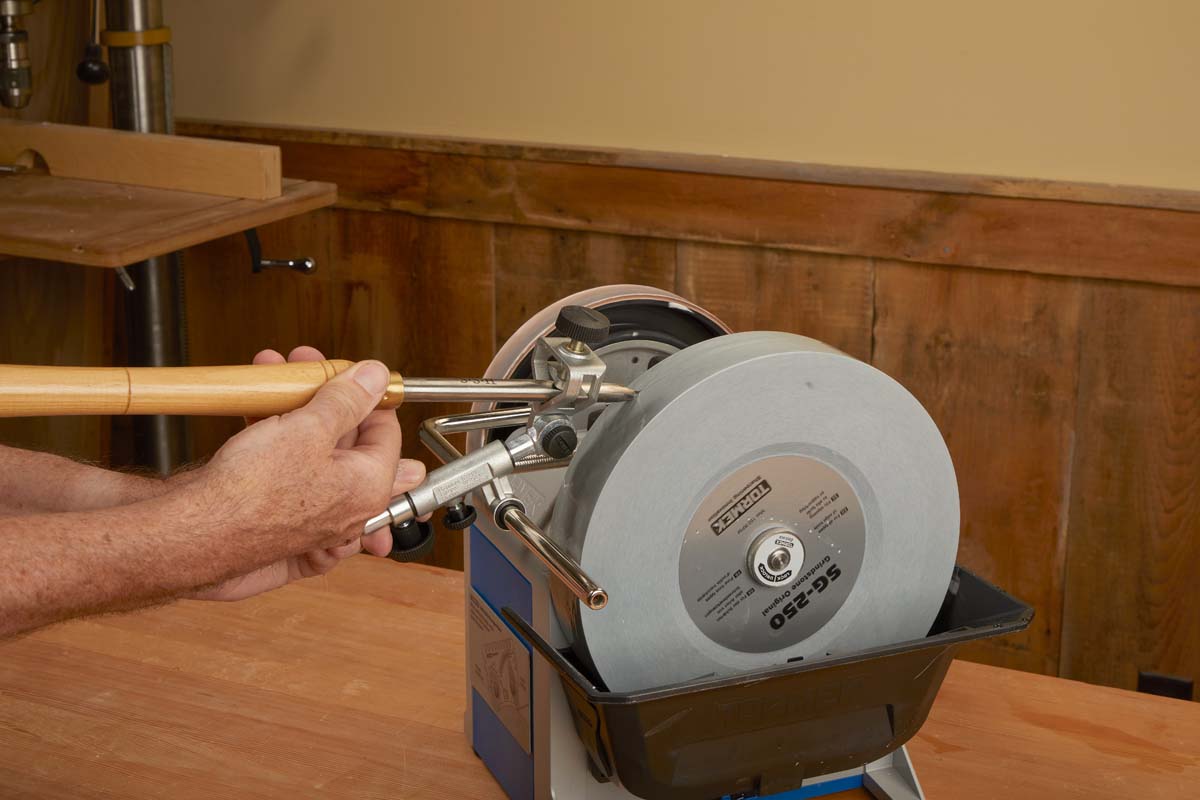
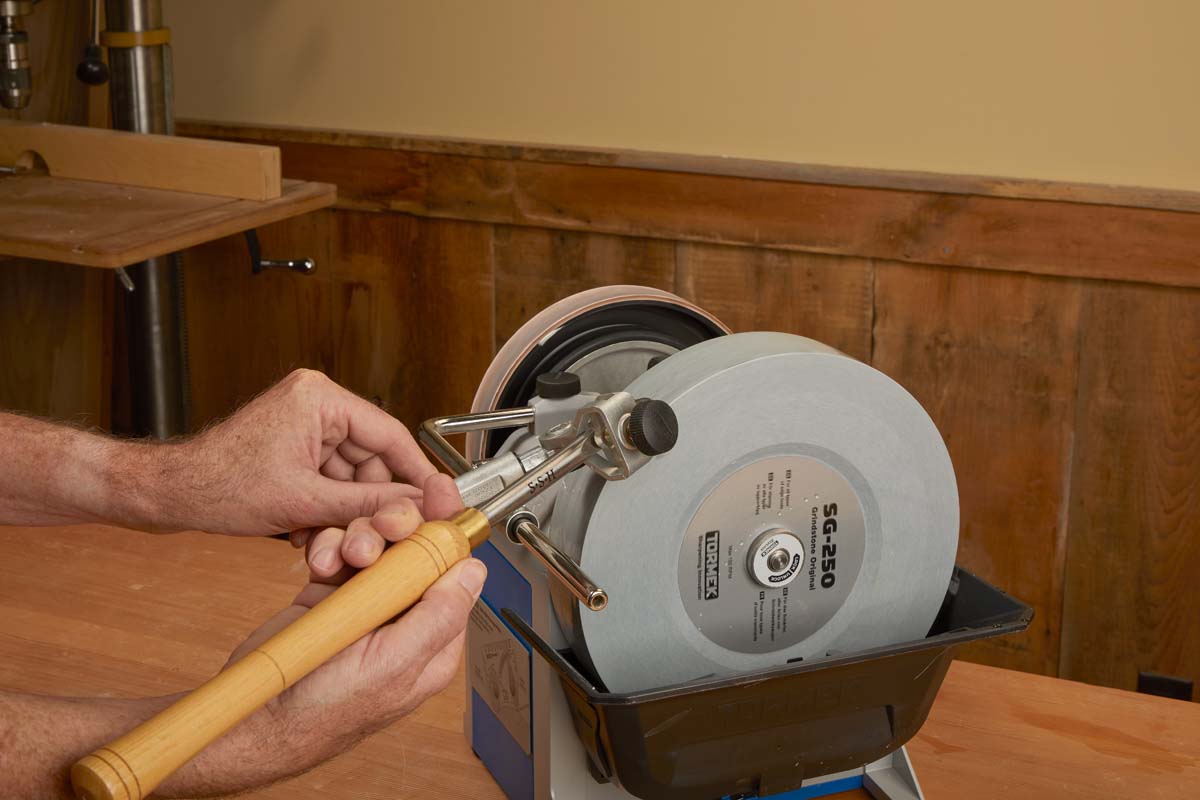
 The SVD-186 is designed to sharpen the “nose” and swept-back-wings of turning tools. Start with the tool rolled to one side. Then, with the grinder running, rotate the tool up and over, finishing with the tool on the opposite side. Repeat this motion back-and-forth.


