



How to Cut Accurate Hinge Mortises With a Router Table
A router table is a great tool for cutting clean, consistent hinge mortises in cabinet doors, boxes, and other woodworking projects. But there's one challenge: Knowing exactly where to start and stop the cut.
Without a reliable reference, it's easy to rout a mortise too long or stop short of the layout lines. And when you're cutting multiple hinge mortises, even small differences can affect how the hinges fit.
The solution is a pair of simple L-shaped stops attached to the router table fence. These shop-made accessories establish both ends of the mortise and provide a stable reference for positioning the workpiece.
They're easy to make, quick to adjust, and help take the guesswork out of routing hinge recesses.
Make Simple Router Table Fence Stops
Each stop consists of two pieces of wood joined at a 90° angle to form an L-shaped bracket.
One leg attaches to the router table fence, while the other extends forward to provide a positive stop for the workpiece.
The stops can be positioned along the fence to match the length and location of the hinge mortise.
This makes it easy to establish the starting and stopping points before making the cut.
Attach the Stops to the Router Fence
If your router table fence has a T-track, you can secure the stops with flange bolts and threaded knobs.
The T-track allows you to slide each stop into position and lock it down without tools.
If your fence doesn't have a T-track, there's no need to modify it. Simply use clamps to secure the stops to the fence.
Either method provides a reliable way to position the stops for the mortise you're cutting.
Set Up the Router Table for Hinge Mortises
Start by installing a 1/2" straight bit in the router table.
Adjust the bit height to match the required depth of the hinge mortise. The goal is to create a recess that allows the hinge leaf to sit flush with the surrounding wood.
Next, position the router table fence to establish the width of the mortise.
The two L-shaped stops determine the length of the cut.
Carefully locate the stops so the workpiece travels only between the intended starting and ending points.
Before routing the project parts, test the setup with a piece of scrap material of the same thickness.
This allows you to verify the mortise dimensions and make any necessary adjustments.

How to Cut a Hinge Mortise With the Router Table
With the fence and stops positioned, you're ready to rout the mortise.
The stops provide positive references for the beginning and end of the cut, helping you produce consistent results.
Step 1: Position the Workpiece Against the Right Stop
Place the workpiece against the right-hand stop.
Hold the board securely and carefully feed it into the rotating straight bit until the workpiece contacts the router table fence.
This establishes the starting point of the mortise.
Step 2: Slide the Workpiece Toward the Left Stop
With the workpiece against the fence, move it steadily toward the left-hand stop.
The straight bit removes material along the length of the mortise.
Continue until the workpiece contacts the left stop.
This establishes the opposite end of the mortise and prevents the cut from extending beyond the intended location.
Step 3: Remove the Remaining Waste
With the ends of the mortise established, carefully rout away the remaining waste between them.
Move the workpiece back and forth as needed, maintaining control and following the routing direction appropriate for the setup.
Use a suitable push block or holding fixture to keep your hands safely away from the bit.
Once the waste is removed, turn off the router and wait for the bit to stop completely before removing the workpiece.

Square Up the Mortise Corners With a Chisel
A straight router bit leaves rounded inside corners at the ends of the mortise.
Most traditional butt hinges have square corners, so a little cleanup is needed before installation.
Use a sharp chisel to pare away the remaining material at each corner.
Work carefully to the layout lines, taking light cuts to avoid removing too much wood.
Test-fit the hinge to check that it seats properly in the recess.
The hinge leaf should fit neatly within the mortise and sit flush with the surrounding surface.

Tips for Routing Accurate Hinge Mortises
A few simple setup techniques will help you get consistent results.
- Use matching stops. Make both L-shaped brackets square so they provide reliable reference surfaces.
- Secure the stops firmly. Whether you're using T-track hardware or clamps, make sure the stops can't shift during routing.
- Set the mortise depth carefully. Use the hinge leaf as a reference when adjusting the bit height.
- Make a test cut. Check the mortise dimensions on scrap material before routing the project parts.
- Use a sharp straight bit. A clean-cutting bit helps reduce tearout along the edges of the mortise.
- Keep the workpiece under control. Use appropriate holding fixtures and keep your hands clear of the router bit.
- Clean up the corners. A sharp chisel makes quick work of the rounded corners left by the router bit.
A Simple Router Table Upgrade for Better Hinge Mortises
Cutting hinge mortises doesn't require a complicated jig.
A pair of L-shaped stops attached to your router table fence provides an easy way to control the length of the cut and make repeatable mortises.
The stops are simple to build from scrap wood and can be adjusted quickly for different hinge sizes.
Whether you're installing hinges on a cabinet door, a small box, or another woodworking project, these shop-made router table stops make it easier to produce clean, accurate mortises.
Build a Versatile Router Table for Your Woodworking Shop
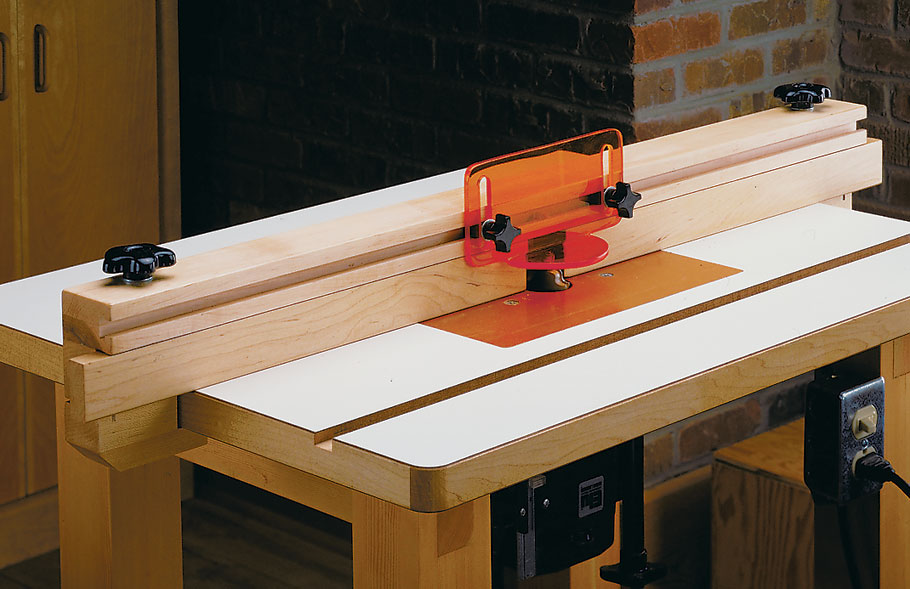
A well-equipped router table makes cutting joinery, shaping edges, and creating accurate recesses easier. Explore this shop-built router table project and discover a practical upgrade for your woodworking shop.
FEATURED PROJECT ➜ Get the Router Table Plans


