


4 Practical Woodworking Shop Tips & Tricks
Some of the best woodworking shop tips come from finding a new use for something you already have on hand. A few washers, a pair of handscrew clamps, or an ordinary ratchet can solve problems that might otherwise require a special tool or accessory.
In this collection of Woodsmith Reader Tips, four woodworkers share simple solutions for common workshop frustrations. From keeping hardware within reach to getting cleaner results with a hole saw, these practical ideas are easy to put to work in your own shop.
1. Open-Concept Hardware Storage
Keeping screws, nuts, bolts, and other small hardware organized is one thing. Keeping them easy to reach is another.
Plastic hardware bins work great for sorting fasteners, but storing them inside a drawer or carrying case can make it inconvenient to grab just a few screws.
Dylan Huffman of Lubbock, Texas, came up with a simple solution: mount the bins directly on the workshop wall.
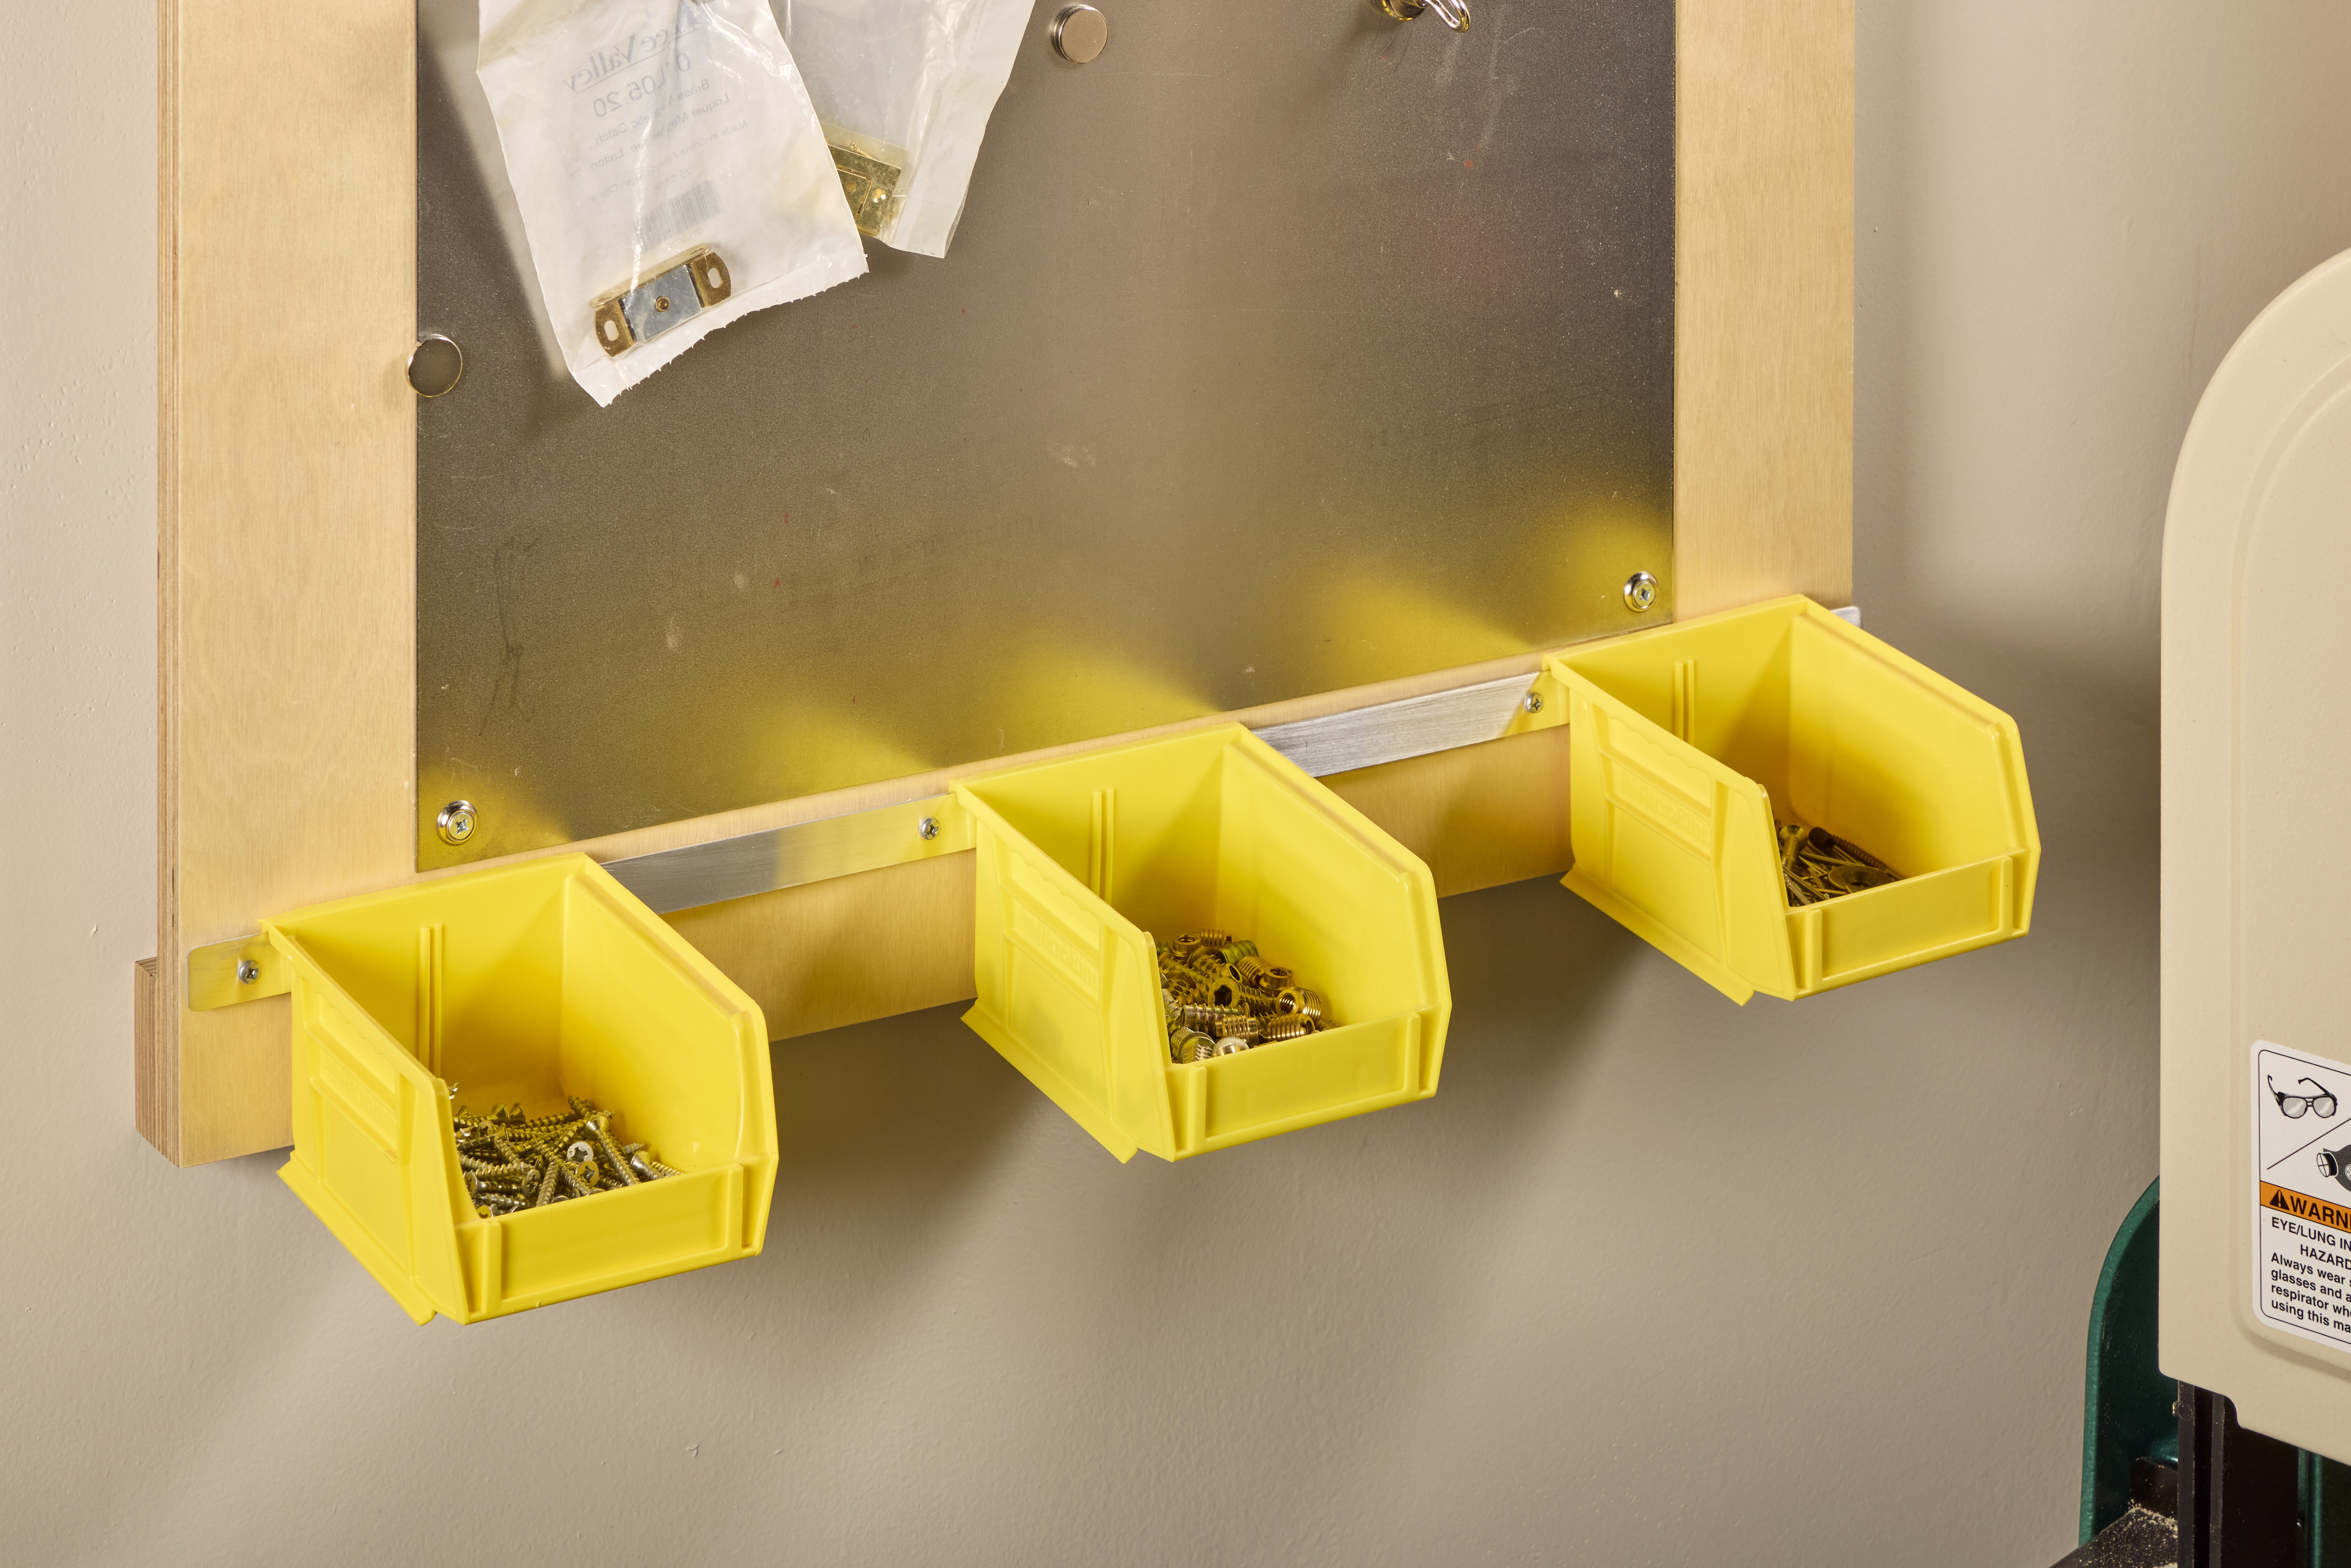
The bins have built-in hangers, so Dylan attached a thin strip of aluminum to the wall to serve as a mounting rail.
A few washers behind the strip provide enough clearance for the hangers to slip into place.
The result is an inexpensive, open-access hardware storage system that keeps commonly used screws visible and close at hand.
It's also easy to rearrange the bins whenever your storage needs change.
Reader Tip submitted by Dylan Huffman — Lubbock, Texas
2. Fiat Lux: Better Lighting for Wood Finishing
Good lighting makes a big difference when applying a finish. Unfortunately, overhead shop lights don't always reveal uneven coverage, streaks, or other surface imperfections.
Henry Hahn of Council Bluffs, Iowa, needed a better way to inspect his work while applying a finish.
His solution was to use a portable, tube-style work light supported by a pair of wooden handscrew clamps.
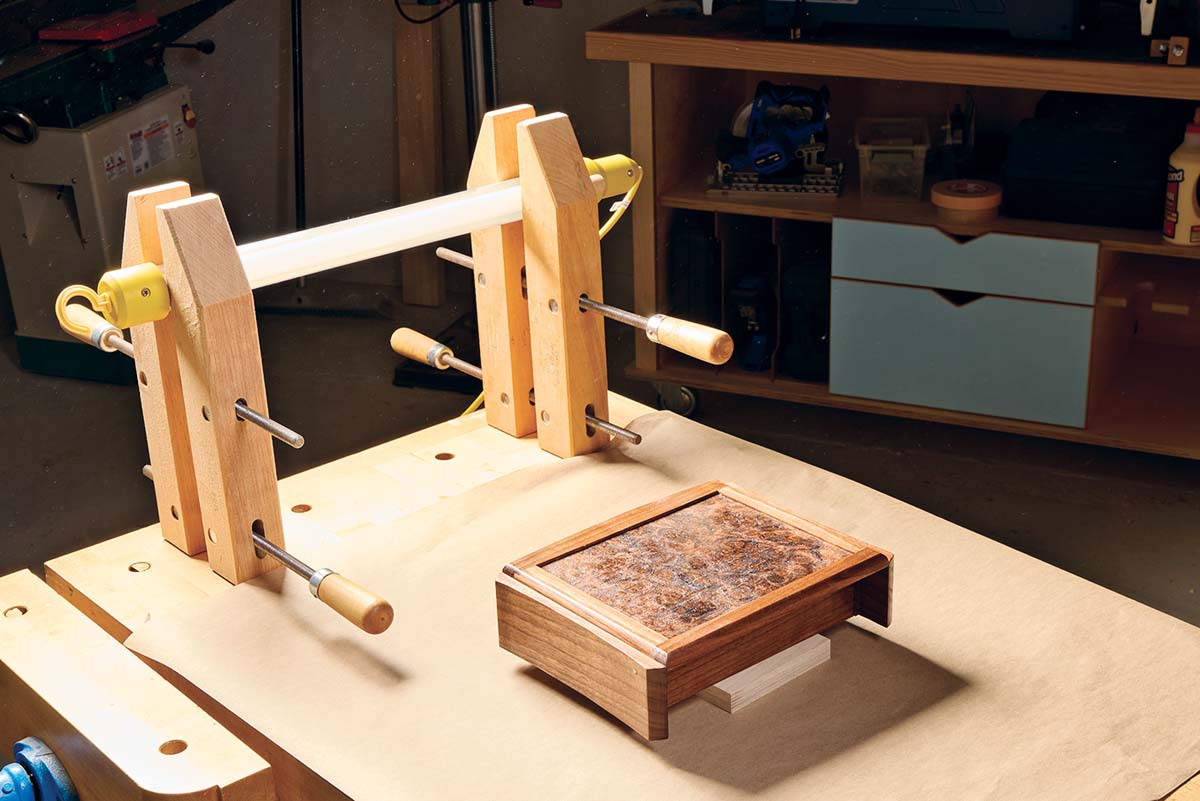
The handscrew clamps create a convenient stand that can be positioned on the workbench wherever additional light is needed.
By moving the light around the workpiece, it's easier to see how the finish is building and spot areas that need attention.
This approach is especially helpful when applying clear finishes, where reflections across the surface can reveal missed spots or uneven application.
Use a cool-running light suitable for the finishing environment, and keep electrical equipment away from spills and flammable finishing vapors.
Reader Tip submitted by Henry Hahn — Council Bluffs, Iowa
3. Make a 90° Screwdriver with a Ratchet
Driving screws in tight spaces can be frustrating when there isn't enough room for a conventional screwdriver handle.
Right-angle screwdriver attachments are available, but Oliver McLeod of Denver, Colorado, found a simpler solution using tools he already owned.
The trick is to combine a ratchet with a socket that accepts standard screwdriver bits.
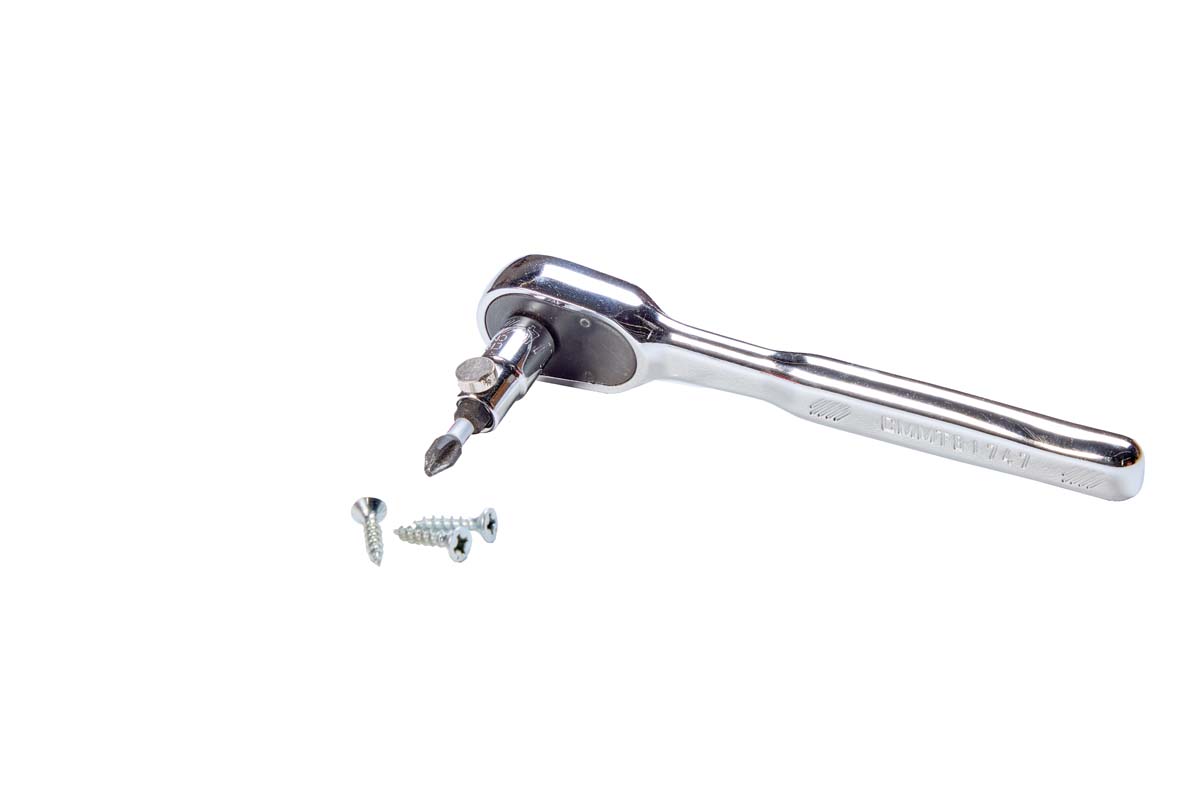
A small magnet inside the socket holds the driver bit in place.
The ratchet positions the bit at a 90° angle to the handle, making it possible to drive screws where a standard screwdriver won't fit.
It's a handy solution for working inside cabinets, installing hardware, and assembling projects with limited clearance.
One caution: A ratchet provides considerable leverage. Use a light touch to avoid stripping screw heads, damaging threads, or overtightening fasteners.
Reader Tip submitted by Oliver McLeod — Denver, Colorado
4. Drill Cleaner Holes with a Hole Saw
A hole saw is often the easiest way to cut a large-diameter hole in wood, especially when the opening is 2" or larger.
But hole saws have a common problem. As the teeth cut deeper into the wood, sawdust and chips collect in the kerf.
That trapped waste increases friction, which can lead to burning, rough edges, and slower cutting.
Reese Wise of Jupiter, Florida, found a simple way to give the waste somewhere to go.
Step 1: Score the Main Hole
Start by using the hole saw to make a shallow circular cut that establishes the location of the finished hole.
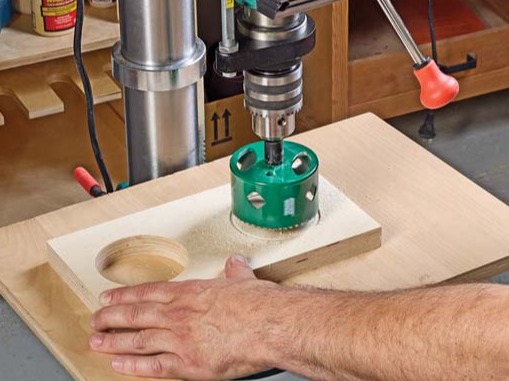
This shallow kerf marks the boundary of the hole and provides a reference for the next step.
Step 2: Drill an Adjacent Relief Hole
Next, use a Forstner bit to drill a relief hole that intersects the hole saw's kerf.
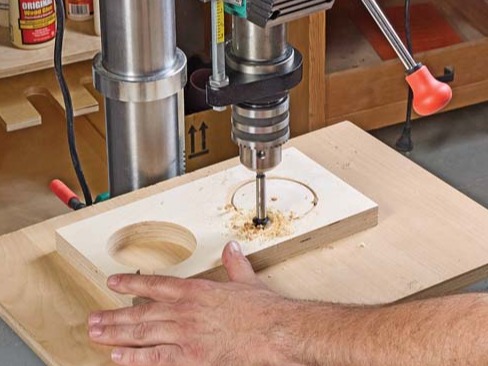
This creates an escape path for the sawdust and chips that would otherwise remain trapped around the hole saw.
Position the relief hole so it opens into the waste area rather than damaging the finished workpiece.
Step 3: Finish Cutting the Hole
Return to the hole saw and continue cutting the main opening.
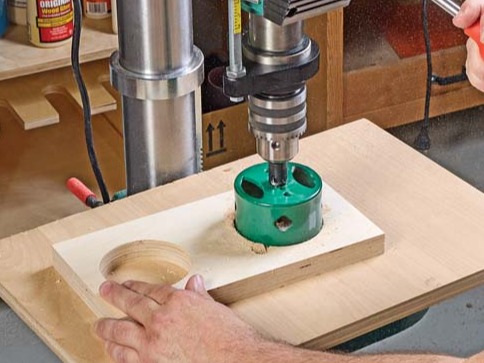
As the teeth cut deeper, the chips and sawdust have a path out of the kerf through the relief hole.
This reduces friction and helps the hole saw cut more efficiently.
The result is a cleaner hole with less burning and less cleanup afterward.
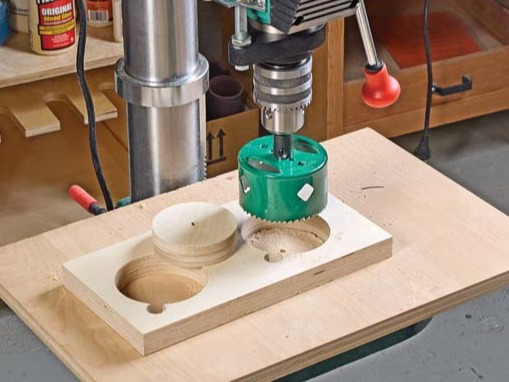
For best results, use a sharp hole saw, keep the workpiece securely clamped, and let the tool cut at a suitable speed without forcing it.
Reader Tip submitted by Reese Wise — Jupiter, Florida
Small Shop Tips That Make a Big Difference
You don't always need an expensive accessory or a complicated jig to improve your woodworking.
Sometimes a few common materials and a little creativity are all it takes.
Whether you're organizing hardware, improving your finishing setup, working in a tight corner, or drilling large holes, these reader-submitted ideas offer practical solutions you can use right away.
And that's what makes a good woodworking shop tip worth sharing.
More Woodworking Shop Tips & Tricks
Looking for more ways to make your time in the shop easier?
Explore more Woodsmith woodworking tips covering shop-made jigs, tool storage, clamping techniques, drilling tricks, and clever solutions to everyday workshop problems.
EXPLORE MORE WOODWORKING TIPS → Simple Ideas for a Better Workshop


