



Build a Stackable Table Saw Featherboard
A featherboard is one of the handiest accessories you can use at the table saw. It helps keep a workpiece pressed against the rip fence for a more controlled, consistent cut.
But there's one problem with most featherboards: They're designed for boards lying flat on the table. When you're cutting a taller workpiece on edge, a standard featherboard may not provide enough support.
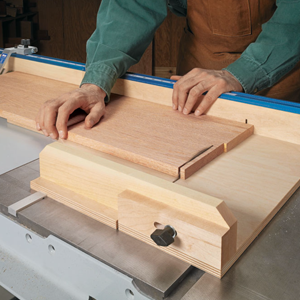
That's where this shop-made stacking featherboard comes in. Its three-layer design lets you adjust the height to suit the workpiece, whether you're ripping a narrow board or cutting a taller piece on edge.
Make the Plywood Featherboards
The featherboard consists of three matching plywood layers that can be stacked together or used individually.
All three layers can be made from a single 12" × 24" sheet of plywood, making this an inexpensive project that doesn't require much material.
Start by cutting the plywood pieces to the dimensions shown in the drawing.
Next, cut the angled fingers along the working edge of each featherboard. These flexible fingers provide pressure against the workpiece while allowing it to feed forward.
Then cut the adjustment slots for the machine screws. The slots allow you to position the featherboard against the workpiece before locking it in place.

The layers should align so they can be stacked together and secured using the same mounting hardware.
Make an Expanding Miter-Slot Runner
One of the useful features of this jig is the way it locks into the table saw's miter slot.
The runner is made from a strip of wood sized to fit the slot.
After cutting it to size, rip a centered slit into each end of the runner. Then drill the holes for the flathead machine screws.
When the screws are tightened, the slotted ends expand slightly, gripping the sides of the miter slot.
This provides a secure mounting point without requiring a separate clamp.

Finally, install the machine screws and add two star knobs.
The knobs make it easy to loosen the featherboard, adjust its position, and lock it back in place.
Adjust the Height for Different Workpieces
The real advantage of this design is its versatility.
With all three plywood layers installed, the featherboard has an overall height of 2¼". This provides support farther up the face of a tall workpiece, helping keep it pressed against the fence.
For thinner stock lying flat on the table, simply remove one or two layers.
This gives you three height options without having to build several different featherboards.
To use the jig, position the runner in the table saw's miter slot and adjust the featherboard so its fingers apply light, even pressure against the workpiece.
Then tighten the star knobs to lock the assembly in place.
WOODSMITH TIP: Position the Featherboard Before the Blade. When using a featherboard for ripping, position its contact area ahead of the saw blade, on the infeed side. Never position a side-pressure featherboard so it pushes the workpiece against the blade or the cut-off portion behind the blade. This can pinch the blade and increase the risk of kickback. Use a push stick or other appropriate feeding aid to keep your hands clear of the blade.
One Featherboard, Multiple Uses
A standard featherboard is useful for everyday ripping, but this stacking design gives you more flexibility when working with different stock thicknesses.
The removable plywood layers provide adjustable support, while the expanding runner makes installation and repositioning quick and easy.
It's a practical table saw jig that uses a small amount of plywood and hardware to make a familiar shop accessory even more versatile.
More Table Saw Tips & Upgrades
A few well-designed accessories can improve the accuracy and convenience of your table saw. Explore more shop-made jigs, zero-clearance inserts, and practical table saw techniques for your workshop.
EXPLORE TABLE SAW TIPS & JIGS → Get More from Your Table Saw


