



How to Build an Adjustable Picture Frame Glue-Up Jig
Gluing up picture frames can be frustrating, especially when you're working with simple butt joints. Keeping the corners aligned, maintaining a square assembly, and applying even clamping pressure can be a challenge with traditional clamps.
I build a lot of picture frames in my shop, and I've found that a simple shop-made picture frame clamping jig makes the process much easier.
This adjustable jig uses a plywood base, a pair of clamp bars, removable dowels, and wooden wedges to hold a frame securely while the glue dries. And because the dowels can be repositioned, the same jig works with a variety of frame sizes.
Best of all, you can build it from inexpensive materials you may already have in your shop.
How the Picture Frame Clamping Jig Works
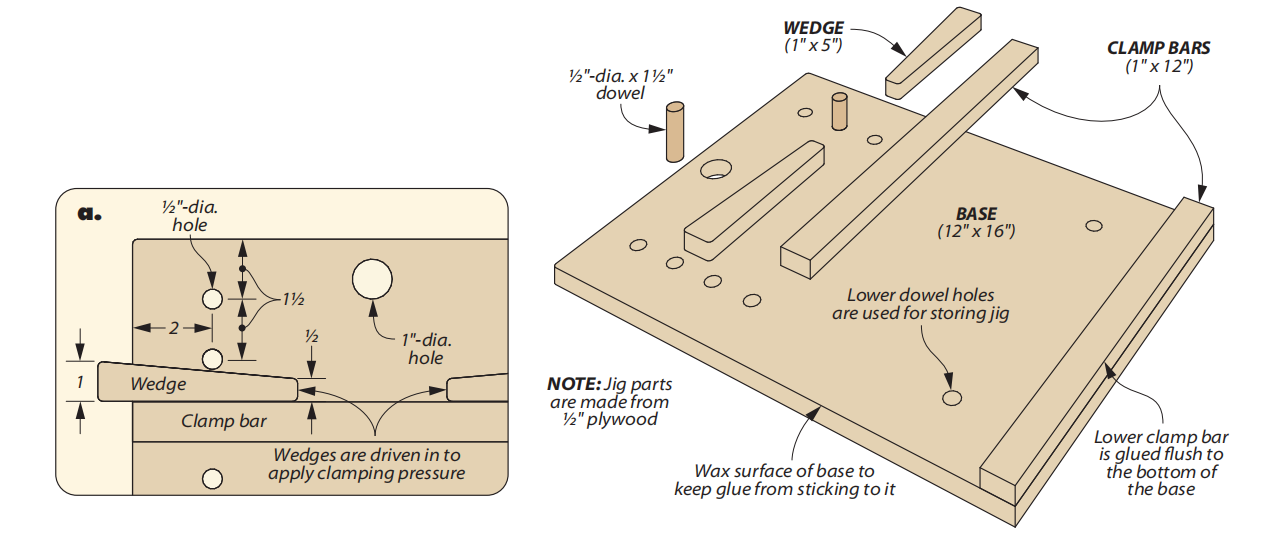
The design is simple. A flat plywood base supports the frame during assembly, while two clamp bars apply pressure to hold the joints together.
One clamp bar is permanently attached to the lower edge of the base. The second bar remains loose so it can move to accommodate different frame sizes.
A series of holes drilled in the plywood base accepts removable dowels. These dowels provide solid bearing points for a pair of wooden wedges.
When you tap the wedges between the dowels and the loose clamp bar, they push the bar against the frame and apply pressure to the joints.
This setup eliminates the need to position several individual clamps around a small frame.
Build the Jig from Plywood and Dowels
You don't need expensive materials or complicated joinery to make this picture frame glue-up jig.
Start with a flat plywood base large enough to accommodate the picture frames you typically build.
Cut two plywood clamp bars to fit across the base. Glue one bar permanently along the lower edge, leaving the other free to slide into position.
Next, drill a series of holes in the base for the removable dowels. The multiple hole locations are what make the jig adjustable.
By moving the dowels closer to or farther from the frame, you can accommodate different frame sizes while maintaining enough room for the wedges.
Finally, cut a pair of wooden wedges that can be tapped between the dowels and the movable clamp bar.
Add Wax to Prevent Glue from Sticking
Before using the jig, I like to apply a coat of paste wax to the plywood base and clamp bars.
The wax helps prevent glue squeeze-out from bonding the frame to the jig.
It's a simple step that makes cleanup easier and keeps the jig ready for the next glue-up.
How to Use the Picture Frame Glue-Up Jig
Once the jig is built, using it is straightforward.
Start by applying glue to the frame joints and positioning the pieces on the plywood base.
Place the loose clamp bar against the frame, then insert the dowels into the nearest suitable holes.
Next, position the wedges between the dowels and the loose clamp bar.
Lightly tap the wedges into place. As they move forward, they push the clamp bar against the frame and draw the joints together.
Check that the frame is square and that the joints are properly aligned before the glue begins to set. Make any necessary adjustments, then allow the glue to dry.
Once the glue has cured, tap the wedges loose, remove the dowels if necessary, and lift the completed frame from the jig.
Adjust the Jig for Different Frame Sizes
One of the best features of this design is its flexibility.
The multiple dowel holes let you reposition the clamping pressure to accommodate a range of picture frame sizes.
If you regularly build larger frames, you can make a longer or wider version of the same jig.
For smaller frames, simply move the dowels closer to the movable clamp bar.
The basic clamping method stays the same, regardless of the size of the frame.
Store the Jig on Your Shop Wall
Another handy feature is that the jig stores neatly when you're finished using it.
The dowels can be placed in the lower holes, and the wedges can be used to secure the loose clamp bar.
This keeps the components together so they don't get lost between projects.
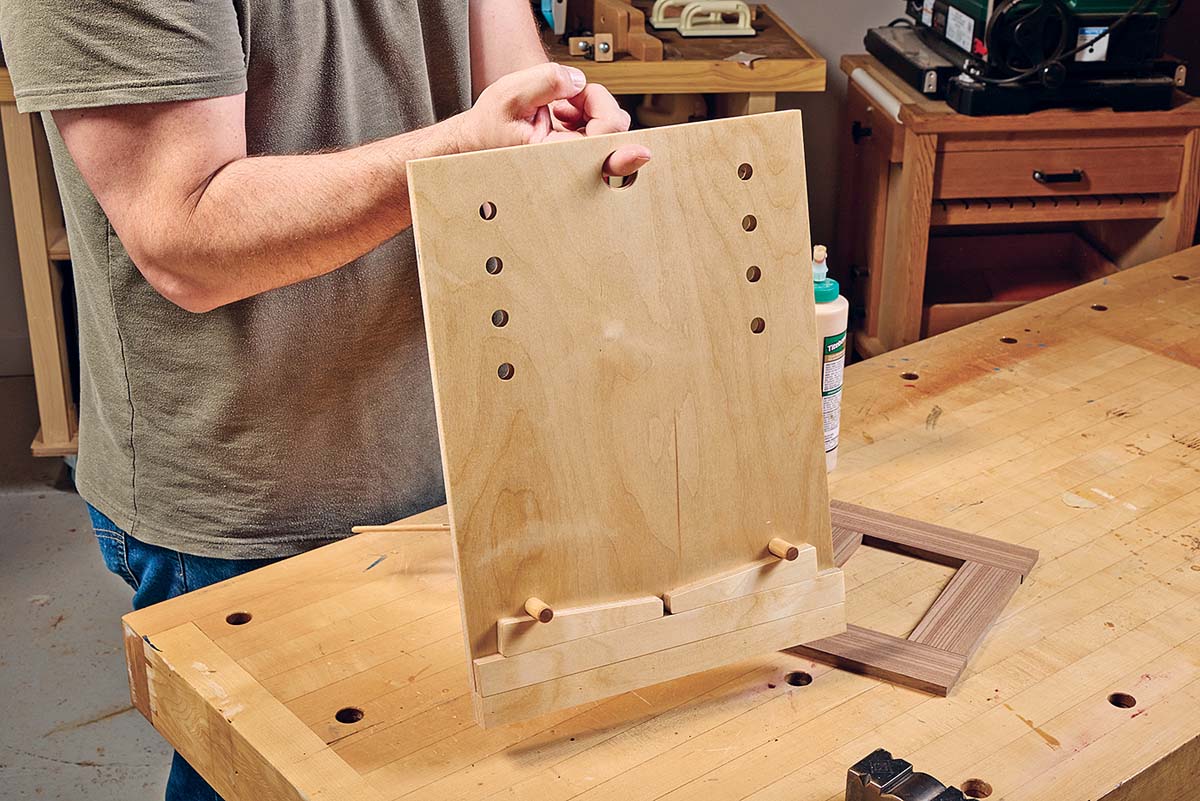
A hole near the top of the plywood base allows the entire jig to hang on a wall hook.
It's a compact storage solution that keeps the jig within easy reach without taking up valuable bench space.
A Simple Solution for Better Picture Frame Glue-Ups
A picture frame clamping jig doesn't have to be complicated to be useful.
With a few pieces of plywood, removable dowels, and wooden wedges, you can create an adjustable jig that makes assembling picture frames easier and more consistent.
The flat base supports the frame, the clamp bars help keep the joints aligned, and the wedges provide the pressure needed for a secure glue-up.
And because the jig is easy to adjust and store, it's one of those simple shop-made accessories you'll find yourself reaching for again and again.
Put This Frame Glue-Up Jig to Work
Ready to put your new frame assembly jig to use? Our No-Miter Picture Frames woodworking plan features six distinctive frame styles that eliminate the hassle of cutting perfect 45° miters.
Instead, these frames use a clever layered construction technique. Two butt-jointed frames are glued together with overlapping corners to create strong, gap-free joints. And the shop-made glue-up jig featured in this article makes assembling the frames flat and square even easier.
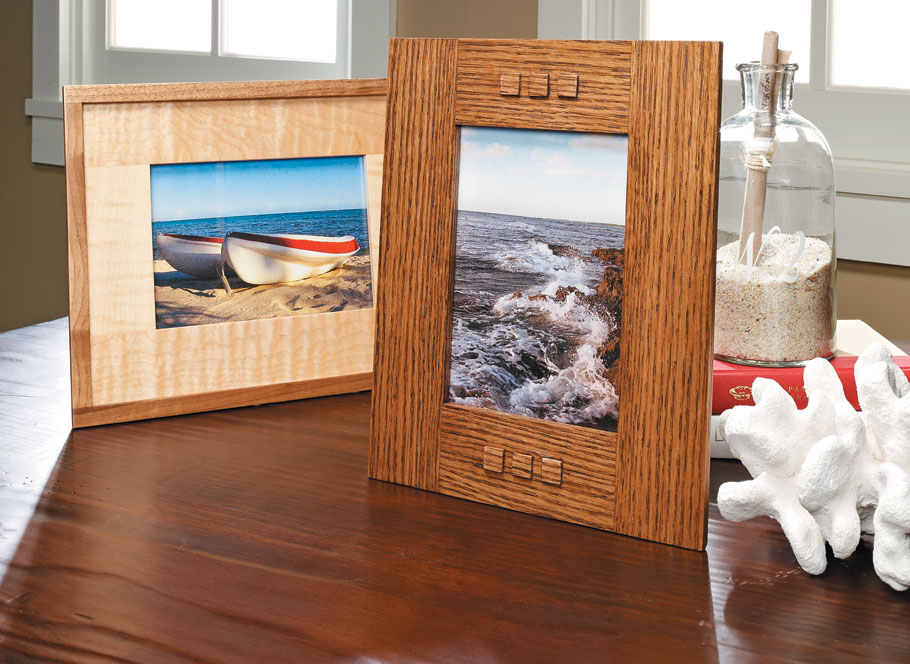
Choose from six designs featuring contrasting hardwood accents, Craftsman-style details, decorative grooves, and elegant curves. They're perfect for displaying family photos, artwork, and more.
GET THE COMPLETE STEP-BY-STEP WOODWORKING PLANS → No-Miter Picture Frames: 6 Easy-to-Build Designs


