Most woodworking projects require square construction. Even the ones with curved parts usually have a few 90° corners. So keeping your right angles “right” is an essential part of the building process. Here are a few techniques that I make a habit of using to help keep things square from start to finish.
STOCK. It’s hard to build a square project if you don’t start with square parts. That’s why I like to take a few minutes to carefully look over all the stock for the project. What I’m looking for at this point is warp, cupping, and twist in the boards. Each of these conditions can be dealt with, but I want to make sure I keep track of the problem areas so I can correct them if necessary.
MILLING. After inspecting the stock, you’re ready to start milling. Even if you hand picked pieces of kiln-dried lumber at the lumberyard, you’ll still need to mill them to make them square and Flat. For instance, if a long piece of stock is warped, you can often salvage it by cutting it into smaller pieces and jointing and planing each piece flat. This is why it pays to inspect each piece of stock early. Fortunately, well-tuned power tools and a routine for using them properly will take you most of the way.
Jointing one face and one edge gets you off on the right foot. Using those surfaces as references, you can then plane the opposite face parallel. Then head to the table saw and rip the opposite edge of the workpiece to guarantee a parallel edge, as well.
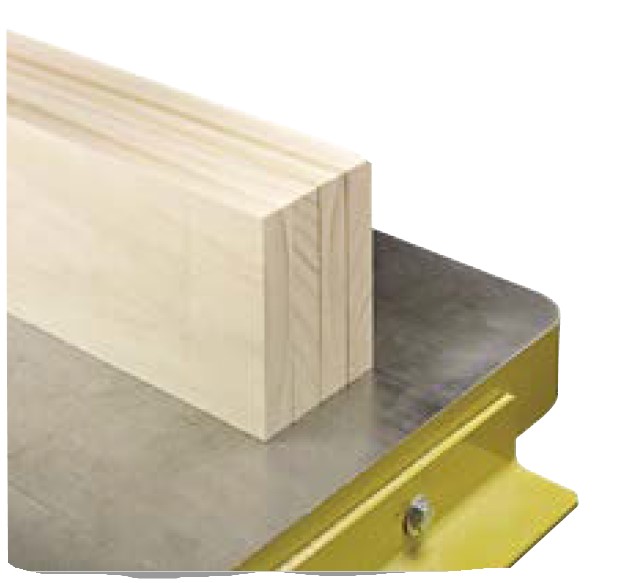
With properly milled stock, cutting parts to final size is pretty straightforward. Nevertheless, I like to keep checking them as I go. A simple way to do that is to line similar parts up on a flat surface, like your table saw, and see if they sit side-by-side with no gaps between the pieces.
JOINERY. Another plus of taking the time to carefully prepare parts is that cutting the joinery is easier. Whether you’re using mortise and tenon joints, miters, or any other types of joinery, square stock ensures things fit together better.
ASSEMBLY
When you’re ready to move on to assembling your project, there are a few more things to keep in mind to make sure things stay square. The best first step in creating a square assembly is a flat surface for the dry fit and final glueup.
ASSEMBLY TABLE. A surface with dips or mounds can throw your assembly out of square. If your bench isn’t up to the task, you can still find a flat surface just by covering your benchtop with an auxiliary surface made of MDF or melamine-covered particle board. A single piece sized to fit over your benchtop should be sufficient for most assemblies. There's another option — a shop-made jig for gluing up panels. It features a square corner formed by two fixed fences on one end and one edge. A sliding fence on the opposite end allows you to square up the assembly before adding clamps.
PROCESS. I use a simple assembly routine. Start by laying out the clamps required to hold the pieces together. At this point, you should prepare any cauls you need. I also make sure to have an engineer’s square handy to check the joints.
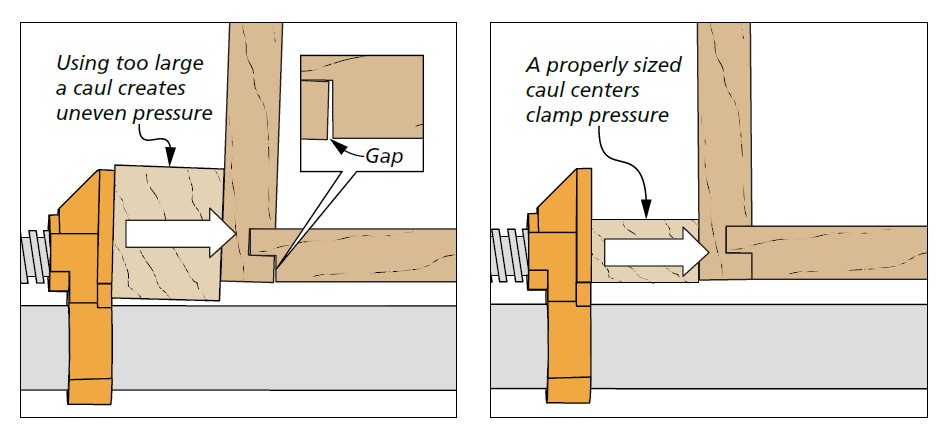
CAULS. Cauls are assembly aids that protect the surfaces of your project and distribute clamping pressure evenly. They can be made from just about any material you have in the shop. The important thing to remember when adding a caul is that the force of the clamp must be aligned with the joint.
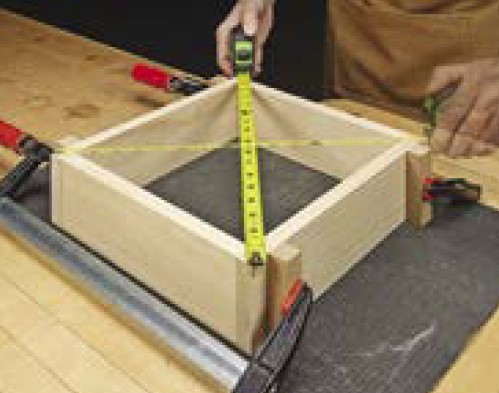
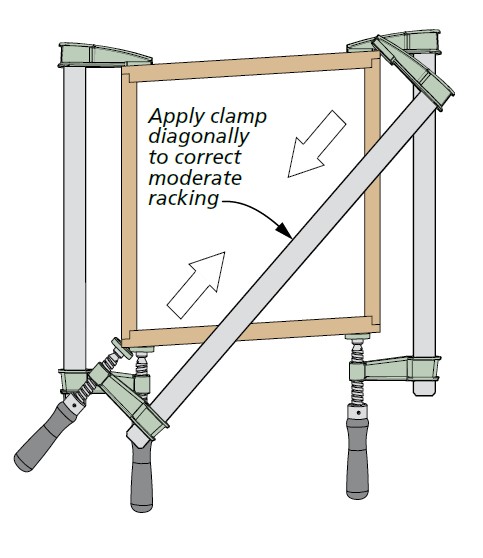
AFTER CLAMPING. Even after you’ve applied the clamps, you can still check and adjust the assembly. I use a tape to check for square. By measuring from corner to corner on opposite sides, you should get an identical measurement. If not, you can tweak the assembly using a clamp.
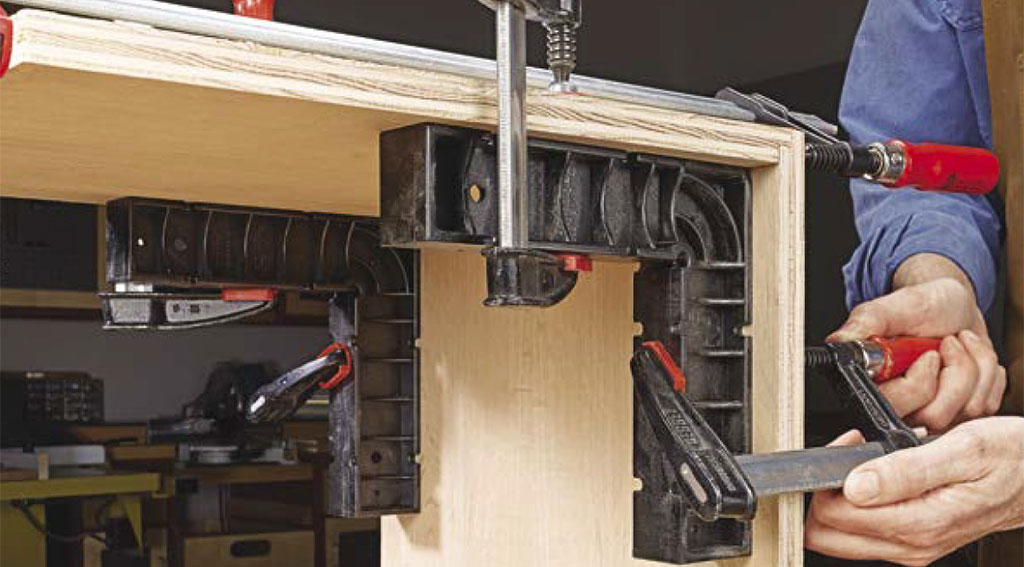
OTHER TIPS. For cabinets and other casework, I often use plastic assembly squares. A clamp on each leg of the square holds two workpieces in place while you add the clamping pressure to the joints. Using these techniques, you can make sure your projects turn out as expected. And that means fewer last-minute “fixes” down the road.