Over the years, I’ve heard a lot of tool-buying advice. One suggestion that often pops up is that the first power tool you should buy is a band saw, even before a table saw. The upshot to this argument is versatility. A band saw can shape curves, saw rough lumber safely, cut joinery, and even rip boards to width. The last item on this list is often met with skepticism. After all, most woodworking plans mention using a table saw for ripping boards. On top of that, band saws have the reputation of only being useful for rough cutting. So I took it on as a challenge. Could I really use a band saw for ripping project parts to width? And if so, how well does the technique really work?
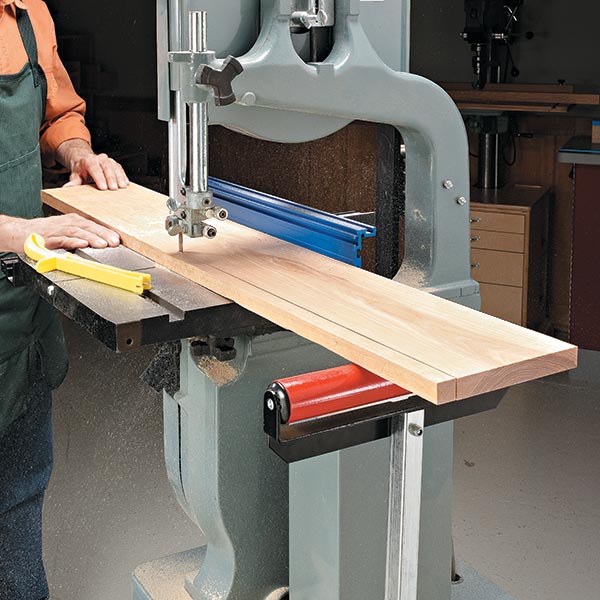
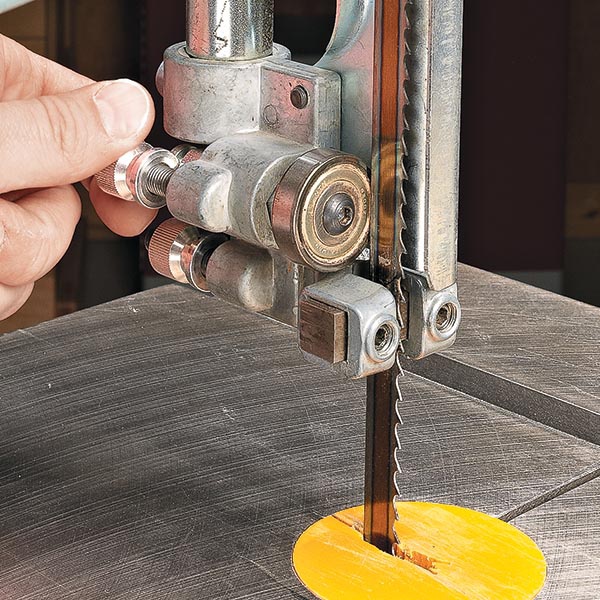
Since the blade does the work, let’s start there. To make straight cuts, select the widest possible blade for your saw. The saw shown here is an older, well-used Delta that can accept a 1/2"-wide blade. For efficient cutting, the blade should have a low number of teeth with large gullets. A hook-toothed blade with 3 or 4 teeth per inch is a good starting point. I found that it pays to spend a little more to get a higher quality blade for ripping. It will last longer and cut smoother. For the ultimate edge, you can use a blade designed for resawing thick boards into thin stock. Even a wide blade is still relatively flexible, so it requires some support. That’s where the blade guides come in. Located above and below the table, these corral the blade to keep it from twisting and wandering. Position the guides and thrust bearings as close as possible to the blade without touching it.
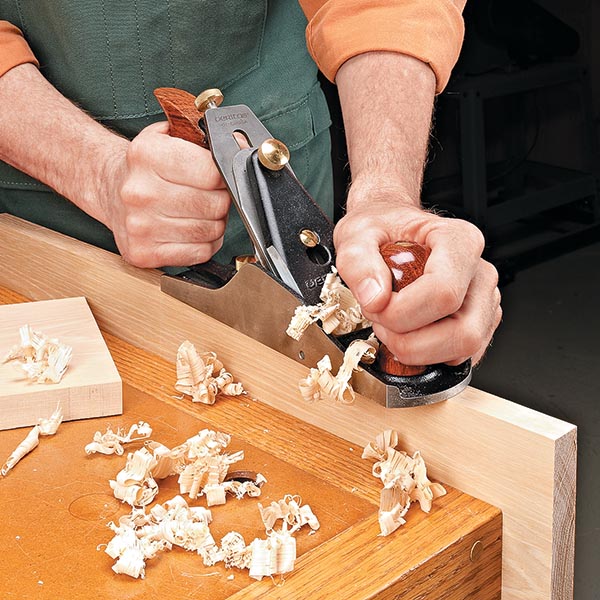
The blade marks left by the saw can be quickly removed to create a finished edge. Frankly, the saw marks look worse than they really are. After one pass over the jointer, the edge is ready for glue. If you don't have a jointer, there's other options as well. The next two slides shows how.

A hand plane works well for creating smooth edges on wide boards
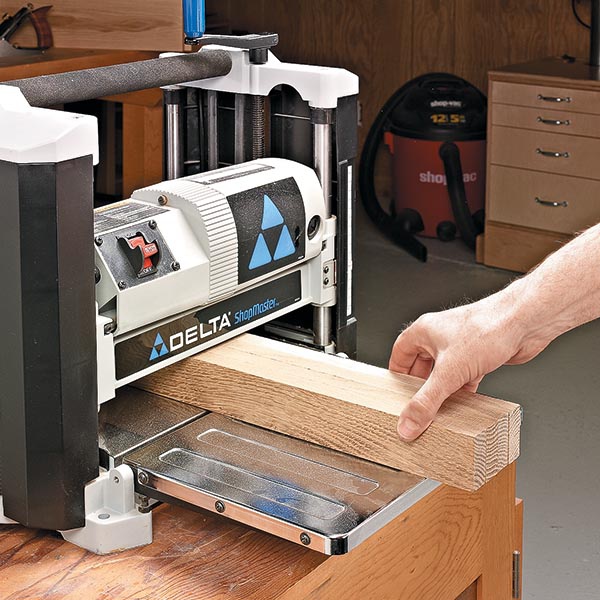
You can clean clean them all up over at the planer. Just gang narrow parts for stability and plane them to consistent width all at once.