

Plywood is a great material when working with larger panels. It’s stable (won’t expand and contract), readily available, cost-effective and typically has a more consistent hardwood face veneer over the alternative of attempting to grain match a bunch of random boards. The only drawback, though, is the exposed edging.
To remedy this, hardwood or a piece of veneer edge banding is applied to obscure the plies. Both have their place; however, when it comes to high-traffic pieces like the table shown above, using a hardwood edge offers unmatched strength and longevity. Another upside is the option to carefully select material that creates a visually balanced border. Using the same board or purchasing a flitch will further help ensure grain continuity.
Below, are three methods I typically employ when edging plywood. The next step is deciding on the best method of clamping, followed by flushing up the edging with the plywood. The following pages will explore some of those methods.
 |
 |
 |
| Edge Glue. The quickest and easiest way to conceal a plywood edge is to affix a piece of solid wood edging directly to it. | Biscuits. Biscuit joints help align the faces of the plywood and hardwood edging, allowing for lateral adjustment. | Spline & Groove. Splines work great for alignment on longer pieces while reinforcing the joint connection. |
EDGE CLAMPING STRATEGIES
 |
 |
 |
| Panel Clamp. The same method for gluing up panels can be applied for attaching hardwood edging. Arrange the clamps on the top and bottom of the panel to create uniform pressure across the edging. | Double Wedges. If you are short on clamps, two wedges used together help exert equal pressure along the edging. Use extra pairs in stubborn spots to ensure consistent clamping force. | Clamp Anchor. If your longest clamps are too short for larger panels, clamp a board to the plywood as an anchor and use shorter clamps to secure the edging. |
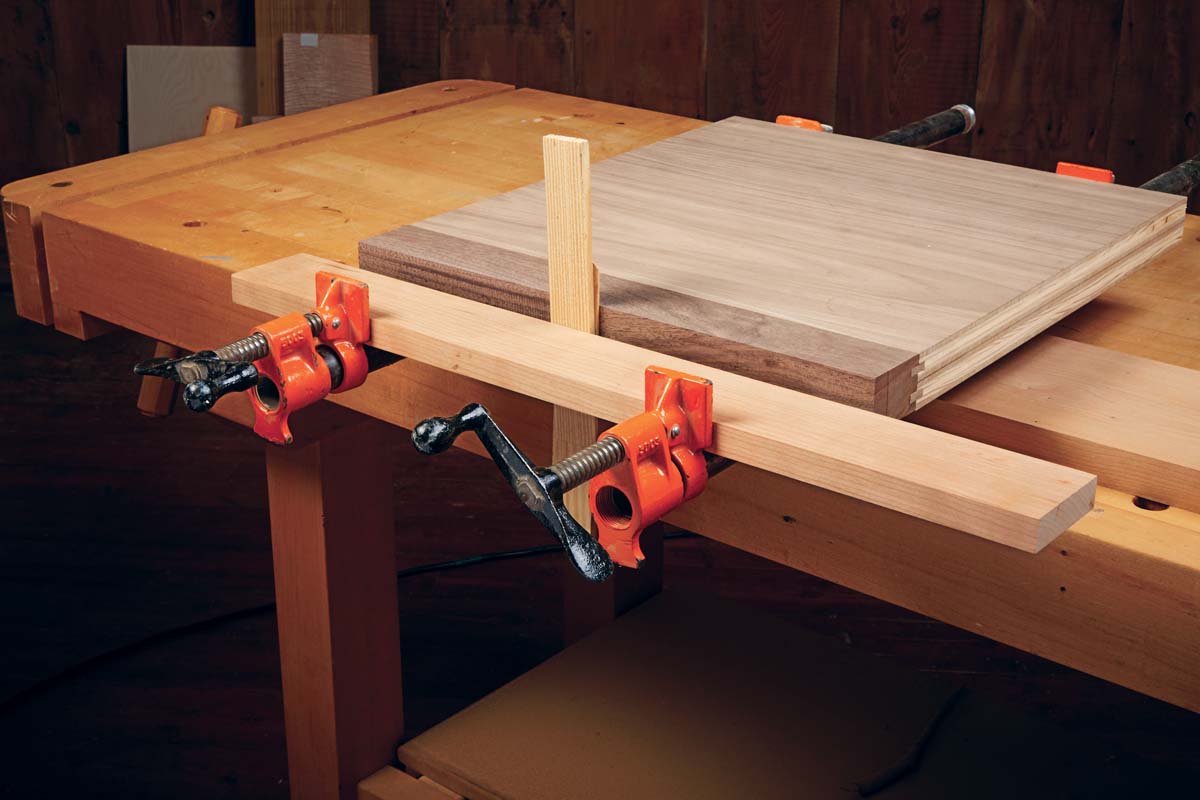
Working with larger panels can pose some challenges when it comes to attaching hardwood edging. The clamps in your arsenal may be too short, in limited supply, or there may be stubborn areas that require further coaxing beyond the limits of just a clamp.
Now, the key to a successful glueup is even clamping pressure along the length of the piece. Clamping is often a numbers game—the more you use, the less chance of gaps. Ideally, I would place clamps every four to six inches apart. Unfortunately, that would require a surplus of clamps for larger projects.
But there are other ways to clamp edging without possessing a cache of clamps. One method just uses the surface area of a traditional bar clamp, see Photo 1. The clamp face footprint is equal to the thickness of our edging, which distributes the pressure more evenly.
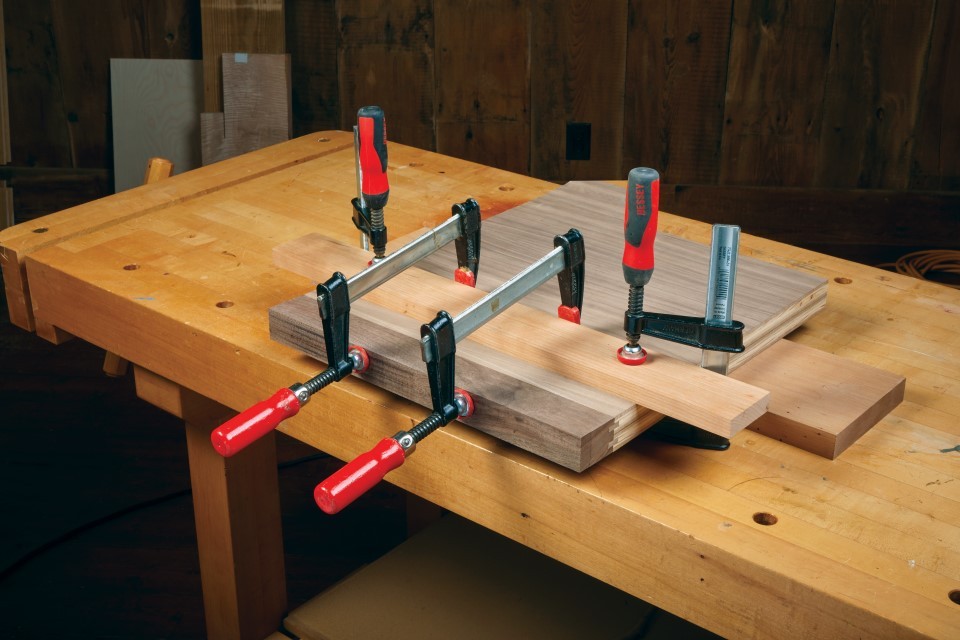
Another method uses a board and wedges, see Photo 2. Wedges are pushed under the clamping caul to apply pressure to the edging. This is an effective way to apply pressure to stubborn areas that won’t adhere properly.
What if your clamps are too short? This is often the case when gluing larger panels. For this instance, try using a clamp anchor seen in Photo 3, below. A short board is clamped across the width of the panel. This creates an anchor that allows shorter clamps to be used in the absence of larger ones.
FINISHING UP
 |
 |
| Block Plane. To prevent making contact with the veneer, apply a strip of painter’s tape to protect the plywood. Then, holding the plane at a slight angle, make a shearing cut along the edging. | Palm Sander. With the tape still intact, use a palm sander to flush up the edging with the plywood. Once the sander has made contact with the tape, the corresponding surfaces are even. |
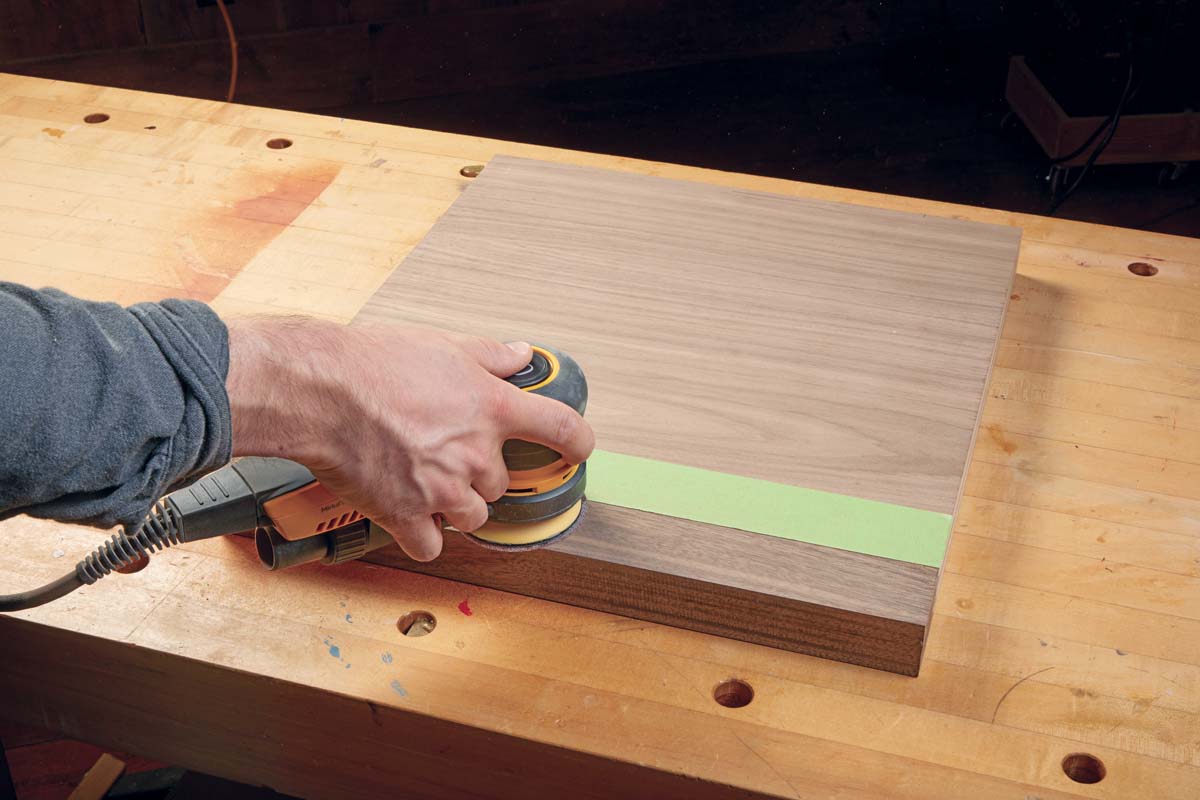
The last step to finishing off the edge is to flush it up with the face of the plywood. This step is crucial, as it unifies the two substrates. Yet, an overzealous hand can undo hours of work by sanding through the plywood. A couple of techniques I like to use to avoid such catastrophes are shown below.
A block plane is a good way to remove the bulk of the remaining material. I find it helps to hold the plane at an angle. This produces a cut with a slicing action, and reduces the chance of tearout.
Lastly, I will follow the block plane with a palm sander to get a finsihed edge. Any remaining height differential between the surfaces can be smoothed with a few passes. Once the sander has started to remove the tape, you know that your surfaces are close to flush. Continue by removing the excess tape, and finish sanding the rest of the panel.


