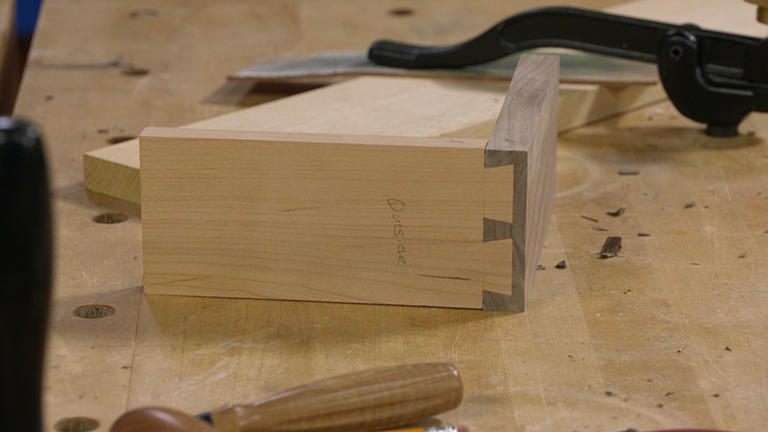
When I need an extra-strong corner joint to handle a heavy load, my first choice is a finger joint. The interlocking pins create so much glue surface that you're assured of a long-lasting joint. And the evenly spaced pins also give a great look to many projects, like this machinist's chest.
But my favorite thing about the joint is that I can make the perfectly mated parts entirely on the table saw with just a simple, shop-made jig.
IT'S ALL IN THE JIG. Of course, the pieces must fit perfectly for the joint to be effective, and that level of accuracy usually means some careful setup. But by building in a little adjustability to your jig, you won't waste a lot of time finetuning the fit. The key is how you make the jig and attach it to your miter gauge.

If you take a look at the main drawing, you can see that I've added a pair of fences to the miter gauge.
The rear fence mounts to the miter gauge with screws. It also features slightly oversize shank holes used to attach the front fence. These holes allow easy side-to-side "tweaking" of the spaces in between the cuts.
The front fence is the business side of the jig. It holds a hardwood key offset from the blade by exactly the width of the cut to control the spacing of the pins. It also backs up the workpiece to prevent tearout during the cuts. The jig is simple enough that I usually just make a new one for each project rather than try to adjust it to accommodate different sized finger joints.
Then it's just a matter of following a few simple guidelines and easy techniques to turn out perfect finger joints, every time.
MAKING THE JOINTS
You can start building the jig by selecting straight, flat material (I prefer Baltic birch plywood) for the front fence. The rear fence can be a piece of hardwood, also milled flat and straight. To allow for easy adjustment, drill oversize screwholes in the rear fence using a larger diameter bit than the screws used to attach the front fence.
SETTING UP THE CUT AND KEY. The drawings below show how to get started setting up the jig. Begin by installing a dado blade set to match the thickness of the pins for your project. In the case of the machinist's chest, I chose 1/4"-wide pins for the 1/2"-thick workpieces.

With the dado blade installed, set the height just below the thickness of the workpiece. Next, hold the front fence in position (don't attach it with screws yet) and make a cut through the fence.
Now you'll need to cut a small piece of hardwood for the key. It's important to get a tight fit, but not so tight you need to force it in to the kerf on the fence. Make the piece for the key long enough to allow you to trim a bit off to use as a spacer. Now slide the jig up to the dado blade and put the spacer between the outside teeth of the blade and the indexing key. With the fence in position, you can now attach it to the rear fence with screws.
TEST CUTS. Using a couple of test pieces milled to the same thickness and width as your project workpieces, cut the first notch with the edge against the key. Then make each successive cut by placing the freshly cut slot over the key.
Once you've cut all the notches, flip the workpiece around and use the first pin as a spacer. Butt the mating workpiece against it and continue cutting. When you're done, check the fit. I like a tight fit, but not one that requires more than a light tap to seat properly. You can fine-tune the fit of the pins by moving the front fence very slightly as shown in the box below.
How-To: Fine-Tune the Fit

CUTTING THE JOINTS. Once you've adjusted the jig for a good fit, you're ready to move on to cutting the project workpieces. But there are a couple of things to keep in mind while making the joinery cuts. First, hold the workpiece tight against the fence at all times. In the case of larger projects, particularly those that have wide and tall parts made of 3/4"-thick stock, you might even want to clamp the workpiece to the fence for added safety and accuracy.
The second thing to keep an eye on is to make sure the end of the workpiece is flat against the table for each cut. It can be frustrating to find out one of the pins wasn't cut deep enough when you're in the middle of an assembly.
With those things in mind, it's just a matter of getting busy and cutting the rest of the parts. It's helpful to mark the workpieces to make sure you're starting your cuts from the same edge. I also stop after each matching set and make sure I'm getting a good fit and that the jig hasn't "crept" out of position. It only takes a minute to check and it can prevent bigger problems down the road. But as long as things are going well, you'll find the work goes quickly.

ASSEMBLY. After you've completed the cuts, you can move on to assembling the project. Once again, if you've established a good setup, this is where it will pay off.
Properly cut finger joints are easy to assemble and keep square. The biggest challenge is to work quickly enough to assemble the joint before the glue tacks up. A small brush makes spreading a thin coat of glue on all the mating surfaces a little easier, but it can still be a scramble to get things together. Once the glue is spread, all you need to do is tap the joints together and clamp them up.
CLAMPING. The photo below shows how I clamped up the sides of the machinist's chest. A couple of plywood spacers fit inside and keep the assembly square as you apply clamping pressure to pull the joints tight. You can fully seat the sides with a few taps on the ends and then tighten up the clamps.
Once you've made a jig and learned the ins and outs of using it, chances are you'll find plenty of applications for finger joints in your future projects.
Shop Tip: Glue-Up Tips


