During construction of a project, more often than not, I make at least one trip to the band saw. Usually this involves cutting a part to shape “free-hand.” By this, I mean simply cutting to a layout line without the aid of a fence or other type of guide. This is essentially what the band saw is designed to do. The task can be as simple as making a straight taper cut or something more involved like shaping a complex profile.
The catch is that good results are not automatic. Inaccurate cuts with rough, burned edges can force you to perform a lot of tedious cleanup on the workpiece with a file, sandpaper, or sanding drum. But a poor result usually stems from a hasty setup and execution. All it takes is a little planning and the right approach to get clean, precise cuts.
SET UP THE SAW
The starting point is proper setup of the saw. And the first step is to choose the right blade for the job. There are two aspects to this — blade width and tooth count.
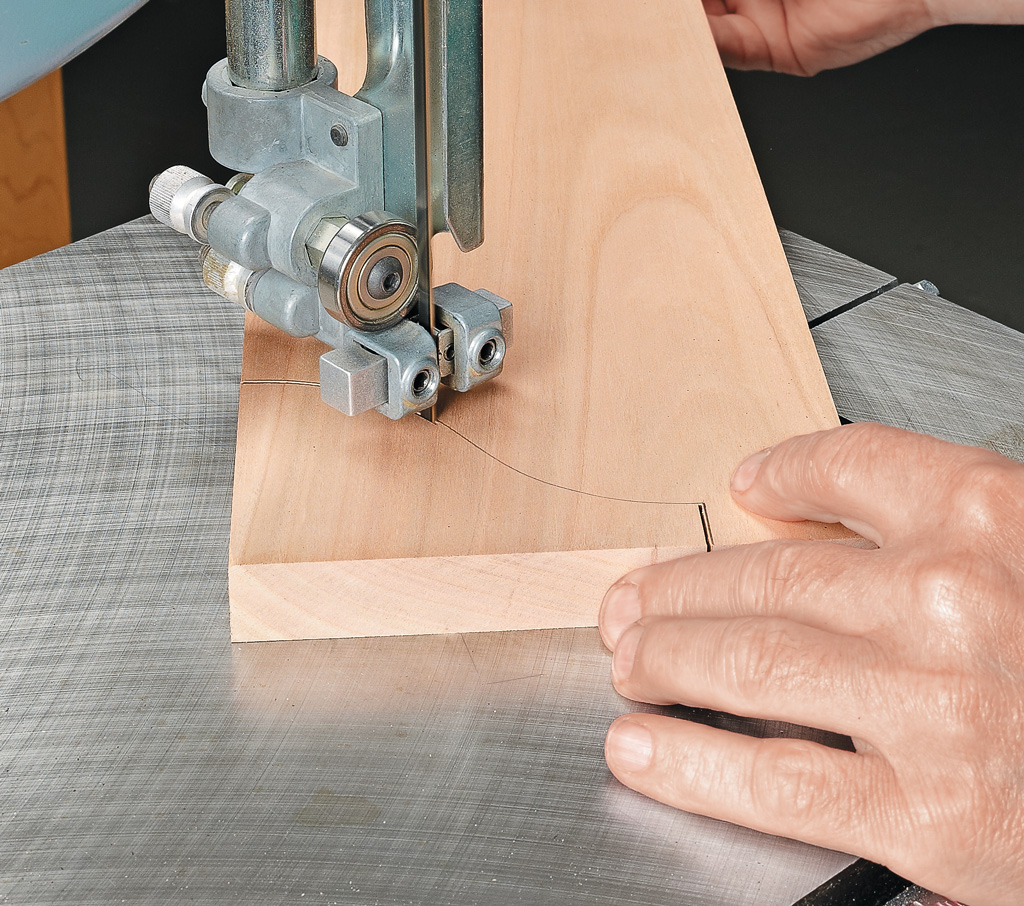
BLADE WIDTH. When cutting a profile, you need to match the width of the blade to the contour of the curve. In a nutshell, the narrower the blade, the tighter the radius it will cut. A blade that’s too wide may not allow for the turns necessary to follow a layout line. On the other hand, very narrow blades tend to flex and can be difficult to keep on track. Your best bet is to choose the widest blade that will still allow you to easily follow the layout line. The Shop Tip at left provides a handy turning radius reference. TOOTH COUNT. Choosing a blade with the right tooth count involves a balance. More teeth creates a smooth surface but a slow cut. A slow feed may cause burning while the tendency to force the cut makes steering difficult. As is often the case, the middle ground is the best place to be. For general use, a 1 ⁄ 4"-wide blade with 6 teeth per inch works well. GUIDES. Setting the height of the blade guides correctly is the second component of the setup. The guides should be as close to the surface of the workpiece as possible without blocking your view of the layout line (lower photo above). This helps minimize blade vibration and deflection.
Shop Tip: Blade Width

As you see above, a blade’s tightest turning radius depends on its width. When matching the blade width to the profile being cut, it’s best not to push the limits.
THINK AHEAD
Once the setup is complete, don’t be in a rush to start the cuts. Sometimes a little planning can actually help get the job done quicker and easier. Let me offer some food for thought.
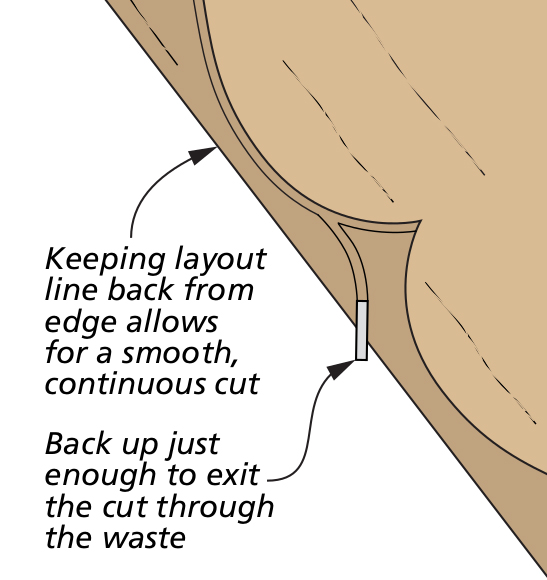
First, when marking a profile on a workpiece, try to keep the layout lines 1⁄8 or more back from any edge (drawing above). The goal is to prevent the blade from breaking through the edge during the cut. A continuous cut in which the blade is always fully engaged will be much smoother.
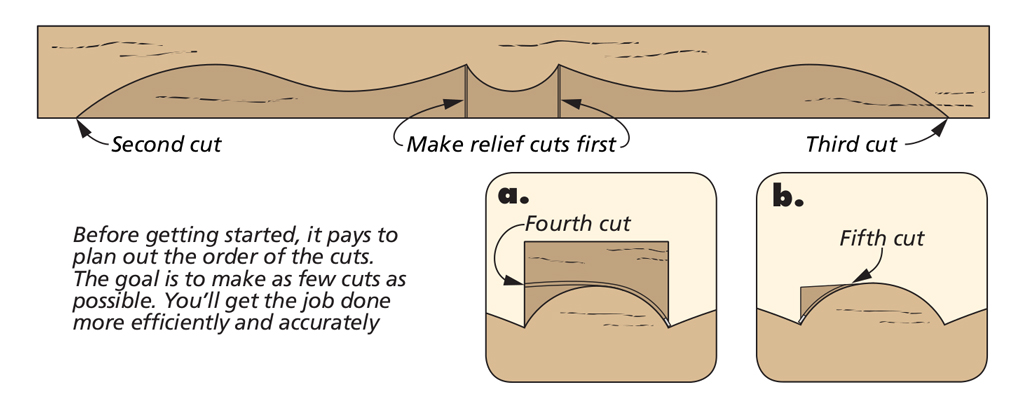
THE FIRST CUT. When cutting a complex profile with multiple, intersecting curves, plan the order of the cuts in advance. If possible, you want to cut each separate section of the profile with a single cut. The drawing above illustrates this idea. The first cuts are simply relief cuts that allow the waste to be removed more easily. You may also need to consider the best place to start a cut. Generally, it’s easier to enter a cut at a steep angle (closer to 90°) rather than a shallow angle. At a very shallow angle the blade wants to skip along the edge. So when cutting a straight taper, enter from the end of the workpiece, as shown in the right drawing.
WATCH THE FRAME. Always remember that the saw has a frame that may obstruct completion of a cut. Running into the frame can be a problem when cutting profiles on longer workpieces. Think about which starting point will allow you to avoid the frame. In some instances, you may need to flip the workpiece and mark the layout on the opposite face.
MAKING THE CUTS
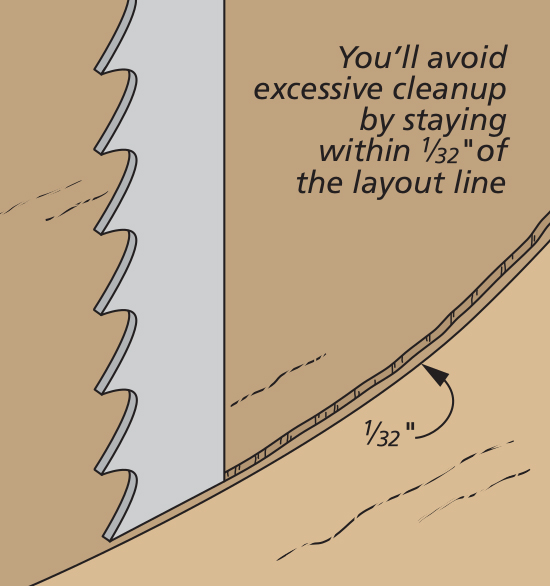
Now that you’re ready to start a cut, you have to ask, “how close to the layout line do I want to be?” If the saw is set up properly — the right blade and guide setting — you should be able to cut within about 1⁄32 of the line without fear of crossing over (right drawing below). This will leave you with a minimum of cleanup after the cut is completed.
SLOW & STEADY. A slow, steady feed rate makes it easier to follow a layout line. Avoid forcing the cut. You’ll end up sacrificing control. However, to avoid burning and “hiccups” in the cut, always keep the workpiece moving.
I like to focus my eyes on the layout line just ahead of the point of the cut. This allows you to anticipate changes in direction and you’ll be able to steer more easily and accurately.
TWO HANDS. I’m right-handed so I usually feed and control the workpiece with my dominant hand while using my left to guide it. You’ll find that a light, sensitive touch with your guide hand produces the best result.
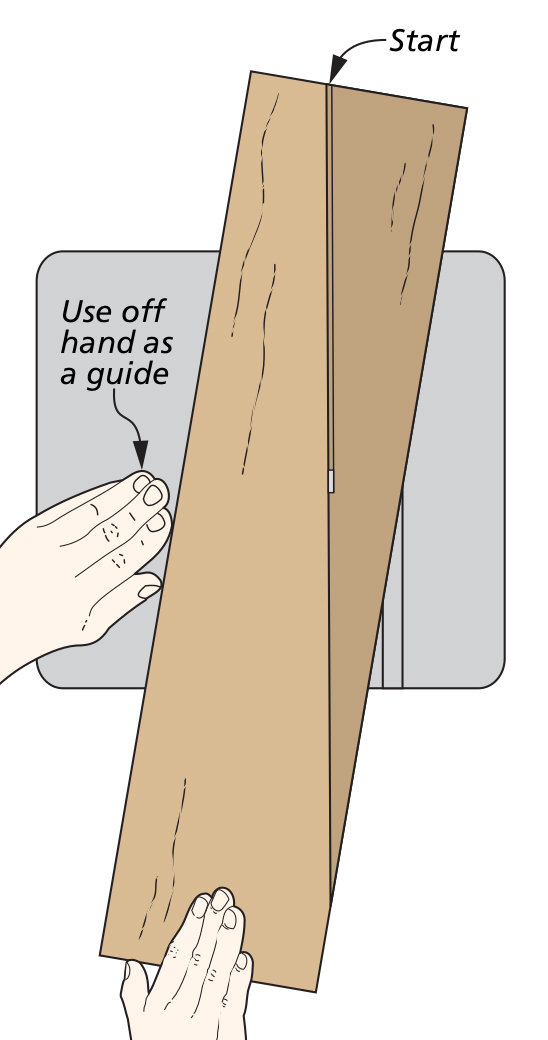
When making a straight cut, you can often use your guide hand as a rub fence. Place the thumb and index finger along the edge of the workpiece and use them to gently steer (drawing above). You’ll find it’s much easier to track a straight line. ONE WAY. Sometimes it’s necessary to back up at the end of a cut, but try to limit this. You’ll usually score or burn the smooth surface. Back up just enough to exit the cut by removing a section of waste (far left drawing).
The only difficult thing here is remembering to slow down and take your time. This will end in a better result from less effort.


