It's no secret that a well-built cabinet needs doors that complement the overall style of the project. But they also need to be strong enough to handle years of use. So before building the doors you'll need to consider the design and joinery options.
Frame and panel construction is a common solution. A hardwood frame surrounding a hardwood or plywood panel provides a lightweight and stable door. And simple stub tenon and groove joinery provides plenty of strength for this application. The only downside is the straight profile of the frame can be a bit, well, boring.

Adding a routed profile to the inside edge of the frame gives a more professional, finished look. But creating it at the router table and then cutting the joinery separately adds several steps to the building process. Fortunately, you can accomplish the same result by using a set of matched router bits.
A set of rail and stile cutters (often referred to as "cope and stick" bits) can take care of the joinery and the decorative profile in one operation. A stile bit cuts the profile and the groove for the panel in the edge of each of the frame pieces. A matching rail bit cuts a coped profile and a stub tenon on the ends of the rails. Since the bits are precisely machined to match, you're almost guaranteed a perfect fit.
These sets can be a bit pricey, usually running anywhere from $80 to $100 for a set. But unless you're running a production cabinet shop, you can probably get a lifetime of service from these bits.

HOW THEY WORK. As you can see in the photos, each bit mirrors the other and the two fit together precisely. On both bits, the profile cutter is integral to the shank. The slot cutter and bearing are attached to the arbor with a nut.
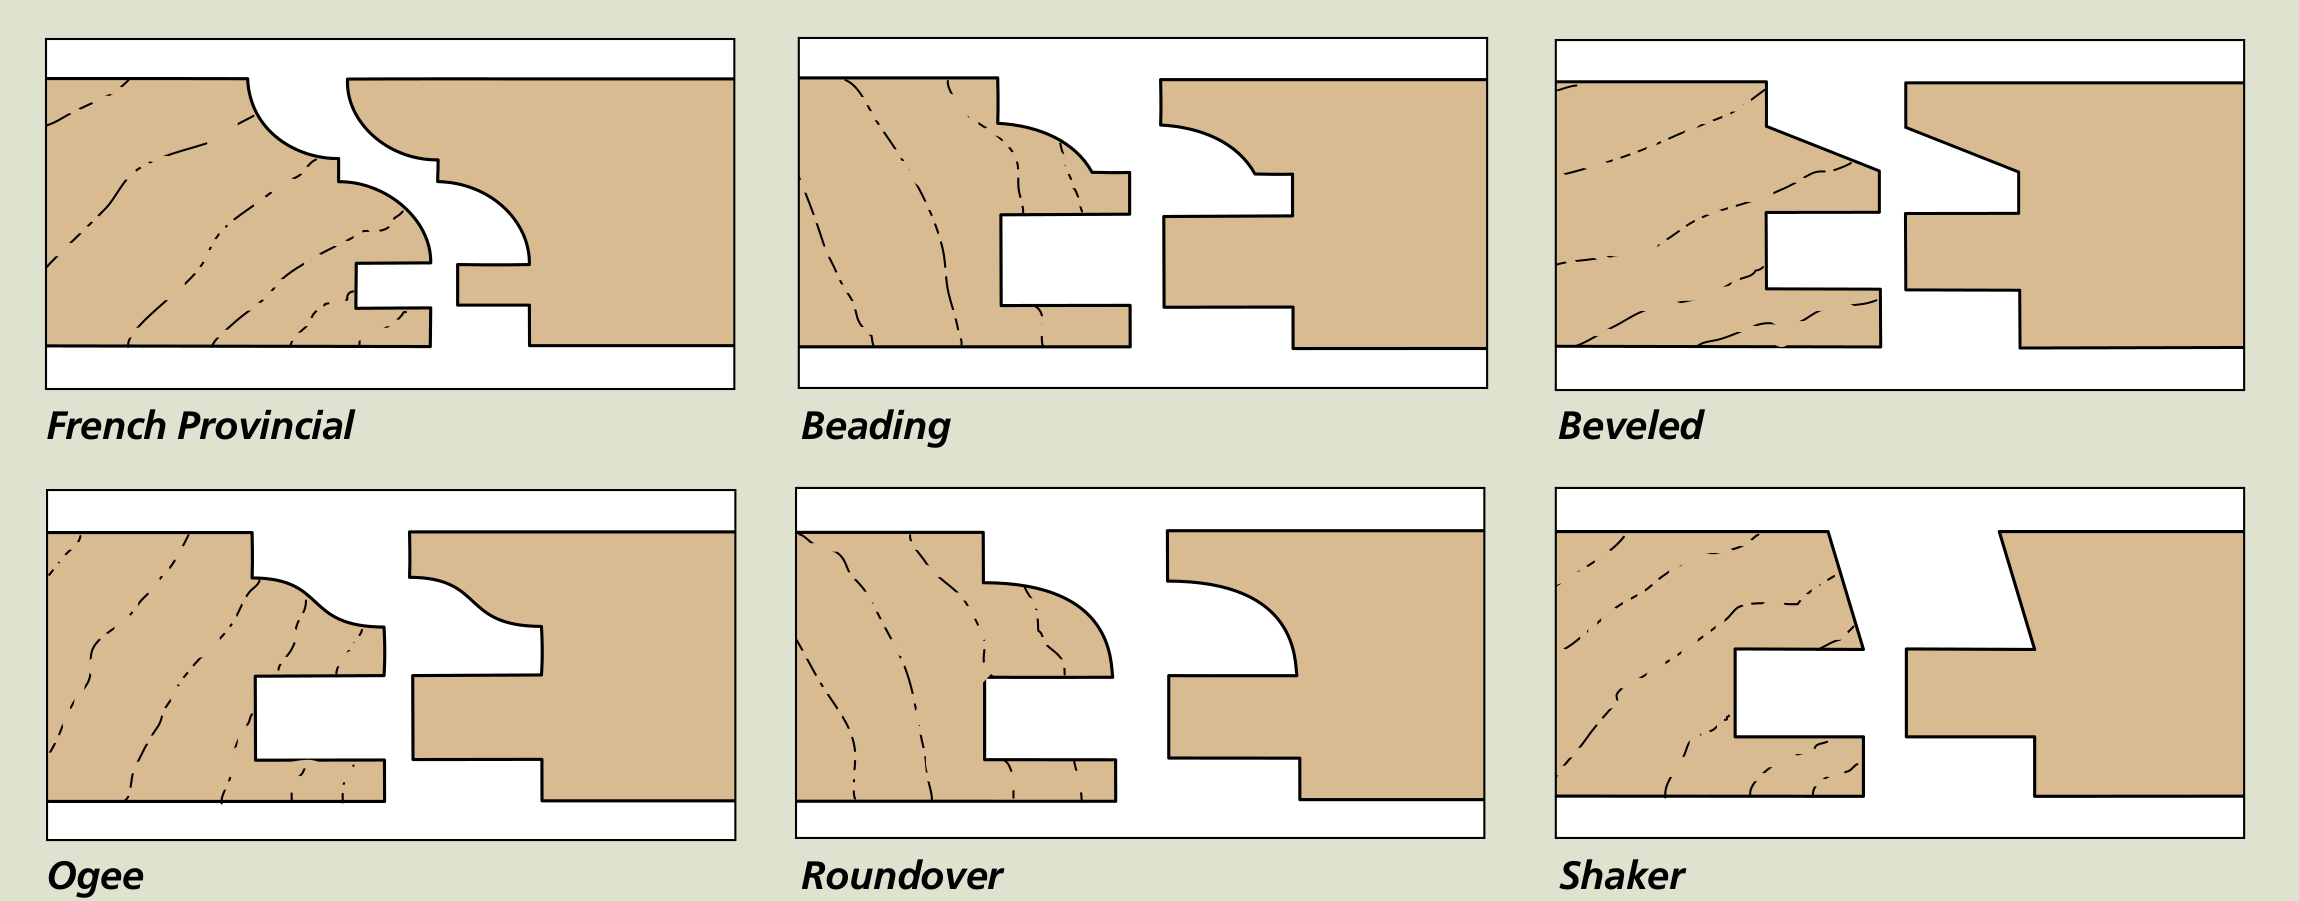
The drawings below show a sampling of the profiles commonly available. From a simple bevel to a an ornate French provincial profile, you can find a set to suit just about any style of cabinet door.
Common Rail & Stile Bit Options
Single-Bit Options
As an alternative to the two-bit set, several manufacturers also offer a single-bit option. These bits cut both the rail and stile profiles by either reversing the cutters or you simply change the bit's height. I've included an example of each and an explanation of how they work.


GETTING READY
After choosing a set of bits, there are a few things you'll need to take care of before routing the door frames. The first step is to mill your stock for the frames. It's very important to make sure it's all perfectly flat, straight, and a consistent thickness. Any bow or twist in the stock will result in noticeable variations in the profile and joinery cuts.
Stock thickness is also a big consideration. Most of these bits are designed to work best with 3/4" thick stock. But you have some "wiggle room" here. Stock between 11/16" and 7/8 " will usually work.
While you're at it, take a minute to make a few extra pieces specifically for testing your setups. I usually look for pieces with sapwood or other areas on the board with less desirable appearance for my test pieces. But always mill them along with your selected stock so they'll give you an accurate result.
With the stock milled flat and square, you can rip the workpieces to width, then cut the rails to final length and the stiles a little oversize. You can trim the stiles to final size after the door is assembled.
__ ROUTER TABLE OPERATION ONLY.__ I need to emphasize that these bits are only to be used in a router table. Under no circumstances should you attempt to use them in a hand-held router. So the next step is to inspect your router table.
Since these bits are larger than many more commonly used bits, it's important to make sure the openings in the table and in the fence can accommodate the size. Then there are a couple of things on the router to set up.
SETUP TECHNIQUES
With the frame pieces milled and cut to rough length, you're just about ready to start making cabinet doors. But before you can begin, you'll need to finish setting up the router and the bit.
__ SPEED.__ You don't need a big router to use these bits - most 2 hp routers will work just fine. But it's important to set your router speed correctly. Although you can safely run these bits at 18,000 to 20,000 RPM, I usually get better results at a lower speed. Try starting at a lower setting (about the halfway mark on the speed-control dial) and make a few test cuts. If you're getting a good cut and no tearout, then you've found the right setting. If you get any burning, try turning up the speed and increasing the feed rate a little.

RAILS FIRST. I prefer to cut the profile on the ends of the rails first. This way, I always have a square edge against the router table fence when cutting the profiles on the edge with the stile bit. Another advantage is that you can clean up tearout from these cuts later, when you rout the profile on the edges.
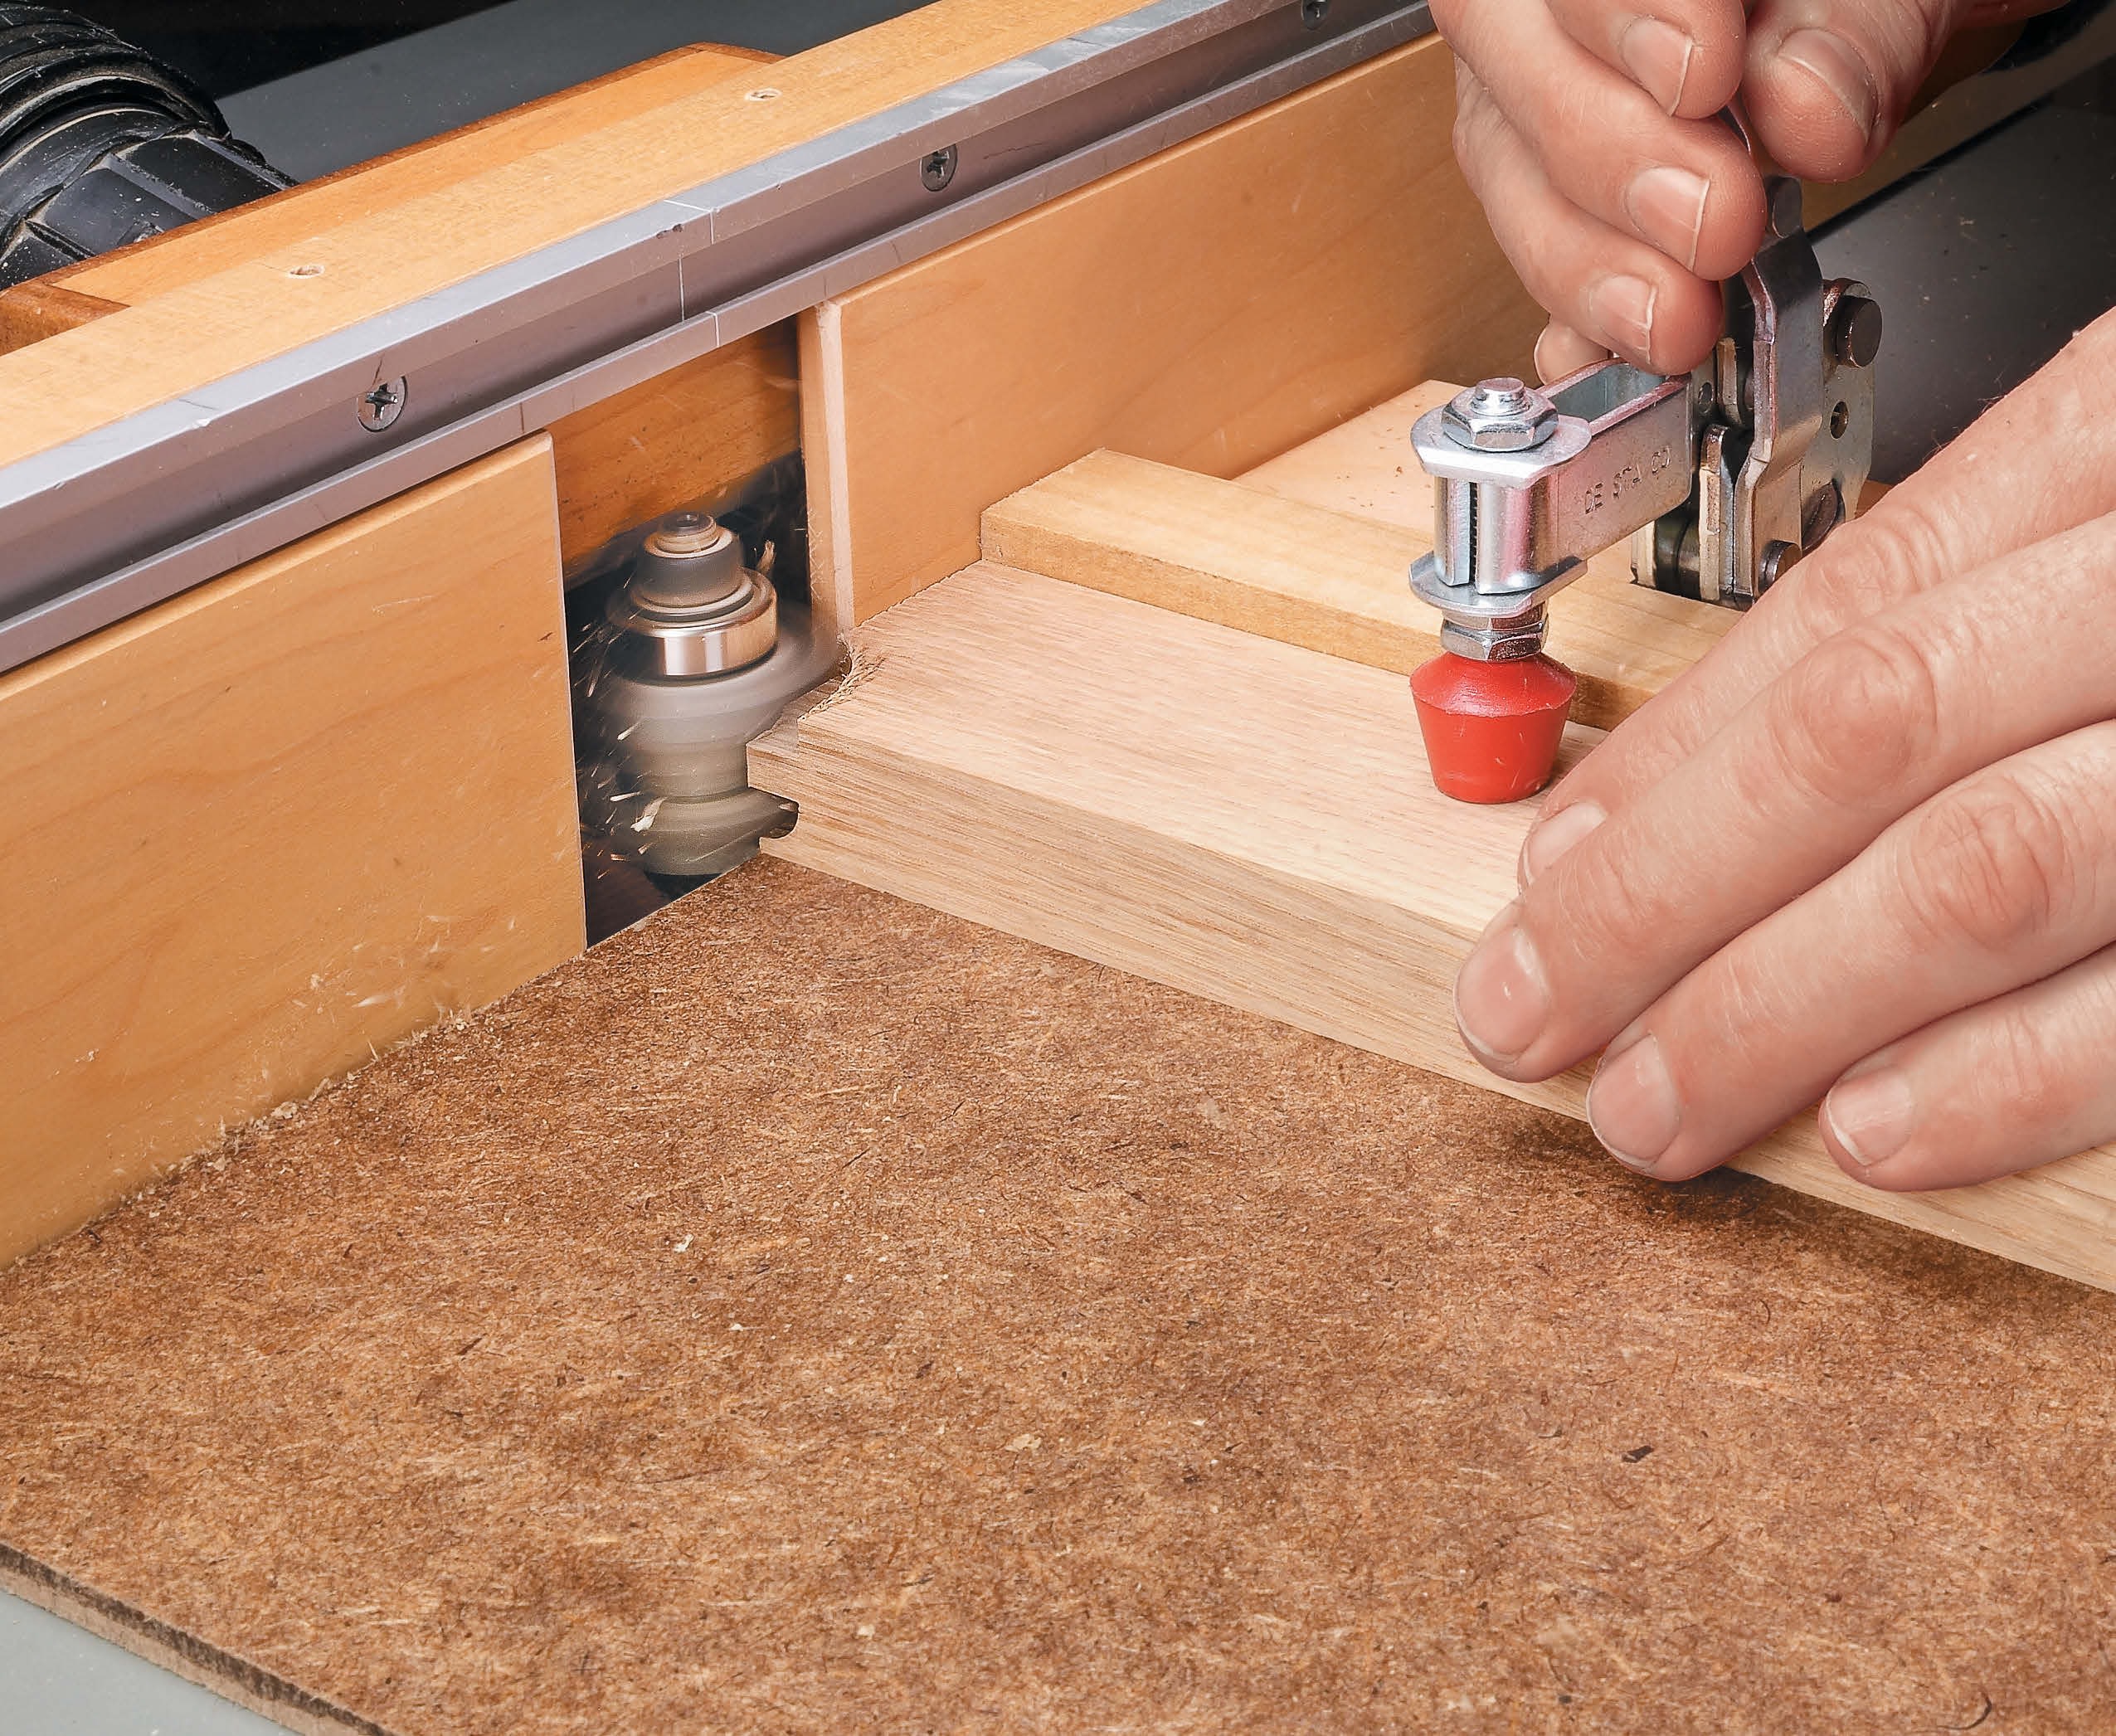
I also like to use a coping sled to help keep positive control of the workpiece when making these cuts. The sled also allows me to place a backer board between the rails and the fence to help prevent tearout. You can see an example of a shop-made sled with a toggle clamp in the photo above.
As a simpler alternative, you could use a miter gauge with an auxiliary fence or a simple plywood push block. Just make sure the workpiece is square to the router table fence and that you can hold the rails firmly while keeping your hands well clear of the bit.
BIT HEIGHT. Now you're ready to set the bit height. This is where your test pieces will come in handy. Chances are it will take two or three test cuts to nail the perfect profile. A good starting point is to raise the bit until the top edge of the slot cutter portion of the bit is just above the top of the rail. (If you're using a sled, remember to make this measurement with the workpiece in place on the sled.)
Now, slide the fence in position by holding a steel rule on the bearing to make sure it's flush with the fence. At this point, you can make your first test cut and inspect the coped end. You can judge the profile by looking at the narrow lip that butts against the shoulder of the stile. For most profiles, I like to shoot for a lip on the coped edge that's about 3/32" thick.
Of course, you're free to adjust to your taste, but just make sure not to let this edge get too thin or you'll limit your options later, when you sand the assembled corners flush. Since this process is a bit finicky, it's a good idea to keep your final test piece to use for future setups.

CUT THE RAILS. When you've settled on a good height, you can rout the ends of all the rails for your project. Place the outside face of the rails down against the table and the edge against the backer board to make the cut. Then rotate the workpiece end-for-end (keeping the same face down on the table or sled) and repeat. The finished rails should have identical profiles and be relatively free of tearout.
__ NOW THE STILE BIT. __ Although we refer to this bit as the stile cutter, you'll use it on the edges of both the stiles and the rails. Once again, the bit setup comes first.
You won't need the sled for these cuts. Start with a test piece on the table and "eyeball" the rough height as shown in the drawings and proceed with a test cut. For these cuts, a featherboard might be helpful to keep the workpieces flat for a consistent result. You'll also want to use a push block to keep your hands clear. You can use one of the finished rails to test the fit and dial in a perfect-fitting edge. Then you can rout the rails and stiles.
__ TEAROUT.__ A common problem when routing the edges is tearout. But you can minimize tearout by taking into account the grain direction of the workpiece. The photos below show you what I mean. Adjusting the router speed (usually faster) can also help get a cleaner cut.

PANELS. After completing the edge cuts on the rails and stiles, you're ready to make the panels. You have a few options for the panels as well. A simple plywood panel is easy and quick. But taking the time to make hardwood raised panels can really give your project a great look. The photos below give you an idea of the differences.

To assemble the doors, all you need is a little glue on the mating edges and a clamp at each joint. The resulting doors are both attractive and strong. I think you'll agree that the finished product easily justifies the cost of these bits.


