Staining is often a finishing step that can make or break the appearance of a project. And unfortunately there's no magic bullet that will guarantee a good outcome. But the more options you have to choose from, the better the chance of getting top-notch results. This is why I keep waterbased dyes on hand.

WHY? A water-based dye can give you a look that's very different from a typical oil stain. Oil stains contain large pigment particles that are simply suspended in a solvent. When the stain is applied, the pigments essentially sit on the surface of the wood to give it color. However, this can sometimes make it difficult to produce a deep, natural color without obscuring the figure of the wood.
Water-based dyes work differently. The dye particles are very small and actually go into solution - like sugar in water. This allows the water to carry the dye particles deep into the wood fibers. The resulting look is more transparent and natural. You end up with a very rich, penetrating color that still lets the figure of the wood show through.
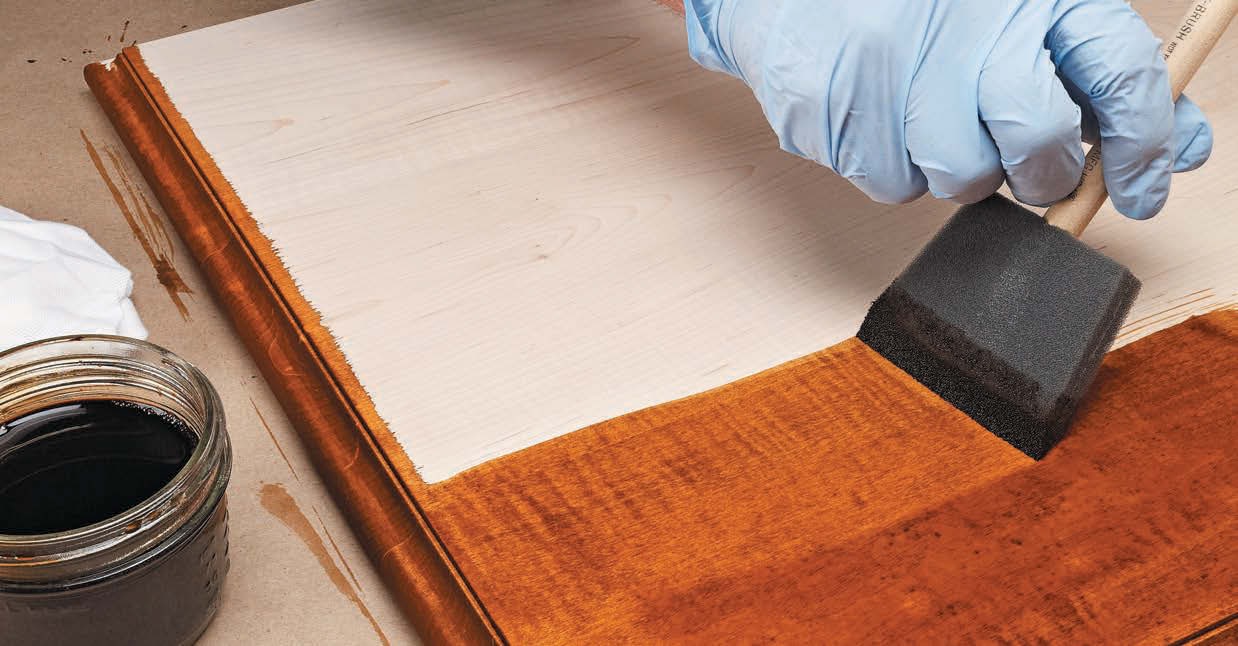
As you can see in the top photo, a dye can really "pop" the beautiful figure of woods such as curly or birdseye maple. And the penetrating nature of a dye makes it a good choice when a deep, dark color is required.
MIX IT UP. You'll find dyes that are formulated for use with different solvents - water, alcohol, and oil-soluble types. However, because of their slower drying time, water-based dyes are by far the easiest to use, especially on large surfaces and projects.
A water-based dye can be mixed from a powder or a liquid concentrate (photo above). The dyes come in a wide range of colors - both wood tones and "pure" colors. Two or more can be combined to create virtually any shade in the rainbow.
When you mix a powdered dye, always use precise measurements and keep track of the formula. This way, you can easily match the same color again, if necessary. For me, it's easiest to simply measure by volume, but you can also weigh out the powder.
Although the instructions on the dye packet provide a recommended concentration, this is just a loose guideline. The base dye color can be lightened or darkened by changing the proportions of dye and water (photo below). Coming up with the desired color can involve experimentation. You'll find that a small amount of dye goes a long way.
The dye powder will dissolve better in hot water. If any powder doesn't dissolve, you'll want to strain it out before applying the dye to the wood.
APPLICATION. Applying a waterbased dye requires a slightly different technique than that used for an oil stain, but it's just as easy. The How-To box below illustrates the basic routine.

The first thing you need to know is that, as you might guess, a water-based dye can raise the grain and leave a fuzzy surface. The solution to this drawback is to beat the dye to the punch by preraising the grain. Lightly dampen the surface, let it dry, and then sand away the raised fibers with 220-grit sandpaper.
A water-based dye can be brushed, wiped, or sprayed on. I like to use a foam brush (main photo). You can apply the dye quickly and it's easier to get into all the nooks and crannies.
When applying a water-based dye, the goal is to avoid streaks and lap marks that result from not maintaining a wet edge. The relatively slow drying rate helps you accomplish this. The trick is to flood the surface and keep it wet until the area you're working on is completely coated. Then you wipe off the excess dye with a clean cloth. You'll get consistent penetration and even color.

The color can be further darkened by applying a second coat once the first coat has dried thoroughly (30 minutes). Or, you can modify the color by applying a different shade over the first.
A TOPCOAT. Dyes don't have an oil binder like pigment stains. So when the water evaporates, the color will appear drab. But once the topcoat is applied, the rich, vibrant look will return.
Water-based dyes are compatible with most topcoats. The exception is a water-based finish. Applying a water-based topcoat can redissolve the dye and leave a streaky mess. If you want to use a water-based finish, you'll need to seal in the dye with a coat of shellac or wiping varnish.
So the next time you’re debating the best color for a project, consider using a dye. I think you'll be glad you did.
__How-To: Apply a Water-Based Dye __

Before applying the dye, it's a good idea to pre-raise the grain by dampening the surface.

A thorough sanding with 220-grit sandpaper will then prevent the dye from raising the grain again.
 Once an area is completely coated and still wet, wipe the excess dye from the surface.


