


A thickness planer is one of the quickest ways to turn rough lumber into smooth, consistently sized stock. Once you've established one flat reference face, the planer makes the opposite face parallel while bringing the board down to the thickness you need.
But with a little help, your planer can handle a couple of jobs you might normally associate with a jointer.
Two simple jigs expand what the machine can do. The first supports bowed, warped, or twisted lumber so the planer can establish a flat face. The second holds boards on edge so the planer can produce straight, consistent edges.
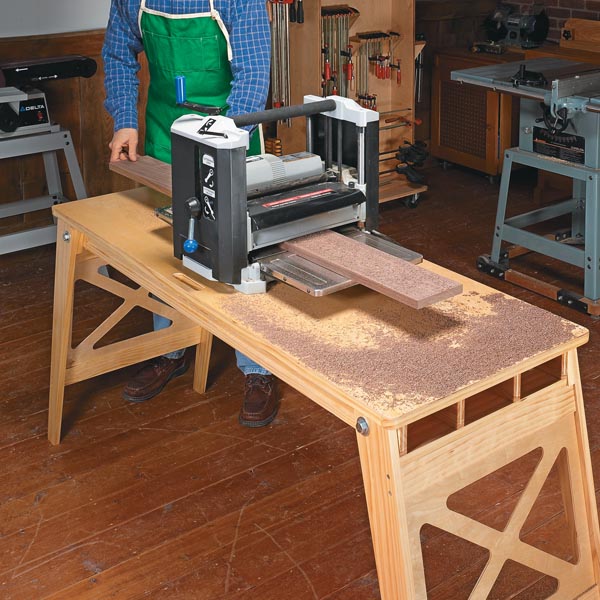
RELATED PROJECT PLAN: Build a Folding Worktable
Why a Planer Won't Normally Flatten a Warped Board
There's an important distinction between making a board thinner and making it flat.
The feed rollers in a planer apply considerable downward pressure as they move a workpiece beneath the cutterhead. Put a bowed or twisted board directly into the planer and the rollers can temporarily press it against the bed.
The cutterhead removes material while the board is held flat. But after the board exits and the pressure is released, the warp can return.
You may end up with a smoother, thinner board that's still warped. That's where a planer sled comes in.
Jig #1: Flatten Boards with a Planer Sled
A planer sled provides the flat reference surface that an irregular board doesn't have.
The sled shown here uses a long, flat bed with a series of adjustable screws along the sides. The board rests on the sled, while the screws are adjusted to support it wherever gaps occur.
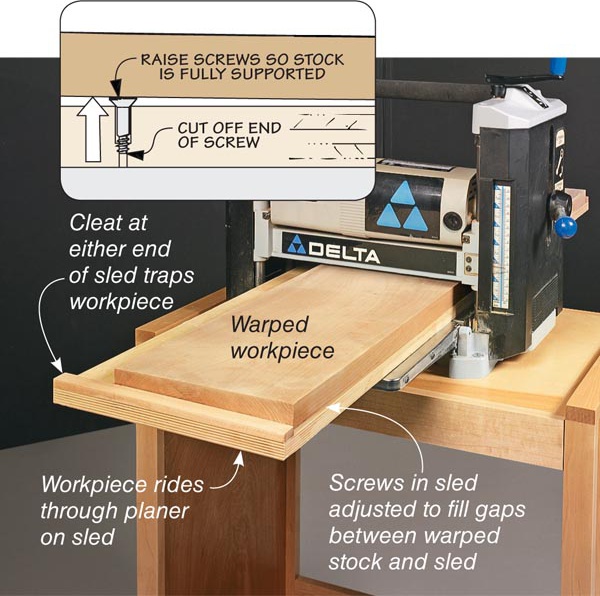
The important point is that the board is supported in its natural position rather than being forced flat.
With the workpiece stabilized, the entire sled and board can pass through the planer. The cutterhead gradually removes the high spots from the exposed face until that surface is straight and flat.
Finish by Planing the Opposite Face
Once you've established the first flat face, the sled has done its job.
Remove the board from the sled, turn the newly flattened surface down against the planer bed, and plane the opposite face normally.
Now the planer can use that first surface as its reference, producing a second face that's parallel to the first.
This is essentially the same milling sequence you'd use with a jointer and planer — you've simply used a sled to establish the first reference face.
WOODSMITH TIP: Don't force a warped board flat against the sled. Support the gaps so the workpiece remains stable without changing its natural shape.
When a Planer Sled Makes Sense
A planer sled can be especially handy when you don't have a jointer or when the board is too wide for the jointer you own.
It also allows you to take advantage of the width capacity of your planer.
The tradeoff is setup. Each irregular board needs to be supported securely before it goes through the machine. If you're milling a large stack of lumber that fits comfortably on your jointer, traditional face-jointing may be faster.
For occasional flattening, however, the sled greatly expands the usefulness of a planer.
Jig #2: Joint an Edge with Your Planer
The second jig tackles another job normally handled at the jointer: creating a straight, square edge.
Rather than laying the board flat, this jig holds the workpiece on edge as it travels through the planer.
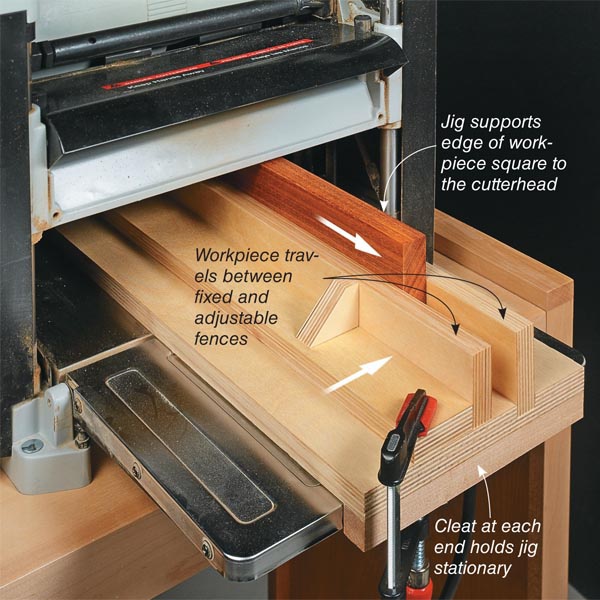
The jig consists of three basic components:
- A plywood bed
- A fixed fence
- An adjustable fence
The fixed fence establishes the position of the workpiece. The adjustable fence moves against the opposite face of the board to hold it securely in the proper orientation.
In effect, the jig does what the fence on a jointer normally does — it keeps the board properly oriented to the cutterhead.
Using the Planer Edge-Jointing Jig
Place the workpiece against the fixed fence and move the adjustable fence into position so the board is held snugly between the two.
The adjustable fence is secured at both the infeed and outfeed sides of the planer.
Once everything is positioned, set the planer for a light cut and feed the workpiece through with the jig.
This setup can be particularly useful when you're preparing several pieces and want their edges to be straight and consistent.
Turn Your Planer Into a More Versatile Milling Tool
A thickness planer is still at its best when it's doing what it was designed to do — creating smooth, parallel faces at a consistent thickness.
These jigs don't change that. Instead, they provide the planer with the reference surface or support it normally needs from another machine.
A planer sled lets you establish that first flat face on irregular stock. An edge-jointing jig keeps a board properly oriented so its edge can be surfaced straight and square.
For a shop without a jointer — or whenever you simply need another way to tackle an awkward board — both are useful tricks to have available.
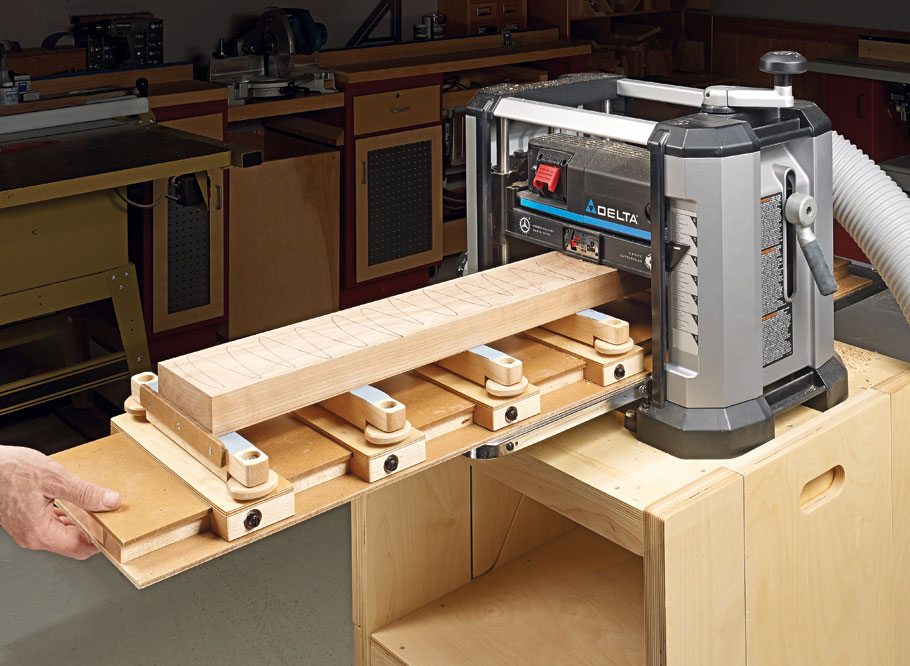
Get Even More From Your Thickness Planer
Turn your planer into an even more versatile milling tool with this Double-Duty Planer Sled. Adjustable levelers support warped boards so you can establish a flat reference face, while a second setup makes it possible to plane thin stock safely and accurately.
The lightweight torsion-box sled fits a standard 12" planer and handles boards up to 48" long. Five adjustable, non-skid levelers provide solid support, and built-in stops help keep the workpiece from shifting during a pass.
GET THE DOUBLE-DUTY PLANER SLED PLANS → Build a Double-Duty Planer Sled


