



Shop-Made Router Table Fence for Flush-Trimming Edging
Adding solid-wood edging to plywood panels is a great way to hide exposed plywood layers and give shelves, cabinet parts, and furniture panels a finished appearance.
But after gluing the edging in place, there's usually one more step: trimming the hardwood edging flush with the plywood surface.
You can do this with a handheld router, but balancing the router on the narrow edge of a panel can be awkward. It's easy to tip the router and accidentally gouge the workpiece.
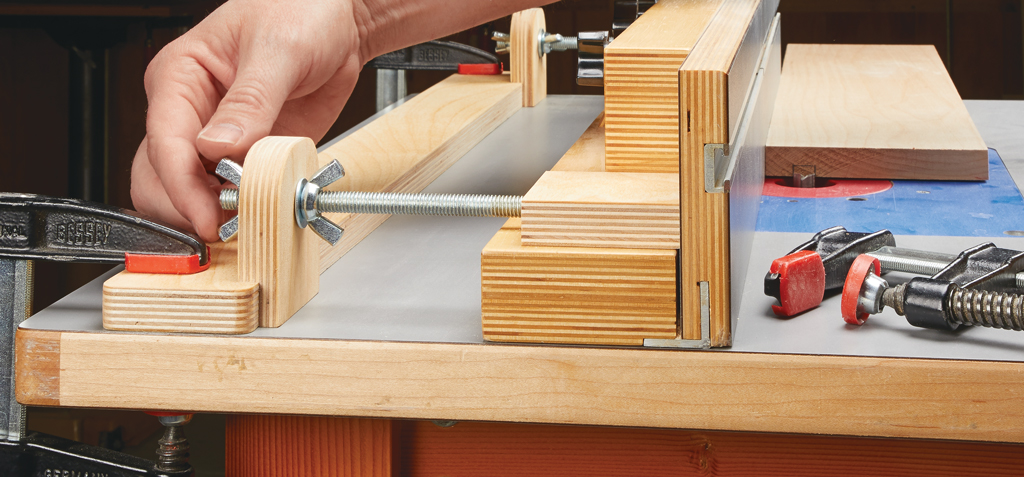
That's why I came up with this simple auxiliary router table fence. It slips over my existing router table fence and makes flush-trimming hardwood edging much easier.
How the Flush-Trim Fence Works
The key to this jig is its tall front face.
Unlike a conventional router table fence, the bottom edge of the auxiliary fence stops about ⅜" above the router table surface.
This gap provides clearance for the projecting hardwood edging to pass underneath the fence while the plywood panel is supported against its face.
The router bit removes the excess edging as you feed the panel past it.
By supporting the panel against a tall fence, you have better control over the workpiece than you would when balancing a handheld router along a narrow edge.
Build the Auxiliary Router Table Fence
The fence is made from several layers of wood glued together to form a rigid, slip-on assembly.
The construction drawing shows how the pieces fit together.

Start by cutting the individual pieces to fit over your existing router table fence.
Before assembly, cut a small opening in the front face to provide clearance for the router bit.
Then glue the layers together, keeping the assembly square and making sure it fits securely over the existing fence.
The completed jig should slip into place without needing separate clamps or fasteners.
The important detail is maintaining the clearance beneath the front face so the projecting hardwood edging can pass through without interference.
Trim Hardwood Edging Flush
To use the jig, install it over your router table fence and set up an appropriate router bit for trimming the edging.
Adjust the setup so the bit removes the excess hardwood without cutting into the plywood face.
With the panel supported against the tall fence, feed it steadily past the bit, allowing the projecting edging to travel through the clearance beneath the fence.
For the best results, remove only a small amount of material at a time if the edging extends significantly beyond the plywood.
WOODSMITH TIP: Test the Setup First. Before trimming your project, test the fence and bit setup on a scrap panel with similar hardwood edging. Check that the fence supports the panel properly and that the bit trims the edging without leaving a ridge or cutting into the plywood. Make sure the auxiliary fence fits securely and cannot shift during the cut. Use appropriate guards, workholding aids, and the correct feed direction for the bit and router table setup.
A Handy Router Table Upgrade
This auxiliary fence is a simple solution to a common woodworking problem.
It provides a stable reference surface for trimming hardwood edging, and its slip-on design makes it quick to install whenever you need it.
When you're finished, simply lift the jig off the router table and store it until the next project.
For anyone who regularly builds cabinets, shelves, or furniture using plywood panels and solid-wood edging, it's a useful shop-made router table accessory that can save time and improve consistency.
More Router Table Jigs & Accessories
A few simple shop-made accessories can make your router table more useful for everyday woodworking tasks. From auxiliary fences to precision routing jigs, the right setup can improve accuracy and make tricky operations easier.
Explore more Woodsmith router table tips, techniques, and accessories.
EXPLORE ROUTER TABLE JIGS → Get More Versatility from Your Router Table


