

Today, it seems like old is new. Painted finishes that are distressed to simulate years of wear and tear on a project are quite popular — and for good reason. Applying a casual, distressed-paint finish offers a pleasant break from a fussier and much more demanding “formal” finish. And on the right project, like the box-jointed pine tray from Woodsmith No. 183 shown here, the result might be good enough to fool the experts. The bonus is that since the goal is simply an old and wellworn look, the technique is easy and very forgiving.

MILK PAINT. One of the best ways to achieve this casual look is to take advantage of the vibrant colors of traditional milk paint. Milk paint is quite different from modern oilbased or latex paints. Basically, it consists of a mixture of milk proteins, lime, and natural pigments. The milk proteins (casein) play the role of binder in the paint. (Casein is also used as an ingredient in certain types of glue.) Milk paint comes in powdered form and is mixed with water as needed. It’s easy to apply, dries fast, and gives you a rustic, washed look that instantly adds authenticity.

LAYERS. The sequence of steps used to recreate the history of wear and hard use a project might show is detailed in the photos below and the main photo at left. As you can see, a distressed-paint finish is created in built-up layers of finish and wear and tear.
FIRST, SOME WEAR. You start by adding some serious wear to your project in the form of vigorous sanding. Don’t be afraid to be aggressive. Knock off all the sharp edges and corners. Certain areas (like the handle) would naturally receive more wear, so give these spots special attention. Don’t worry about overdoing it. Just try to imagine the toll that a hundred years or more of use would take.

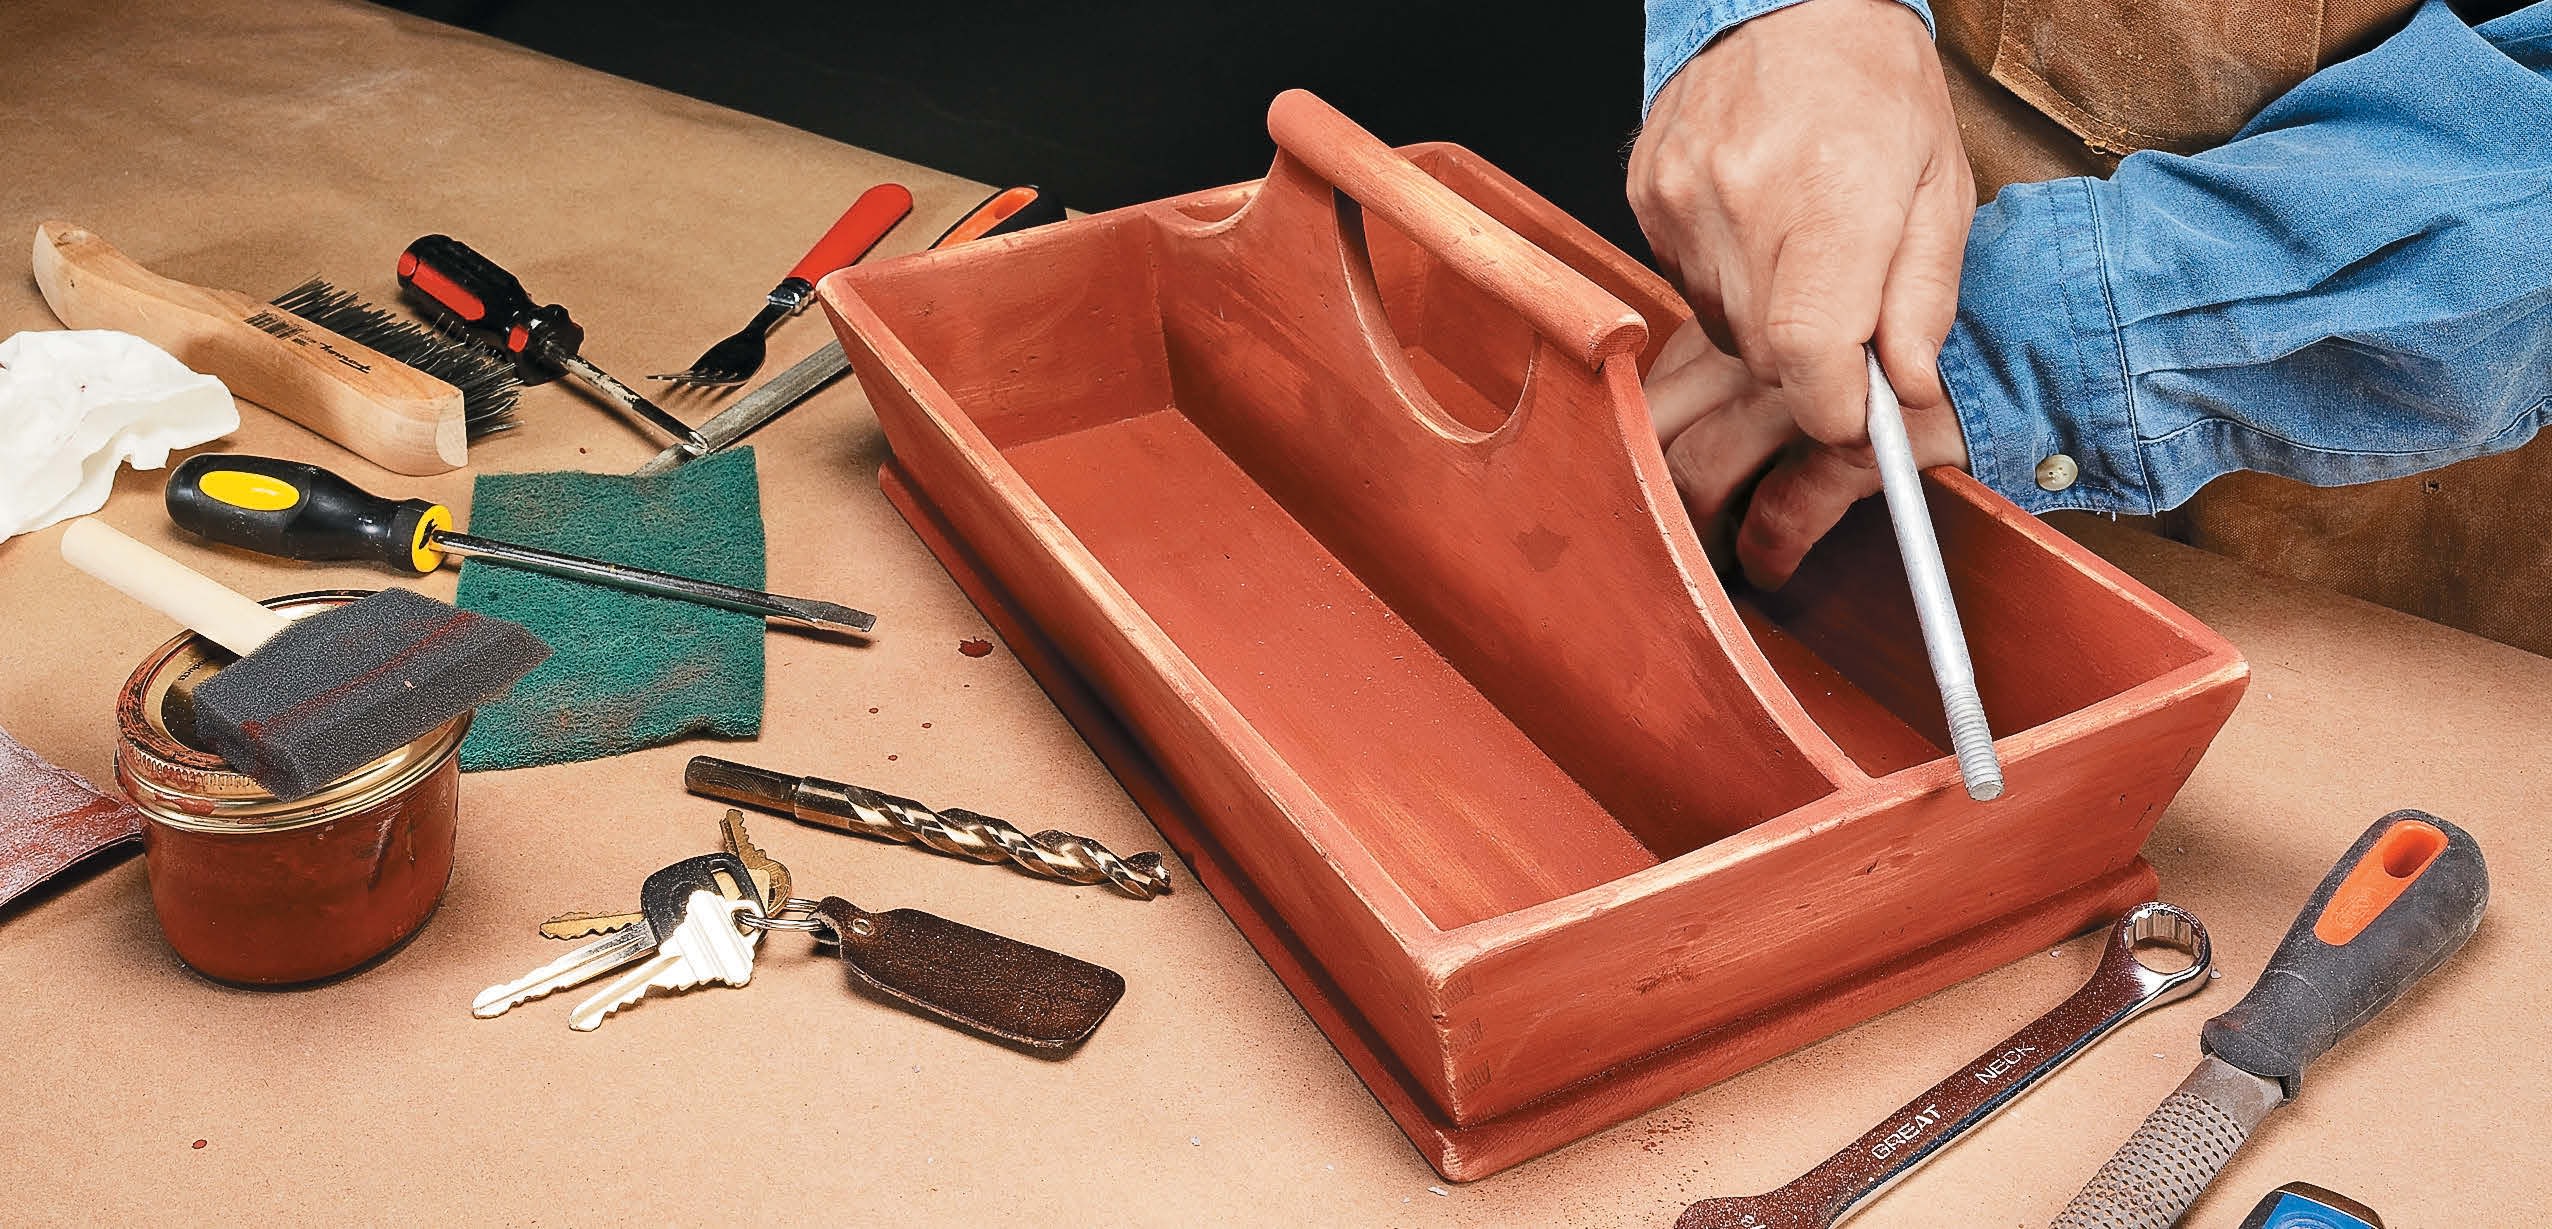
DISTRESS. Now you’ll add some insult to your sanding injury. Dents, dings, scratches, and gouges are the natural result of years of use. This distress can be added using just about anything handy. Keys, bolts, nails, a rasp, a screwdriver, or any other hard object will all work well.
The idea is to make this abuse look general and unplanned, as it would naturally occur. So work over all the surfaces, maybe concentrating just a bit more on the edges and other spots that would be more vulnerable. Again don’t be shy. You don’t want to break anything, but make the damage noticeable.

A COAT OF PAINT. Now comes the first coat of milk paint — a deep, rich Barn Red . This is pretty straightforward. Mix up enough paint according to the directions and apply it with a foam brush.
You’ll find that milk paint works differently than other paints. The water in the paint is quickly absorbed into the wood, so you’ll get little flow. You just have to brush a little more vigorously than you otherwise would. The paint may appear streaky and not cover evenly, but this is normal for milk paint. Since this is simply a base coat, basic coverage is all you’re after.

MORE YEARS. Once the paint dries, you can add more years of age to the tray. Start with sandpaper and remove the paint from the edges, corners, and obvious wear areas. You want raw wood to show again. Then add a few more decades of wear and tear to some of the “high traffic” spots with your arsenal of tools, as shown in the main photo on the opposite page.
A SECOND COAT. After all this use and abuse, the tray is due for another coat of paint. But this time around, you’ll want to use a different color. (I used Soldier Blue. ) The process for applying the paint is the same. And again, don’t worry if the coverage isn’t complete and even.

A HARD LIFE. The next step is to again expose some of the raw wood and the underlying red paint. Sandpaper is your tool for this step. Hit the corners, edges, handle, and natural wear areas.
A LITTLE DIRT AND GRIME.
Now there’s just one missing feature that will complete the look — the “patina” created by the accumulation of dirt and grime. To simulate this, I glazed the entire project with a light brown oil stain. This gives the bare wood an aged color and the painted surfaces a well-used, slightly dirty appearance.

Go over the entire project, wiping on a light coat of stain and then wiping off the excess quickly. The goal is to leave some stain on the painted surfaces and bare wood, in the distressed areas, and in the cracks and crevices where dirt would naturally accumulate.
A PROTECTIVE FINISH. The final step is a bit ironic. After your best efforts at making the project look old and beat up, you want to protect it from further wear. So a light topcoat of low-gloss spray lacquer, or water-based finish is in order. Now you can put your hard work on display and prepare for the inevitable question, “Where did you find that great antique?”


