


The quality of a job is often only as good as the tool used to accomplish it. Applying a smooth, blemish-free finish by brush is no exception. A high-quality brush in good working order makes the task easier and the result much better.
But when the job is done, it’s always tempting to simply drop the brush into a can of the appropriate solvent and walk away. The downside is that if you don’t take the time to clean the brush properly, the job will be harder later on and your brush may suffer. (If you’re guilty of such a lapse, the box on the opposite page offers a fix.)
Taking proper care of your finishing brushes isn’t difficult or timeconsuming. I’ll walk you through the basics starting with a look at choosing the right tool for the job.

TWO TYPES.
Brushes fall into two broad categories — natural bristle (usually white or black hog hair) and synthetic bristle. This is an important distinction. Natural bristle brushes are the best choice for applying solvent-based finishes such as varnish, shellac, lacquer, or oil-based paint. Synthetic-bristle brushes are generally used with water-based finishes or paints but can be used for solvent-based finishes as well.
However, you should never use a natural bristle brush with a water-based finish. Natural bristles tend to absorb water, causing them to swell and the brush to lose its shape during and after use. On the other hand, synthetic bristles are more or less moisture-proof and unaffected by the water in a finish. So matching the brush to the finish will increase its lifespan.
TRY PRE-LOADING. One of the simplest things you can do to make cleaning your brush easier takes place at the beginning of the finishing process. This trick is called pre-loading or conditioning.

Pre-loading is done by dipping the brush up to the ferrule in a container of the solvent present in the finish (mineral spirits, lacquer thinner, alcohol, or water) and allowing it to soak for a minute. The solvent fills the reservoir at the top of the brush to prevent the finish from drying in this area. The brush will stay more flexible during use and require a lot less effort to clean.
Then, before putting the brush to work, shake or wipe off as much solvent as possible.
CLEANING A BRUSH
Once the finish has been applied, make it a habit to give the brush quick attention. Whether it’s a synthetic or natural bristle brush, the process is essentially the same.
SQUEEZE. The first thing you want to do is squeeze as much finish out of the brush as possible. Rub both sides of the brush across the lip of the can or jar from the ferrule on down. Do this until you’re not getting any more finish off the brush.

RINSE. Next, rinse the brush thoroughly in a container of the appropriate solvent. The same container of solvent used to preload the brush is an easy option. You can simply let the brush soak for a while in the solvent, but it’s better to work it against the sides and bottom of the container. This helps the solvent penetrate between the bristles to loosen the finish. When the solvent gets cloudy with dissolved finish, replace it and work the brush some more.
SHAKE, RATTLE, & ROLL. When you’re planning on recoating within a short time, the brush can be left soaking in fresh solvent. If not, the next step is to remove as much of the solvent from the brush as possible. This can be done by either shaking it vigorously or rolling it rapidly between the palms of your hands, as shown in the main photo. The latter method is more effective, but can be difficult to do on brushes with wide, flat handles.

SOAP & WATER. This next step — washing the brush with soap and warm water — is optional. But it guarantees a super-clean brush. Dishwashing soap is the standard choice. Wet the brush and then work the soap through the bristles with your fingers (photo above). You can also use a brush comb at this stage to help loosen and remove any remaining finish. After a couple minutes, you can rinse the soap out of the brush.
You may note a contradiction. Natural bristles don’t like water. But as long as the brush is dried and then stored properly, a water wash isn’t a problem.

WRAP IT. When thoroughly clean, the final step is to wrap the brush to shape and protect the bristles. Many brushes come in a cardboard sheath. This is a good way to store them. Or, you can wrap the brush in heavy paper. Either way, it’s never a good idea to leave a brush uncovered.
When you get into the habit of following this simple routine, a good brush will last for years. And best of all, it will always be ready for duty when needed.
How-To: Rescue a Brush

Nobody is perfect. The brush in the photo above wasn’t cleaned promptly and you can see the result. But it can be saved.
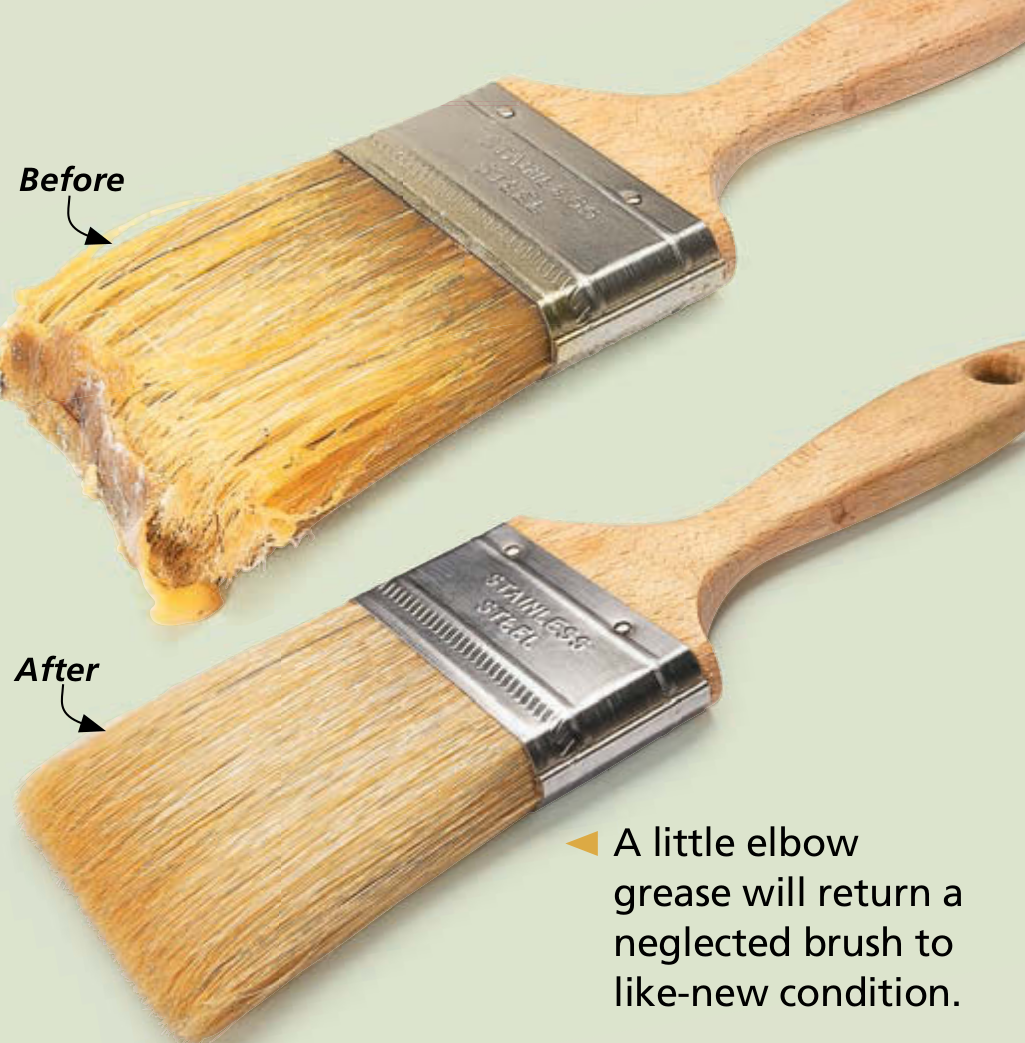
Start by letting the brush soak in mild paint stripper, as shown at above. After an hour or two, use a brush comb to separate the bristles and work the stripper deeper into the brush. Alternate soaking and combing until the finish is loosened and the bristles are pliable. Then rinse the brush in lacquer thinner before washing it with soap and water and wrapping it.


