

Boxes are a paradox. Like a lot of woodworkers, I build boxes as a diversion between larger pieces of furniture. However, I know quite a few who say that boxes are the thing they enjoy most about the craft.
Boxes require a small amount of material to make. As a result, it’s possible to build one at a low cost. On the other hand, the compact nature of a box forces you to focus on small details. When people hold a box, they see all the features and flaws. So don’t let these tiny treasures fool you.
I find that the same skills and principles that making a great box teaches can be applied to other woodworking projects. On these pages, I gathered a number of my boxes. Not a one is perfect, but in considering these, I’ll share some of the lessons they taught me about boxes and other projects.
FIRST BOX.
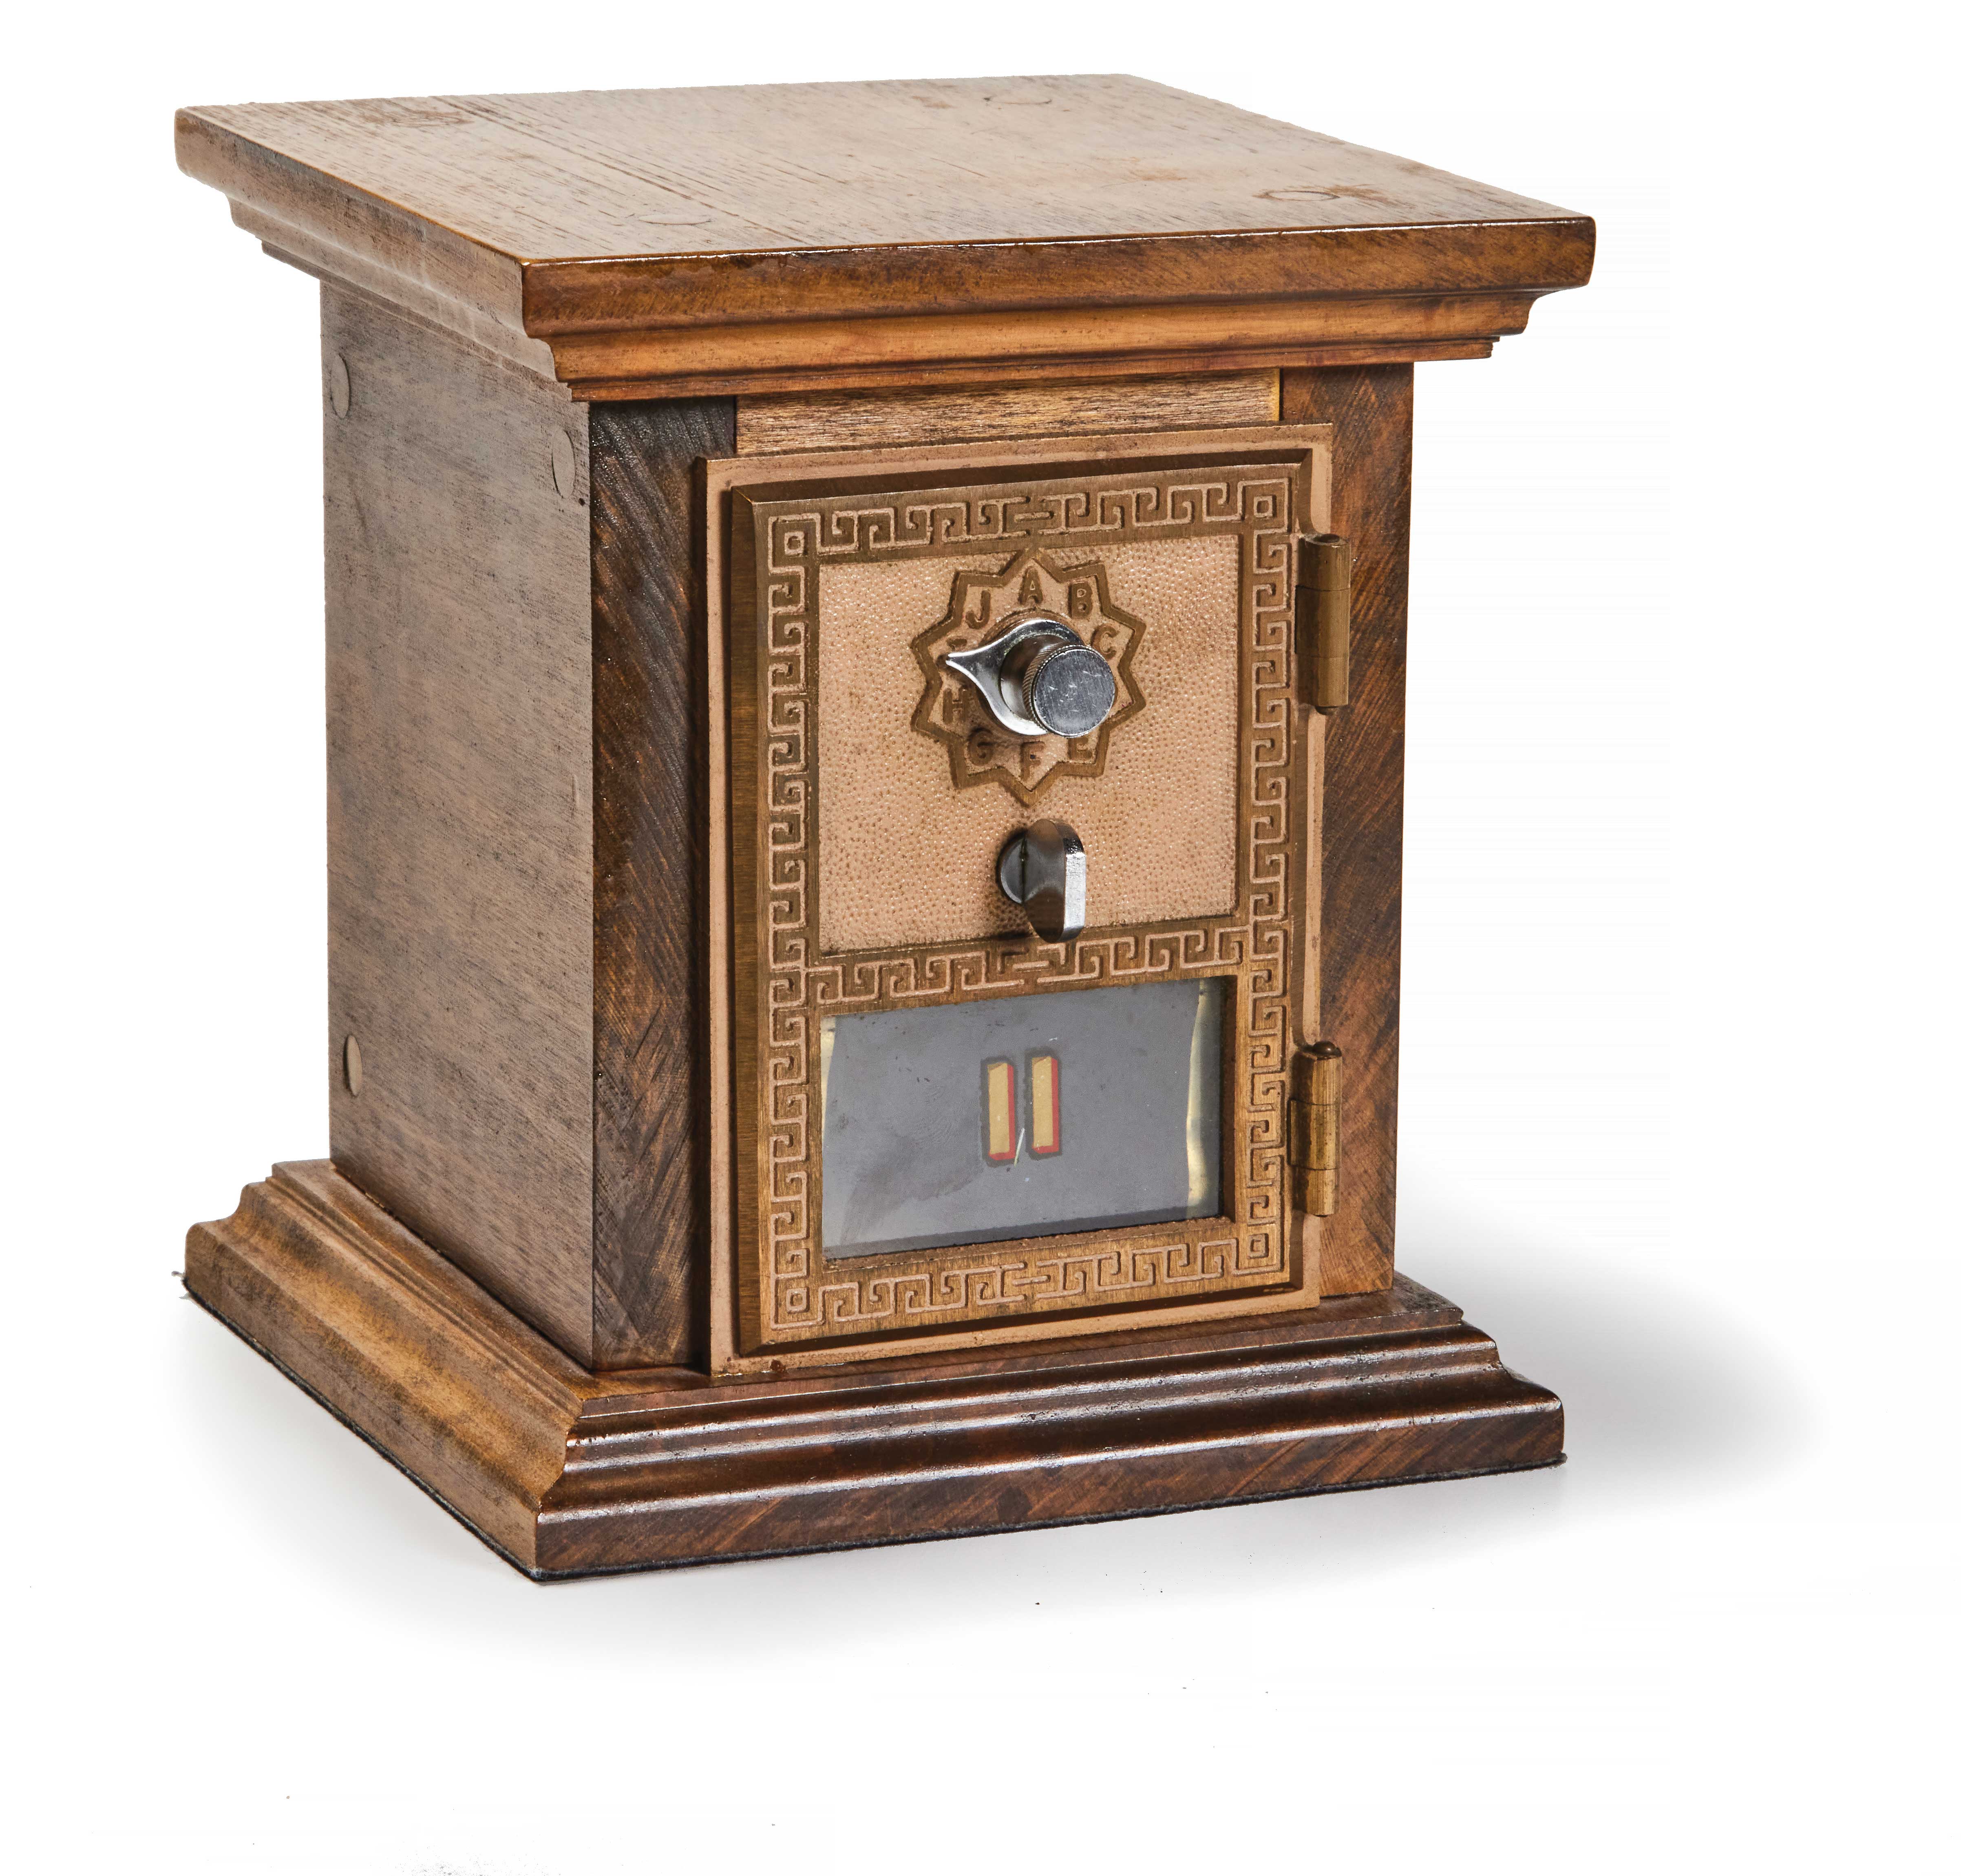 |
| We all start somewhere. This is my first box. I love it in spite of its flaws. The lessons I learned from this box play out in every other box I make. |
This box is the first one I made. It was longer ago than I care to share here. It’s focus is a door that came from a post office that was getting remodelled. My dad brought a few home and I wanted to make something around it.
The box carries all the wonders and flaws of a new woodworker. It’s assembled with wood screws covered by plugs. Some of the joints aren’t closed. I figured that the stain would cover up the blade marks and lack of sanding.
I used to think that I should remove the door and start over. Now I think I’ll keep it. It’s become precious to me.
SCALE.
The box parts are 3⁄4"-thick hard maple. I’m certain they were in dad’s scrap bin. Wood comes in common sizes. It’s easy, (especially for new woodworkers), to stick with stock dimensions. The issue is that as the project becomes smaller, the relative scale of parts becomes more pronounced. Those thick pieces in my first box look clunky.
The lesson I learned: the smaller the box, the thinner the parts should be. A corollary to that lesson is to vary the thickness (or apparent thickness) of the parts that make up the box. The box has a classical look to it that works, like a Greek column. Thin sides along with a smaller and slightly thinner top would emphasize that look even more. Keep the stately effect while adding a bit of lightness.
RULE OF THREE.
It’s tempting on projects of all sorts to show off: wood species, joinery technique, hardware, all the things. On boxes it feels overwhelming. Years ago, a friend’s dad, who is an architect told me about the “rule of three” he used in his practice. I think it applies just as much to woodworking. The guideline: if you have more than three eye-catching details, you don’t have any.
This doesn’t mean you have to have three on every project. Instead, find at most three ele-ments you want to play up and make those count. More is sometimes just more.
IN USE.
 |
 |
 |
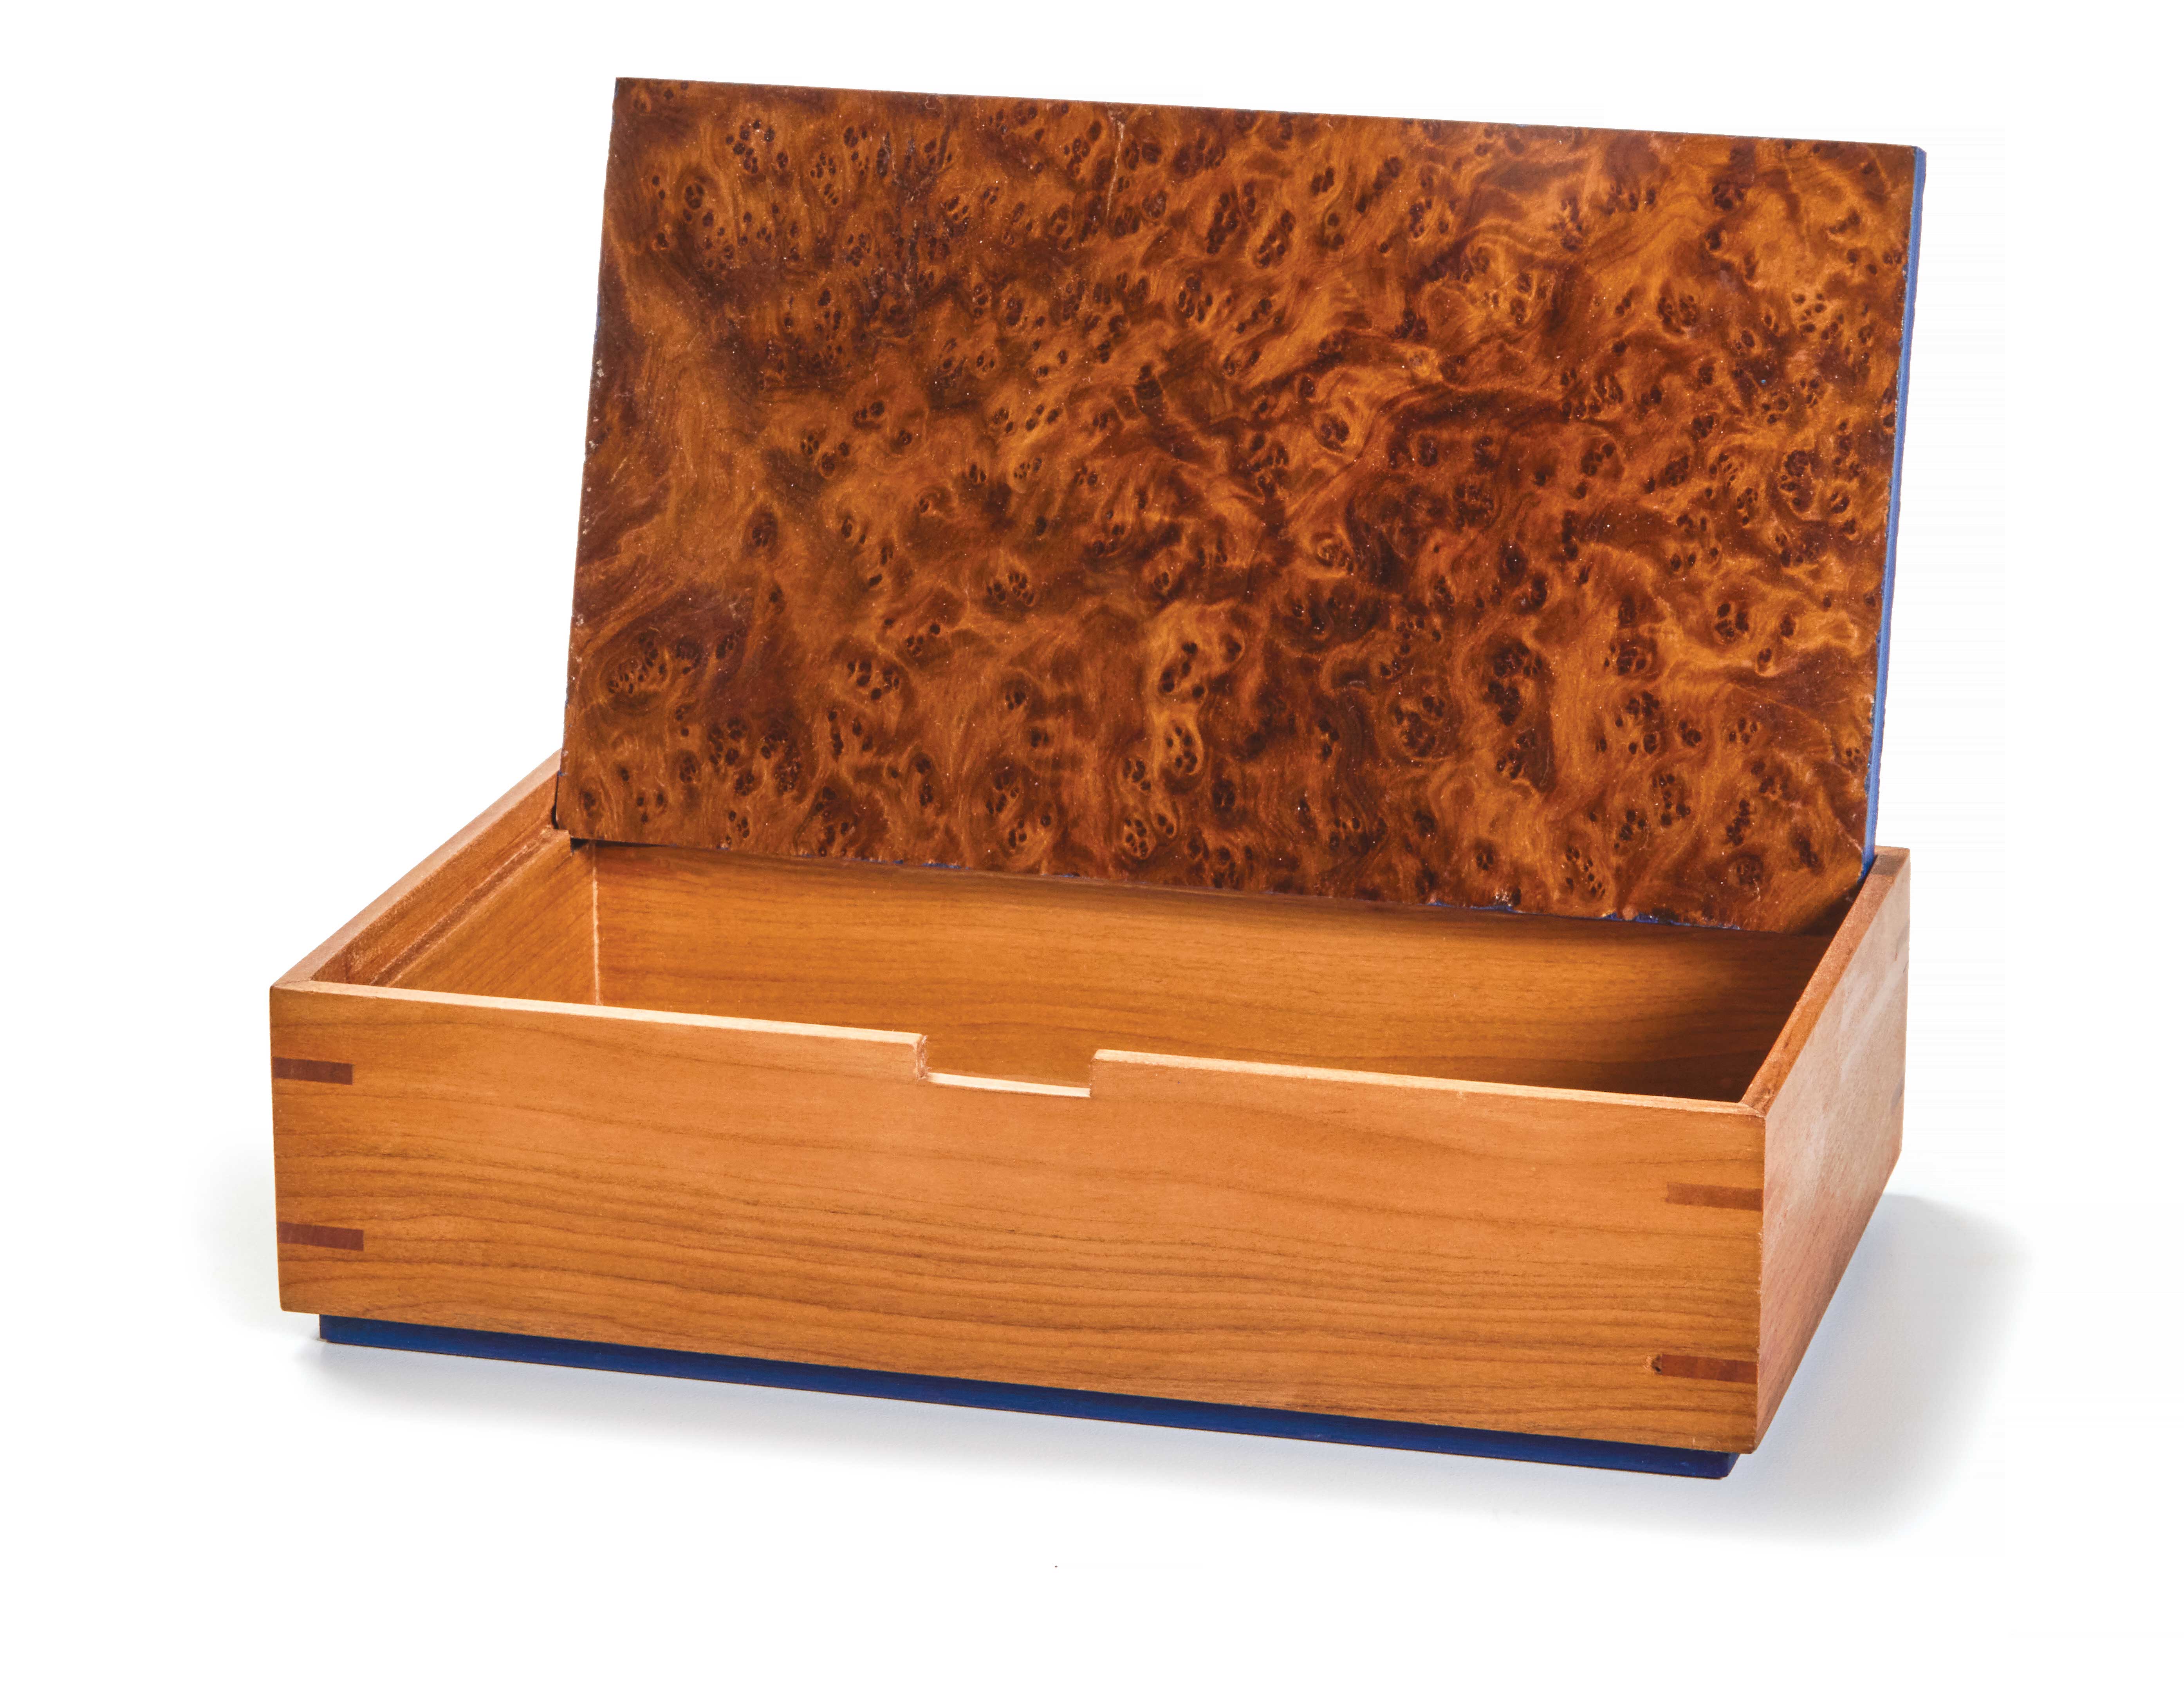
| The walnut burl veneer is the hero. However, the exposed spline joinery and thin bands of color contribute to the appeal of this box. |
The box above provides an example of how this can play out. The prime detail is the walnut burl veneer on the lid. The crisp square lines of the box allow this dramatic grain to take the stage.
The second detail is the joinery. Splines reinforce the miter joints on the box. Even though the splines are made from the same material, the exposed end grain allows them to stand out. The final element is the glints of blue that edge the lid and the bottom panel. You’ll notice that while there are three main elements, they don’t carry the same weight. I believe this gives a project a sense of order. Someone holding the box may not be able to point this out, but the sense of rightness is there.
DEFINTION
Boxes invite people to pick them up, examine the details, and find out what’s inside. As builders, we can reward the curiosity by the sense of structure a box displays. I like to think of each box as having three primary components: a lid, body, and base.
If you create a distinct lid, you’ve given a person the invitation to open up the box. Blur that boundary and an unsuspecting user could be surprised by picking up the box in a way that spills the contents. That’s not the kind of attention you want.
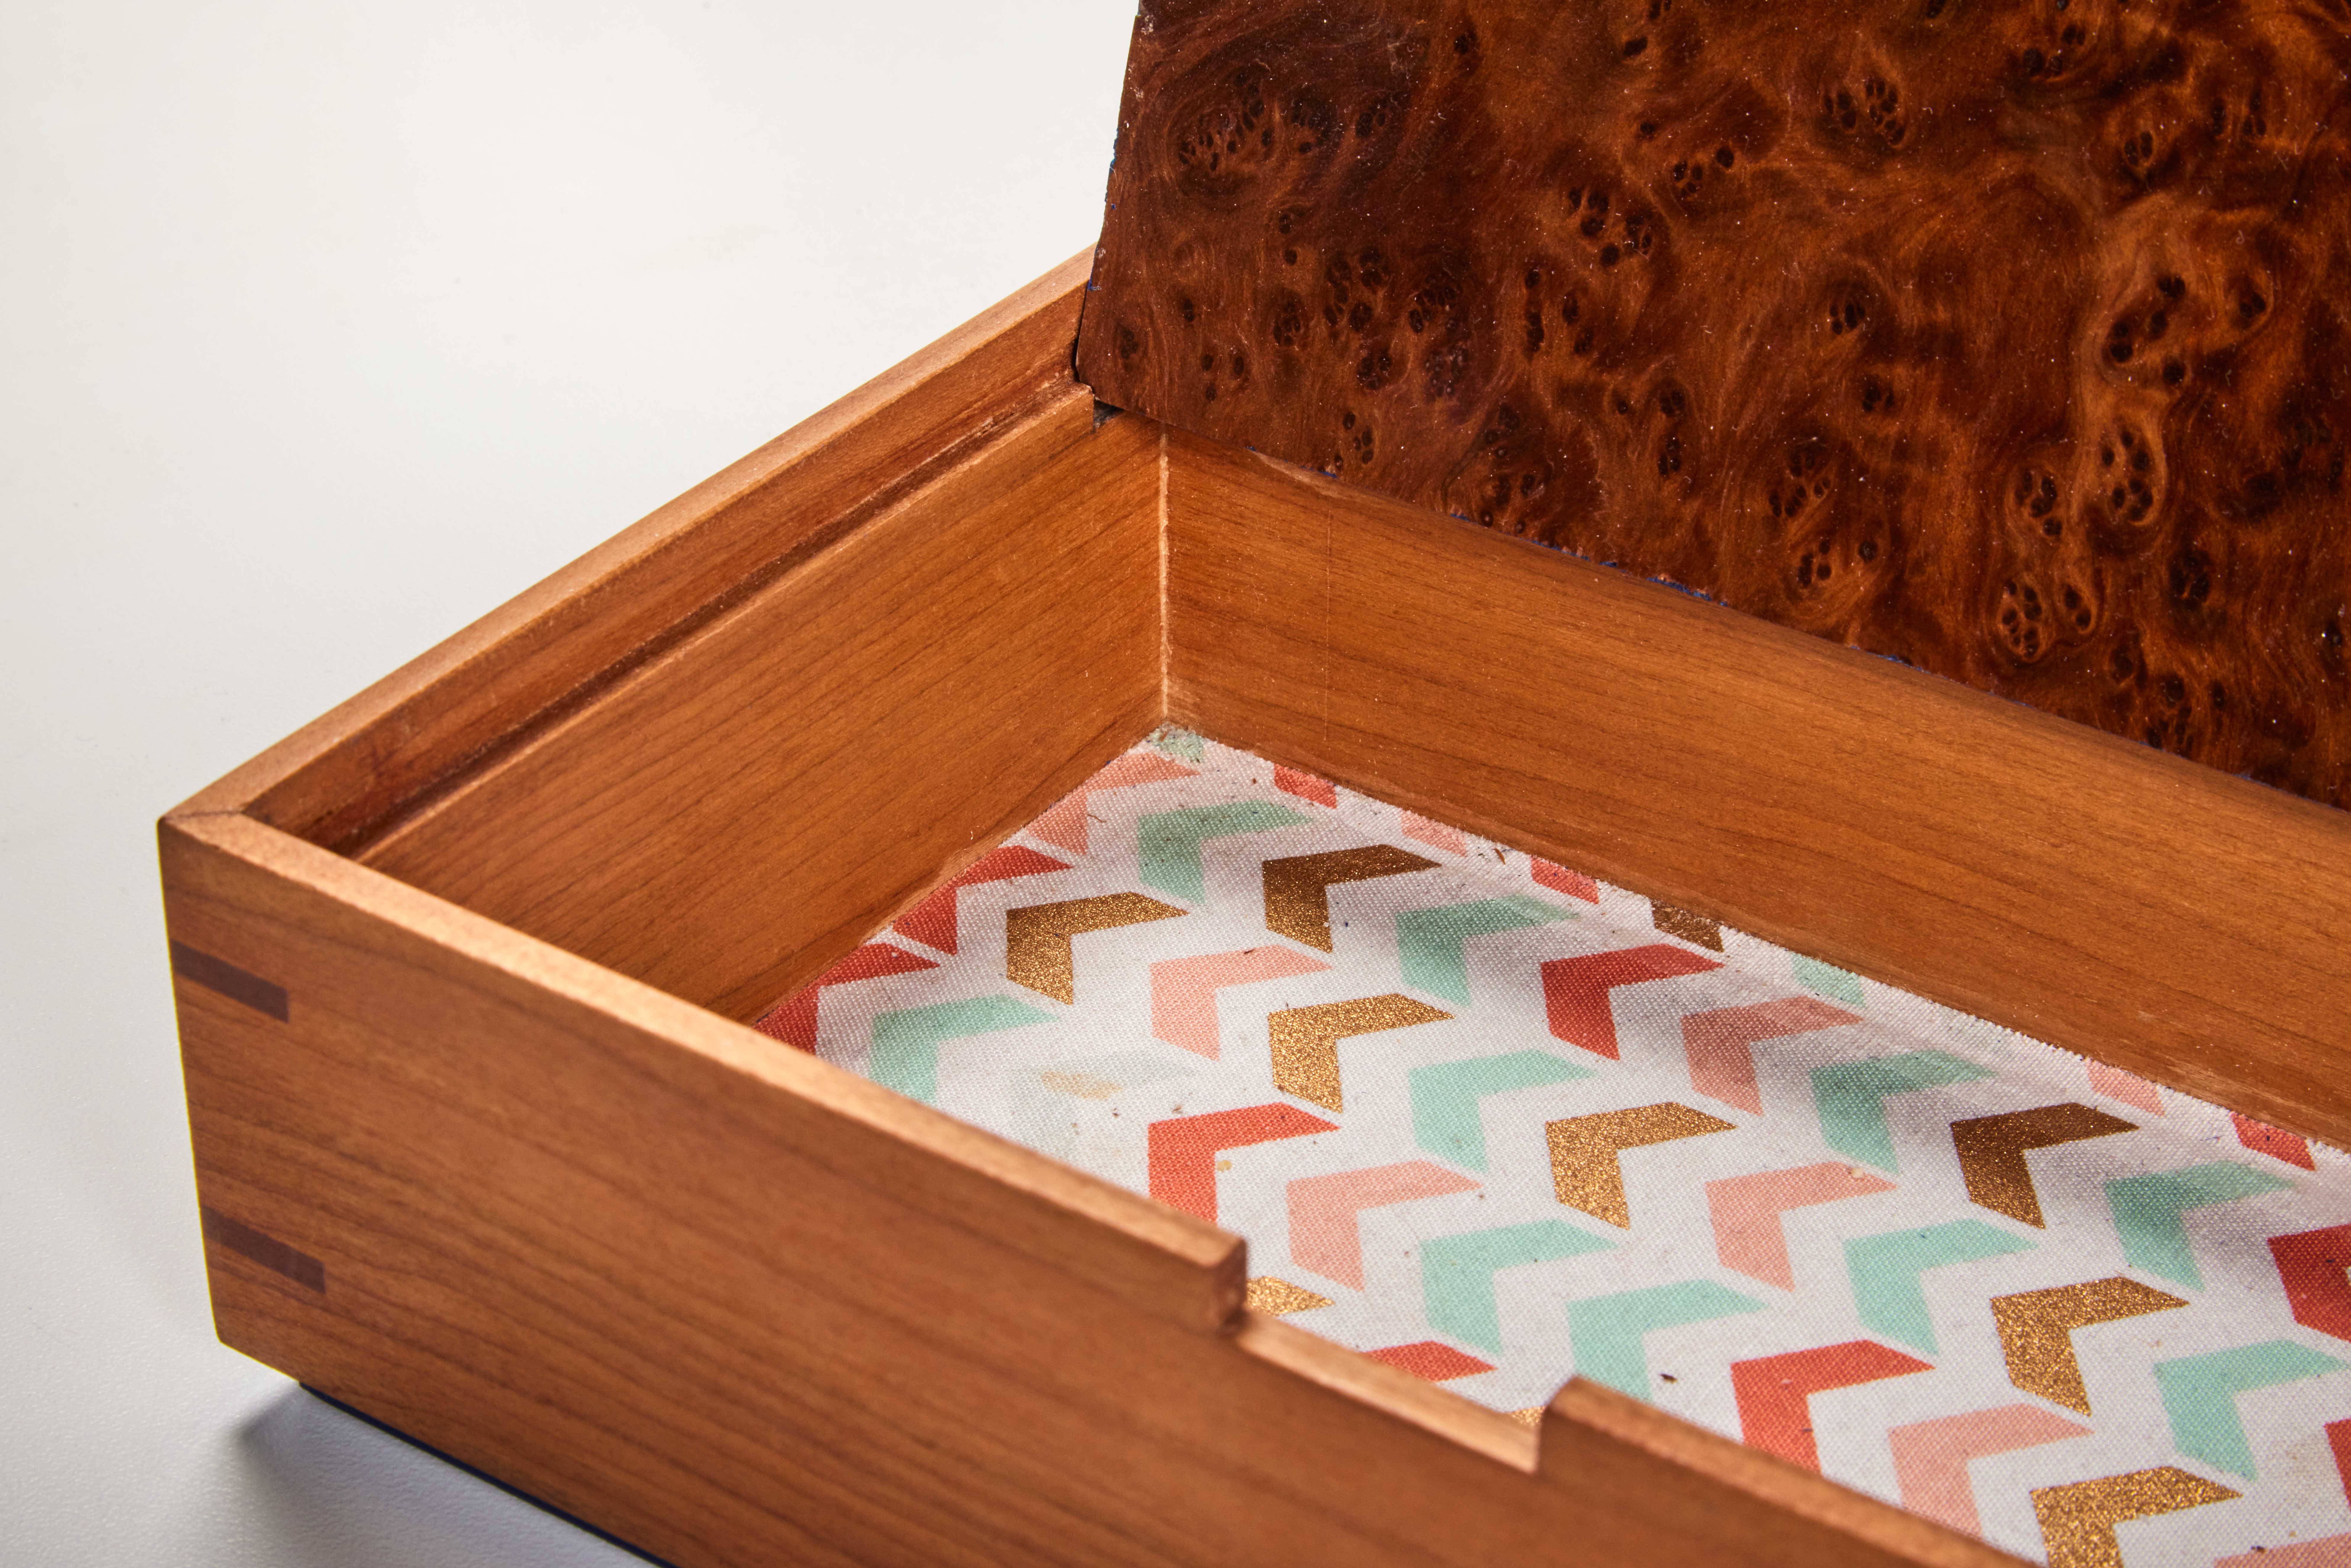
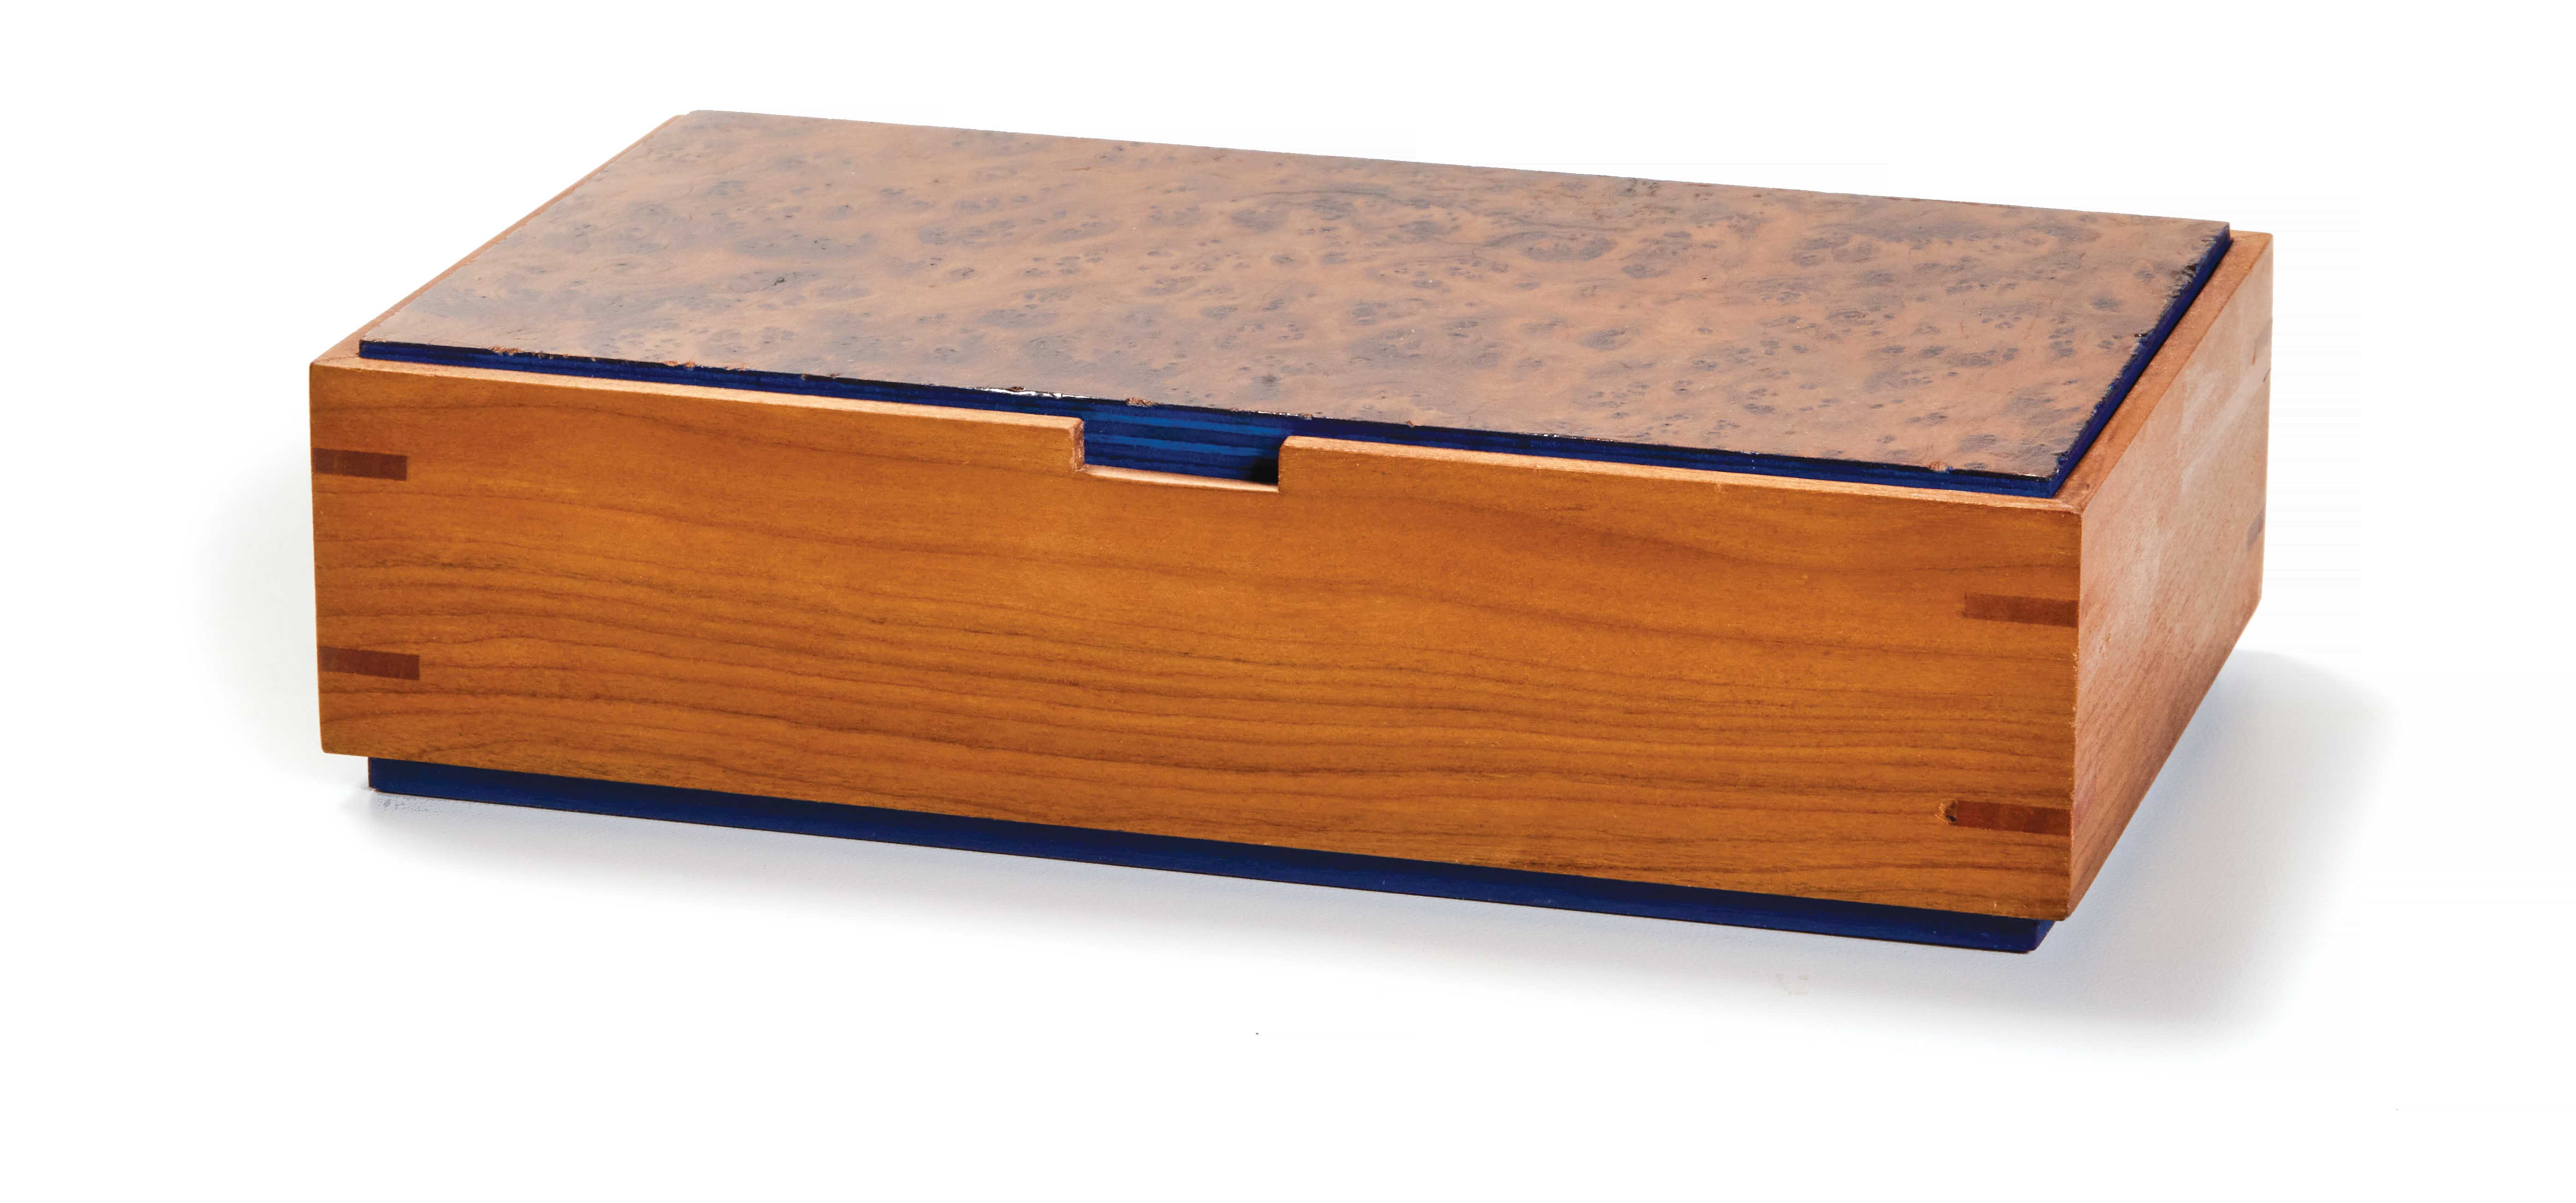
 |
| Use obvious (or subtle) clues to define the parts of a box. Or leave them out in order to enhance a sense of mystery. |
The two boxes on the left of the photo above show different ways of creating definition. The jewelry box at the top has a formal air. Moldings define the lid and raised feet are obviously the base. Inlay banding and corner bands define the body.
The lower box takes a subtle approach. The shadow line created by the recessed bottom acts as the “base.” The lid is indicated by a band of blue and a notch at the front. The quiet grain of the body is all the clue you need.
There may be a good reason to break that rule. In the puzzle box on the upper right, the idea is to confound the viewer and draw them into the mystery of how the box opens.
LIMIT HARDWARE.
I’ve already mentioned how boxes require smaller scale parts. This principle applies to hardware — and that’s the problem. The second box I made was a music box. In the lower left photo, you can see the result. The lid can’t open fully with this design. So I struggled to get the hinges installed.
It’s debatable whether it’s the fault of the design, the hardware, or the maker. The lesson I learned is I prefer to skip hinges if at all possible. Sliding lids and lift lids work best at this scale. If you need a pivoting lid, consider pins or recessed pin hinges, as in the lower middle photo.
 |
 |
 |
| The lid design of this box made installing the hinges a pain. After this box, I avoid hardware as often as I can. | Spring-loaded hidden pin hinges offer the benefits of traditional hinges while making the installation easier. | The lid on this box flips up to rest in a notch formed along the back of the sides. It functions just like a hinge. |
PURPOSE.
Designing a fresh take on a box feels daunting. To jumpstart your creativity, give the box a specific purpose or use. The size or nature of its contents drives the shape of the box and can lead to other ideas.
I picked up a set of rasp rifflers. In order to keep them safe and organized, I made the sliding lid box shown at right. This box fits in my tool cabinet and allows me to bring the tools to my bench when needed.
TELL A STORY.
Another way to find a box design is to center it around a story. Perhaps the wood you’ll use is from a family farm, or is meant to remind you of an event or trip. The book-shaped box in the upper right is based on one carried by an Iowa soldier during the Civil War. I saw it at the state historical museum and liked the idea of a book box that held important items, a pen, and paper to stay connected to his faraway home.
 |
| Boxes built around a new technique (carved lid), or a story (book box), or a purpose (tool box) tend to exhibit a sense of liveliness. |
EXPERIMENT.
At a small scale, a box is an ideal way to play around with a new technique, material, or joinery method. The lid of the upper left box is carved with a router and a set of core box bits. Making the panel the focal point of the box and backing down on the other details lets it stand out.
No single box needs to exhibit all these lessons blatantly. However by keeping these in mind, you can begin to figure out approaches to make your next box the best one yet.
HIGHLY ADORNED JEWELRY BOX
Or Not. Perhaps the best part about learning lessons like the ones I share above, is knowing when to break them, or at least set them aside. With the jewelry box at right, I went for broke. The box lid and body are covered in bold burl veneer, detailed moldings adorn the lid, a striking inlay banding, and a raised base could be seen to violate the “rule of three.” I used small hinges to attach the lid (and broke a couple of soft brass screws in the process — lesson relearned).
On the other hand, the distinctions between the lid, the body, and the base are clearly evident, as are the scales of the various details. Besides that, there’s a story behind it. I made this as a significant wedding anniversary gift for my wife. And it serves a definite purpose. So maybe it’s the culmination of all that a box project can be.


