


You don't always need a major shop renovation to make your workspace more useful. Sometimes a few pieces of foam insulation, a scrap of plywood, or a small kitchen strainer can solve an everyday woodworking problem.
In this collection of Woodsmith Quick Tips, three readers share ideas for breaking down plywood in a small shop, creating an additional worksurface, and making homemade wood filler with a smoother consistency.
1. Make a Folding Foam Cutting Mat for Plywood
Breaking down a full sheet of plywood can be a challenge, especially when you don't have room for a large cutting table. A sheet of rigid foam insulation makes a convenient support surface for cutting plywood with a circular saw or track saw. The foam supports the panel while allowing the blade to extend slightly below the workpiece.
The downside is storing that large sheet of foam when you're finished.
Harold Ebbletrap of Potter, Wisconsin, came up with a simple solution. He cuts his foam insulation sheet into thirds, then joins the sections with tape so they fold together like old-fashioned continuous-feed printer paper.
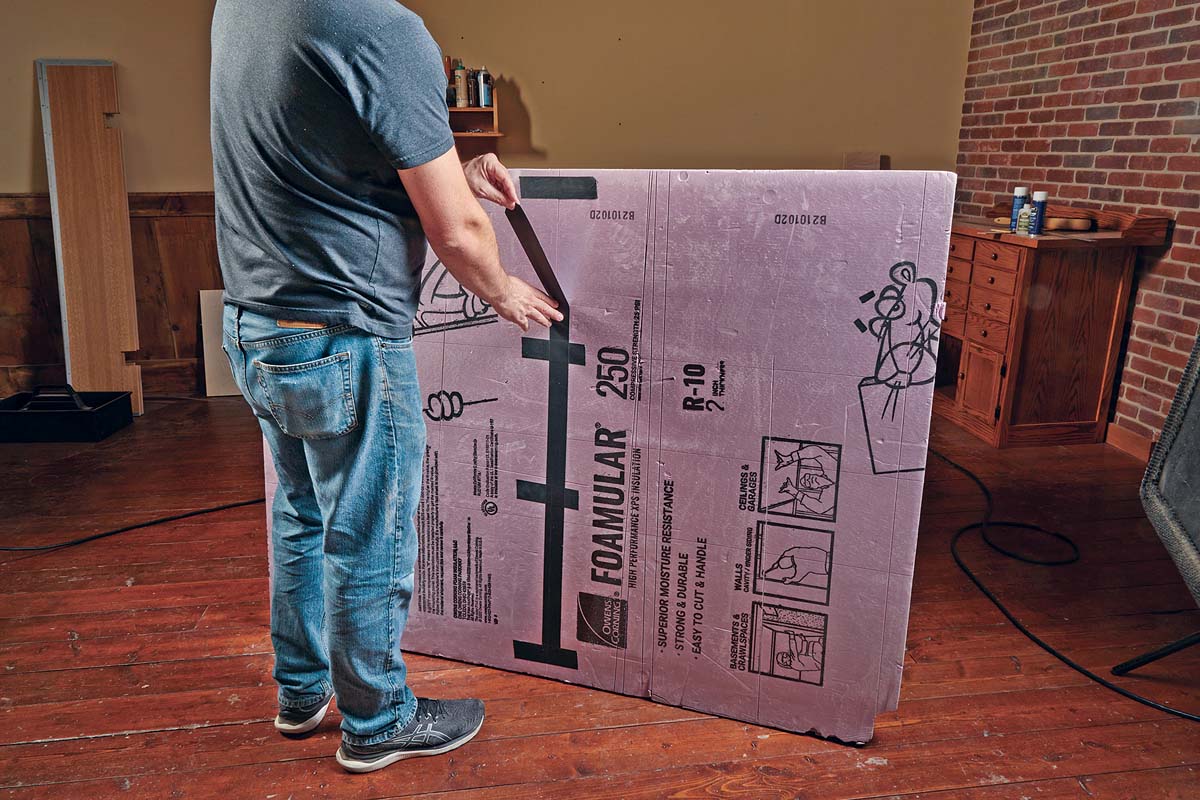
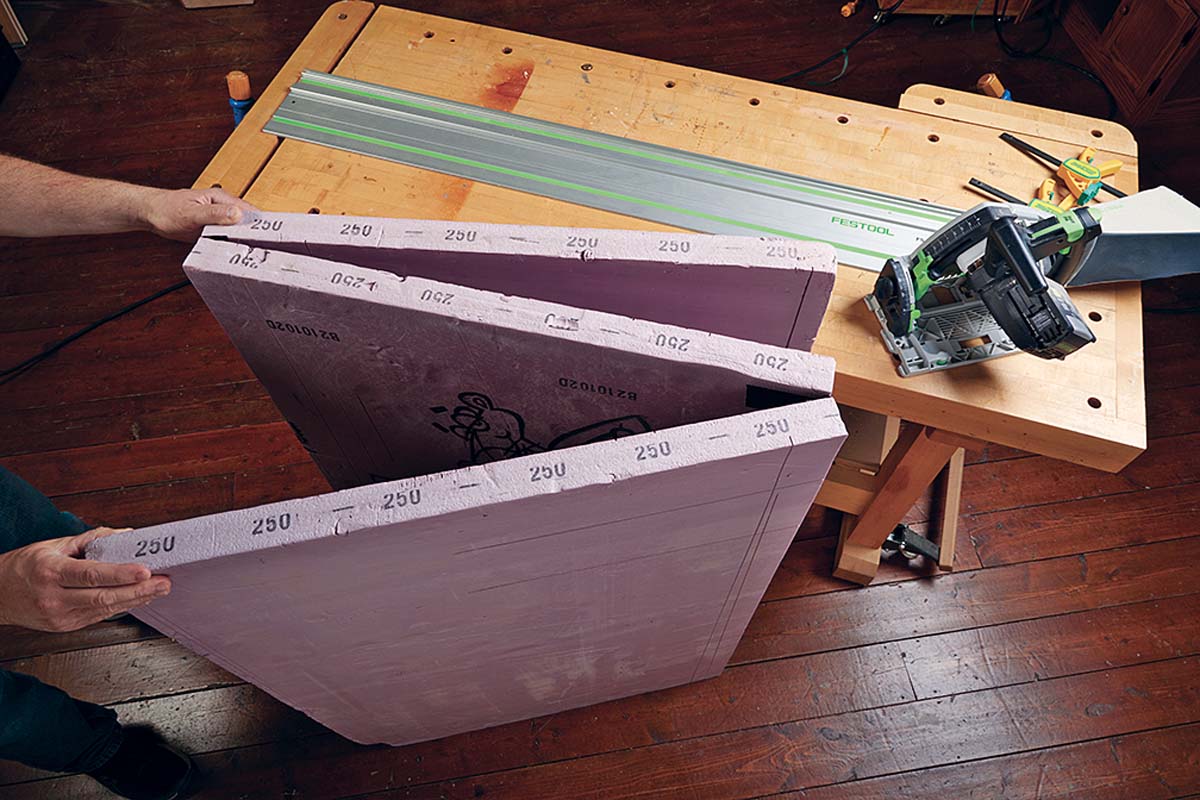
The result is a folding cutting mat that provides a broad support surface when opened but takes up much less room in storage. When it's time to break down another sheet of plywood, he simply unfolds the mat and gets to work.
It's an especially handy idea for a garage workshop or any small shop where a permanent plywood cutting station isn't practical.
Woodsmith Tip: Set the saw blade just deep enough to cut through the plywood and slightly into the foam. Make sure the panel is fully supported and that the cutting setup can't shift during the cut.
Shop tip submitted by Harold Ebbletrap, Potter, Wisconsin.
2. Add an Auxiliary Top to Your Thickness Planer
Many thickness planers have rollers built into the top of the machine. They're intended to help move long boards around the shop, but they aren't always convenient when you need a stable place to set something down.
A board may need to be balanced carefully to keep it from tipping, and on some planers, the rollers turn so freely that a workpiece can slide right off.
Pam Oslund of Cape Girardeau, Missouri, solves this problem by covering the rollers with a removable plywood top.
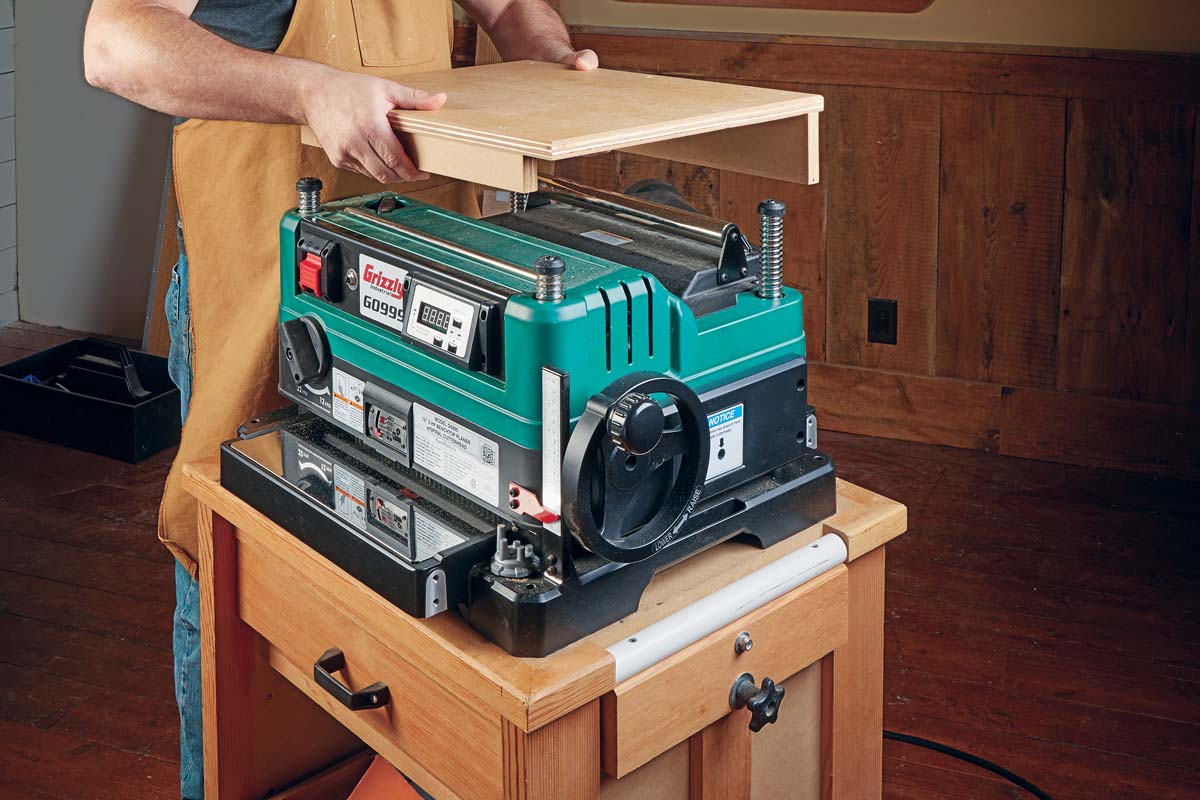
She adds a couple of cleats to the underside of the plywood to keep the top securely positioned. The cleat sizes and locations depend on the shape of the planer, so this is a project you'll need to customize to fit your machine.
Pam's planer sits on a low cart, making the auxiliary top a convenient extra worksurface. She uses it to hold portable tools and other items while working in the shop.
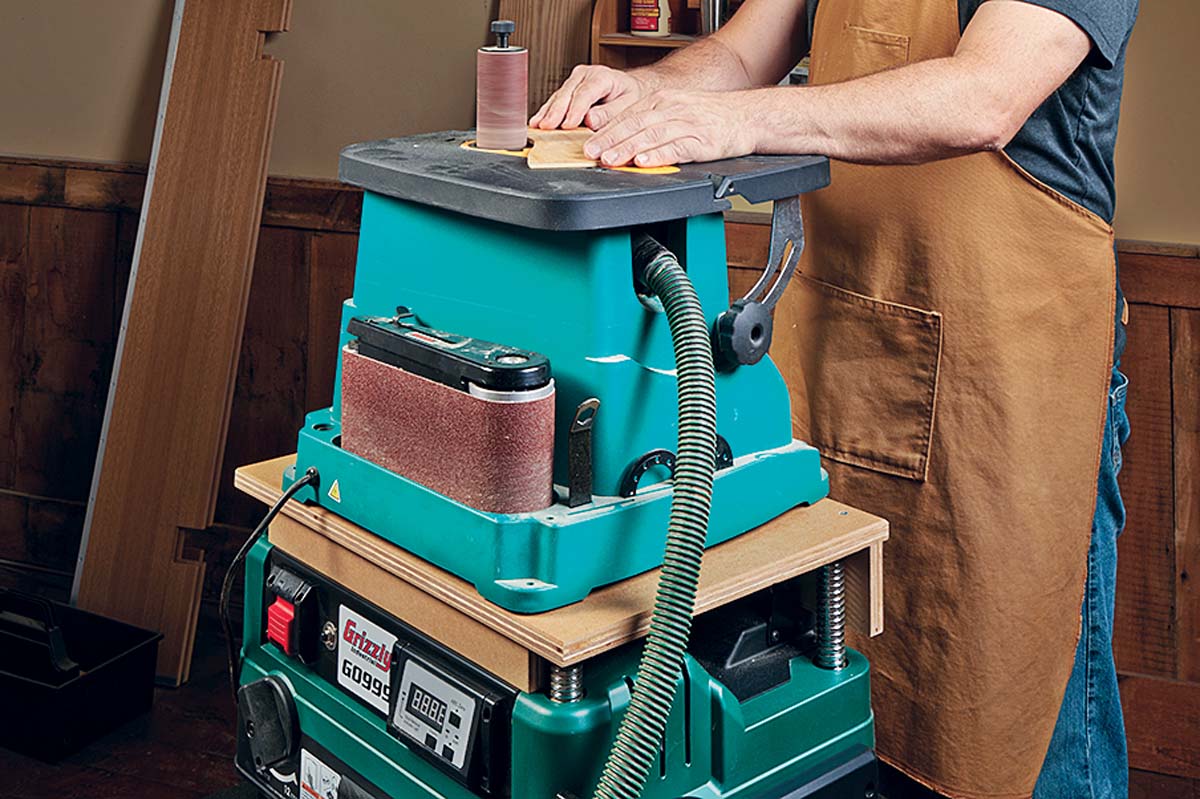
The top is easy to remove when she needs to use the planer, and it turns otherwise awkward space into a stable, useful surface between milling sessions.
Woodsmith Tip: Remove the auxiliary top and clear all tools and loose items from the machine before operating the planer. Keep the top from covering ventilation openings or interfering with the machine's controls.
Shop tip submitted by Pam Oslund, Cape Girardeau, Missouri.
3. Sift Sawdust for Smoother Homemade Wood Filler
Making your own wood filler from sawdust and glue is a handy way to fill small cracks, gaps, and other minor defects. Using dust from the same wood species can also help the repair blend with the surrounding material.
But sawdust collected directly from a sander or other machine often contains a mix of fine particles and larger chips. Those coarse particles can make the filler lumpy and difficult to spread smoothly.
Marc Hopkins of Des Moines, Iowa, came up with an easy way to improve the consistency of his homemade filler: He sifts the sawdust through a small strainer before mixing it with glue.
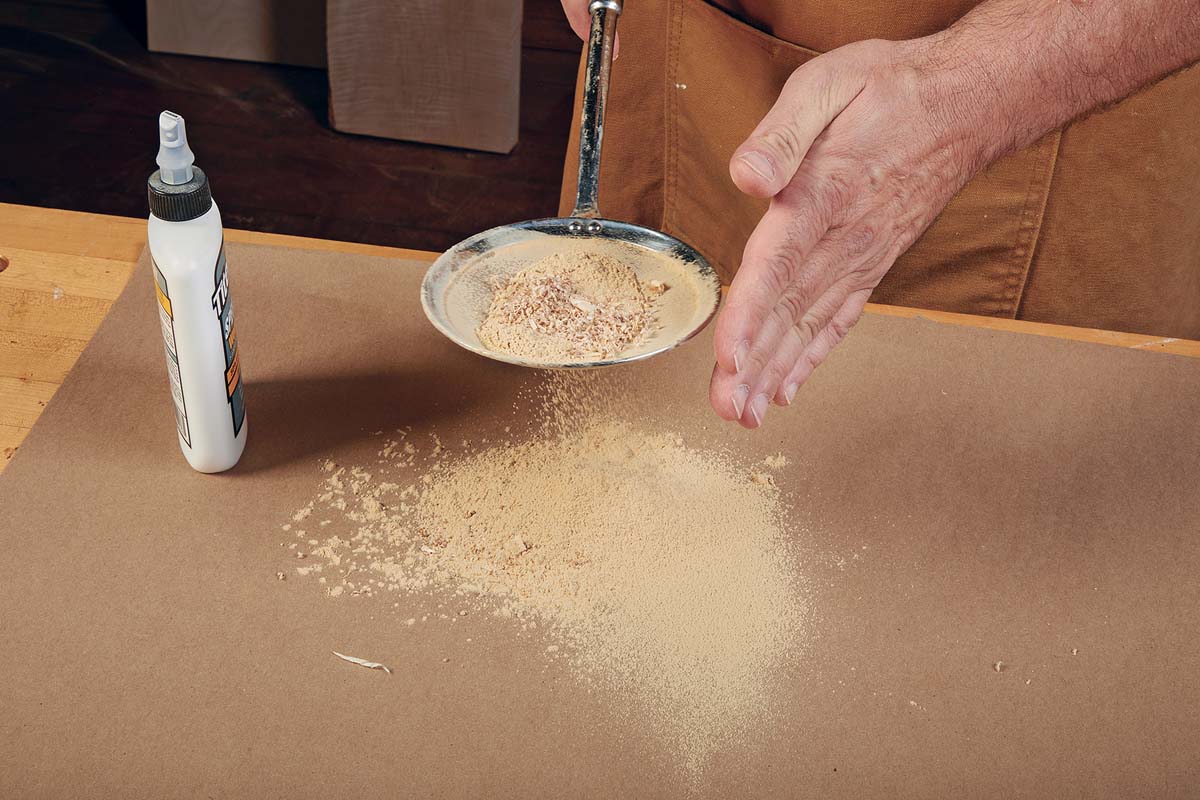
The fine particles pass through the strainer, while the larger pieces are separated out. Marc uses the fine dust to make a smoother, creamier filler that's easier to work into small defects.
For the closest color match, collect the dust from a piece of scrap that matches your project. Mix in glue a little at a time until the filler reaches a workable consistency, then apply it to the defect.
Keep in mind that glue-based filler may absorb stain or finish differently from the surrounding wood, so it's worth testing the mixture on scrap before using it in a highly visible area.
Shop tip submitted by Marc Hopkins, Des Moines, Iowa.
Make More of the Space and Materials You Already Have
These three woodworking tips are good examples of getting more from everyday shop materials. A folding foam mat makes plywood cutting practical in a small space, a removable planer top creates another useful surface, and a simple strainer improves the consistency of homemade wood filler.
None of these ideas requires a complicated build. They're small, practical improvements that can make your next project a little easier.


