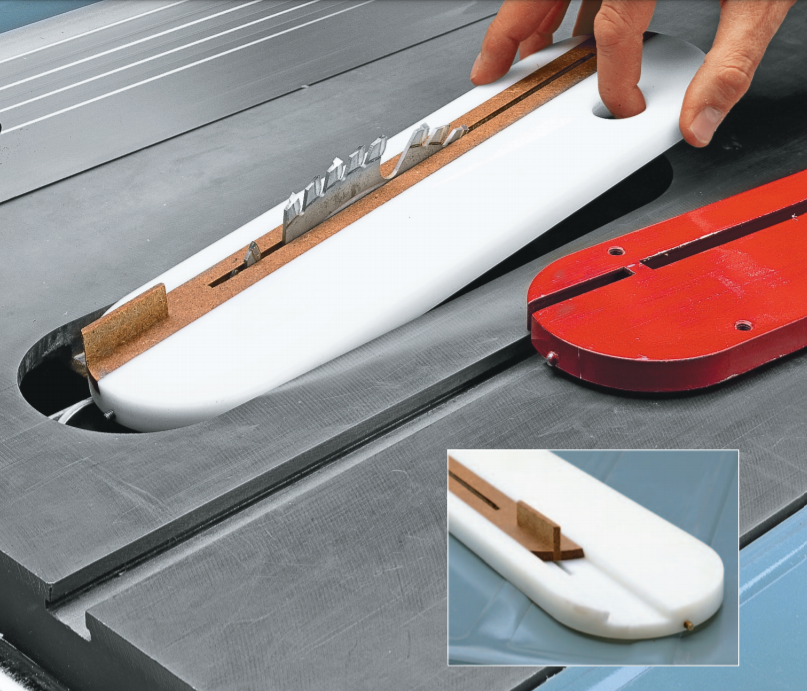
Ripping is usually a pretty simple task. When the workpiece is fairly narrow, however, I often run into a challenge. The strip falls into the opening between the saw blade and the insert. I needed to find a way to keep this from happening. Otherwise, a strip can get wedged into the opening and kick back. Fortunately, the solution is simple — replace the metal insert that comes with the table saw with a zero-clearance insert that has an opening that’s the same width as the blade, like the one shown in the photo below.
This prevents a strip from getting jammed in the opening. And since the insert supports the workpiece right up next to the saw blade, it also reduces chipout on the bottom. Although the idea of a zero-clearance insert has been around awhile, this one has a couple of advantages over others I’ve seen.
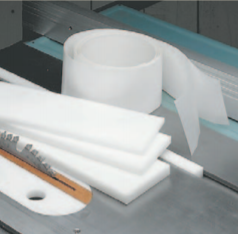
First, it’s made from a special material called Ultra-High Molecular Weight (UHMW) plastic. This plastic is extremely slick, so the workpiece glides across the insert as you make a cut. Another thing I like about UHMW plastic is that it won’t expand and contract with changes in humidity. So once I cut it to fit a particular jig, I don’t have to worry about it binding (or getting sloppy) as the seasons change.
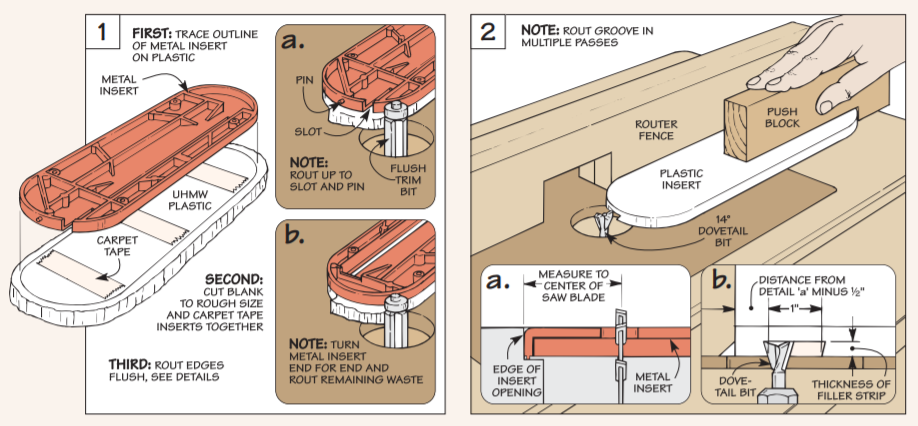
Another unique thing about this insert is that it has a replaceable filler strip. This way, if you have several different blades that cut different width kerfs, you can just slip in the correct filler strip.
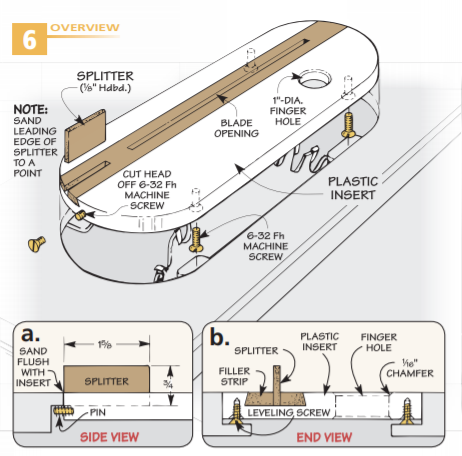
You can also add a splitter to this replaceable insert. It’s a piece of 1⁄8" hardboard that fits in a slot in the end of the filler strip. Once the short slot is cut, you can glue in the splitter. Then, to avoid “catching” a workpiece, simply sand the leading edge to a point.
The only thing left to do is add some leveling screws and you're ready to start making clean, safe cuts at the table saw.