Ripping a board to width may be one of the most basic table saw techniques, but that doesn't mean it's a cut to take for granted. One of the biggest concerns is kickback — when the workpiece is caught by the blade and propelled back toward the operator.
Good table saw setup and workpiece control go a long way toward reducing that risk.
Three simple helpers make a big difference: a splitter or riving knife, a featherboard, and a push block. Each performs a different job, and together they help keep the workpiece moving smoothly and under control throughout the cut.

RELATED ARTICLE: 5 Essential Woodshop Safety Tips for Woodworkers
Use a Splitter or Riving Knife
A splitter positioned directly behind and in line with the saw blade helps prevent one common cause of kickback.
As the workpiece moves through the blade, the freshly cut kerf passes around the splitter. This helps prevent the kerf from closing around the back of the blade and pinching it.

The setup shown here uses a shop-made splitter, which can be a useful addition to a saw that doesn't have a suitable splitter or riving knife. If your table saw is equipped with a manufacturer-designed riving knife or splitter, use it according to the saw's instructions.
Keeping the kerf open can also help reduce burning and produce a cleaner rip cut.
Woodsmith Tip: Keep It Aligned. A splitter needs to be aligned with the blade so the workpiece can pass it without binding. Check its position whenever you change blades or make adjustments that could affect alignment.
RELATED ARTICLE: How to Make a Zero-Clearance Insert for a Table Saw
Add a Featherboard for Better Control
Keeping the workpiece firmly against the rip fence is another important part of making a controlled rip cut.
That's where a featherboard comes in.
A featherboard applies steady sideways pressure to the workpiece, helping keep its edge against the rip fence as you feed it through the blade.

Position the Featherboard Before the Blade
Placement is important.
The featherboard should apply pressure in front of the saw blade, not alongside or behind it. Once the workpiece reaches the blade, the cut begins to create two separate pieces. Applying sideways pressure at or behind the blade can push the kerf closed and create a potential binding problem.
Adjust the featherboard so it provides firm pressure without making the workpiece unnecessarily difficult to feed.
Use a Push Block to Maintain Control
As the end of the board approaches the blade, you still need a way to provide forward and downward pressure while keeping your hands away from the cutter.
That's the job of a push block.

The simple shop-made push block shown here has a thick heel that hooks over the back of the workpiece. This provides positive forward pressure while the broad body of the push block lets you apply downward pressure to keep the board flat against the table.
That combination gives you control over the workpiece throughout the cut without placing your hands close to the blade.
A sacrificial push block may be designed so the blade passes into or through its replaceable body during the cut. If you use this type of push block, make sure its design, dimensions, and use are appropriate for your saw and cutting operation.
RELATED VIDEO: My Favorite Shop-Made Push Block
Three Helpers, Three Jobs
Each accessory contributes something different to the rip-cut setup:
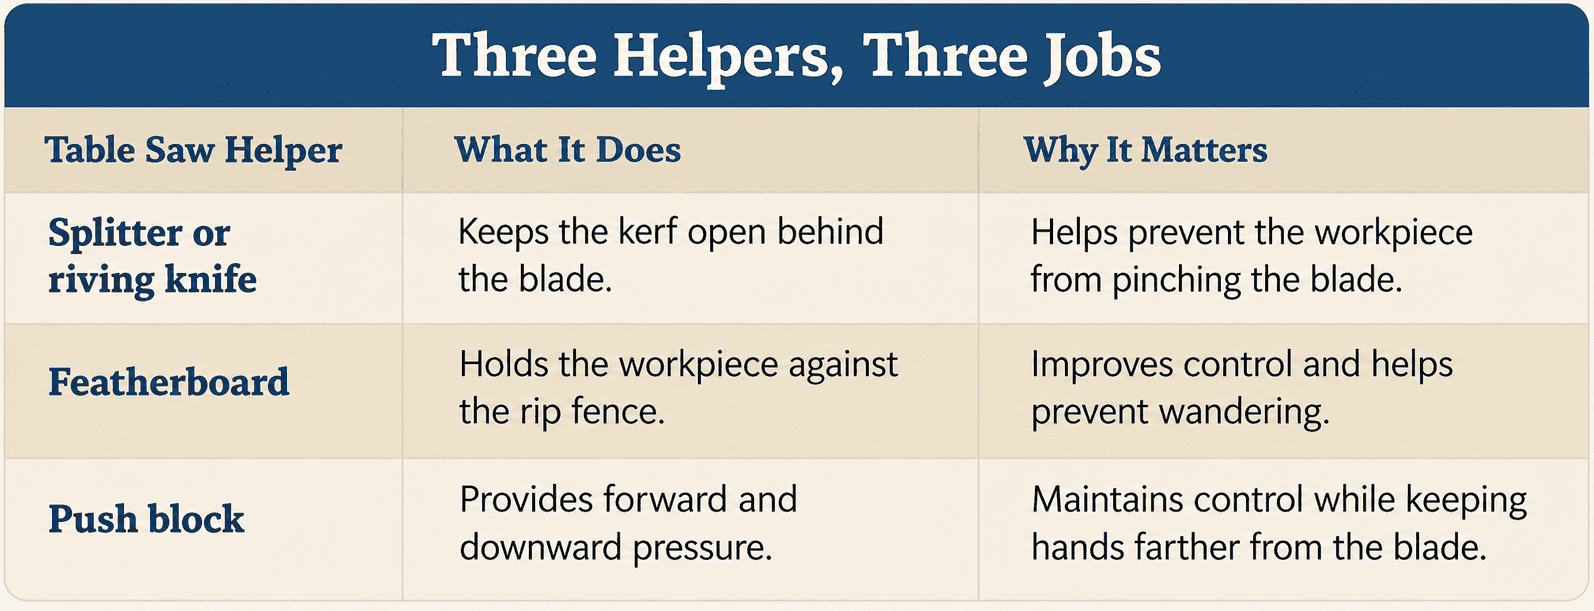
Used together, they help control the workpiece behind the blade, alongside the fence, and from above.
Make Safer Ripping a Routine
The real advantage of these accessories comes from making them part of your normal table saw setup rather than something you reach for only when a cut looks difficult.
Before making a rip cut, check that the blade, fence, splitter or riving knife, and featherboard are properly positioned. Make sure the workpiece is suitable for the operation and plan how you'll maintain control through the entire cut.
Then use a push stick or push block appropriate for the workpiece and operation to keep your hands safely away from the blade.
A few extra moments spent setting up the cut can give you better control, cleaner results, and a safer trip through the table saw.
Better Cuts Start with a Well-Maintained Saw
Good technique is only part of getting safe, accurate results. Keeping the blade, fence, tabletop, alignment, and other components in good working order helps your table saw perform the way it should.
TABLE SAW MAINTENANCE TIPS → Keep Your Table Saw in Top Shape