

A coat of paint is a great way to add a splash of color to a woodworking project. But don’t fall into the mindset that you’re limited to the paint that is available at your big box stores. While water-based latex is great for some things (like sealing the ends of logs), do yourself a favor and break out of that box and take a look at a few traditional types of paint — milk paint and linseed oil paint.
MILK PAINT
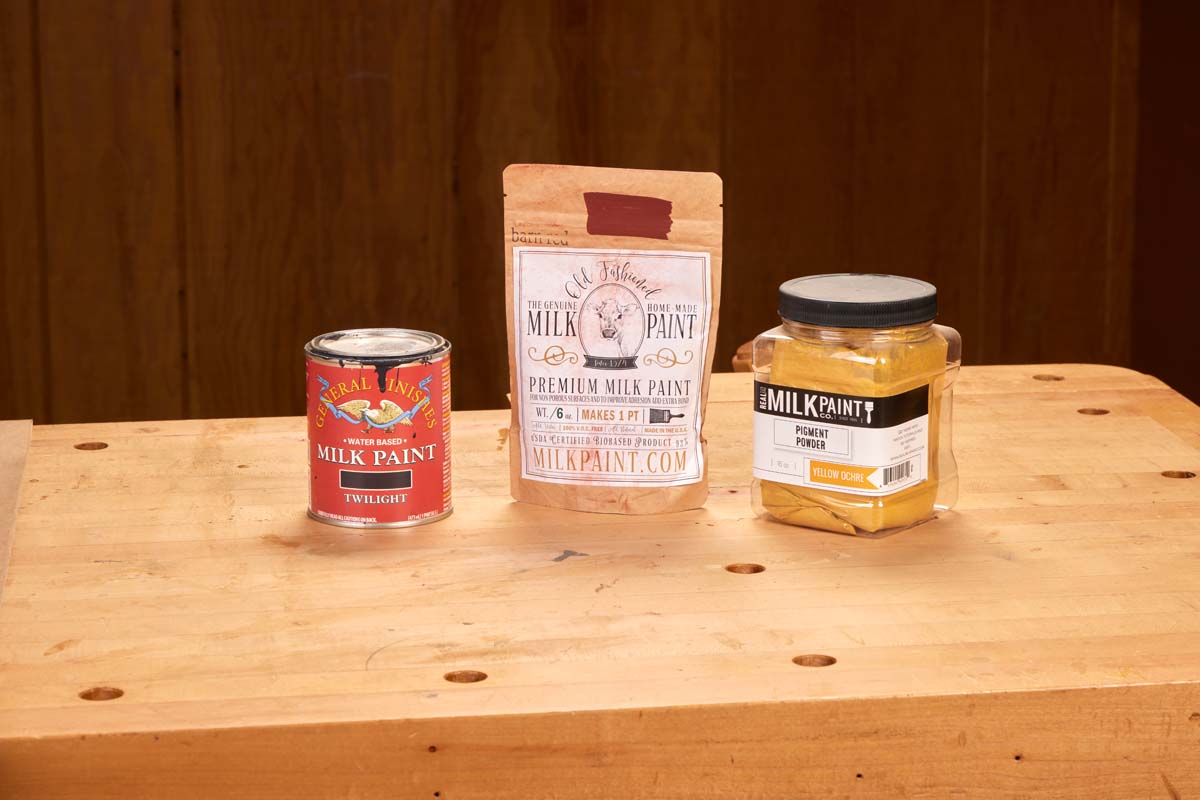 |
| Left to right: pre-mixed milk paint that comes in a can, and two options for powdered milk paint. |
I’m sure that most of us have seen milk paint in one form or another. Unfortunately (or fortunately), the milk paint that is plastered all over craft stores and “up-cycled furniture” isn’t representative of traditional milk paint. Traditional milk paint is made with a milk protein called casein. It generally consists of casein, lime (or borax), and a pigment. You can see a few options for modern, quality milk paint in the photo above.
CHOOSE YOUR STYLE.
Modern milk paints come in a few types. Some, such as General Finishes (technically an acrylic with no casein), are pre-mixed, and ready to go. Others, come in a powdered form and you must mix them as needed. This is my preferred type — I can mix how much I need at a time and to the consistency that I need.
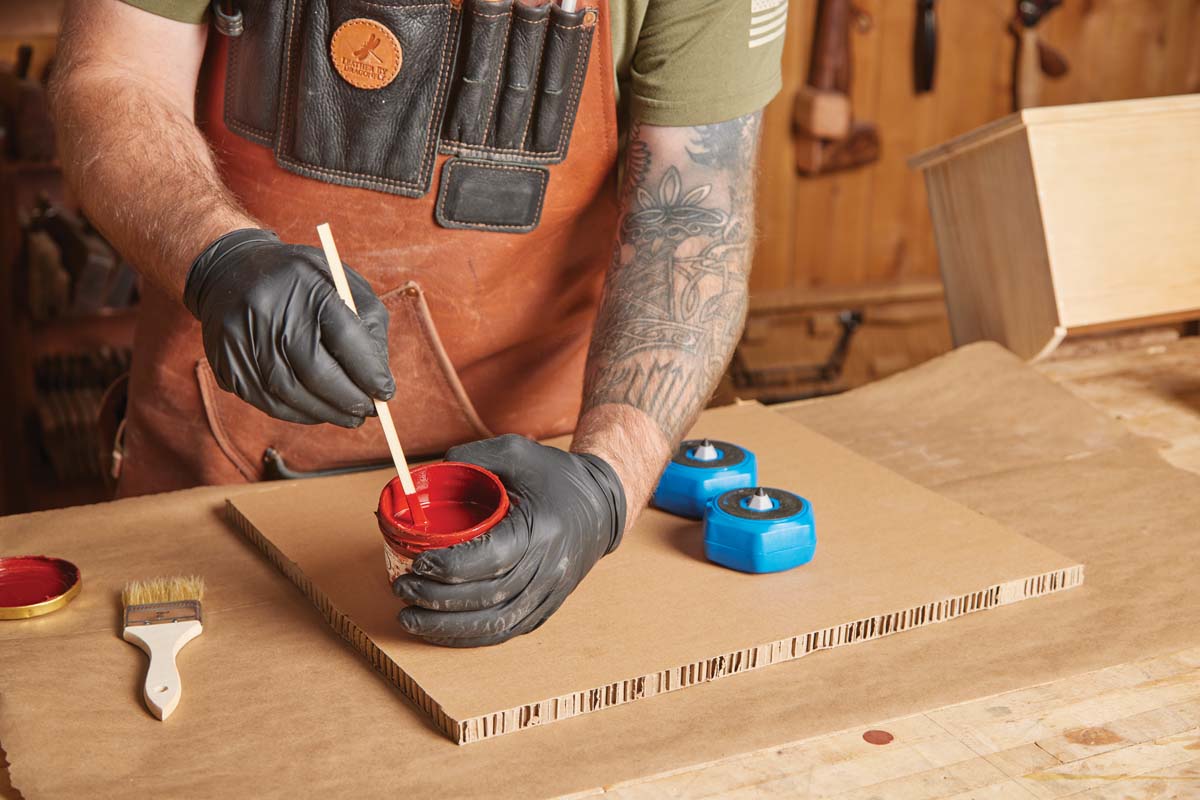
There’s a trick with using powdered milk paint, however. It starts with a proper and thorough mixing. The photos below walk you thorough this process. The biggest thing is that there’s no right or wrong — if you add too much water, add more powder. If it’s too thick, add more water. You know, the same thing you do when mixing up pancakes (because who reads the measurements anyways?). I shoot for a 1:1 (volume) ratio of water to paint, then adjust as the situation deems fit.
 |
 |
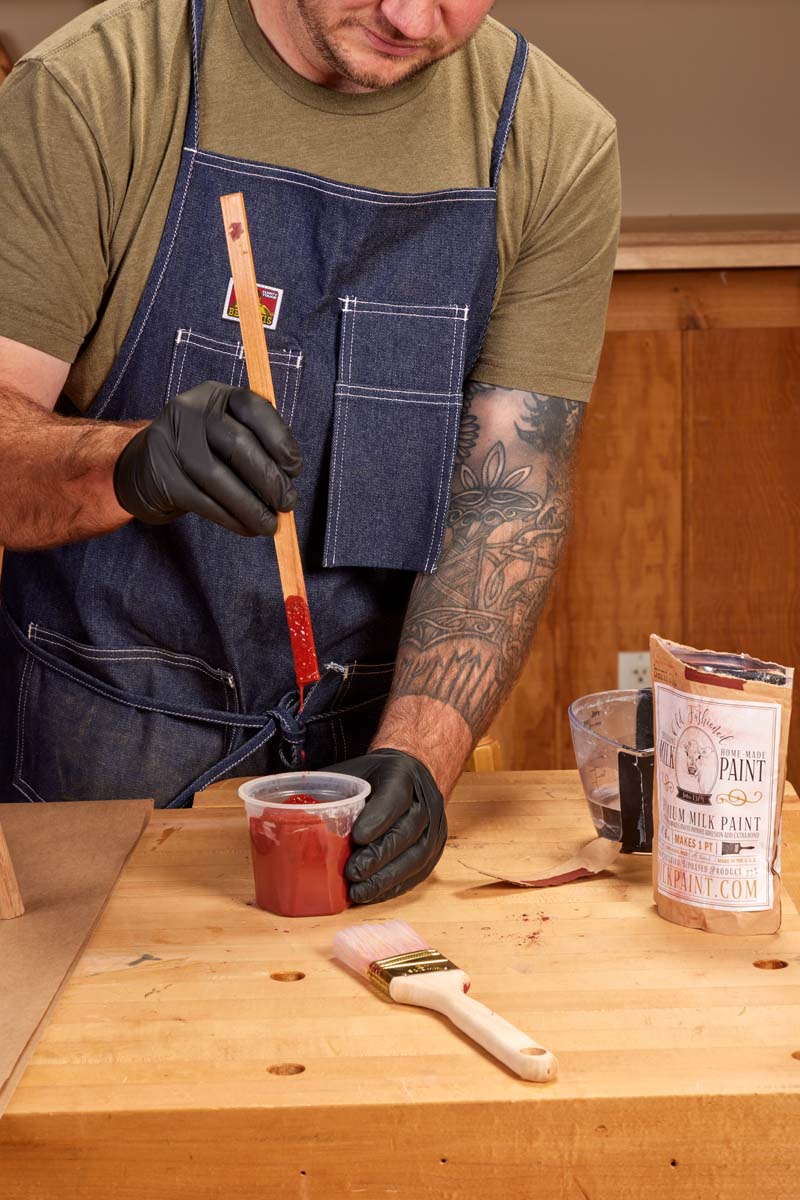 |
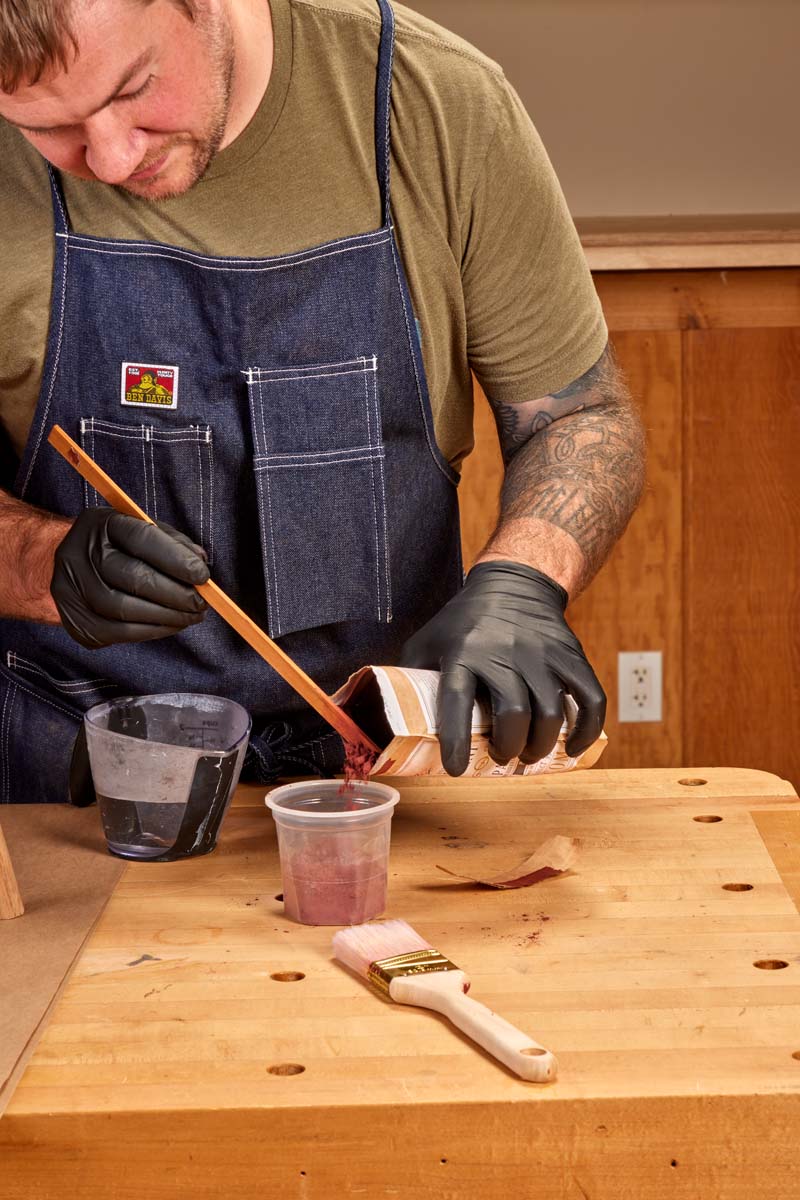
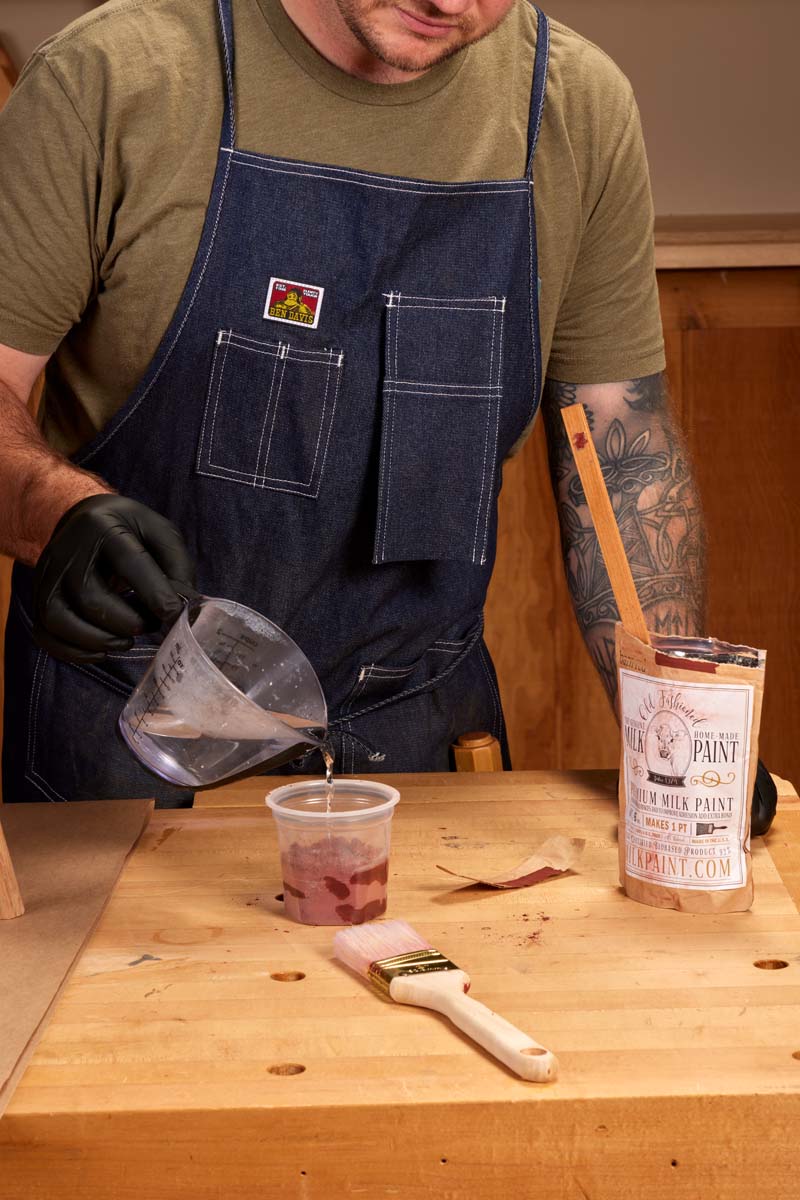
| Guestimate how much paint you’ll need for your project and pour it into an appropriate container. | Using hot water will help dissolve the paint. Generally, I aim for a 1:1 (volume) ratio of water to powder. | Mix and mash until you get something about as thick as heavy cream. Not watery, but not curdled either. |
Now here’s where I can’t stress enough — mix the ever-loving snot out of the paint. The dry milk paint likes to stay clumpy. Some people use an immersion blender to mix up the paint, and it wouldn’t be a bad idea. I tend to use a stout stirring stick and just mash it around as much as I can. It’s inevitable that you’ll be left with a few chunks. Depending on your application, you can ignore them and brush them out. That’s what I did on this windsor style chair — the red was a base coat, so a little powder was fine. If you are looking for a fine finish, then you can pass the mixed paint through a paint strainer to remove the chunks.
BRUSH IT, SPRAY IT, STICK IT IN A STEW.
Milk paint, once mixed, can be applied however you’d like. For a larger project, I’ll spray it with a 2.0mm spray tip. For smaller projects, I’ll bite the bullet and brush it on. It goes on easily, and dries fast. Once dry, you can inspect the surface and see if it needs an additional coat. A good layer of milk paint will have a soft feel — some have called it velvety. Light sanding can be done to add an aged appearance. You can also add a top coat to change up the hue and sheen of the finished surface.
The original oil — Linseed Paint
 Leaving the world of water-based paint, we wander into the land of oil-based paint. I’m not talking about that petroleum-based junk that you can buy at the store either. Back before World War 1, almost all oil paint that you’d find would be made from linseed oil. The cold-pressed flaxseed oil makes a wonderful carrier for pigment and has some great benefits — more on that in a bit.
There are several companies once again making linseed oil paint, and I think we’ll see more and more as people rediscover this lovely option. The paints you see here are from Allbäck (sold by SageRestoration.com).
SUPER PAINT.
So what makes linseed paint better than regular oil paint? Well, first of, it’s all natural and not petroleum based. The linseed oil carries the pigment deep into the surface of the wood. This means it’s actually adding protection to the wood from the inside out, not just as a top coat.
Linseed paint also allows moisture to pass freely through it. Because it doesn’t create a barrier, there is zero chipping or peeling that occurs with linseed paint. There’s a reason that the Scandinavian region has used linseed paint for decades — look at any Scandinavian town and you’ll see buildings and doors painted with rich colors that withstand harsh weather. That’s thanks to linseed paint.
UNIVERSAL PAINT.
Finally, one of the other great things that I’ve found about linseed paint is that it’s universal. What I mean by that is that it sticks to almost any material without a primer. Metal, wood, brick — it sticks to it all. Just make sure to have a good surface — see the photos at left for tips on repairing blemishes. I dislike painting (ironic, as I’m writing about it), so any thing that allows me to avoid more painting (such as a primer coat) is a plus in my book.
PRE-MIXED.
Linseed paint comes in pre-mixed jars, such as you see in the top photo on the previous page. That doesn’t mean that you can just shake it and be good. Linseed oil has such a high amount of solids that it can takes a long time to get mixed back in. Much like the milk paint I talked about previously, you’ll want to mix vigorously. As you’re mixing, you’ll feel a sludge in the bottom — break it up and mash it. After a few minutes it will mix back into the rest of the paint.
 |
| When mixing the linseed paint, scrape the bottom of the jar to help mix back in all of the settled pigments. |
BRUSH IT ON.
One of the first times that I used linseed paint, I remember telling Phil that I believe it changed the way I feel about painting with a brush. Linseed paint brushes on so well. I don’t know if it’s the oil carrier, or that the paint just seems to stretch so much further (about 2x as far as normal paint), but it’s a great paint to work with. I’ve found that a cheap chip brush works great —I’m sure a nice “linseed” specific brush would work even better, but I don’t feel like I need to clean up a chip brush.
Linseed paint does take a long time to dry, depending on the conditions — I always start with hard to reach places so I avoid dragging my arm over wet surfaces. After I’ve covered the surface, I’ll get at a low, raking angle and check and see if there are any drips or runs. Usually, I don’t have any as the linseed paint is pretty thin and absorbs quickly.
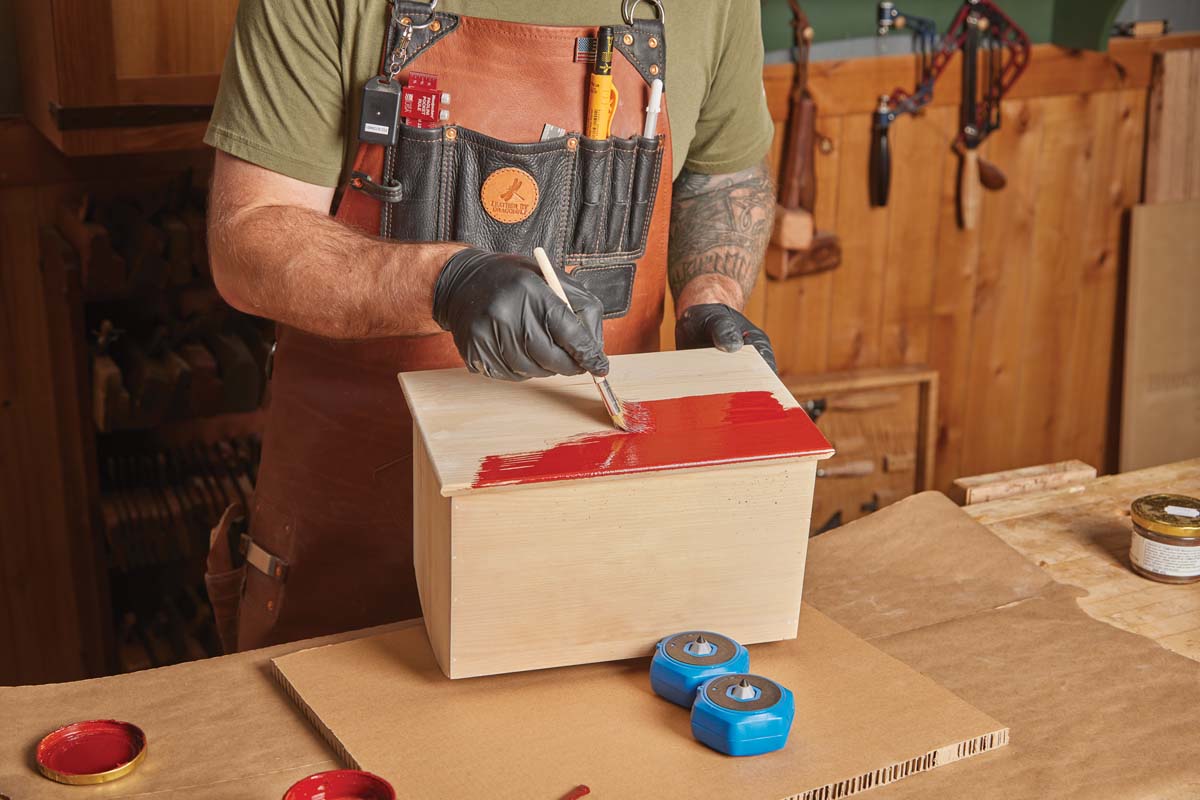 |
| Start with the hard-to-reach areas and brush on the paint. A little bit of the linseed paint goes a long way. |
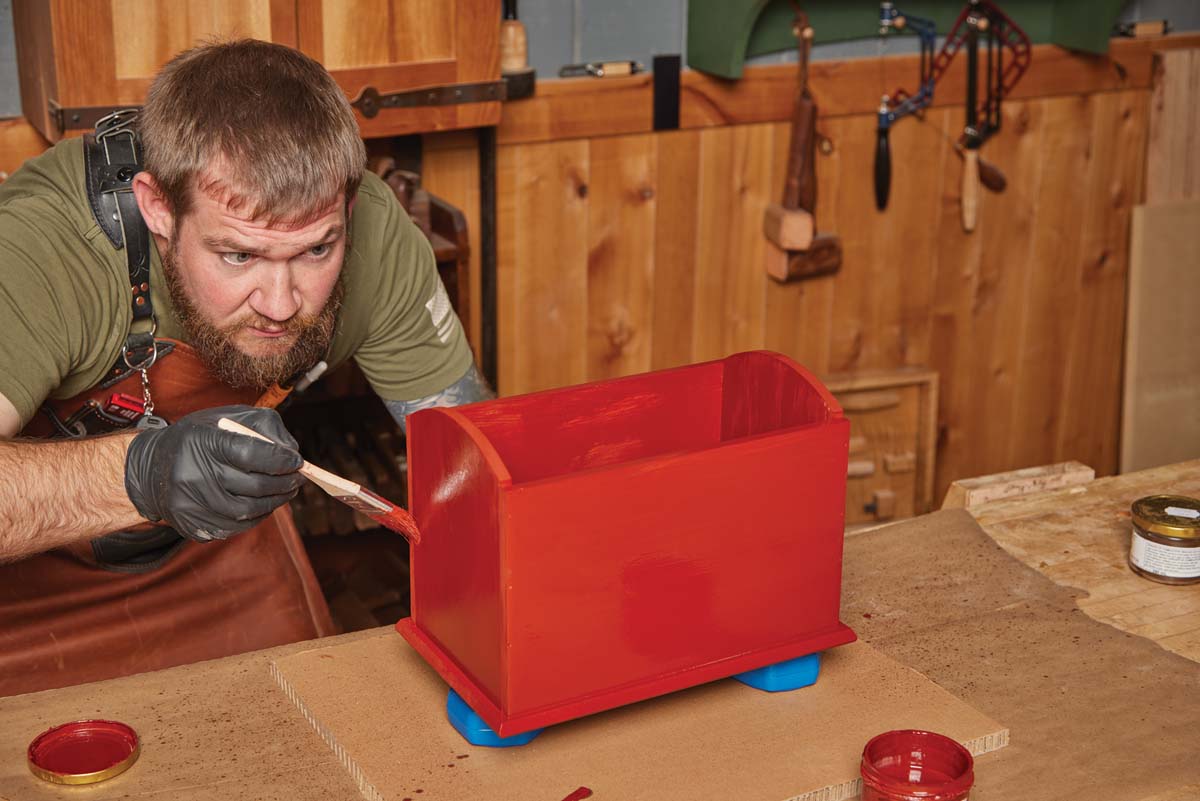 |
| As you finish covering the surface, stoop down low and look for any drips, sags, or thin areas and brush them out. |
CLEANUP AND TOP COAT.
Cleaning up linseed paint is done with linseed soap. This soap is dissolved into water and used to clean up brushes and any errant spills. Once your project is covered, let it sit. Seriously, for a week if possible. I’ve found there’s always one or two spots that take forever to dry, and will leave a smear of color on your new shirt.
TOP IT OFF.
Both milk and linseed paint can be top coated. Wax is a great option for both of them — the right photo below shows me applying All-bäck linseed wax to the linseed oil paint. Notice the change in hue and sheen. Linseed oil paint can also be top coated with linseed oil for additional sheen.
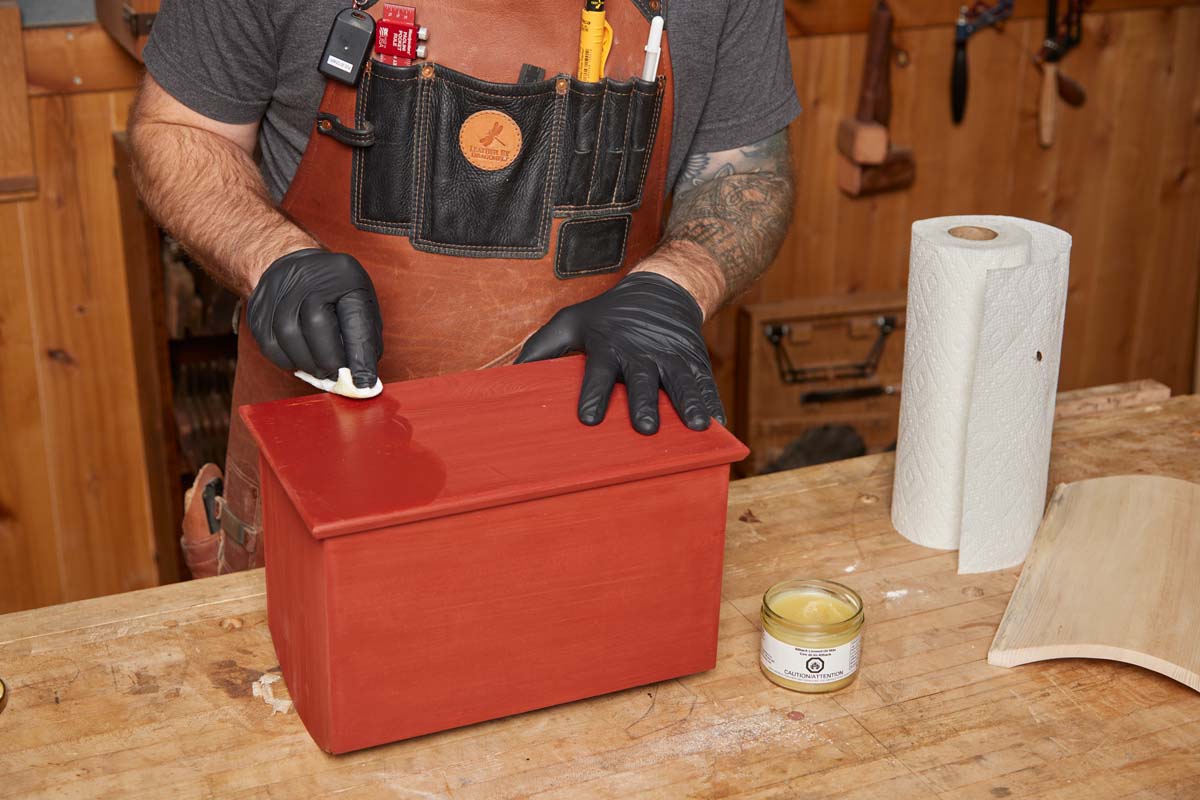 |
| As an optional top coat, add a layer of linseed oil wax. It provides additional protection, sheen, and depth of color. |
Repairing Blemishes
 |
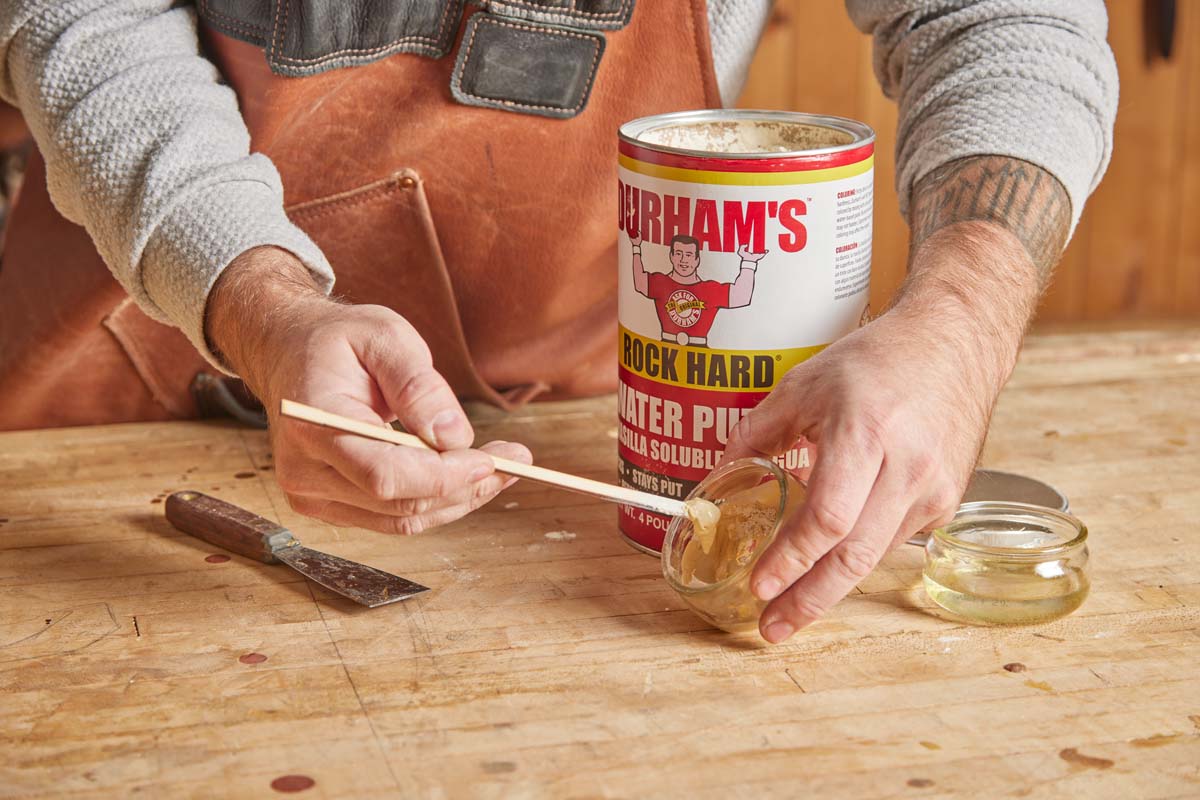 |
| A quality filler will go a long way in hiding surface imperfections. Durham’s is a water-based putty that can be painted. | I mix up the putty until it has a peanut butter like consistency. For packing end grain, I add additional water to dilute it. |
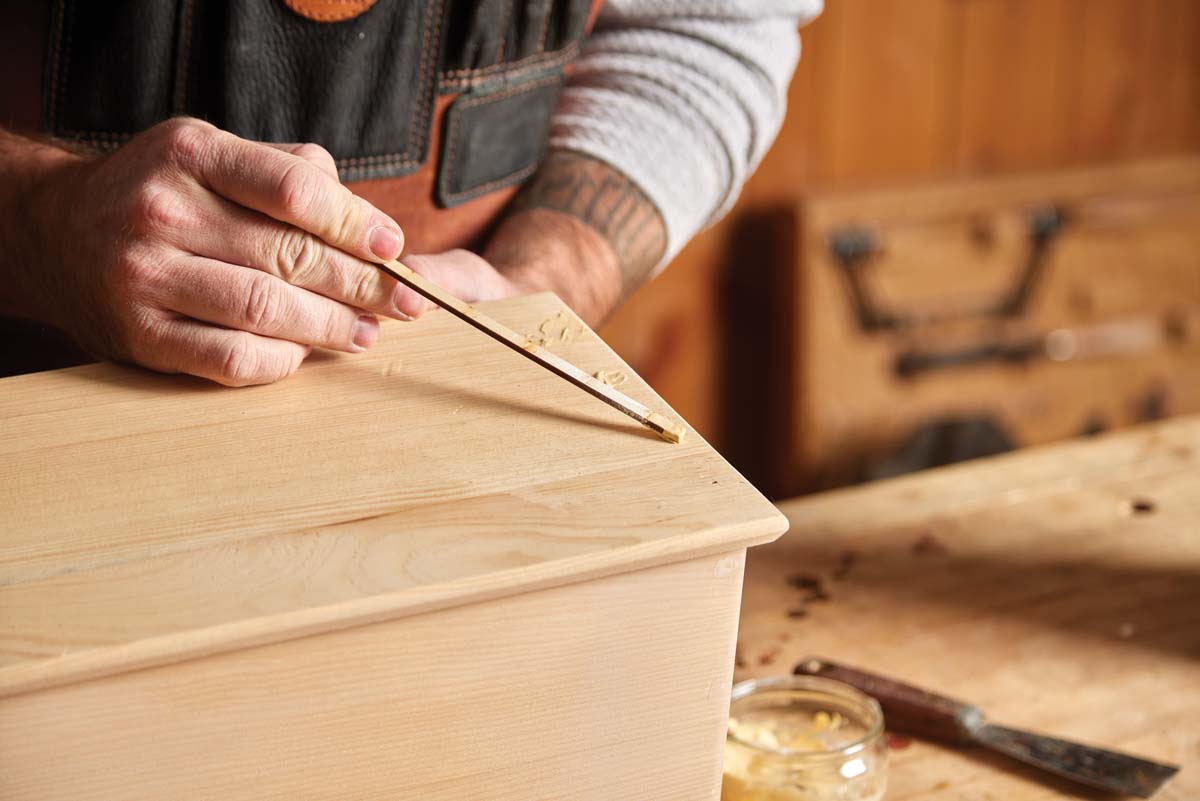 |
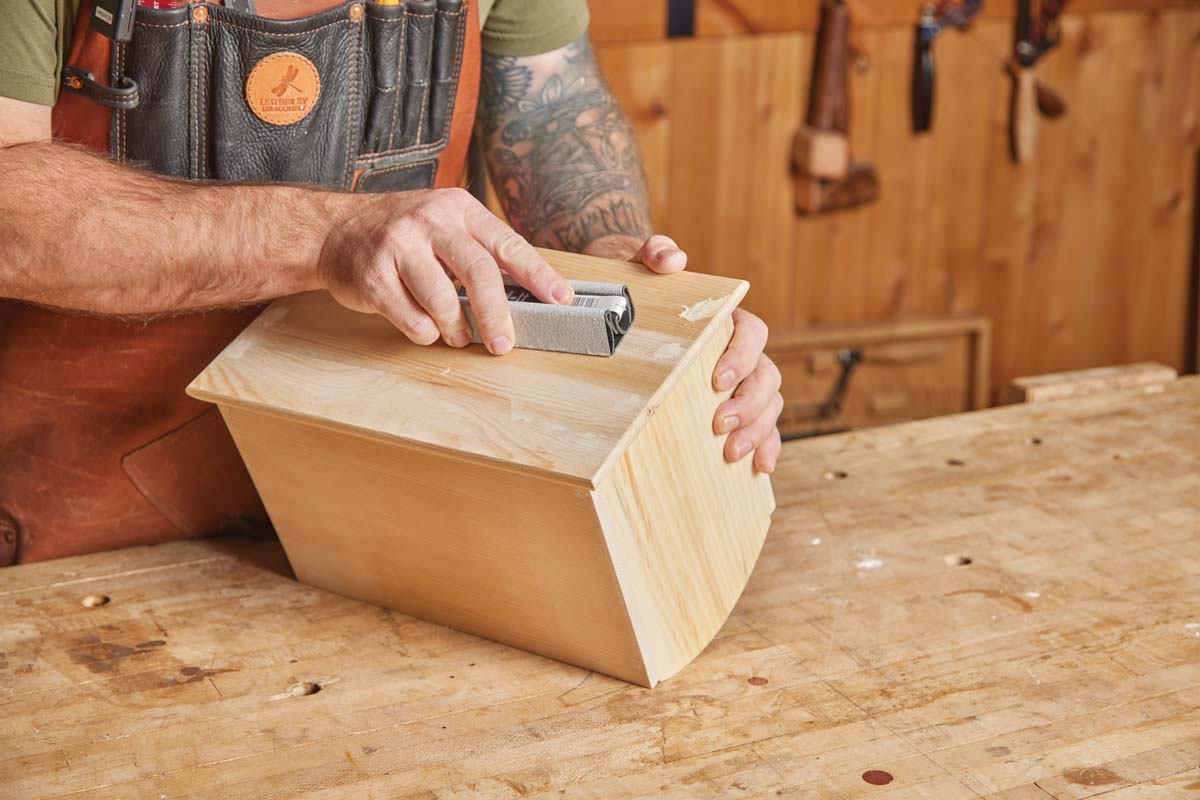 |
| Smear the putty over any blemishes. Here, I mash it down into the nail holes, making sure the hole is filled. | Use a hard sanding block to sand the putty areas and bring them flat with the surrounding surface. |


