Putting a square edge on a board is the first thing most woodworkers think of when using a jointer. But there’s another job it does that I think is even more important — flattening the face of a board. Actually, it’s the first thing I do with lumber that comes into my shop. The process I use isn’t complicated and only takes a few minutes. But by following these steps, you’ll establish a flat reference face for cutting parts to size, getting square edges, and cutting accurate joinery.
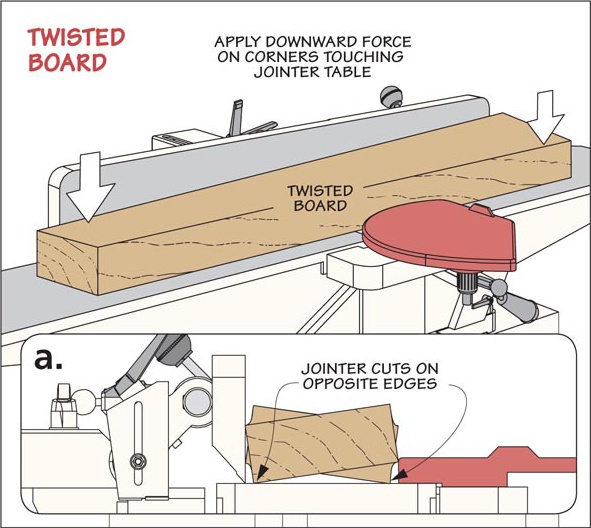
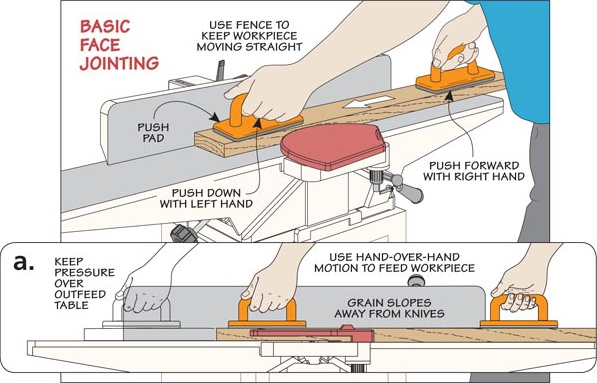
First, you want to pay attention to the grain direction of the board. To prevent tearout, the grain on the edge of the board should run up and away from the jointer table. You can see this in detail ‘a.’ A second way to avoid tearout is to take light cuts (about 1/32" - 1/16").
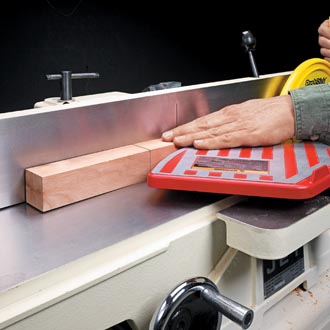
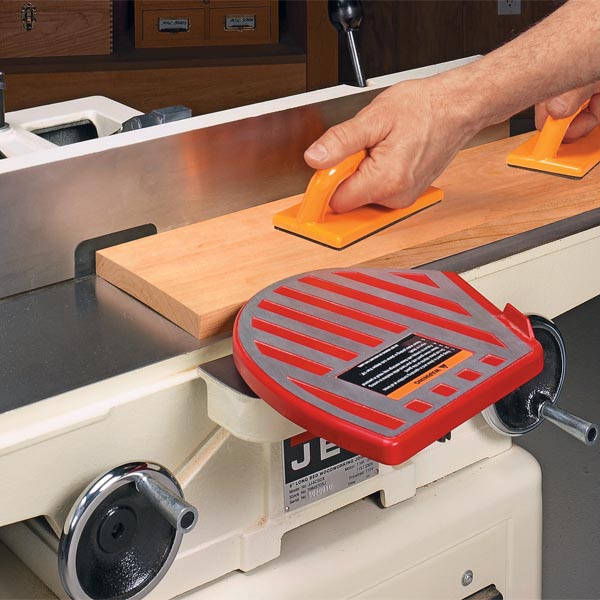
Then, as you move the board across the cutterhead, you want to concentrate pressure on the outfeed table with your left hand. Your right hand only serves to push the workpiece forward.
As you look over a board before jointing, you’re likely to see one or more problems. The board might be cupped, bowed, or twisted.
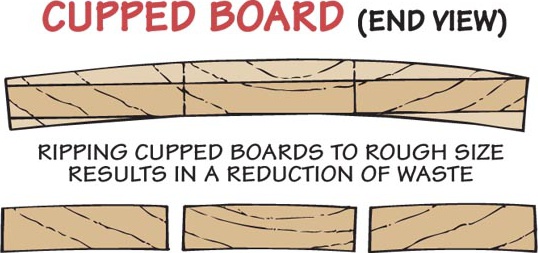
A cupped board is the simplest problem to take care of. Joint the workpiece with the cup facing down. The edges give the board a solid stance. Then, as you joint the face, apply just enough pressure to keep the board moving. Too much pressure can press the cup flat. When you let go, it will spring back and you’ll still have a cupped board.
If a wide board has a lot of cup in it, you could spend a bit of time — and waste a lot of wood — trying to flatten the face. To save both time and material, it’s a better idea to rip the board into narrower pieces so you can almost eliminate the curve. And you’ll end up with thicker stock, too.
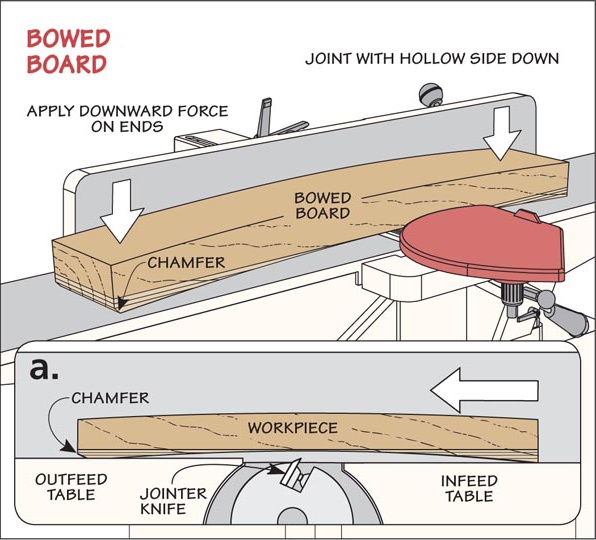
Another common problem you’ll find is a board that’s curved along its length. This is called bow. Like a cupped board, you want to work with the hollow side down. But getting a flat face here requires a slightly different approach.
The idea is to remove material only at the ends where the board is touching the jointer. It’s even easier in this situation to press the board flat as you move it across the jointer. So it’s important to only apply pressure on the ends.
Twist is another problem you may find with lumber. And it seems like the most challenging to deal with since only two corners of the workpiece are in contact with the jointer tables at the start of the cut. The key here is applying pressure only at the corners. Steady progress will bring the other corners and more surface area into contact with the jointer. At this point, I usually find that the board is either cupped or bowed as well. So you’ll need to take the steps I mentioned earlier.
The ultimate reward for your efforts is a smooth, flat face. But even more importantly, it puts you on the right path to projects that fit and look better.