

Building the plywood projects on page 26 reminded me that navigating large sheets of plywood can be a challenge — regardless of the size of your shop. But here you’ll find answers, tips, and tricks on how to deal with this ubiquitous material.
First, we’ll look at storing and moving plywood around without damaging the goods, or your back, and avoiding splinters along the way. Then we’ll examine some tactics for both rough-cutting the material down to size, then honing in on chipout-free final pieces. Let’s start by getting the plywood safely in the shop.
STORAGE
 |
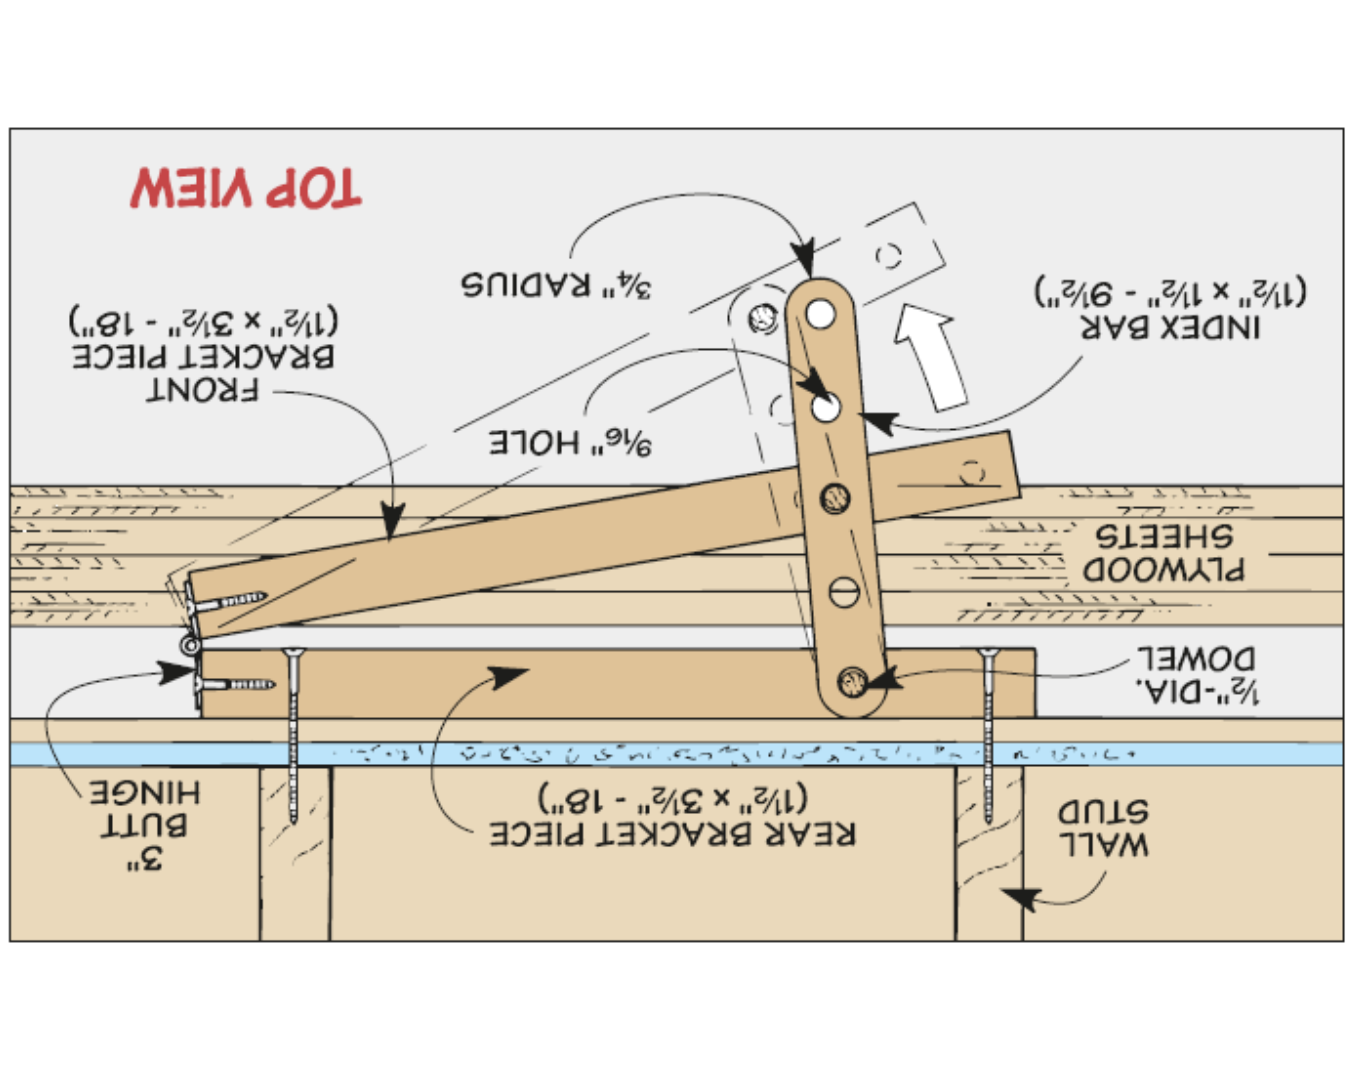 |
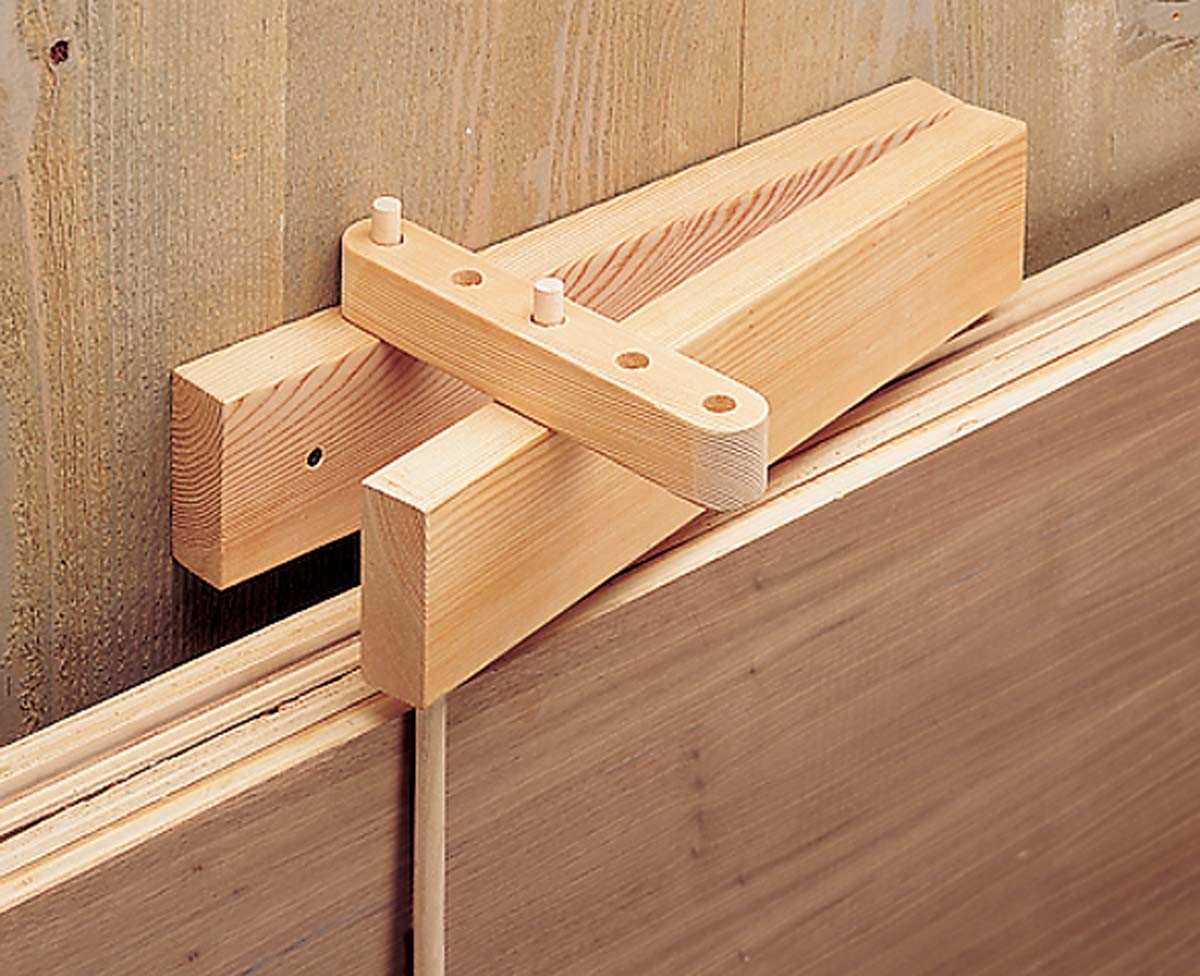
| The hinged bracket is anchored to the wall and expands to accommodate multiple sheets of plywood. |
I like to cut up the plywood for my project right away. But there are times I can’t always do that. So I came up with a way to store plywood sheets nice and flat until I can.All you need to do this is some free wall space and the storage bracket shown in the photo to the left, and the drawing underneath it.
The wall bracket consists of two parts: a hinged bracket attached to the wall that holds the plywood in place, and an index bar that adjusts the opening of the bracket to allow for varying amounts of sheet goods. The hinged bracket is nothing more than two 2x4s joined together at one end with a 3" butt hinge. You’ll also notice that there’s a 11⁄22"-dia. dowel glued into the top of each 2x4.
 |
These dowels fit in holes drilled into the index bar so you can adjust the front bracket piece. The plywood is held against the wall with another 11⁄22"-dia. dowel (8" long) that’s glued into the bottom of the front bracket.
I ripped the index bar to width from a short length of 2x4. Once you have it cut to size, the holes can be drilled. Then, to soften the sharp corners and allow the index bar to clear the wall, I sanded a radius at each end of the bar.
To use the storage bracket, select a hole in the index bar that takes the most slack out of the front bracket. When you want to sort through the stack, just set the index bar so the dowels are in the outside holes. Storing plywood is only part of the challenge, next let’s look at two shopmade aids that ease the lugging around of large sheets of plywood.
CRUISING WITH A DOLLY
 |
 |
| Maneuvering plywood is easy when using the dolly. Just place the single wheel on the end you want to steer. |
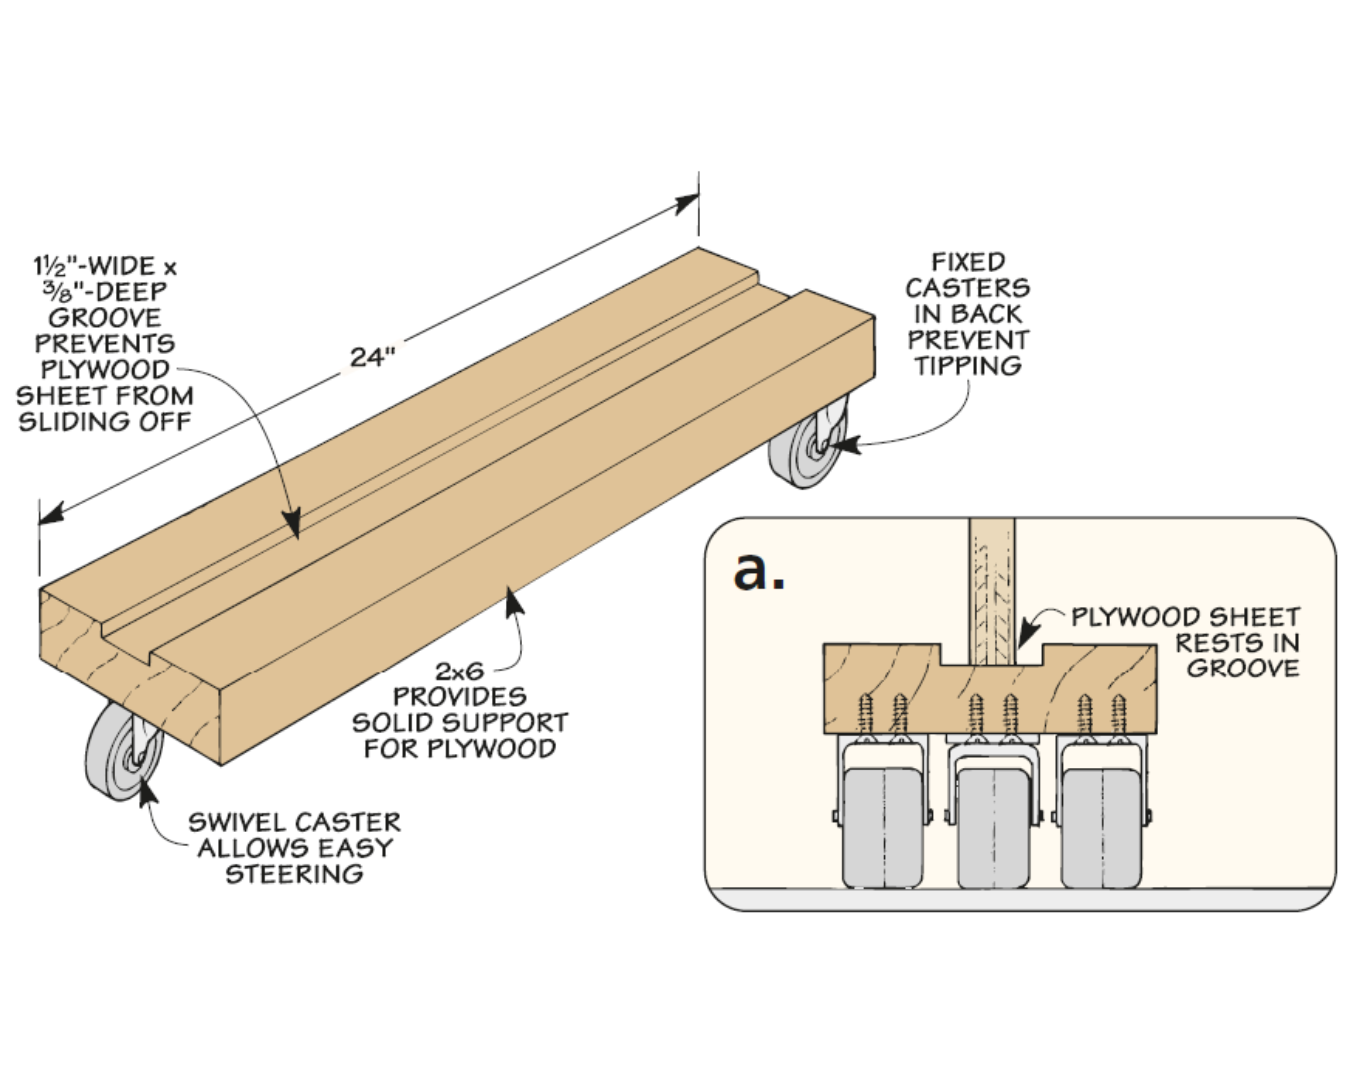
To avoid having to carry plywood around the shop, I made a “skateboard” from a piece of scrap 2x6 and a set of casters, like you see in the photo below.
To ensure the plywood doesn’t slip off the top as you’re moving the sheet around, there’s a shallow groove cut down the center of the top, as illustrated in the drawing below. And to make it easy to steer, the caster at one end swivels.
A HANDY TOTE
 |
 |
| The tote is made from scrap material and helps ease the burden of moving plywood. |
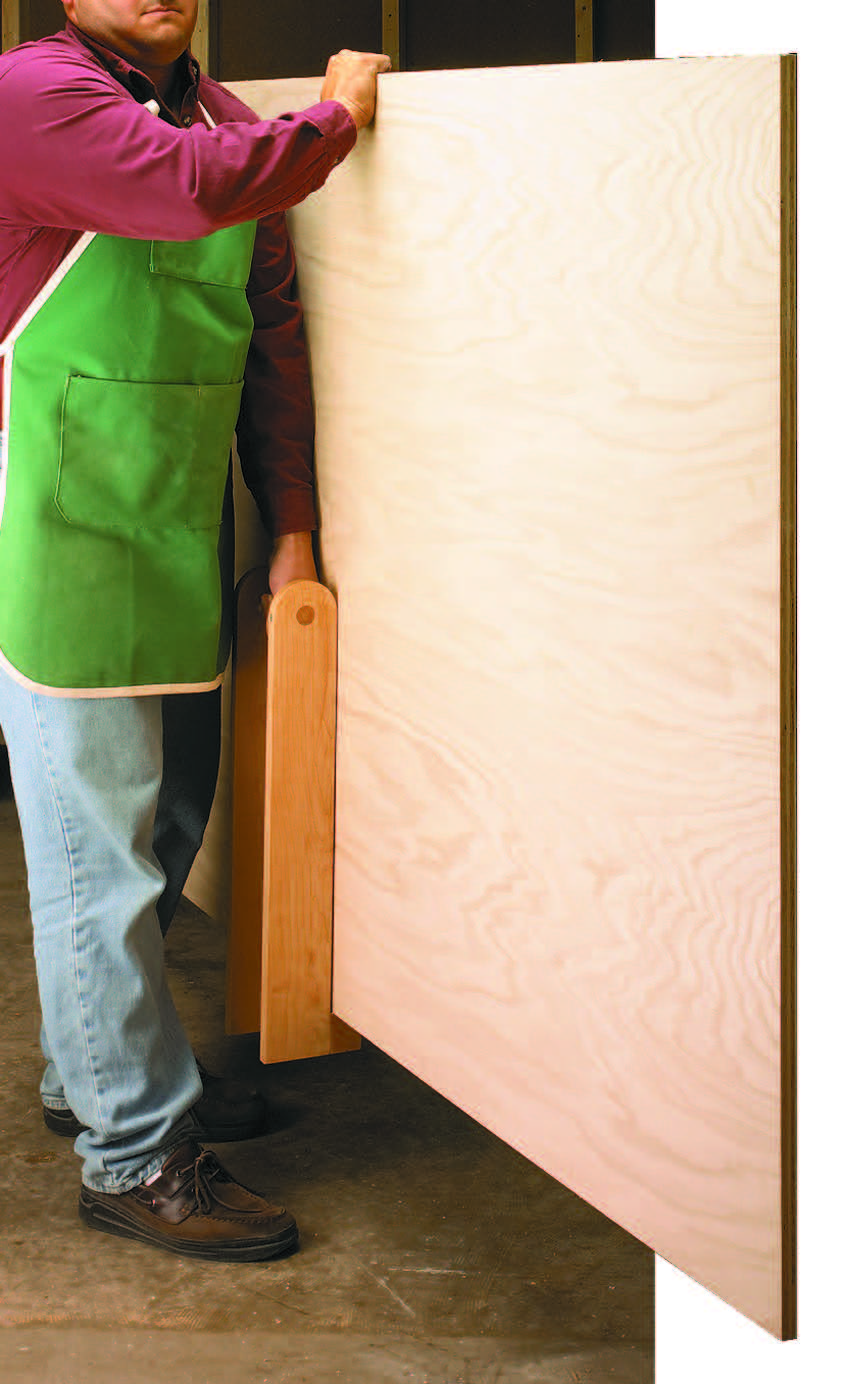
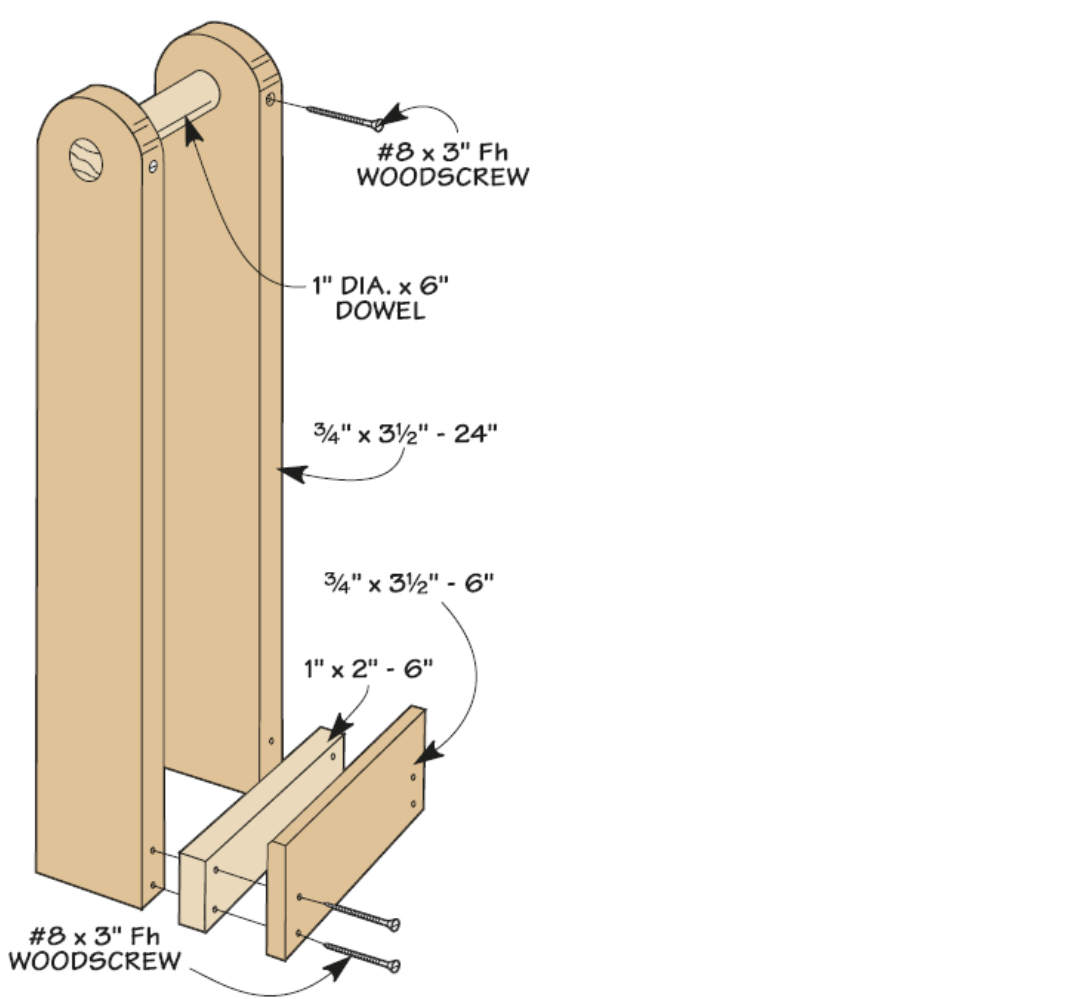
Rolling a sheet of plywood around is quite easy. But sooner or later you’ll need to carry a plywood sheet to get it right where you need it. When that’s the case, I use the handy tote shown in the drawing and photo above.
The tote is designed to hook under the bottom edge of the plywood. A round handle that fits into the sides of the tote is easier on your hand than the sharp edges of the plywood. And the extended sides on the tote make it possible for me to pick up a heavy sheet by lifting with my legs — rather than my back.
Note: When using the tote, be sure to center the plywood sheet on the support for better balance while placing your other hand at the top of the sheet to steady it. On the next pages we’ll look at some ways to break down your sheets of plywood to manageable sizes.
2-IN-1 CUTTING GUIDE
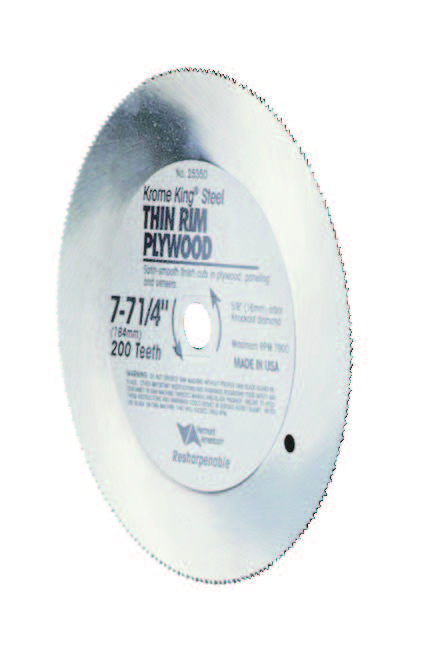 |
| If you do an online search for “200-tooth steel blade,” you can still find some of these vintage plywood-cutting blades. |
One of the biggest challenges when working with plywood is cutting a large sheet down into pieces that are a little easier to handle. Even with help, it’s a hassle to cut plywood on a table saw. To avoid this, I use my circular saw and a cutting guide like you see in the photo at right. The cutting guide not only solves the problem of making a straight cut, but it makes it easy to position the saw so you know exactly where the cut is going to be.
AN ACCURATE EDGE.
 The way this works is simple. The edge of the guide acts as a reference that indicates the path of the blade (or router bit, but more about that in a minute). Ensuring an accurate cut is just a matter of aligning one of the edges of the guide with the layout line on the workpiece.
BUILD THE GUIDE.
 There’s nothing too complicated about making the cutting guide. Start out with an extra-wide base made from 11⁄44" hardboard. The drawings below show how you’ll use both sides of the guide.
The next step is to glue and screw a plywood fence to the base. Since the fence is going to establish the reference edge, it’s important to attach it so it’s perfectly straight.
 Once the fence is in place, you can create the reference edge by trimming off the waste with a circular saw (with the plywood blade). The nice thing about the extra width on the base is that by using a hand-held router and a straight bit, you can create a second reference edge on the other side of the guide.
THE CUTTING EDGE
Although the guide will make a straight cut with either a circular saw or a hand-held router, it won’t always guarantee you a chipout-free cut.
When I’m using my circular saw, I like to use a steel saw blade designed specifically for plywood. But when using my table saw or router, I use a different blade or bit.
EXCELLENT Cutting Edges
| |
| ---------- |
| |
|A double-flute compression bit eliminates chipout on both faces of a sheet of plywood by compressing the cut to the center of the sheet. |
|
|
|A double-flute compression bit eliminates chipout on both faces of a sheet of plywood by compressing the cut to the center of the sheet. |
| |
|This blade is designed to produce a superior cut on the top and bottom of laminates and melamine. This triple chip grind blade with a negative hook angle also works great on plywood.|
|
|This blade is designed to produce a superior cut on the top and bottom of laminates and melamine. This triple chip grind blade with a negative hook angle also works great on plywood.|
BREAKING DOWN.
Before making any cuts, you’ll need to lay out the pieces on the plywood first. It’s a good idea to allow a minimum of 11⁄44" extra all the way around to provide enough material to make the final clean-up passes later. The goal is to end up with clean, straight edges that can ride against the rip fence (or guide).
Speaking of the guide, it’s time to use it and the saw blade I mentioned earlier. You’ll also need a way to support the plywood during the cut. A good way to do this is to lay the plywood on a sheet of foam board insulation.
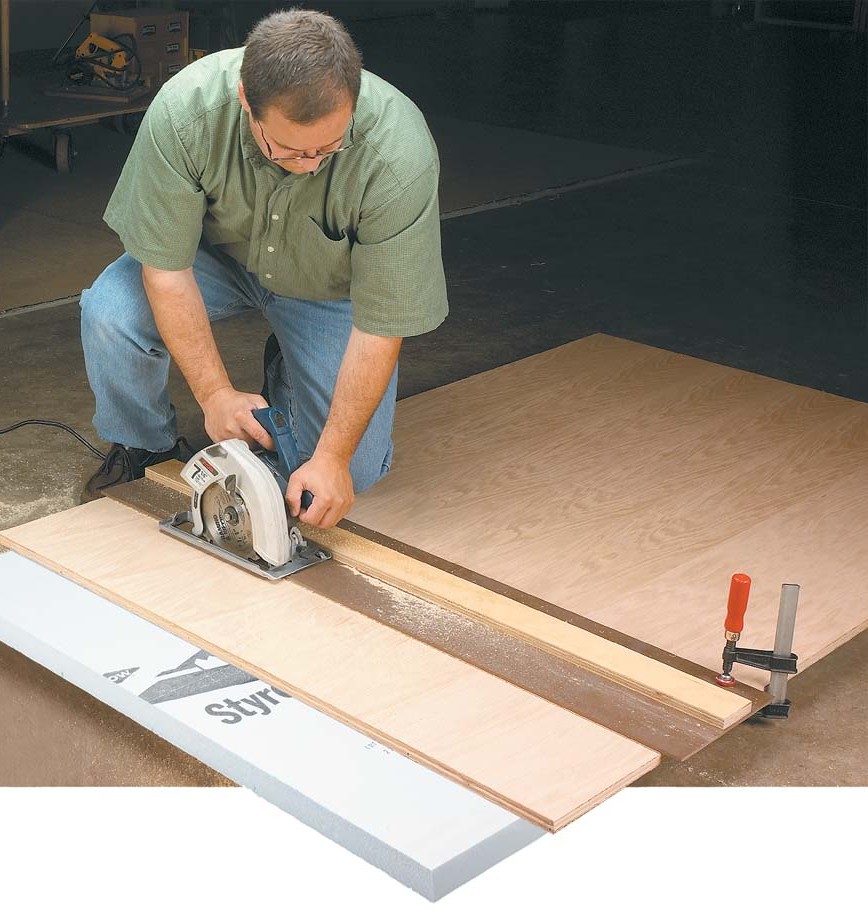 |
| For a clean cut, lay the plywood good side down on the foam insulation. |
FINISH CUTS
You can count on the factory edge to be straight and true. But it’s often dented or nicked. So it’s best to trim it off. To do this, adjust the rip fence to make an extra-wide cut (Figure 1). Then, readjust the fence, and run the “just-cut” edge against it and rip the piece to final width to clean up the factory edge.
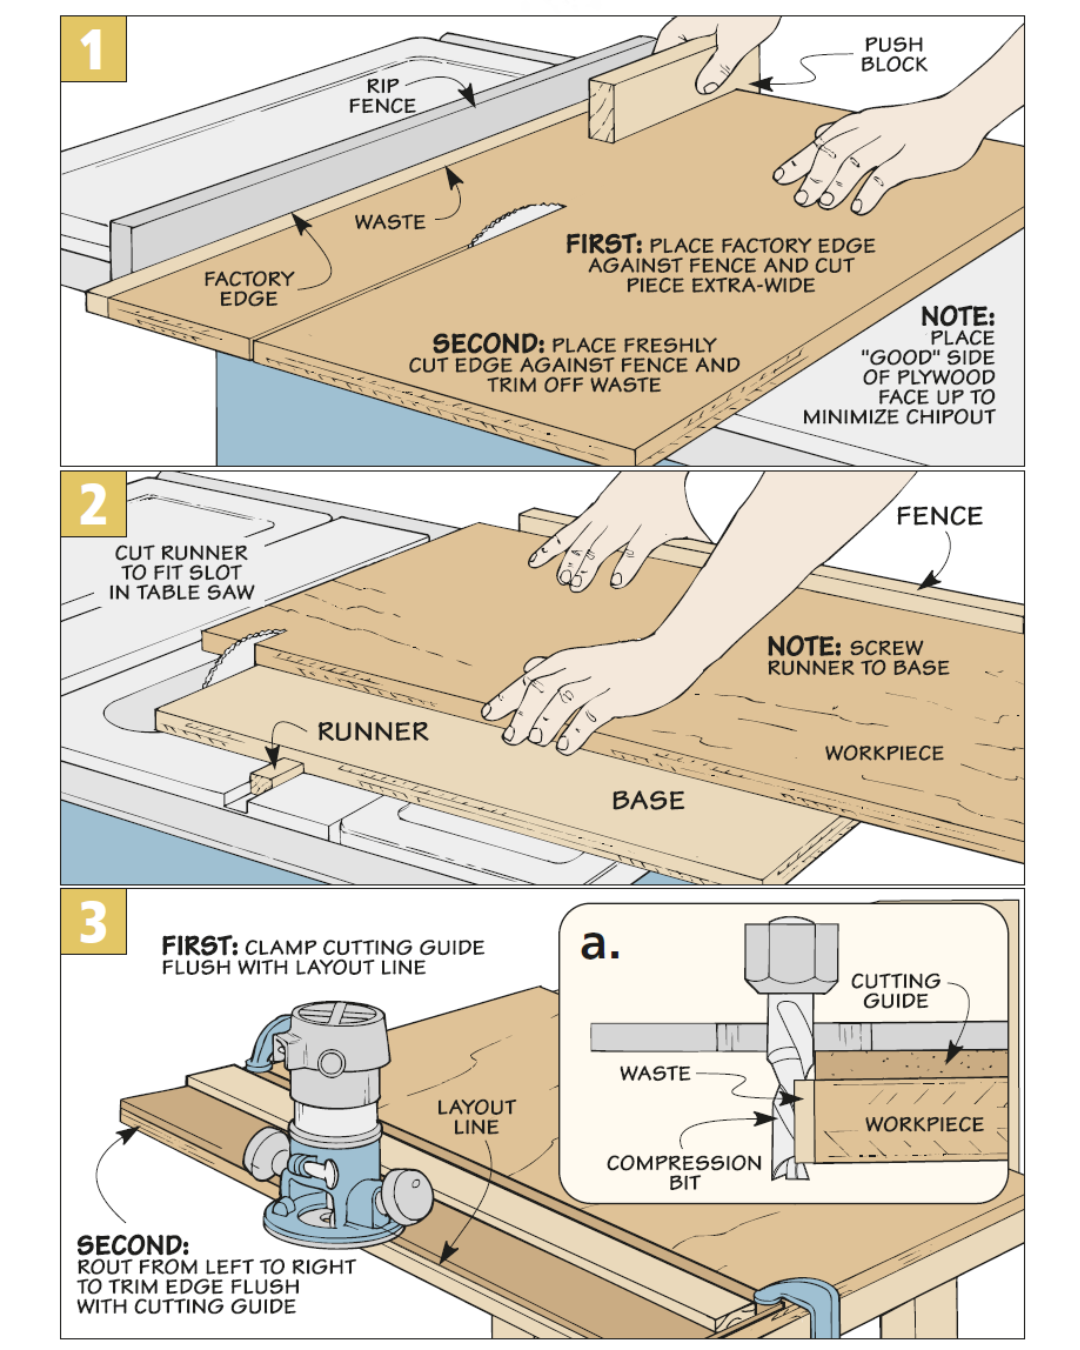
SLIDING PLATFORM.
Making a wide crosscut is often a difficult task with your standard miter gauge. The solution is a large, sliding platform that provides extra support for the workpiece, like you see in Figure 2.
The platform is just a plywood base that carries the workpiece through the blade. The base is guided by a hardwood runner that slides in the miter slot. As you make a cut, a fence keeps the workpiece square to the blade.
FLUSH TRIM.
Sometimes a workpiece is too wide even for the sliding platform. That’s when a hand-held router comes in handy. With the cutting guide and a compression bit (see opposite page), you can cut a clean, straight edge without any chipout (Figure 3).


