


Ebony has an unmistakable appearance, but using the real thing isn't always practical. When the goal is simply to create a deep black surface, you can get the look with a much more common wood and the right coloring technique.
The sides of the box shown here were made from ordinary maple. The ebony-like appearance comes from India ink.
The process is surprisingly straightforward: Prepare the wood, pre-raise the grain, apply the ink liberally, and protect the dried surface with a clear finish.

GET THE STEP-BY-STEP PROJECT PLANS: Build a Curved-Lid Treasure Box
What Does It Mean to Ebonize Wood?
Ebonizing is a finishing technique used to give another species of wood a dark, ebony-like appearance.
There are several ways to accomplish this, including dyes. For this project, India ink provided the deep black color needed for the maple sides.
It's also a particularly simple approach because the color is applied directly to the prepared wood.
If you're shopping for ink specifically for woodworking, look for a waterproof, lightfast India ink and test it with your intended finish before committing to the project.
Ebonize the Parts Before Assembly
Whenever possible, apply the black color before assembling the project.
That's especially helpful on a project like this box, where only selected parts are ebonized. Coloring the individual pieces makes it easier to cover the surfaces completely without accidentally getting black ink on neighboring parts that will receive a different finish.
It also gives you easier access to corners and edges.
Woodsmith Tip: Make a Sample First. Different woods can respond differently to a coloring treatment. Apply the India ink to a piece of project scrap and add your intended clear finish before starting on the actual parts. You'll see both the final black color and how the topcoat affects its appearance.
Pre-Raise the Grain
Before applying the ink, prepare the wood much like you would for a water-based dye.
Wipe the surface with a little water to pre-raise the grain.
As the wood gets damp, loose fibers swell and stand proud of the surface. Taking care of this before adding the black color helps create a smoother final surface.
After the dampened wood has had a chance to dry, lightly sand it again with 220-grit sandpaper. Don't sand aggressively. You're simply knocking back the fibers that were raised by the water.
Apply the India Ink Liberally
Once the final sanding is complete, you're ready to add the black color.
Use the dropper to spread a liberal amount of India ink across the surface.

There's no advantage to trying to stretch a tiny amount across a large area. Apply enough ink to wet the surface so you can distribute it evenly.
Work the Ink into the Wood
Next, use a disposable foam brush to spread the ink over the surface.

Work the ink into the grain as thoroughly as possible and make sure you haven't missed any areas.
The foam brush makes this easy. It's inexpensive, spreads the liquid quickly, and can reach into corners and along edges without requiring you to clean a good finishing brush afterward.
Allow the ink to dry completely before handling or assembling the parts.
Protect the Ebonized Surface with a Clear Finish
Once the India ink was dry, the box could be assembled.
The project was then protected with a few coats of spray lacquer.
A clear topcoat protects the colored surface from handling and wear while giving the finished project its final sheen.
Spraying also has an advantage over aggressively brushing the first coat: There's less physical contact with the colored surface.
Whatever clear finish you choose, test the entire combination — ink and topcoat — on scrap first to make sure they're compatible and produce the appearance you want.
Ebonizing with India Ink at a Glance
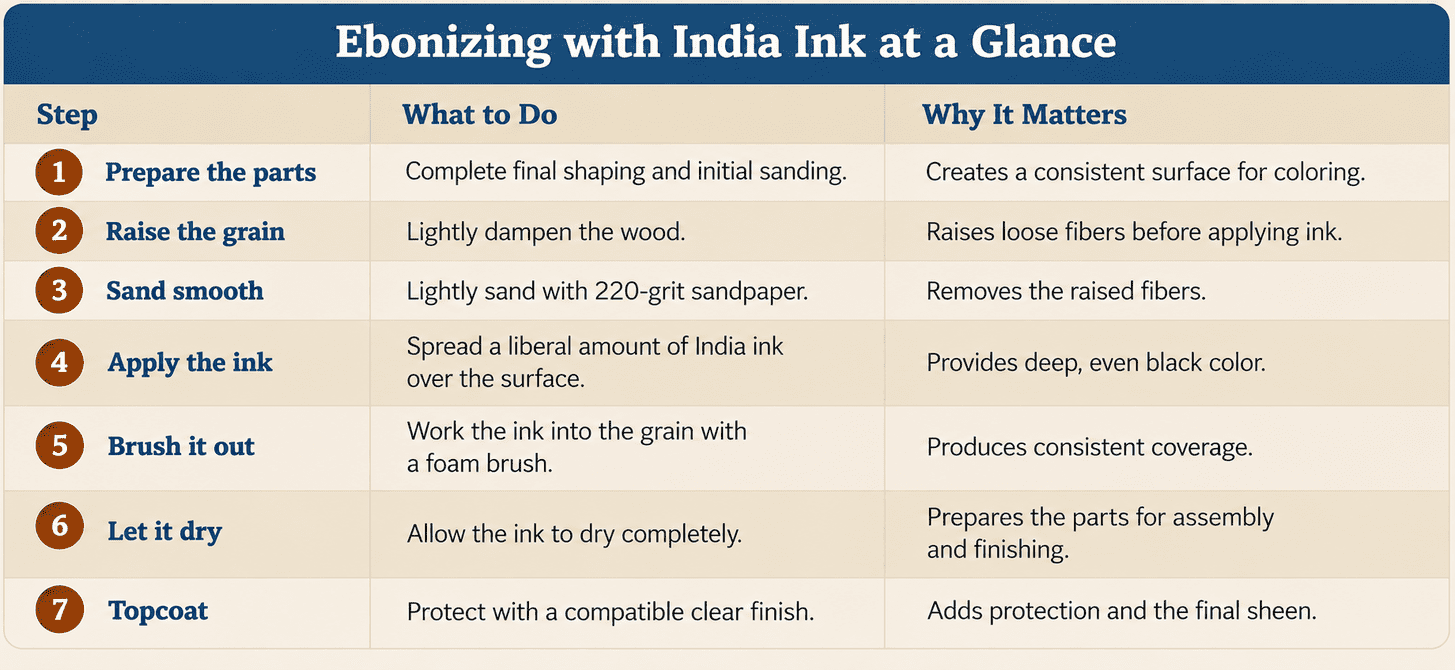
An Easy Way to Get the Look of Ebony
The appeal of this technique is its simplicity.
Rather than tracking down expensive ebony, you can start with a more readily available wood such as maple and transform its appearance with India ink.
Careful surface preparation makes the difference. Pre-raise the grain, sand it smooth, apply the ink generously, and work it evenly into the surface. Once the ink dries and the clear finish goes on, you're left with the deep black appearance that makes ebony such a dramatic accent in a woodworking project.
Prefer to Color Wood with Dye?
India ink is useful when the goal is a deep black surface, but wood dye gives you much more control over color. Learn how to mix and apply water-based dyes for transparent color that lets the grain and figure remain visible.
LEARN HOW TO USE WATER-BASED DYE → How to Use Water-Based Dye for Rich Wood Color


