

Leave your sander on the shelf. A sharp hand plane can often level and smooth a glued-up frame faster and better.
Chances are good that the next large project you build will involve mak-ing a frame. A door frame, a face frame, a frame that’s a structural part of a project — it’s an essential part of woodworking. And one goal is always the same — tight, flush joints. Gap-free joints are usually not a problem. But perfectly flush joints are a different matter.
Uneven joints are hardly a reason for concern. This is why sanders were invented, right? Sometimes a little sanding is all it takes to level a joint. But in many cases, there’s a better way. A hand plane can often do the job quicker and better.
WHY?
There are several advantages to using a hand plane to smooth an assembled frame. First, a sharp hand plane will remove more wood in a few quick strokes than a sander can in several minutes. Second, a plane leaves the surface and joints perfectly flush, flat, and glass smooth. You easily avoid the dips, gouges, and rounded edges that heavy sanding can create.
PREP FOR THE JOB.
Successfully planing a frame starts with having the right tool and some advance preparation. My tool of choice for this job is a #4 bench plane — often appropriately called a “smoother”. This compact, 9"-long plane is easy to control and not too tiring to work with. But, it has a sole large enough to create a very smooth, flat surface.
 |
| Smooth and Flat. Skipping over the low side to shave down the high side, a hand plane will quickly level an uneven joint. |
The iron should be very sharp and honed with a slight crown across the width. The feathered cut of the crowned blade gives you fine control while still leaving a flat surface.
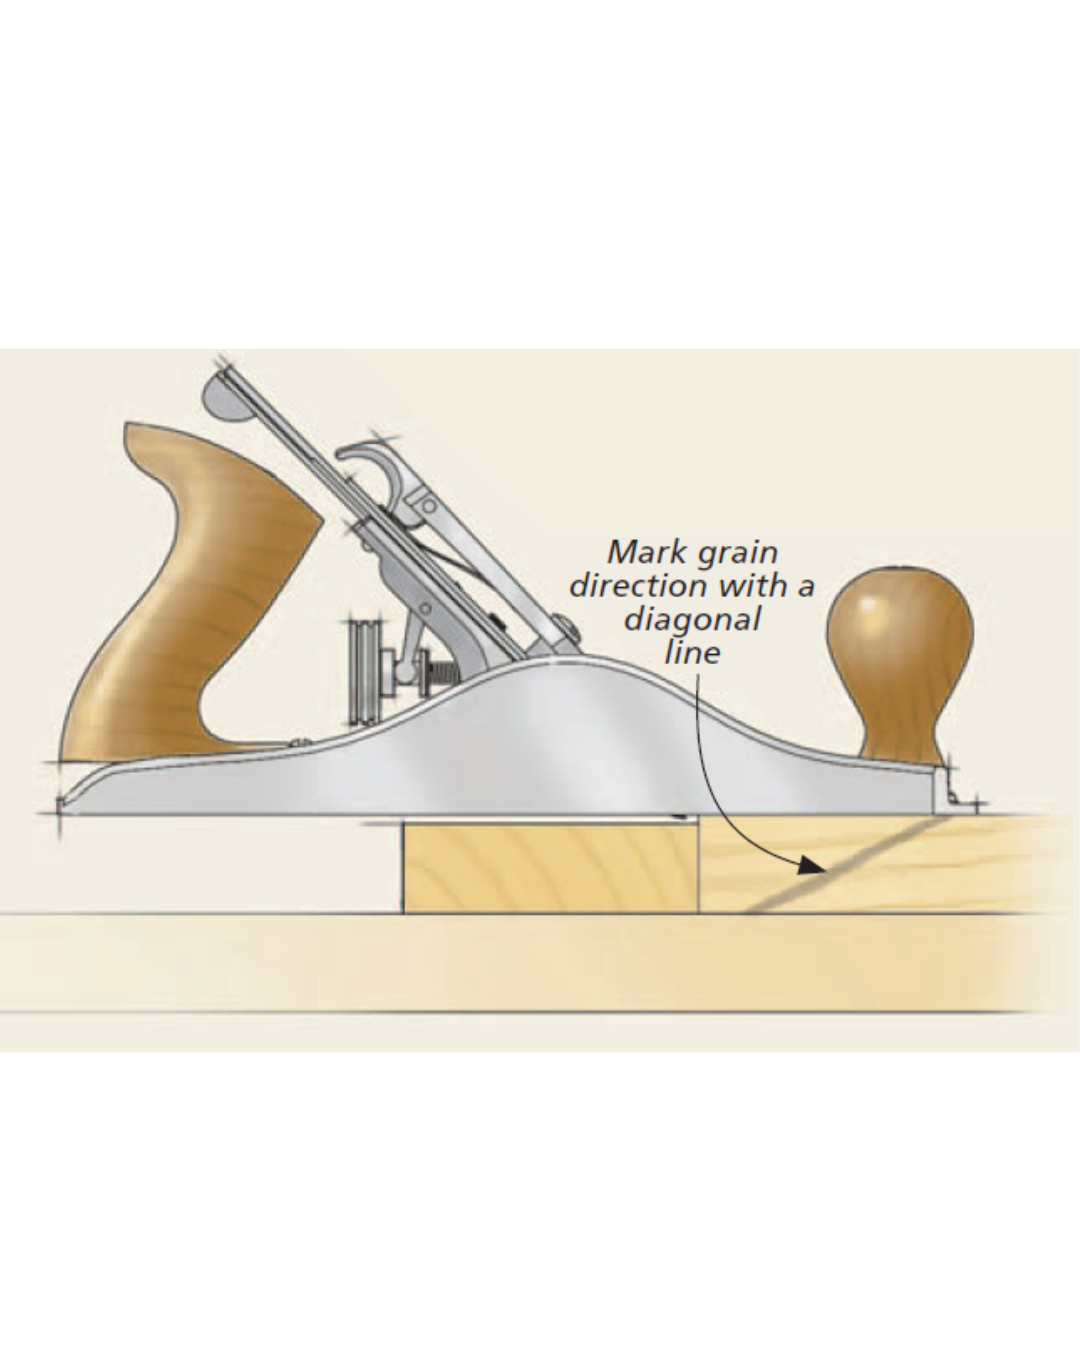
GRAIN DIRECTION.
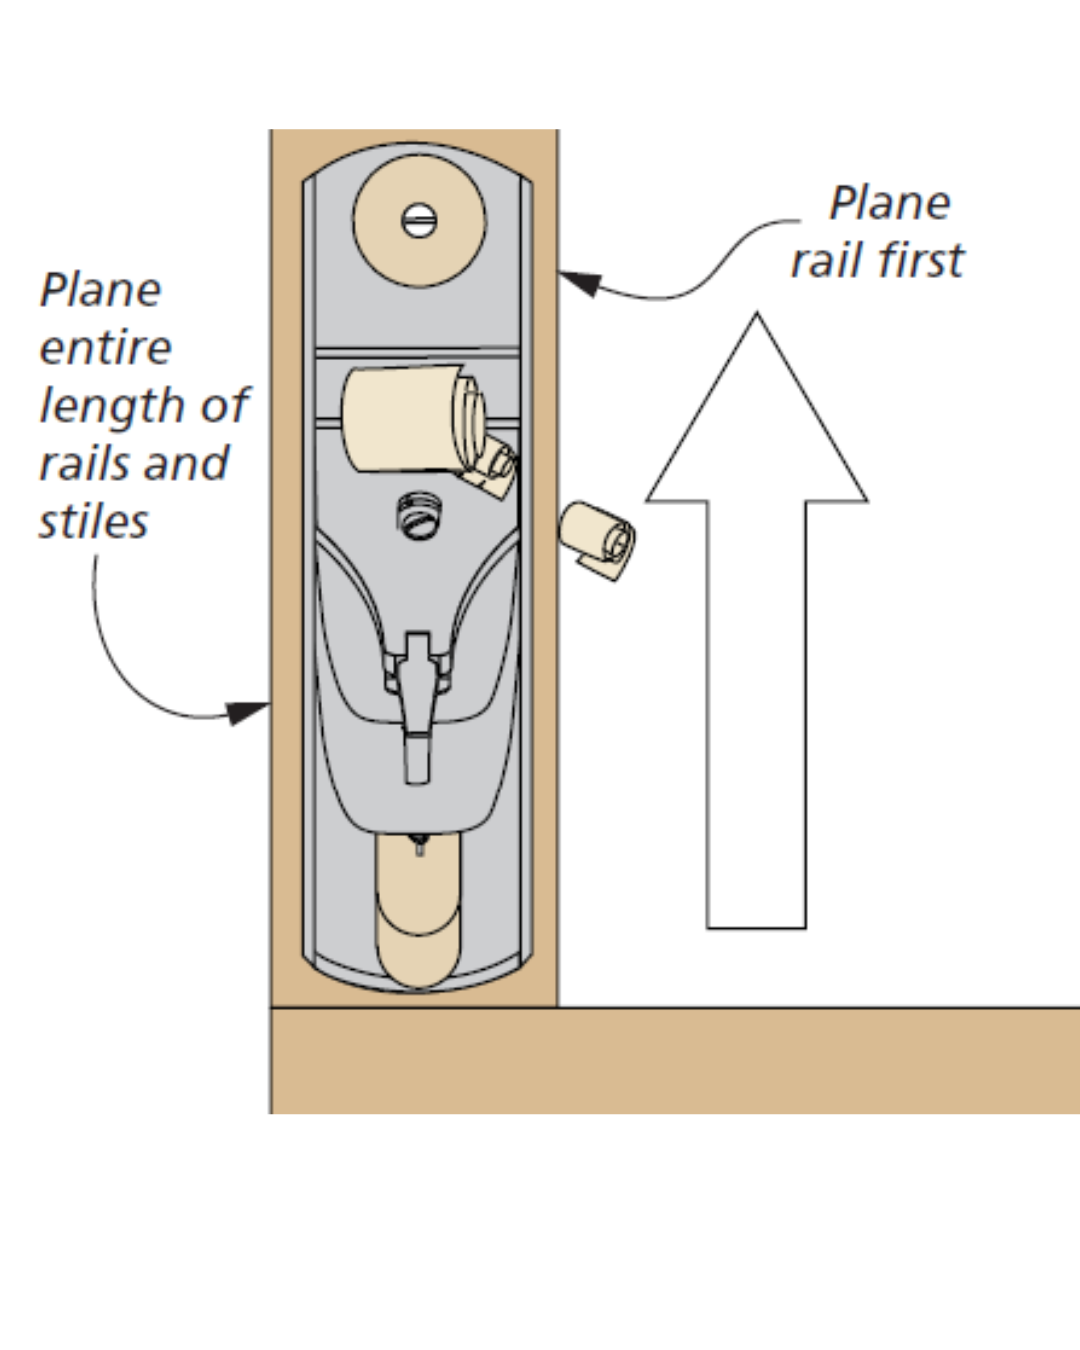
With the plane ready, the next thing I do is look at each piece of the frame to determine its grain direction. A simple way to mark this is with a diagonal line on the edge “pointing” out the grain direction of each piece, as in the main drawing above.
HOLDING THE FRAME.
Now you need to secure the frame fimly to the bench. A consideration here is that you’ll be turning the frame often to work on the different sides. So the method you use to hold the frame needs to be solid but at the same time allow easy repositioning. Bench dogs offer one solution. Another option that I often use is a cleat attached to the bench to act as a stop. Along with a clamp or two, the cleat will hold the workpiece firmly, but still allow you to move it easily (upper right drawing, opposite page).
MAKING SHAVINGS.
Now you’re about ready to make shavings. I always like to work on the back face fi rst. Planing the good side last means less chance of marring or scratching this surface.
Before planing, I scrape away any major glue squeezeout at the joints on both sides of the panel. You want the panel to lay flat, and you don’t want to dull the plane iron on the hardened glue.
HIGH SIDE.
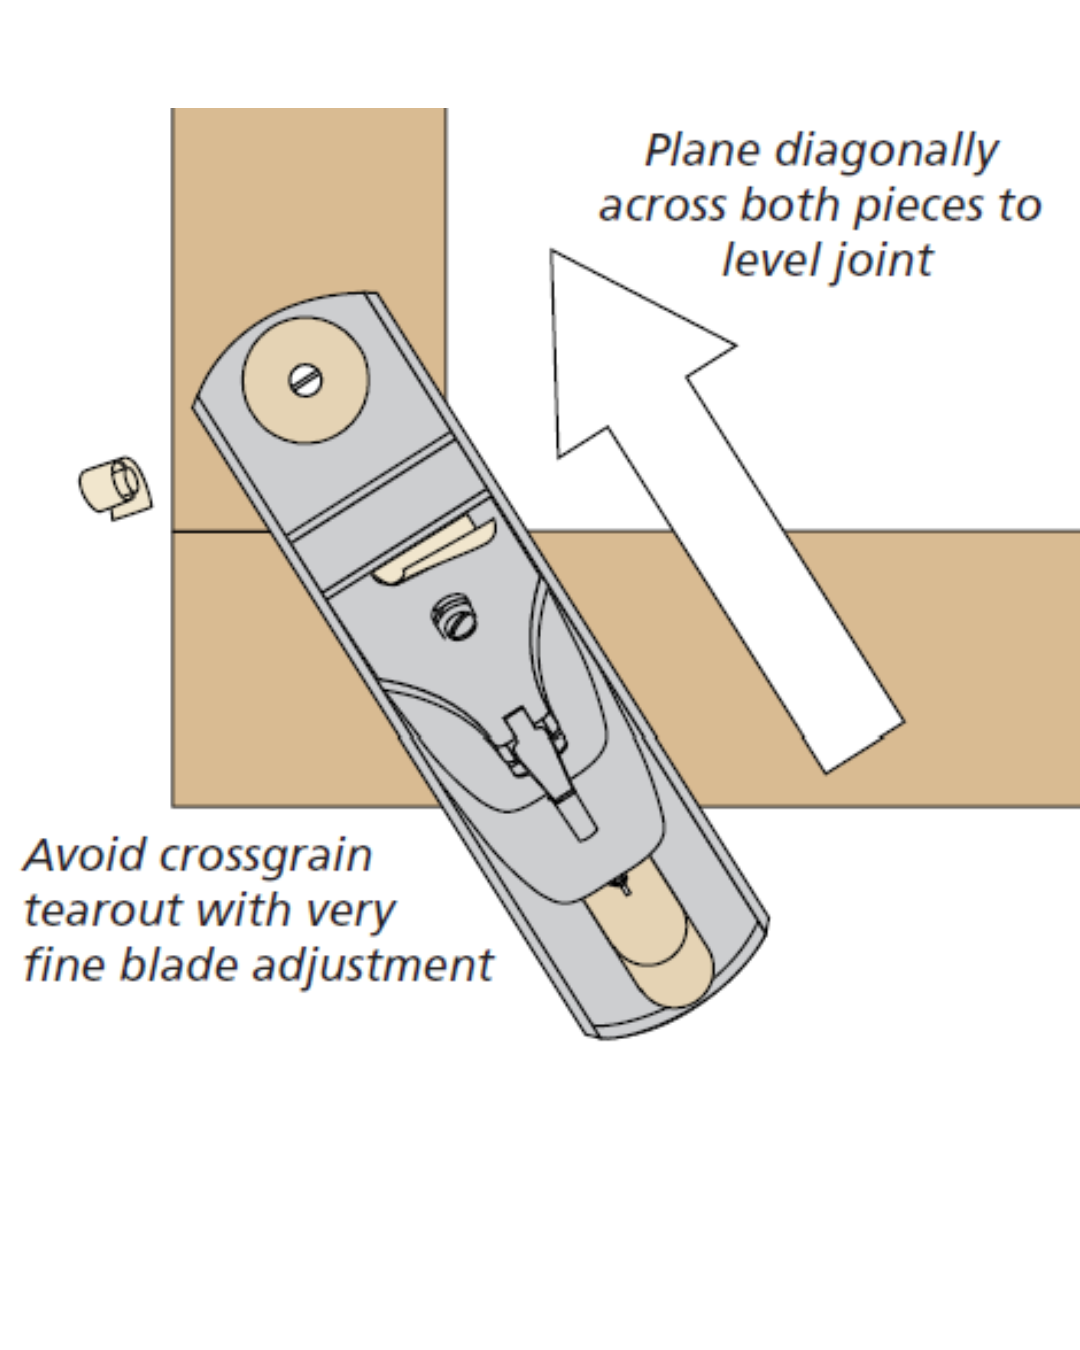
Now, there’s a simple order to the task. I start by leveling each joint in turn. At first, you’ll work only on the “high” side of the joint — it might be the rail or stile. Plane with the grain straight along the high rail or stile. Since the two pieces are joined at right angles, the trick is to avoid the crossgrain planing that might cause tearout. With the blade set for a very fine cut and a little concentration, this isn’t difficult.
TECHNIQUE.
Try to keep firm downward pressure on the plane. This helps avoid the “chatter” that leads to tearout. And move the plane slowly and steadily across the surface, giving it time to cleanly cut the wood fibers. If the work gets tough, I rub beeswax on the sole of the plane to make it slide easier.
When necessary, I tweak the depth setting of the iron to better fit the job. A heavier cut removes wood faster. Use your fingers to check the joint for flush and lighten the cut when you get close.
DIAGONAL.
When the proud piece is nearly flush, I start working diagonally to level the joint. This way you avoid planing directly across the grain of either piece. Even working slightly crossgrain, with a sharp iron and fi rm hand, you’ll get a very smooth surface.
You want to be certain to level the two pieces all along the length of the joint. One way to be certain is to draw a squiggly pencil line across the joint before you start this final light cleanup. When the pencil line is gone, you can be sure the joint is flush.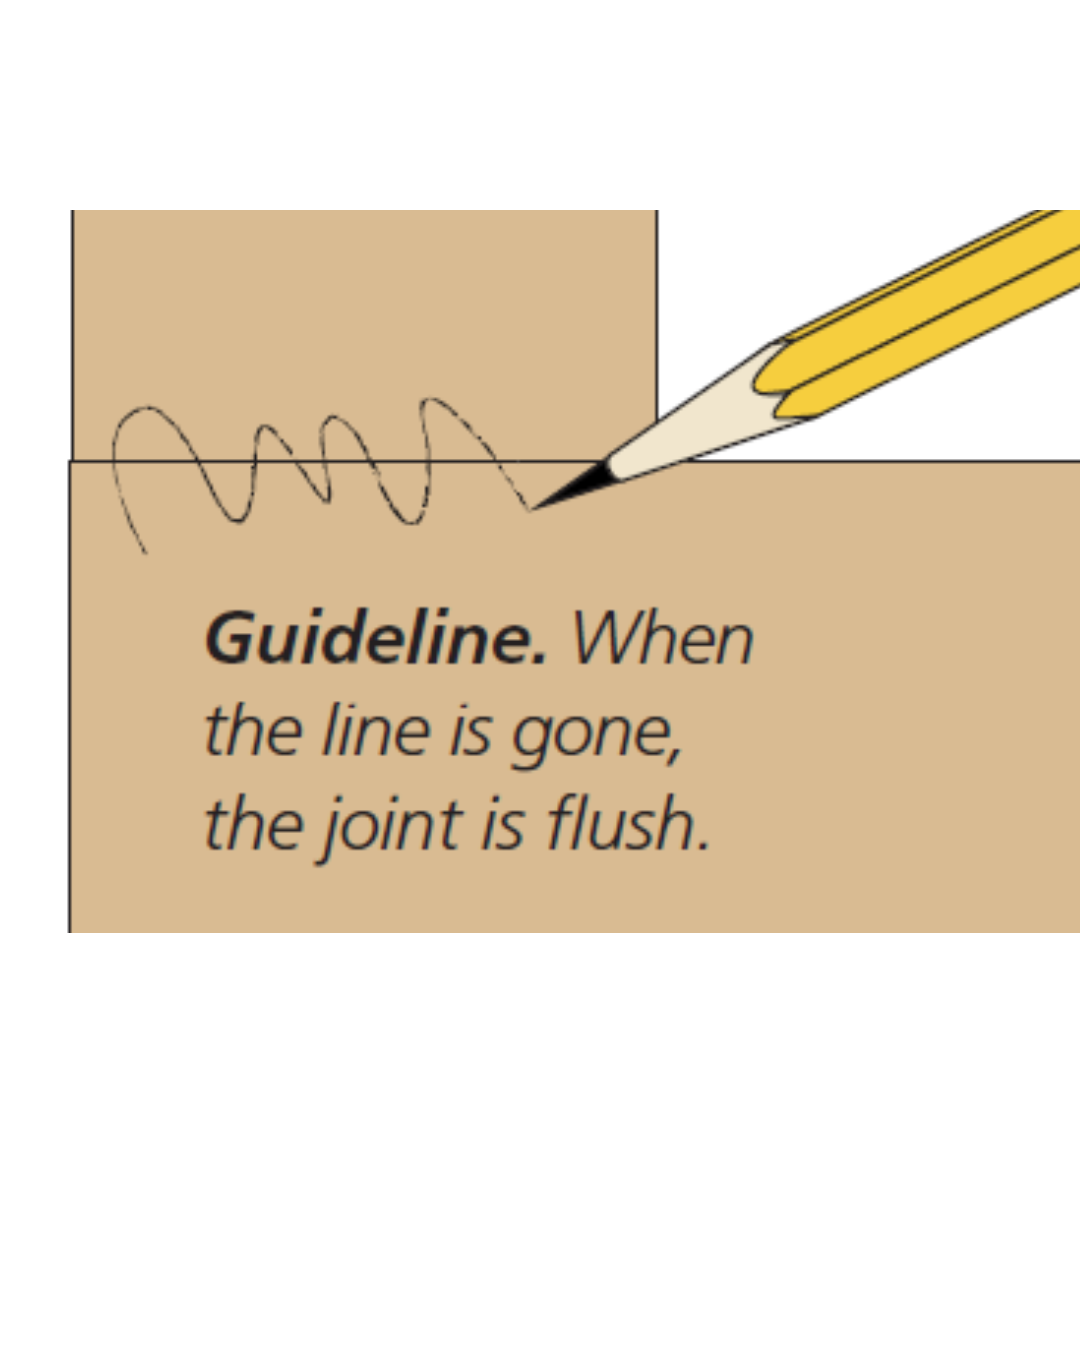
When one joint is flush, I move to the next, repositioning the frame on the bench if necessary. Remember that you always want to work with the grain and in a comfortable position when planing each section.
CONTINUOUS.
At this point, the area near each joint should be smooth and level, so next I focus on blending these sections into the unplaned sections to create a consistent, smooth, flat surface. To do this, I plane down the entire length of each rail and stile.
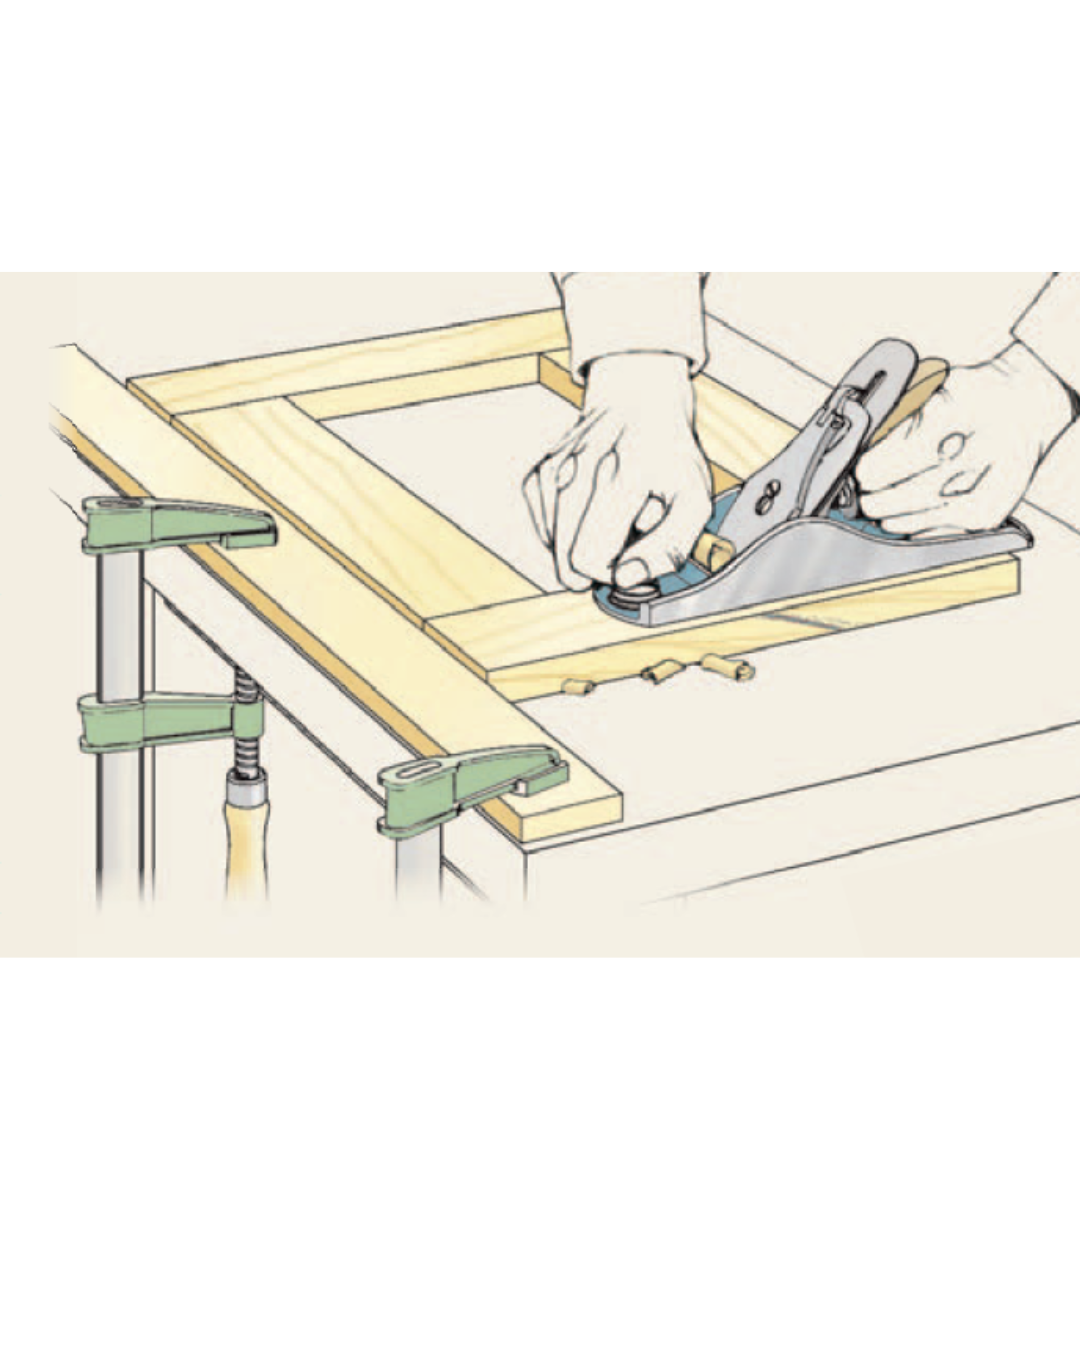 |
| Bench Cleat. A thin cleat clamped to your bench makes a versatile stop for planing. |
Work from the inside out starting with the rails. The idea is to plane the length of the rail while avoiding the stile at each end. With a very fine iron setting and a light touch, this is not as difficult as it sounds.
Start your stroke by skipping over the stile and feathering into the cut near the end of the rail. Before you reach the opposite end, lighten your pressure and start to lift the plane out of the cut.
When both rails have been smoothed, finish up the job by planing along the entire length of the stiles. For a consistent surface, you want to cover the entire width and length. Along the inside edge, the trick is to plane up to, but not over, the joint line. The feathered cut of the crowned iron gives you the control you need to do this.
The whole process goes pretty quickly — faster than heavy sanding. But I confess, my final step is to pick up a sanding block and sand the entire surface lightly with fine sandpaper. This removes any minor planing “scallops,” knocks off the sharp edges, and gives you a consistent surface for finishing.
In the end, you’ll find that cleanly planing a frame can be a really satisfying experience. Just a simple tool and your skill combine to yield a perfectly smooth assembly.
How-To: Plane a Frame Flush
 |
 |
 |
| Almost Flush. Begin leveling the joint by planing straight along the “high” piece. | Change Angles. Plane diagonally across the joint to avoid tearout during final leveling. | Feathering. Smooth the entire length of the rails and stiles to complete the job. |


