I would wager that you could find a portable circular saw in just about every woodworking shop. But it's usually tucked away in a corner gathering dust. A circular saw is the lonely Maytag repairman of shop tools - always waiting, but seldom called upon.
Most woodworkers think of a circular saw as a "construction" tool known more for its speed than its accuracy. And because it's hand-guided, a circular saw can be awkward to use and a challenge to control.
Well, it doesn't have to be this way. In a small shop, a circular saw can be very handy for a variety of tasks, from cutting stock to rough size to breaking down sheets of plywood to taking on light joinery tasks. But in order to use your circular saw more productively, you have to overcome three challenges.
The first is achieving a smooth, clean, chip-free cut. This can be important when you're working with valuable hardwood and cabinet-grade plywood. Second, when using a circular saw, you need a reliable way to support the workpiece - both the finished piece and the cutoff. The final element is a method of guiding the saw for a straight, accurate cut. The good news is that with a little advance preparation, you'll no longer dread the thought of getting out your circular saw.
Clean, Chip-Free Cuts

The blade that comes packaged with a circular saw is generally suitable for quickly tearing through dimensional lumber and not much else. So the number one thing you can do to improve the quality of your saw's cut is to upgrade the blade.
If you're accustomed to rough cuts from a cheap blade, you'll be amazed at the difference a 40 tooth general purpose or 60-tooth finish-cut carbide blade will make. I've found that a circular saw cut made with a high-quality blade can be every bit as good as a cut from the table saw. The sample cuts in chip-prone oak plywood show the difference a good blade can make.

GOOD SIDE DOWN The way you set up for a circular saw cut will also affect the end result. When a circular saw cuts, the leading edge of the blade spins upward into the material. This means that it exits the cut on the top side of the workpiece and the cleanest edge will be on the bottom side. So if your material has a good and a not-so-good side, put the "A" side face down.
Solid, Stable Support

Trying to make a circular saw cut without solid support for the entire workpiece can be a nightmare. And I've learned the hard way that sawhorses alone are not the best answer. As the cut is made, the workpiece can shift and bind on the blade. And too often one or both pieces end up on the floor.
Rather than the narrow support provided by a sawhorse, you need a large surface that will steady and support both of the pieces created by the cut. And the cutting surface needs to be sacrificial and nondamaging to the saw blade.
My solution is the lightweight, but very stable, knockdown cutting table shown in the photos. The table is made up of notched, interlocking slats of 3/4" plywood. It can be rapidly knocked together and then hoisted onto a pair of sawhorses at a comfortable height.
The large surface of the table will hold a full 4' x 8' sheet of plywood. The "open" design provides very solid support with virtually no resistance when cutting through a workpiece. Another big plus is that the table makes for easy clamping of both the workpiece and the cutting guides shown below.
Cutting Guides
When breaking down a sheet of plywood with a circular saw, following a layout line freehand is difficult at best. A wandering, rough cut is the norm. And this means allowing for more waste and extra work sizing the pieces later on.

So I don't rely on my fine motor skills. I always use a guide to position the cuts and steer the saw. It's easier, much more accurate, and you'll even get cleaner cuts.
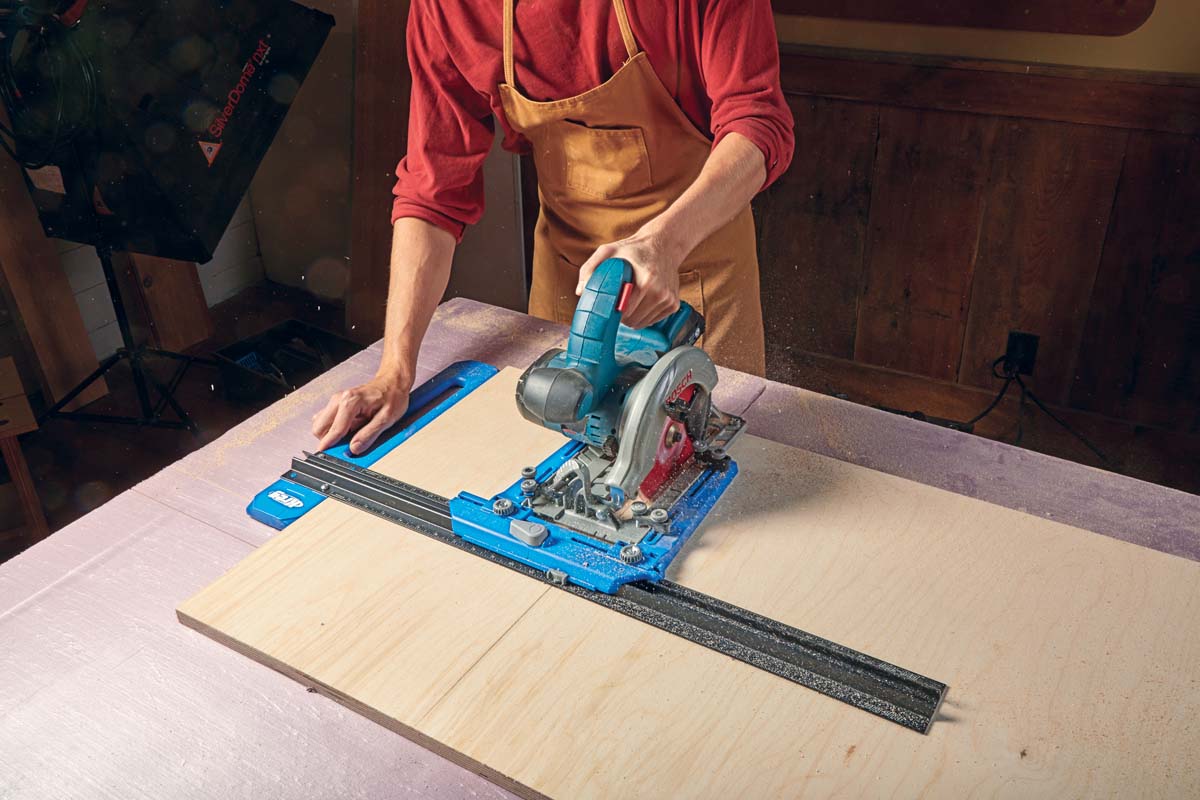
I keep two guides handy - a 60"-long version for full width panel cuts and a similar, shorter guide for accurate right angle cuts, as shown in the photos. The basis of both guides is a 1/4" hardboard baseplate with a 1/2" plywood fence attached. The outside edge of the saw's base, or shoe, runs along the fence to give you a foolproof, right-on-the-line, and perfectly straight cut.

But the real key to the handy function of the guides lies with a simple trick. When making the guides, you position and attach the fence allowing a little extra waste along the guide edge. Then you use your saw to trim the baseplate. The resulting "zero-clearance" edge gives you a dead-on reference for easy positioning of the guide and also serves to back up the cut.
The extra-wide baseplate provides ample clamping space on the "off" side. And the addition of a perpendicular cleat to the underside of the right angle guide allows quick registration for accurate crosscuts (inset photo above).
Shop Tip: Foam Backer

__ Quick and Easy__ In a pinch, a thick piece of rigid foam insulation laid on the floor provides a solid, sacrificial surface for making cuts on sheet stock.