

When I make a project that uses stub tenon and groove joinery, I usually turn to my table saw to cut the grooves and to form the stub tenons. But lately, I’ve been using my router table. I've found it's quite easy to get flat-bottom grooves and nice, clean joint lines.
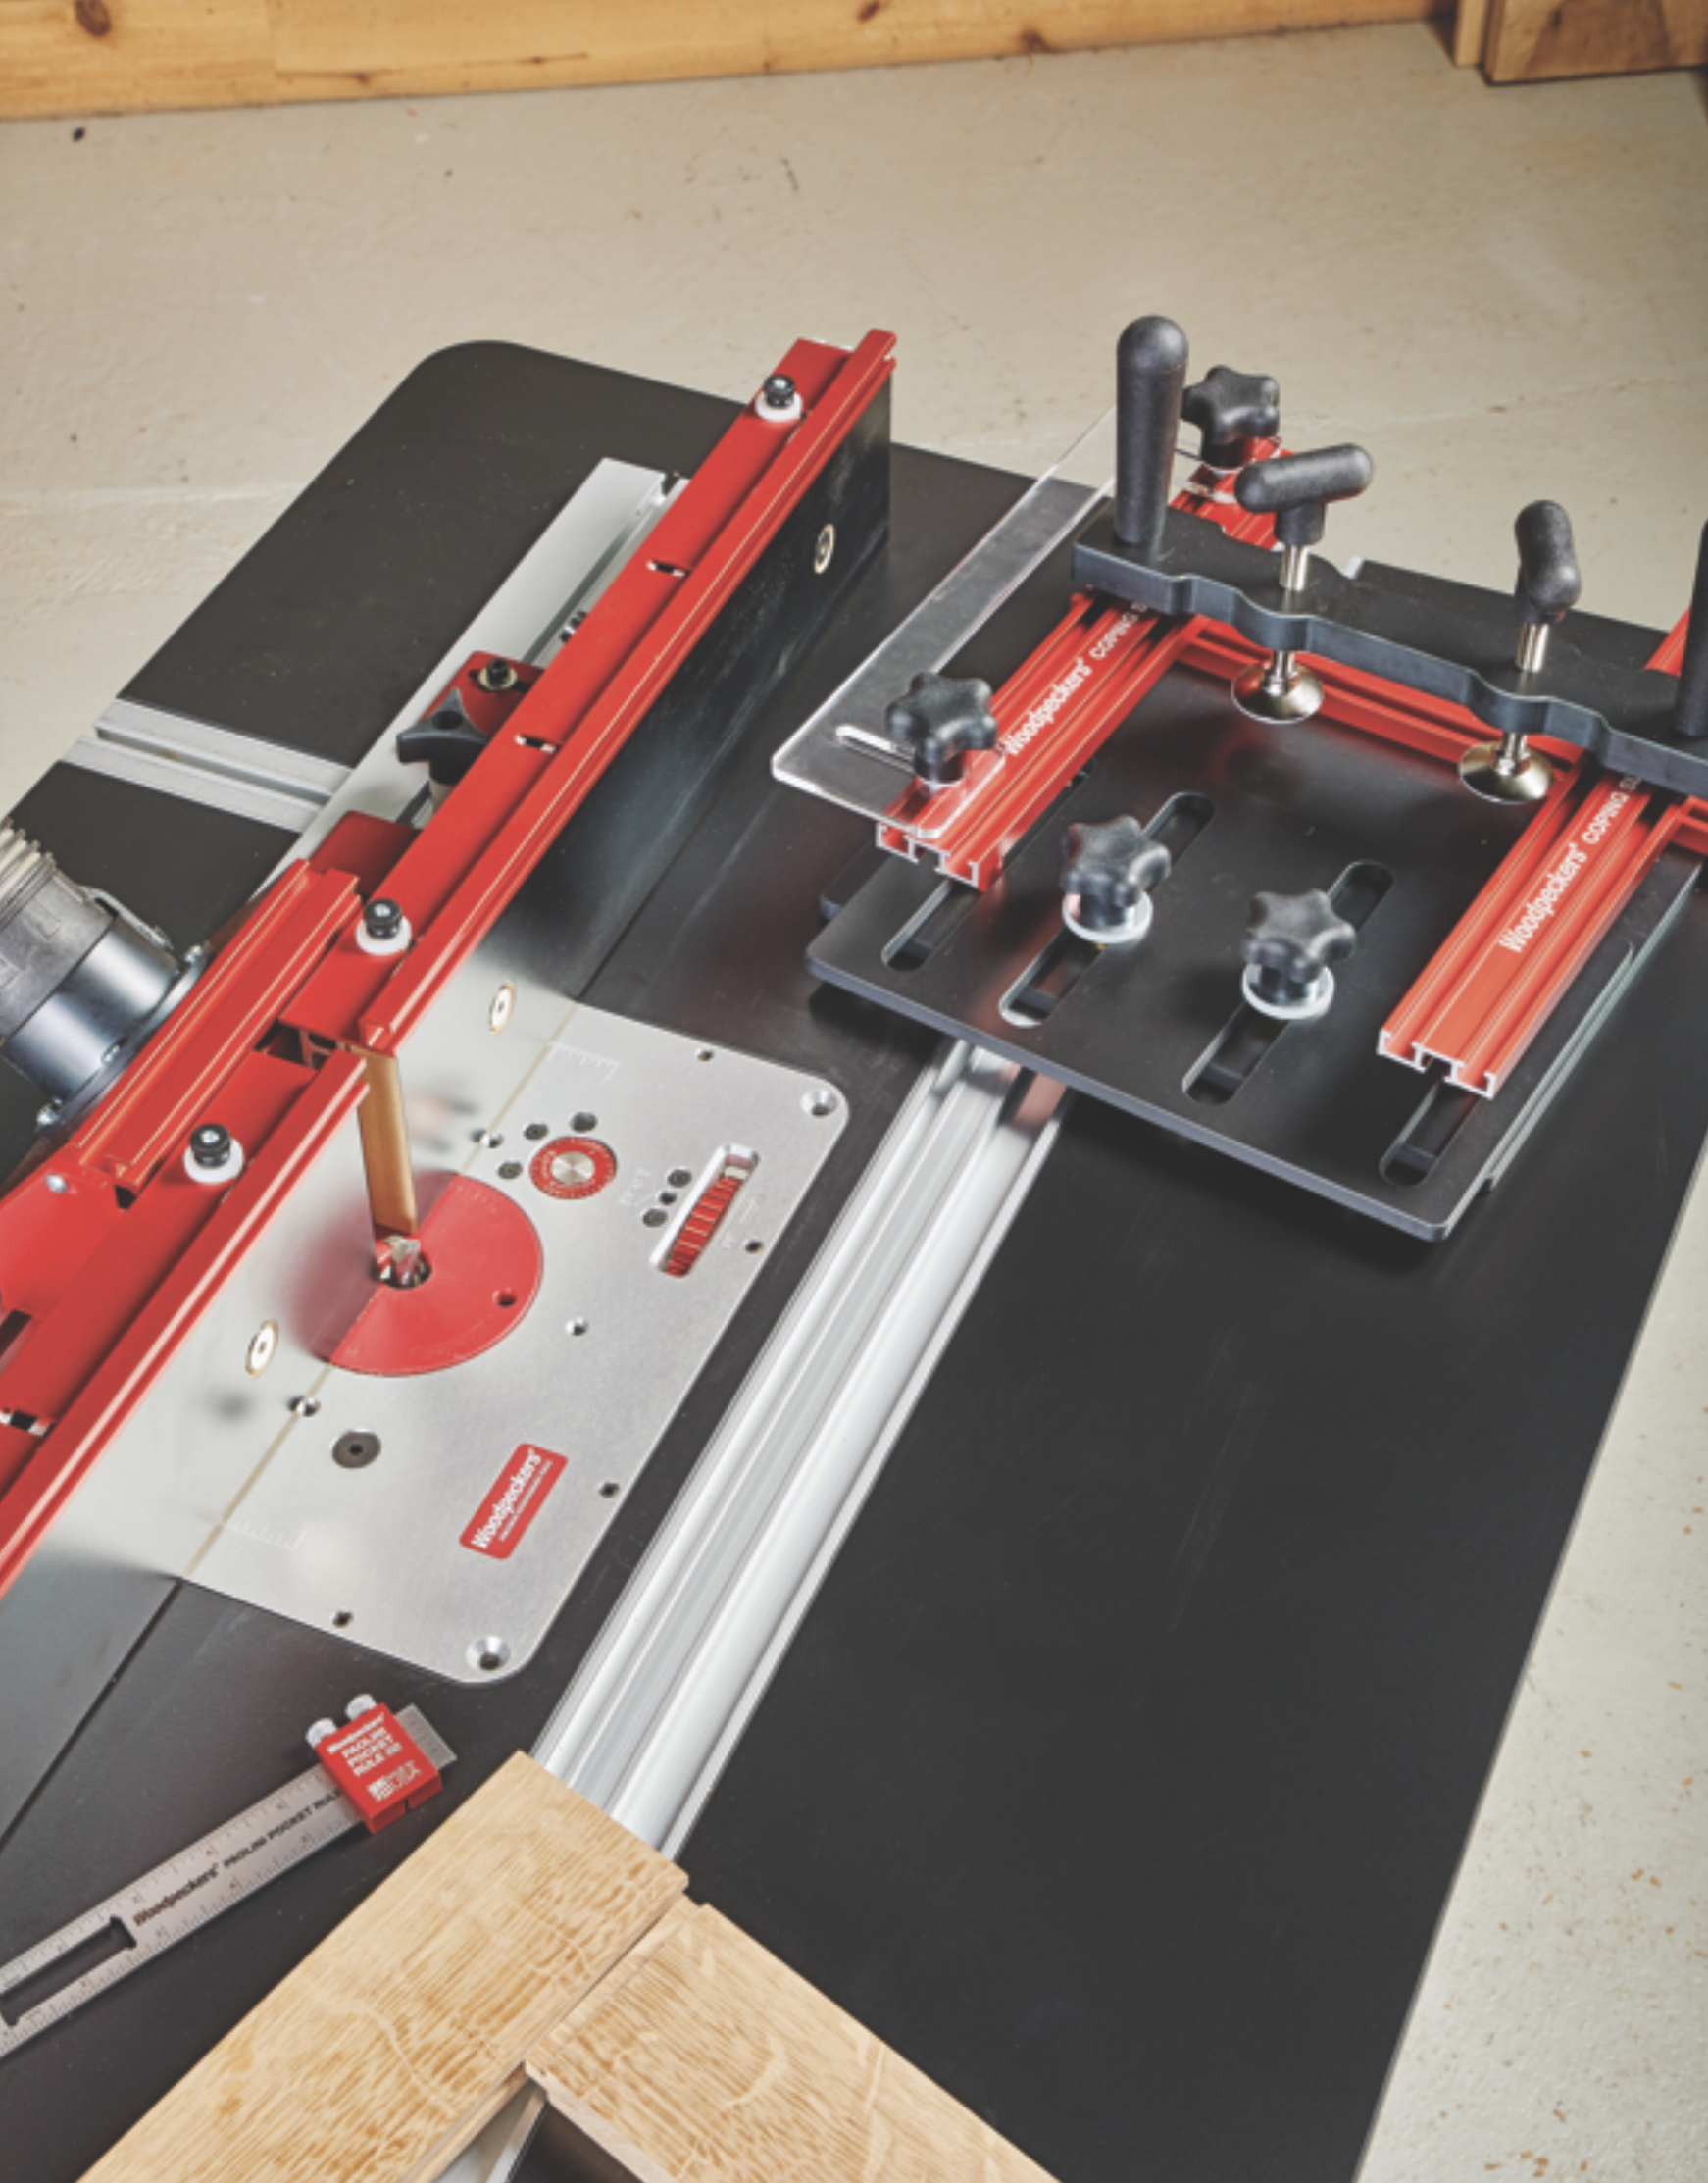
It only takes a little set-up time to cut the grooves, as shown in the photo above. And a coping sled helps create the stub tenons. Here’s what you need to know to turn your router table into a joint-cutting power house.
ROUTING THE GROOVE
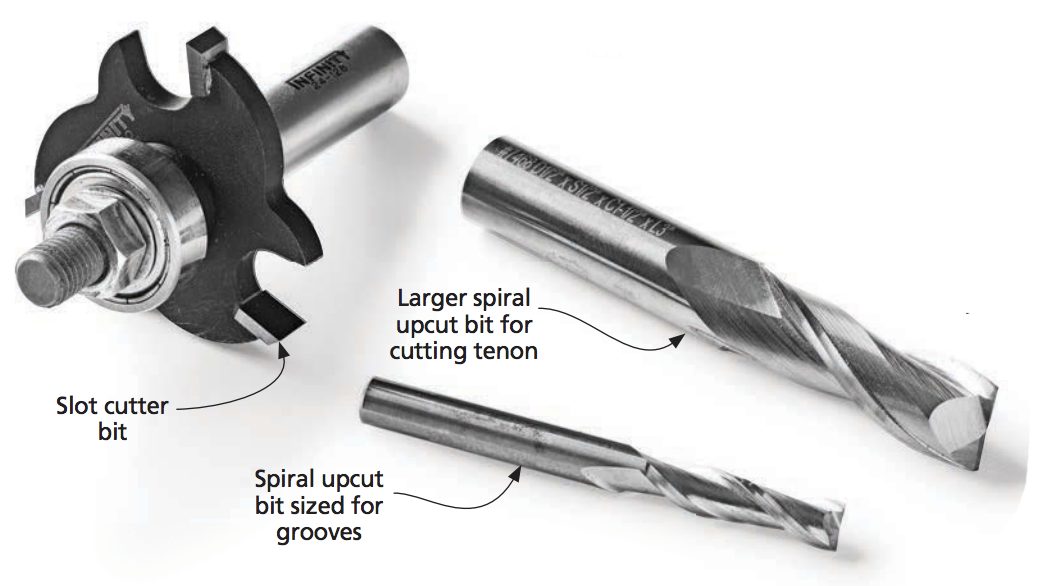
I find it easier to make the grooves first and then size the stub tenons to fit. But there are a couple of challenges with creating a groove. The first is choosing which bit to use. The two bits that I reach for are shown below.
Straight bits. A straight bit might be the obvious choice for cutting grooves. It creates a specific width groove. Most of the time my groove is 1?4" so I use a straight bit of that size (Like this one). You have a couple of different options for the cutting edge style as well. The bit I like is a bit with a spiral upcut pattern. This style allows the bit to pull the chips and dust down and out of the groove. You can see this type of bit below. Another option for cutting grooves is to use a slot cutting bit, also shown below. The slot cutting bit is like a dado blade for your router table. You can add and stack cutters to get slots exactly the width you need. One advantage of a slot cutter is you can form a deeper groove in one pass. Often a straight bit requires multiple passes to make grooves more than 1?4"-deep. On the other hand, slot cutting bits tend to be more expensive than spiral bits.
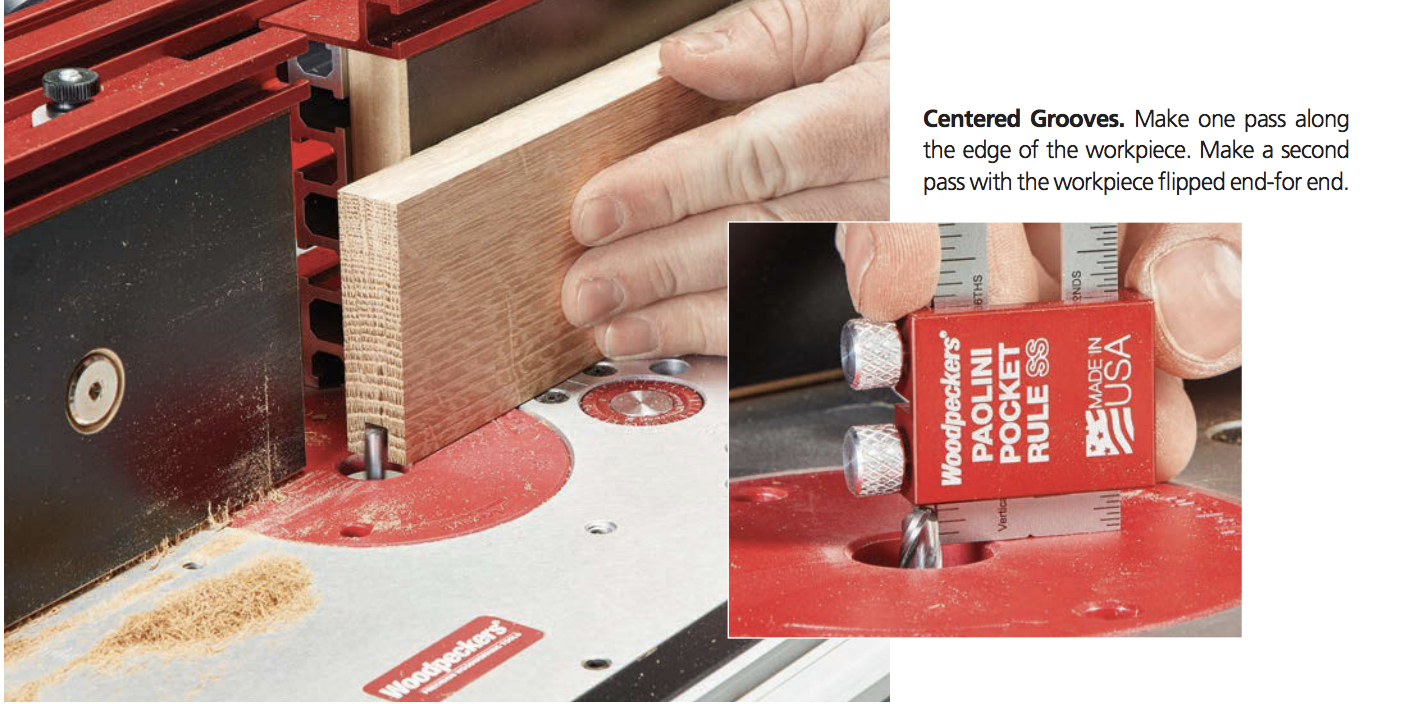
Setting up the cut. After loading the bit into the router table, you'll want to set up the fence and bit height. I like to use a small ruler like the Paolini ruler from Woodpeckers to help set the bit height as well as the fence location. Setting the height is as simple as setting the ruler stop and raising the bit until it just touches the stop (inset photo, above). To set the fence location, I’ll start by rotating the bit so the cutting edge is as close to the fence as it will get. Then, move the fence into position to center the groove on your workpiece. After locking down the fence, you can make a test cut.
The key when test cutting is to make sure your test piece is the same thickness as your workpieces. Make a pass (photo above) and measure the groove. You're looking for the groove to be centered. Make any necessary adjustments to the fence to get the groove centered, and you're ready to rout your workpieces.
Two Passes. When you're routing your workpieces, there is a simple trick you can do to make sure that the grooves are perfectly centered. After making a pass to form the groove along one edge, simply flip the workpiece end-for-end and make another pass, with the opposite face against the fence. This ensures the groove is perfectly centered on your workpiece. Hold your workpiece tightly though. If the bit is cutting on the fence side, the bit will try and pull the workpiece through (called back routing). Just go slow on the second pass.
Groove Depth. A quick note about groove depth. Most of the time, I make my grooves for 1?4"-long tenons. To keep the tenon from bottoming out, I will cut my grooves slightly deeper. Usually, a 3?8"-deep groove is about right. If the ends of the tenon and groove are going to be exposed however, like on the end of a door, I will aim for a groove that is just slightly deeper (1?32") than the tenon.
STUB TENONS
Now that you have the grooves cut, you can set up to cut the stub tenons on the rails. The stub tenon is formed by making cuts on each face of a workpiece, leaving only the material in the center. There are two variables to consider while sizing the tenons. First, is the width of the cut to make, which determines the length of the tenon. The second is how much material to remove, setting the tenon thickness. Luckily, we’ve already determined both of those factors by cutting the grooves first.
bit again. Before making test cuts, I always swap out my bit to a larger bit than I used to make the groove. In this case, I'll swap the 1?4" bit for a 1?2" bit. This allows me to form the entire tenon cheek in one pass. Here, the cutter orientation doesn’t matter a whole lot. I usually just reach for the sharpest bit in my collection.
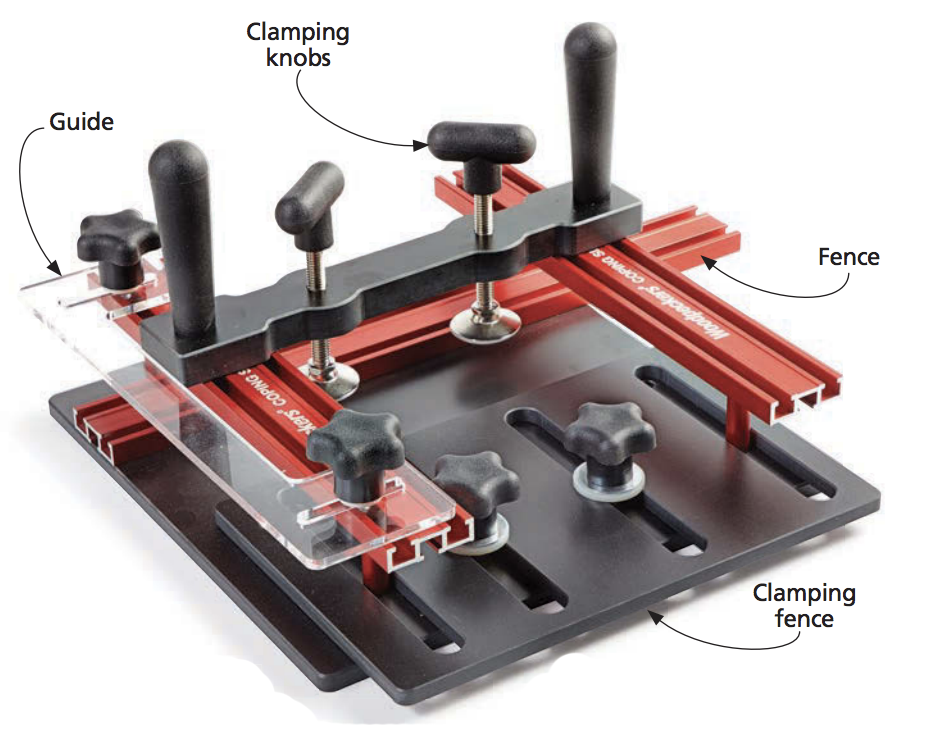
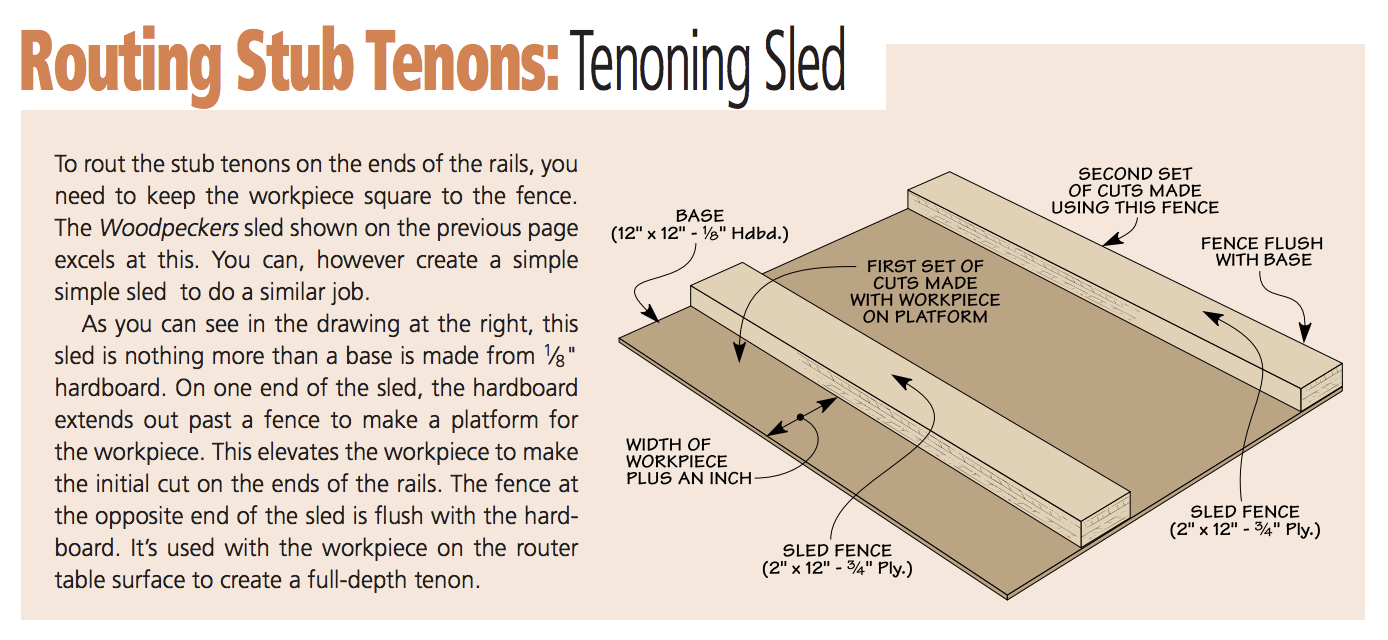
Use a Sled. To form the tenon, you’ll be routing across the grain. Two of the problems with routing in this direction is the likelihood of tearout and making sure to hold the workpiece securely while keeping it square to the bit. That’s why I like to hold the workpeice in a router sled, like the one shown above from Woodpeckers. It solidly grips the workpiece square to the fence and allows me to use a backer board to reduce tearout. Not to mention, it gives me repeatable results. Before I upgraded to the Woodpeckers sled, I often used a shop-made version. You can see this type of sled in the box at the bottom of the page.
Simple setup. As when routing the grooves, the fence position is critical to set the length of the tenon. Here again, I reach for a small rule and set the fence to form a 1?4"-long tenon. Setting the bit height is simple, especially if you saved one of your test pieces from setting up the grooves. Simply set the bit height to just remove the material on each side of the groove (left photo below). Cutting a tenon on the test piece will show you if you need to adjust the bit. You’re looking for a tenon that fits snug into the groove, but doesn’t need to be forced in place.
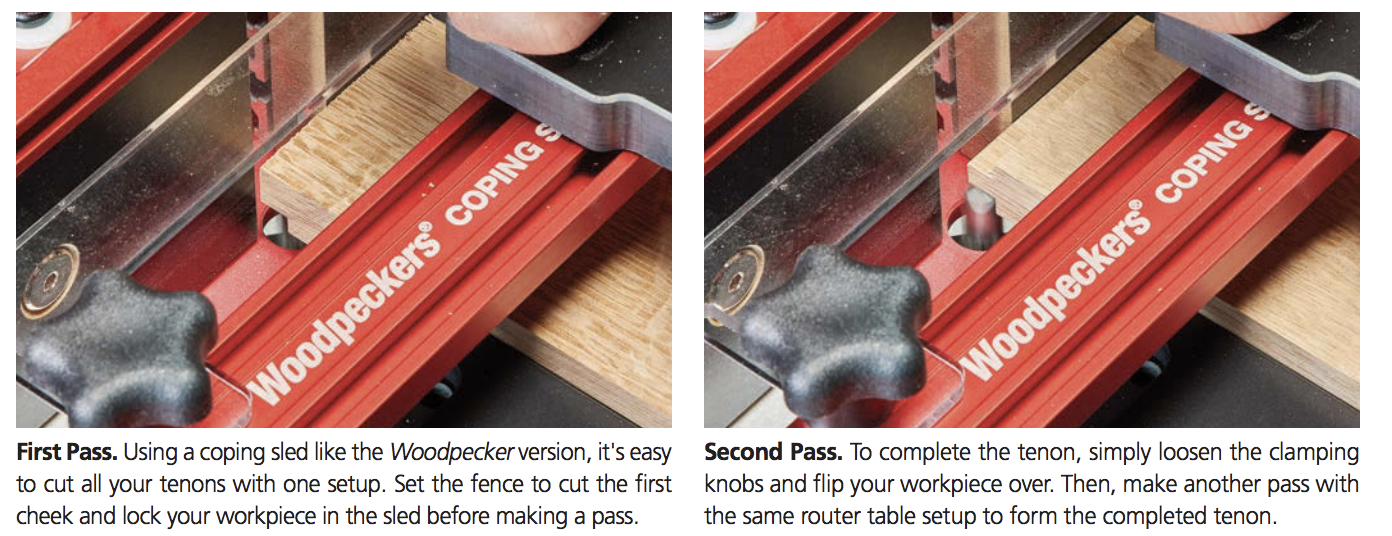
Form the Tenon. With the router table set up, you're ready to cut your tenons. Insert your workpiece into the router sled, making sure it butts up against the fence. Then, make a pass on one face, forming one cheek of the tenon. Then, flip the workpiece over to cut the remaining cheek. To finish out the workpiece, it’s a simple matter of repeating this process on the opposite end.
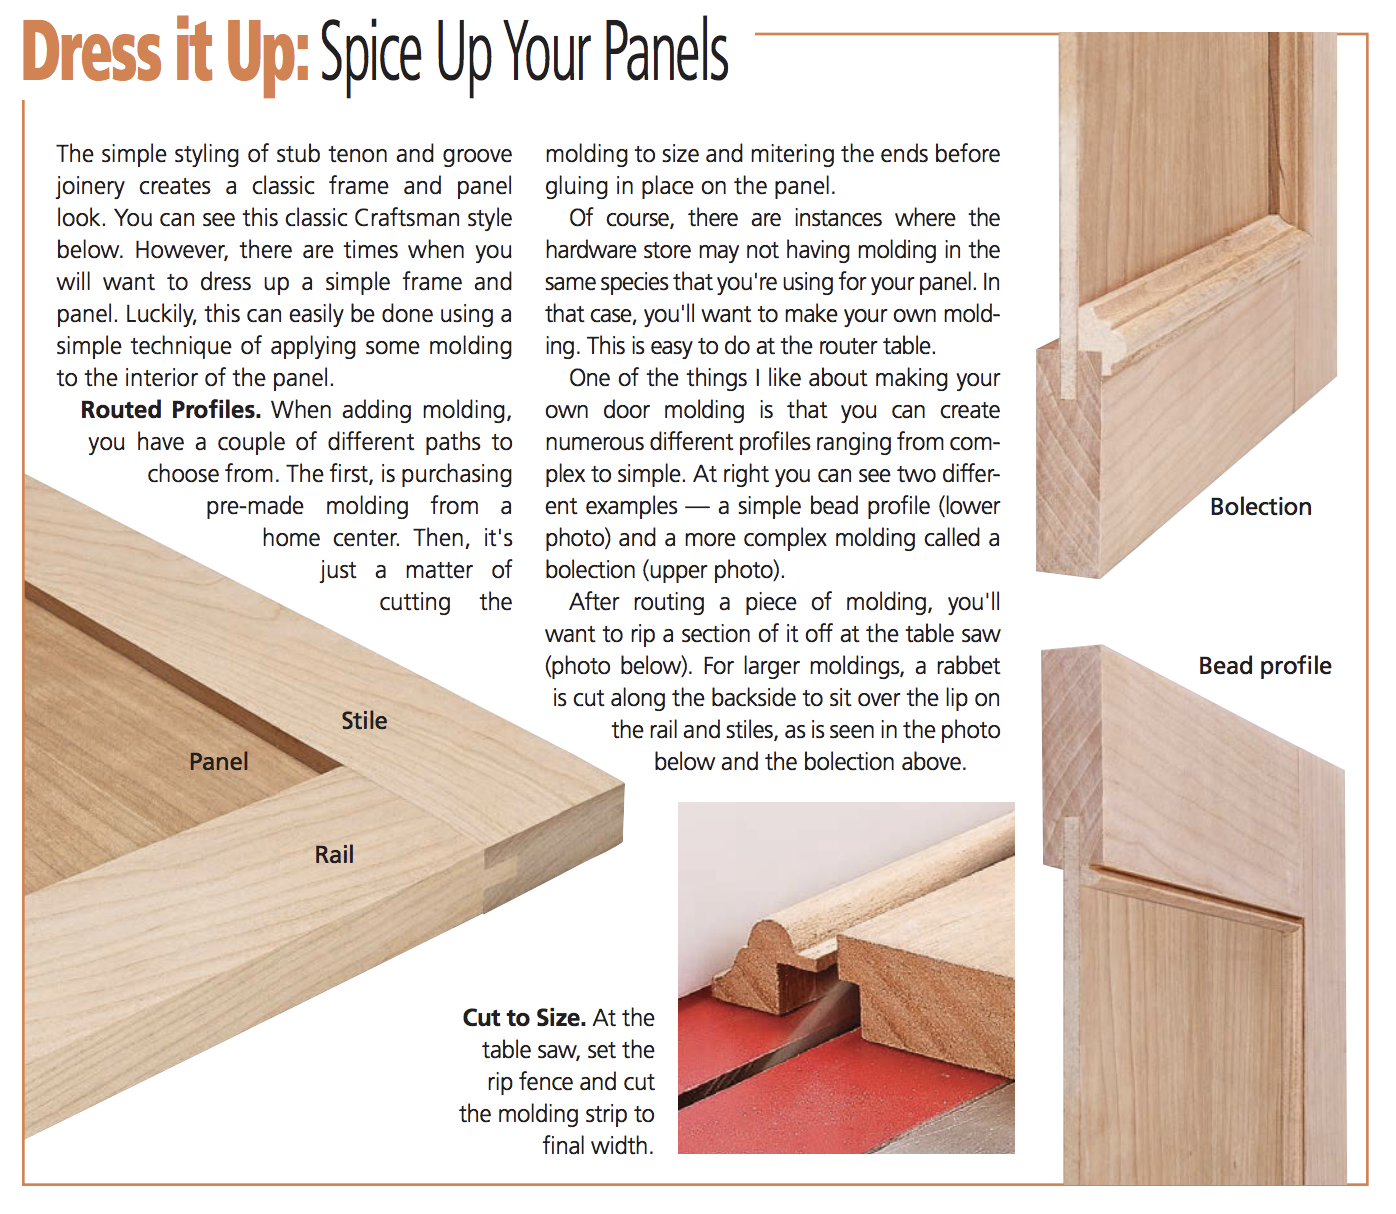
Added details. As a woodworker, I love the classic stub tenon and groove look. It oozes Craftsman style. However, there are some instances where you might want to dress up a frame and panel assembly, such as a cabinet door. Luckily, you can utilize the same stub tenon and groove joinery, and simply add some decoration. Take a look below for a couple of examples. The next time you have a project that calls for stub tenon and groove joinery, think about using your router table. I think you’ll be surprised how easy it is to set up and get great-looking joints.
A special thanks for WoodPeckers for supplying the tools needed to produce this article. This article was originally published in the Craftsman Furniture Projects Book.


