


Plastic laminate is one of the most useful surfaces you can add to a woodworking project. It's durable, easy to clean, and available in an enormous range of colors and patterns.
In the shop, I especially like laminate for router tables, assembly tables, workstations, and other hardworking surfaces. It creates a smooth, wear-resistant surface, and applying it doesn't require a lot of specialized equipment.
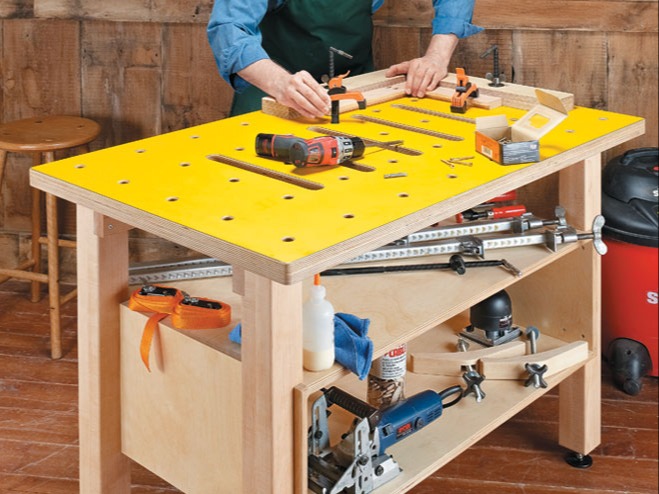
The key is understanding a few basic techniques. Start with a flat, stable substrate, cut the laminate oversize, apply contact cement carefully, and then trim the edges after the laminate is bonded in place.
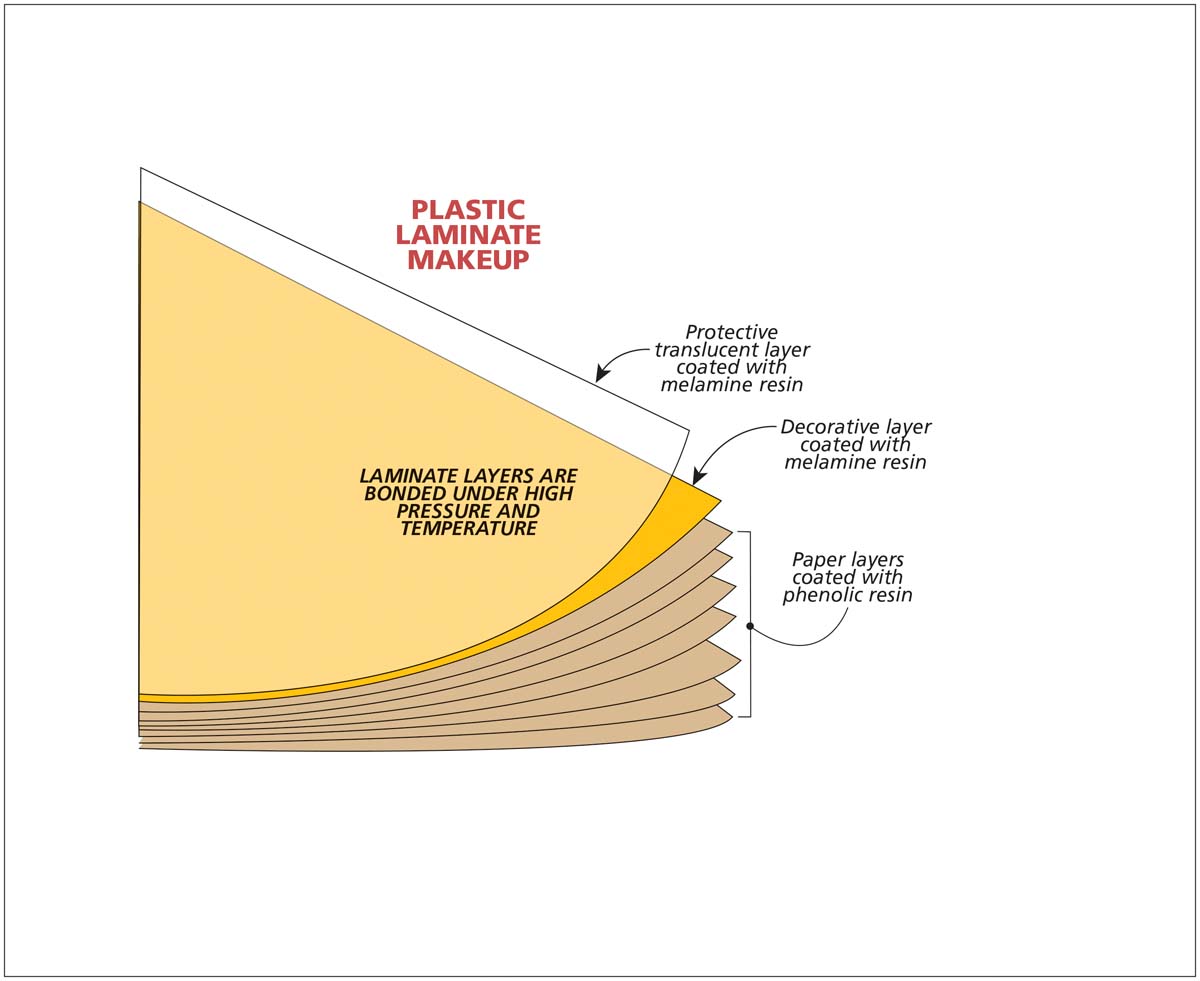
What Is Plastic Laminate?
Plastic laminate is a thin sheet material designed to be bonded to a rigid substrate. Instead of providing the structure of a project, the laminate creates the finished outer surface.
That's what makes it so useful for woodworking. You can build the project from plywood or MDF and add laminate only where you want a smooth, durable surface.
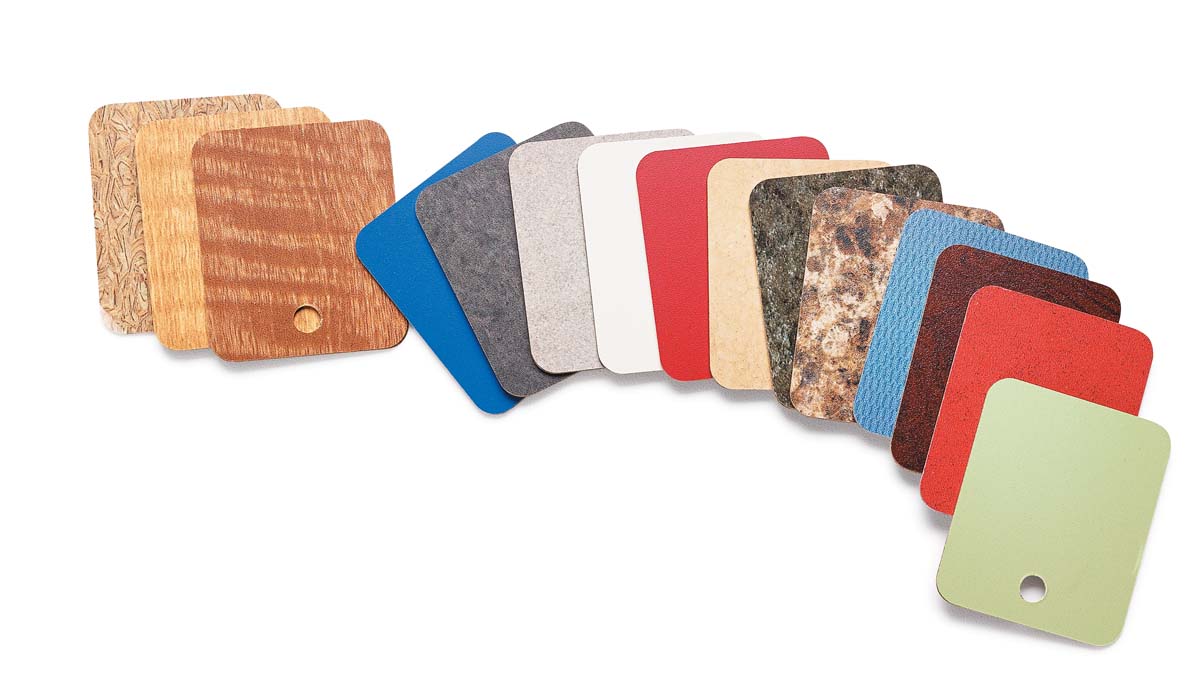
Laminate is available in a huge range of colors and patterns, so it can be used for everything from understated shop furniture to more decorative projects.
Sheets are commonly available in sizes such as 4' × 8' and 5' × 10'.
Vertical Grade vs. Horizontal Grade Laminate
Plastic laminate is available in different grades and thicknesses.
Vertical-grade laminate is thinner and is intended for surfaces that aren't subjected to heavy wear.
Horizontal-grade laminate is thicker and better suited to hardworking horizontal surfaces such as tables and countertops.
For many woodworking and shop projects, the thicker material is the natural choice for a worksurface.
Woodsmith Tip: Choose the Grade for the Job. Don't automatically choose laminate based only on color or pattern. Consider where it will be installed and how much wear that surface will receive.
What's the Best Substrate for Plastic Laminate?
A good laminate surface starts underneath the laminate itself.
The substrate should be:
- Flat
- Smooth
- Stable
- Suitable for a strong adhesive bond
For many projects, MDF is an excellent laminate substrate. It's flat, smooth, stable, and economical.
When the project requires greater structural strength or resistance to long-term deflection, high-quality plywood such as Baltic birch plywood is another good option.
RELATED ARTICLE → Best Materials for Workshop Cabinets, Jigs & Workbenches
The important thing is to start with a smooth surface. Any defect, debris, or irregularity underneath the laminate can affect the finished surface.
Step 1: Cut Plastic Laminate to Rough Size
Plastic laminate is brittle, so cutting it cleanly requires a little preparation.
A table saw makes quick work of sizing laminate. Use a fine-tooth blade, such as a crosscut blade, along with a zero-clearance insert to help produce a clean edge.

Because laminate is so thin, it can slip underneath an ordinary rip fence. Clamp an auxiliary fence tightly against the saw table so there's no gap beneath it.
Use a push pad to keep the laminate flat as you feed it through the cut.
The source technique also calls for setting the blade about 1½" high to help prevent the laminate from climbing the blade.
Cut the Laminate Oversize
Don't try to cut the laminate to its exact finished dimensions at the table saw.
Instead, leave approximately 1" of extra material around face sheets. Strips for edging can be cut about ½" wider than necessary.
The extra material gives you some margin for error when positioning the laminate. After it's bonded to the substrate, a router makes it easy to trim everything precisely to size.
Woodsmith Tip: Support Large Sheets. Full sheets of laminate are large, thin, and awkward to handle. Clear the area around the table saw, provide adequate infeed and outfeed support, and get another person to help control a large sheet when necessary.
Step 2: Apply Contact Cement
Although various adhesives can bond laminate, contact cement is the standard choice for this process because it allows the laminate to be bonded quickly over a large surface.

Contact cement is applied to both mating surfaces — the back of the laminate and the substrate.
A foam brush works well on small pieces. For larger surfaces, a foam roller can make it easier to spread an even coat.
Porous materials such as MDF may require additional adhesive coverage. Follow the instructions for the contact cement you're using, including application rate, number of coats, drying time, ventilation, and other safety requirements.
Water-Based, Solvent-Based & Aerosol Contact Cement
There are several convenient options for laminate work.

Water-based contact cement avoids the flammability associated with solvent-based products and is what we use in the Woodsmith production shop.
Solvent-based contact cement is another established option, but its fumes require excellent ventilation and careful attention to the manufacturer's safety precautions.
For smaller projects, aerosol contact adhesive can provide a convenient way to apply the adhesive.
Whatever product you choose, use it according to its specific directions.
Woodsmith Tip: Keep Everything Clean. Cleanliness is especially important when applying laminate. A chip, shaving, or bit of sawdust trapped between the laminate and substrate can create a noticeable bump in the finished surface. Clean both surfaces and the surrounding work area before applying the adhesive.
Step 3: Position the Laminate with Dowels
Contact cement presents an unusual challenge: once the coated surfaces touch, repositioning them can be difficult or impossible.
That's no problem with a small strip that you can position by eye. A large sheet requires a different approach.
The solution is simple — use wood dowels as temporary spacers.

Space the dowels across the substrate, then set the laminate on top. The dowels keep the adhesive-coated surfaces separated while allowing you to move the laminate into its final position.
Once everything is aligned, begin removing the dowels.
Start at one end for smaller pieces. On a large project, you can begin near the center and work outward.
Remove one dowel at a time and press the laminate onto the substrate as you go. Work progressively across the surface rather than allowing the entire sheet to drop onto the substrate at once.
Step 4: Roll the Laminate for a Strong Bond
Once the laminate is in place, apply firm pressure across the entire surface.

A roller makes this quick and provides consistent pressure. Work systematically across the whole surface to ensure the contact cement bonds completely.
If you don't have a roller, the source technique uses a smooth wood block and hammer to press the laminate firmly into place.
Don't rush ahead to trimming until you're satisfied that the entire sheet is securely bonded.
Step 5: Trim the Laminate with a Router
Now the reason for cutting the laminate oversize becomes clear.
Instead of trying to align the laminate perfectly with the substrate during glue-up, you can use the substrate itself to guide a router and trim the laminate afterward.

A compact or palm router is ideal for the job.
The type of bit depends on the edge you're trimming.
Flush-Trim Bit
Use a flush-trim bit when you want the laminate edge flush with the underlying substrate. This works especially well for trimming laminate edging.
Bevel-Trim Bit
For an exposed laminate edge, a 15° bevel-trim bit can trim the overhang while easing the sharp edge.
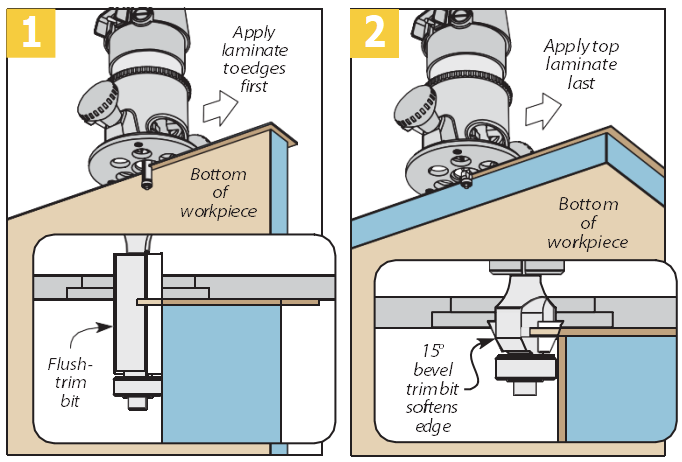
Be careful as you approach corners and edges. Laminate can chip if it's handled aggressively, so let the router and bit do the work.
File the Edges Smooth
Routing gets the laminate very close to its finished condition, but a file provides the final touch.
Use a smooth-cut mill file to remove any remaining overhang and soften sharp edges.

Use controlled strokes directed downward and outward along the edge. The goal is to smooth and ease the laminate without catching the edge and chipping it.
This small final step can make a noticeable difference in how professional the completed surface looks and feels.
Plastic Laminate Tips at a Glance
A Durable Surface for Woodworking Projects
Plastic laminate is particularly useful in the shop because it combines a smooth surface with excellent resistance to everyday wear.
Use it on a router table and workpieces slide smoothly across the top. Add it to an assembly or workstation surface and dried glue and finishing residue are easier to deal with. And because laminate comes in so many colors and patterns, it can look just as appropriate on furniture as it does on shop equipment.
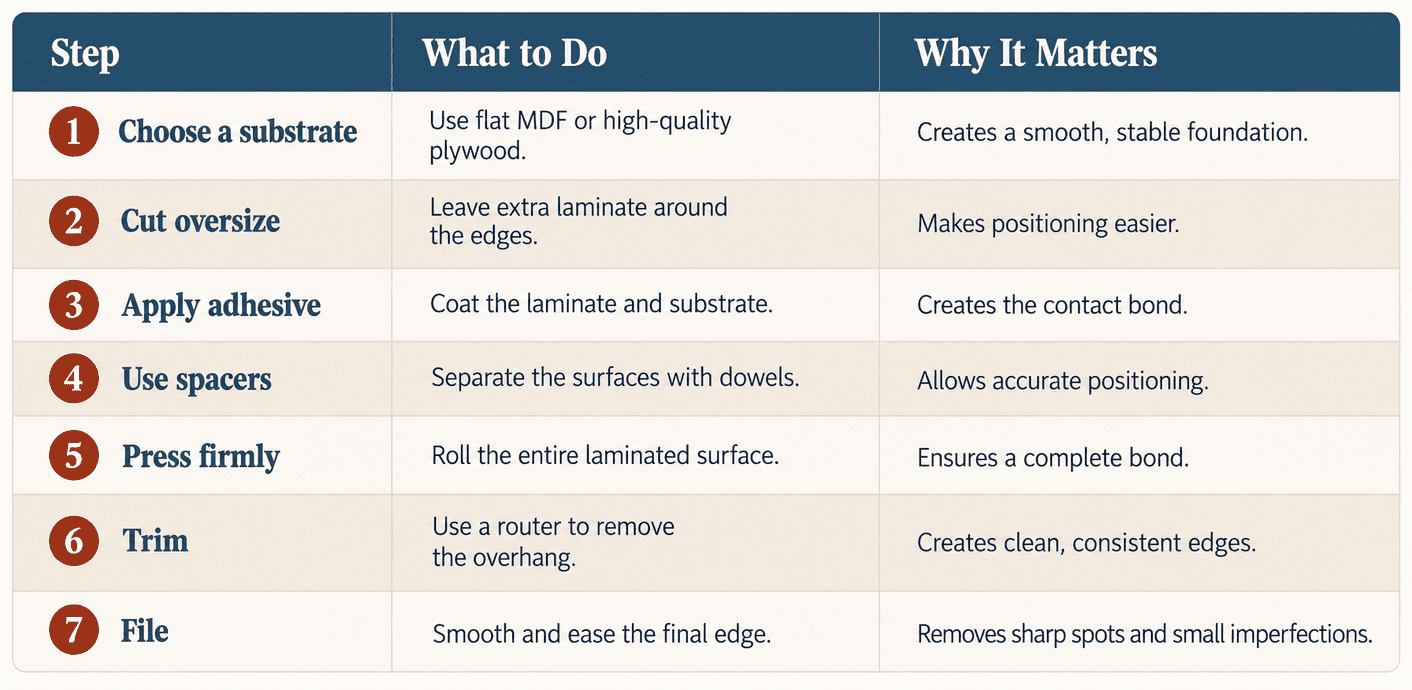
The process itself is straightforward: prepare a flat substrate, cut the laminate oversize, apply contact cement, position it carefully, roll it firmly, and trim the edges.
Once you've worked through those steps on your first project, you'll find plenty of other places in the shop where a laminate surface makes sense.
Choose the Right Material for Your Next Shop Project
Plastic laminate is only one of several materials that earn a regular place in the Woodsmith shop. See where we use Baltic birch plywood, MDF, hardboard, pegboard, Douglas fir, and hard maple — and why each one works well for particular projects.
CHOOSE THE BEST SHOP MATERIAL → Best Materials for Workshop Cabinets, Jigs & Workbenches


