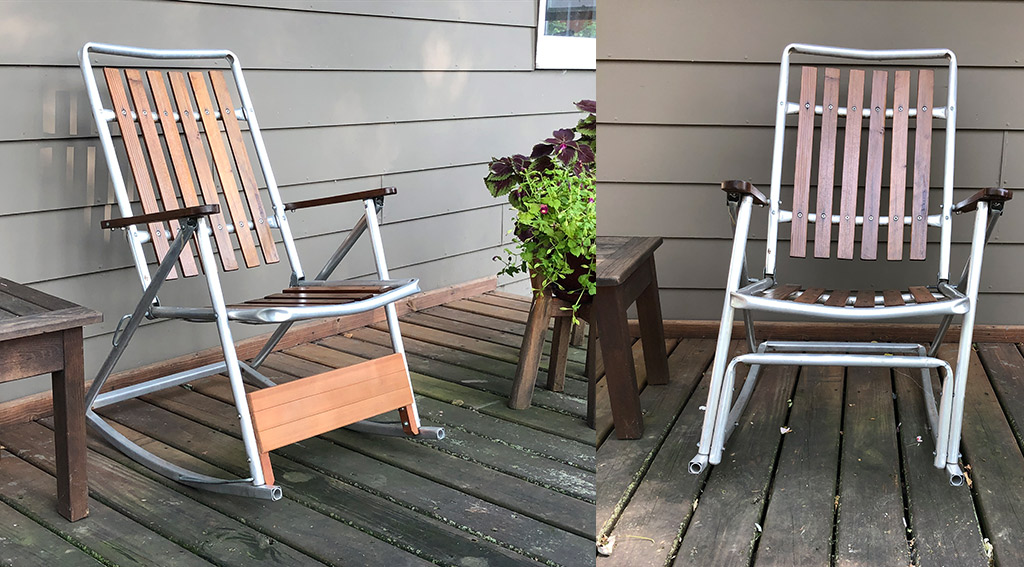
A few years ago, we got a pair of aluminum framed patio chairs from my wife's grandma. They've seen some stuff and were in need of a little attention. One of the chairs developed a discomforting lean. As a woodworker, I jumped at the chance to restore these chairs and get them back in use.
Now you don't need to be a fully equipped furniture maker to repair patio chairs. I'll highlight the steps I took, as well as the tools, supplies you'll need.
There are really two different components that you need to evaluate and address: the aluminum frame and the wood slats. Each requires a different process.
Yes, Disassemble
I began by taking all the wood parts off the frame. Use painters tape to label the parts so you can put them back in the correct place. Somewhere along the line, someone had tried to fix up the chairs while leaving everything together. But there are so many nooks and crannies, that the results looked haphazard.
Aluminum woodscrews and machine screws held the slats in place. That's right, aluminum. This is soft metal, so take it easy. However, you can find replacement screws at a good hardware store. Another option is to use stainless steel screws. These are harder and will last longer. Just avoid mixing regular steel and aluminum (the frame). It creates a reaction that will quickly damage both the frame and the screws.
The Frame
The chair frame had a powdery layer of oxidation along with blotches of varnish from the last rehab. I used a non-woven abrasive pad (Scotchbrite is one brand) to remove the finish. The pad also gives the metal an even, satin scratch pattern. Then you can apply a metal restorer and polish. Some even include wax for ongoing protection.
Check all the pivot points to determine if any of this hardware needs to be replaced or tightened.
Repair and Replace
The front support tube on this chair was bent and starting to crack on the corners. That's what was giving the chair its list. I cut the rivets holding the frame in place with a hack saw. The bottom was secured with caps that needed to be pried off.
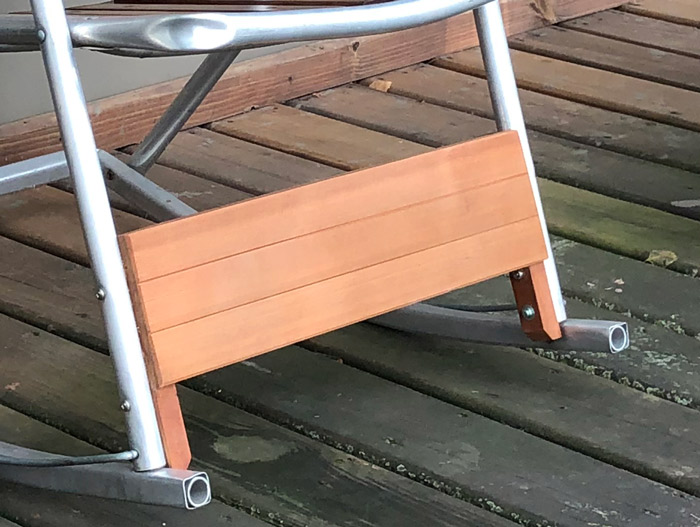
To recreate the necessary stiffness, I made a wood frame and panel. I found some cedar that had the color and grain to complement the redwood slats. The frame consists of two vertical stiles with a pair of horizontal rails. The stiles and rails are notched to "lap" over each other creating a rigid framework. This can be done with a hand saw, table saw or band saw.
After gluing up the frame, I used a half-round rasp to hollow the outside edges to match the round tubes of the frame.
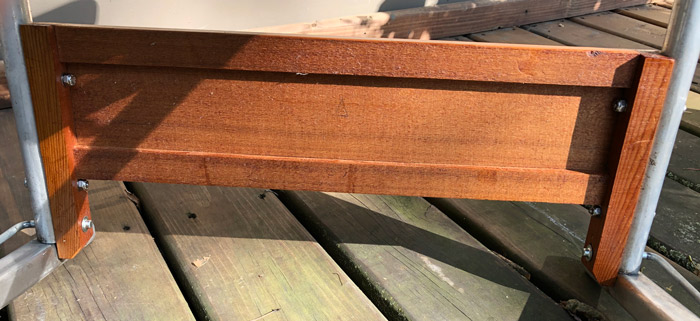
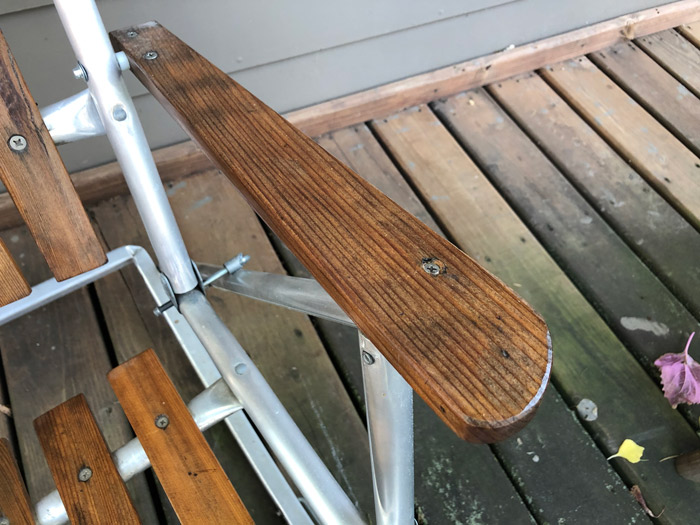
On its own, the frame would probably be strong enough. However, I decided to add an overlapping panel. The panel has shallow rabbets on the back face to nestle over the stiles and rails. This increases the strength of the assembly.
A couple v-grooves added to the front of the panel break up the appearance. It also echos the pattern of the slats on the seat and back.
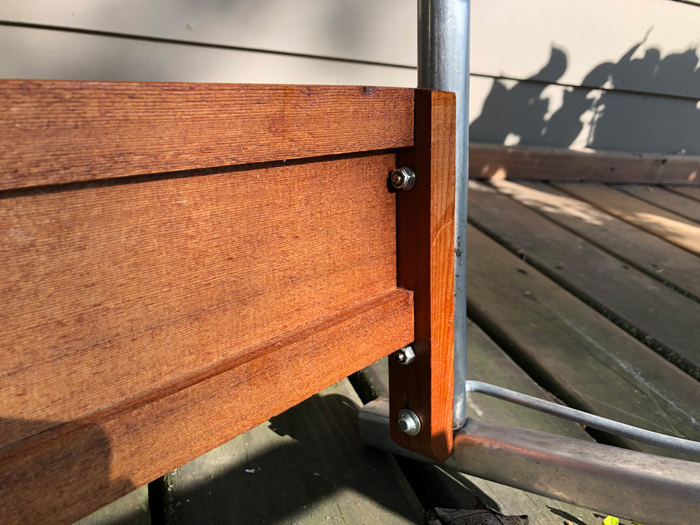
The frame serves as a guide for drilling the holes to attach the new section to the frame. I used stainless screws and nylon-insert nuts for this. Hold off on final assembly until you've applied finish (see below).
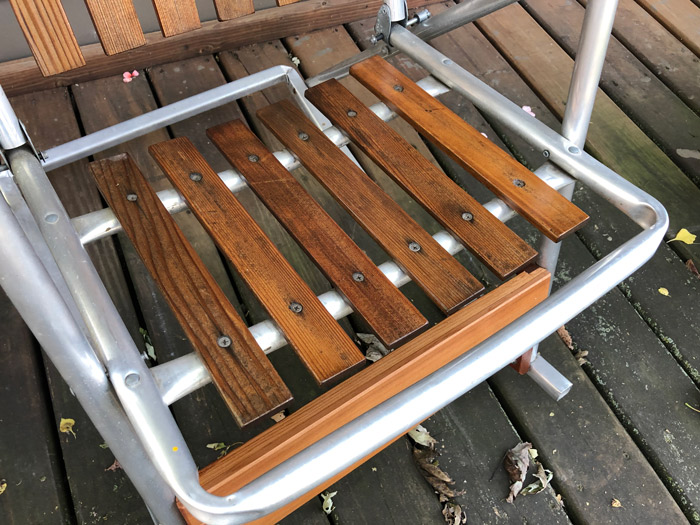
The Wood Slats
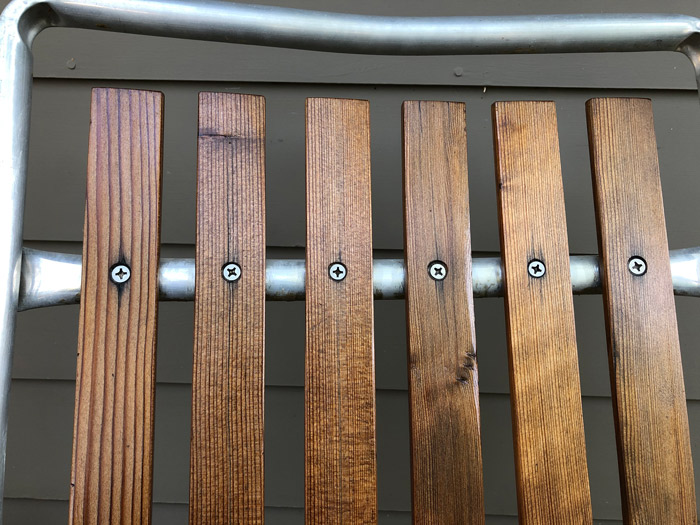
You can set the frame aside and consider the wood bits next. Our chairs had redwood slats. The condidtion of the these was even at best. Some had peeling varnish. All showed weathered, gray wood. While silvery gray outdoor pieces can look sweet. These chairs exude a mid-century cool that's best appreciated with rich, clear finished wood in its natural red-brown hues.
You can begin reviving the slats by scraping away the flaking finish with a carbide scraper. A random orbit sander makes quick work of removing old finish and working down to bright wood. Softwoods like redwood and cedar will sand quickly, so there's no need to start with a coarse disc. I began with 120-grit and stepped up to 180-grit. On the edges and ends, I used a cork sanding block instead of the power sander. This keeps the edges smooth and crisp.
A quick onceover with the sanding block on all the surfaces with 220-grit sandpaper completes the sanding process. Ease any sharp edges with the sanding block to prevent splinters. Your next task is to presever your efforts.
Finish Right
I prefer finishes that provide just a bit of shine to the projects I make — or restore. For chairs like these, you go one of two routes: water-based or oil-based. Water-based finishes offer quick drying times and easy, soap-and-water cleanup. Oil finishes typically give you a richer color and slightly more durable protection.
Old Masters water-based Ascend Exterior is my preferred finish. Unlike other water-based finishes, it warms up medium and dark-toned wood with a slight amber color. And since it dries quickly, I can apply three coats in a single day.
If you want to go the oil-based path, try Old Masters Spar Marine Varnish. Though it isn't necessary, you can dilute it with mineral spirits to apply in thinner coats and allow it to penetrate deeper. Apply two to three coats, waiting overnight between each coat. Lightly sand the dried coat with 400-grit sandpaper before applying the next.
It's Never Really Done
It's best to think of applying the finish as a temporary step and not the final step. Sun, rain, bird doo ... all punish wood that lives outside. So the finish you apply is designed to wear down while protecting the wood. This means you'll need to give your projects a checkup periodically and apply more coats.
I usually do this in the spring as the weather warms. The process helps me to anticipate the pleasure of sitting out on the deck enjoying the sunshine after a long winter. Scuff the finish lightly with 400-grit sandpaper. Then apply another coat or two.
Put it All Together
Once the finish has dried, you can reassemble the chair. With an aluminum tube frame, it's easy to strip out the screws. So use a hand screwdriver instead of a power driver.
Stand back once to admire your work. Then find a book, a beverage, and a shady spot to enjoy the day.