

One of the key skills in cutting dovetails is the ability to make consistent angled cuts. Perhaps this is the reason why some folk think of the table saw, at least for cutting the tails. You tilt the arbor to a specific angle and know that every cut is identical.
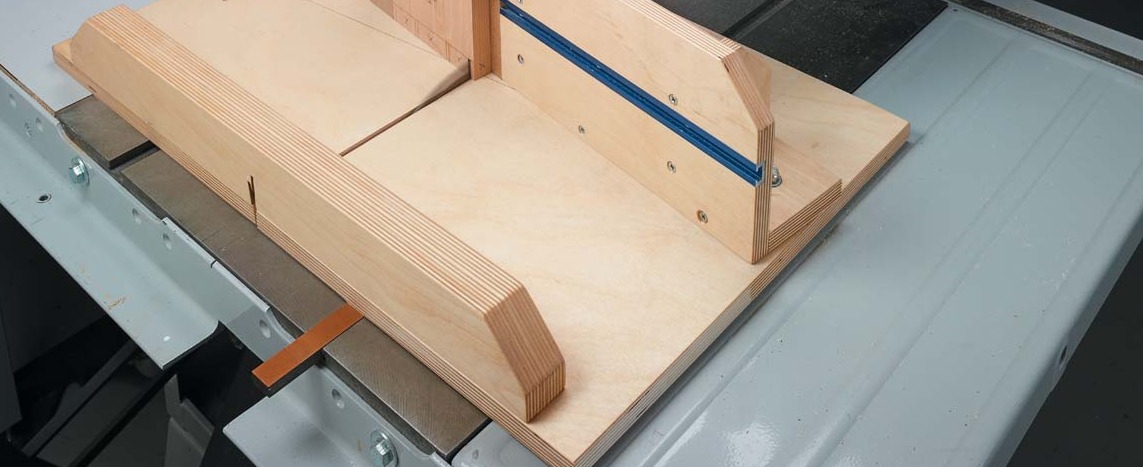
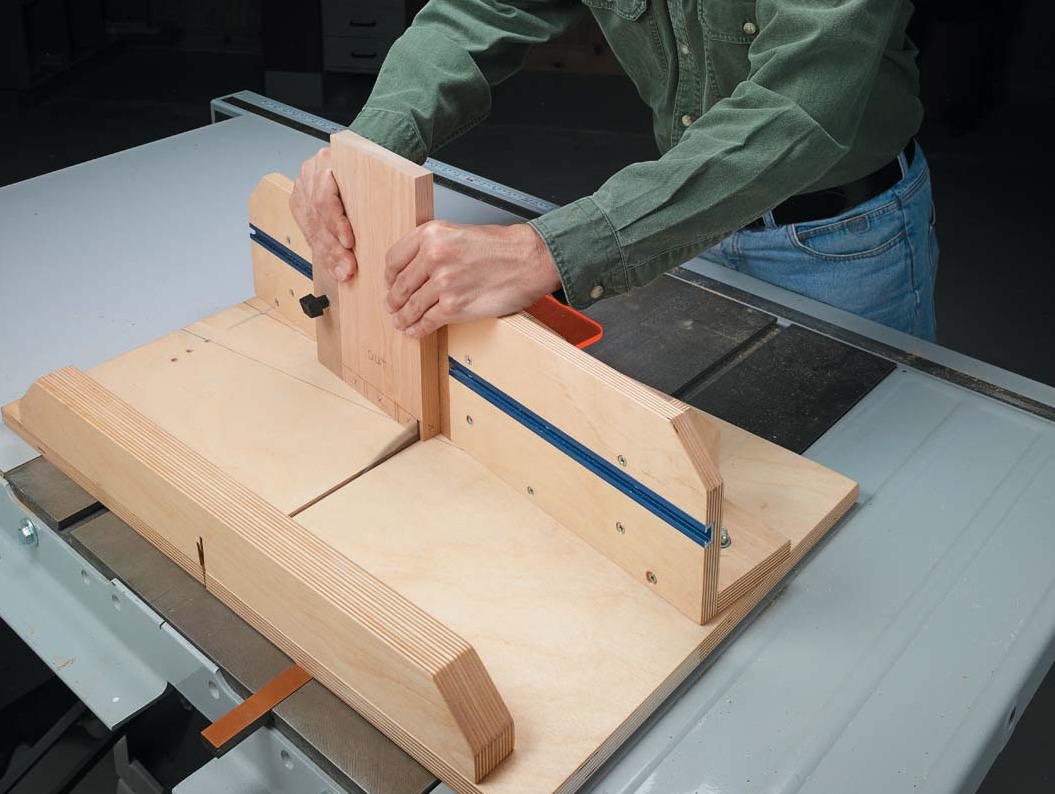
To cut the pins, however, the blade needs to be vertical and the workpiece rotated in relation to it. By this point, the various setups feel complex. Allow me to persuade you to transform your dovetailing by making a table saw jig, first. Follow the link to the plans at Woodsmithplans.com. The jig resembles a crosscut sled, but the fence is adjustable to allow for cutting both the pins and tails.
The jig does more than hold a piece in the correct position. It uses custom-made spacers to establish consistency across all of your project parts.
TAILS FIRST
The approach I demonstrate here starts with cutting the tails. You then use them to lay out the pins. Before you jump in, cut a few test pieces to guide the setup and give you some practice parts.
||
| ---------- |
| |
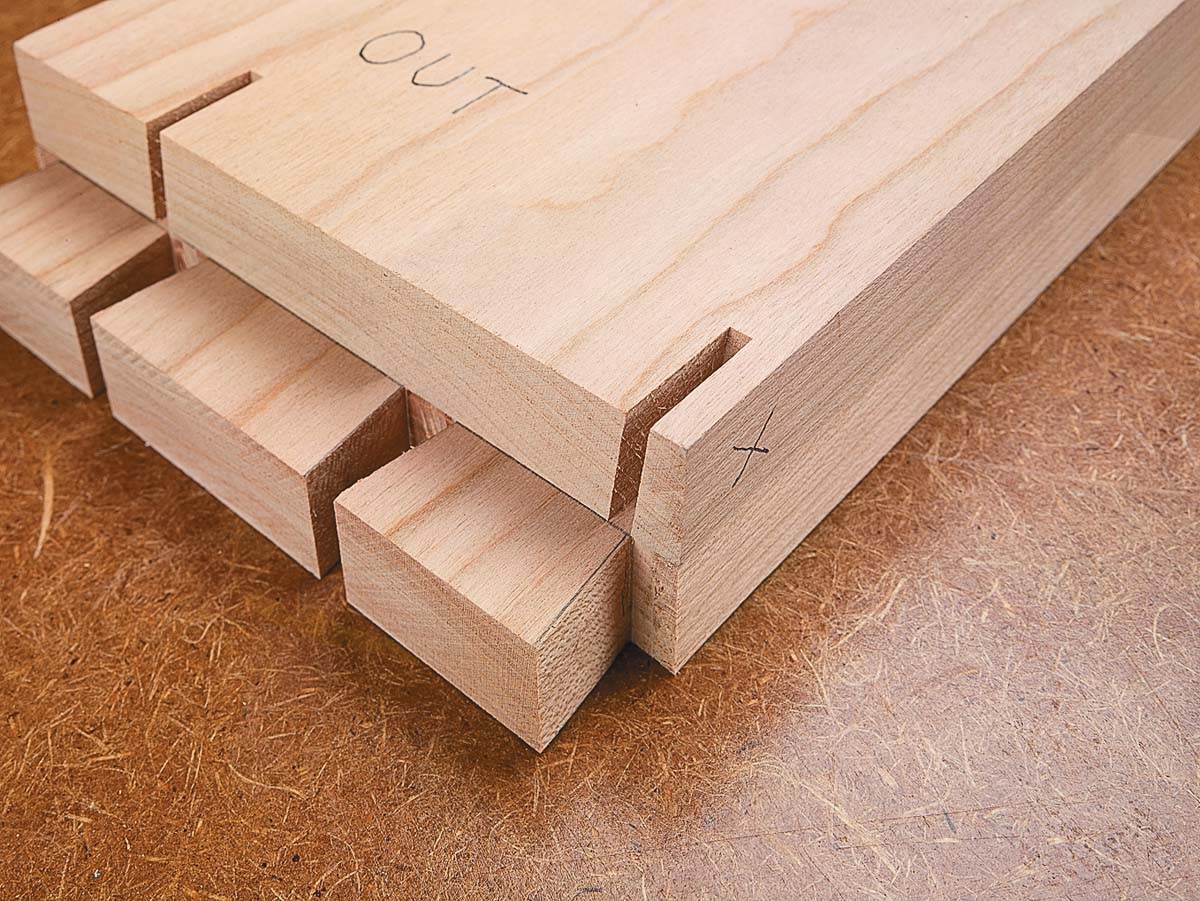
|Careful setup following simple steps results in crisp, snug-fitting dovetail joints across multiple parts.|
|
|Careful setup following simple steps results in crisp, snug-fitting dovetail joints across multiple parts.|
LAYOUT.
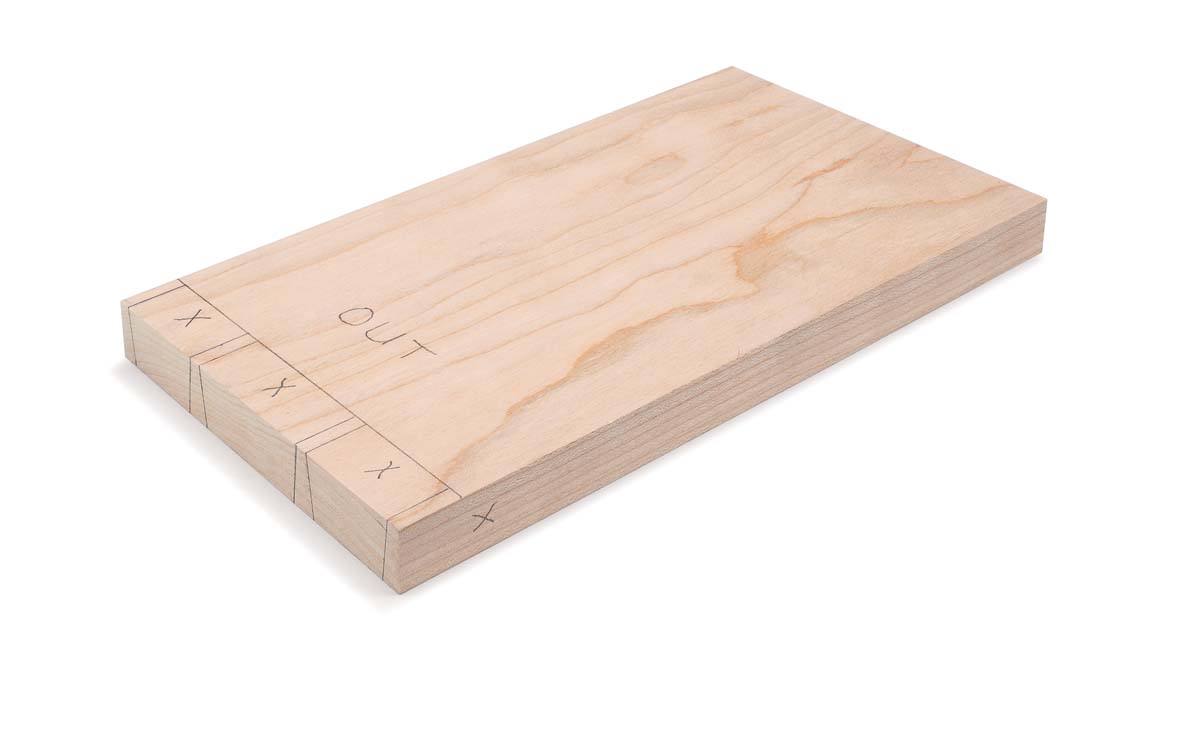
As with any joinery, dovetails start with the layout. Begin by scribing the baseline of the joints on all your parts with a marking gauge. (Feel free to run a pencil along this scored line to increase your visibility.) You only need to mark the sides of the tails on one set of parts since the spacers handle positioning, as shown in Step 1. Lots of lines can lead to confusion, so it’s a good idea to indicate the waste areas.
||
| ---------- |
|
 |
|Pencil lines are easy to see and all you need to set up the stops and spacers of the table saw jig. Scribe the baseline.|
|
|Pencil lines are easy to see and all you need to set up the stops and spacers of the table saw jig. Scribe the baseline.|
With this jig, the size and spacing of the tails can vary, but the arrangement needs to be symmetrical about the centerline of the workpiece. The space between each tail is limited by the thickness of the saw blade. In practice this means about 3⁄16" is about the minimum.
Tilt the saw blade to match the slope of your tails. I like to use a digital angle gauge to set the blade. Some woodworkers may want to go all-in and get a blade ground to match the slope of the dovetails. You’ll see that kind of blade reflected in these photos.
||
| ---------- |
| |
|A digital angle gauge offers good visibility to set the blade angle on the table saw, not to mention it’s more accurate than the saw’s gauge.|
|
|A digital angle gauge offers good visibility to set the blade angle on the table saw, not to mention it’s more accurate than the saw’s gauge.|
FIRST CUTS.
Raise the blade and make a cut through the jig with the fence set 90° to the blade. Set the blade so the tip just touches the baseline of the tails. This kerf helps determine the location for a stop block and spacers. Align your marked workpiece with the kerf on the waste side of the line. I clamp the piece in place while I position the stop block on the opposite edge.
This is the position for an initial set of cuts at each corner of your tail boards. Rotate and flip the pieces to make each cut. This is shown in Step 2.
||
| ---------- |
| |
|A stop block registers your workpiece for the first cut. Be sure to rotate and flip the piece as needed.|
|
|A stop block registers your workpiece for the first cut. Be sure to rotate and flip the piece as needed.|
It comes as a surprise, but that’s all there is to cutting the tails. The only difference is that between each set of tails, you slip the appropriate spacer between the workpiece and the stop block. (The jig plans include information on how to size the spacers to suit your project.) The cuts are simple, but repetitive, so you need to keep your wits about you. Keep an eye out for dust or chips that could wedge between the workpiece, the spacers, and the stop block. This spoils the spacing and affect later cuts.
STEP & REPEAT.
Step 3 and the main photo show the continuation of the process as more spacers are added. Once you cross the centerline of the workpiece, the shape of the tails is revealed.
| |
| ---------- |
| |
|Slip a spacer between the workpiece and the stop block to set up for the second set of cuts.|
|
|Slip a spacer between the workpiece and the stop block to set up for the second set of cuts.|
SOME HANDWORK.
A small amount of waste remains between each kerf in the waste areas. Smaller bits lurk in the very corners if you’re using a regular blade. The remedy is shown in Step 4. After all the table saw cuts, some handwork at the bench offers a welcome change of pace. Sharpen a narrow chisel to chop out the waste. Flip the piece so that you work in from each face to avoid tearout.
| |
| ---------- |
| |
|The table saw cuts leave little waste to remove by hand. The saw kerfs and scribed line guide the way.|
|
|The table saw cuts leave little waste to remove by hand. The saw kerfs and scribed line guide the way.|
The edge of your chisel registers in the scribed baseline to ensure accurate placement There’s a bit of a reset between cutting the tails and making matching pins. First up is to return the blade to vertical. (Put in a standard blade if you used a special-purpose blade.) When you change the angle, you need to adjust the height of the blade. That’s an easy step to overlook. Angle the fence on the jig to one of the pin-cutting positions. I show it angled back for the first set of cuts.
TRANSFER PORTAL.
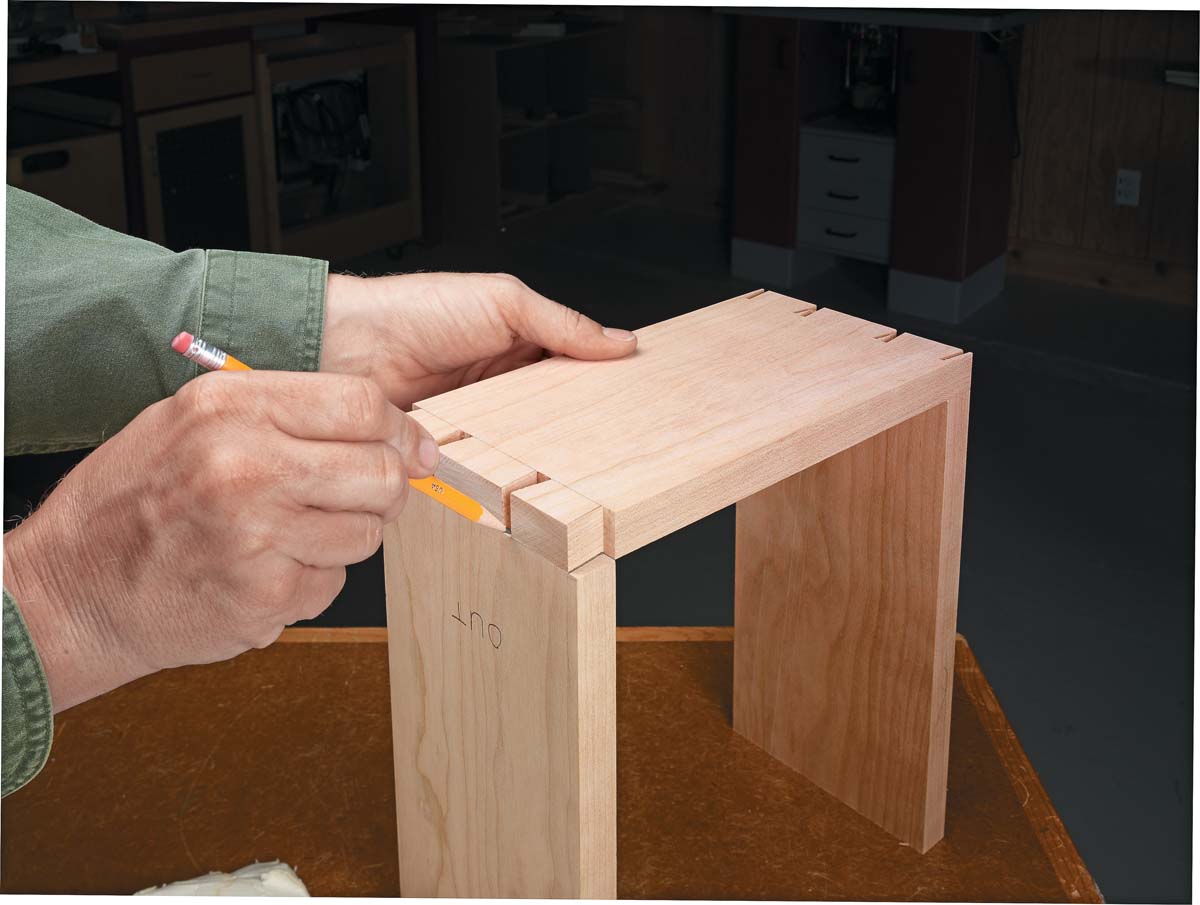 |
 |
 |
| Trace the sides of the tails onto the ends of the pin boards. Sharpen your pencil often to keep a fine point. | Use a small square to extend the lines across the faces of the pin boards and down to the baseline. | Indicate the waste area on the layout to avoid any confusion in the cutting or fitting process. |
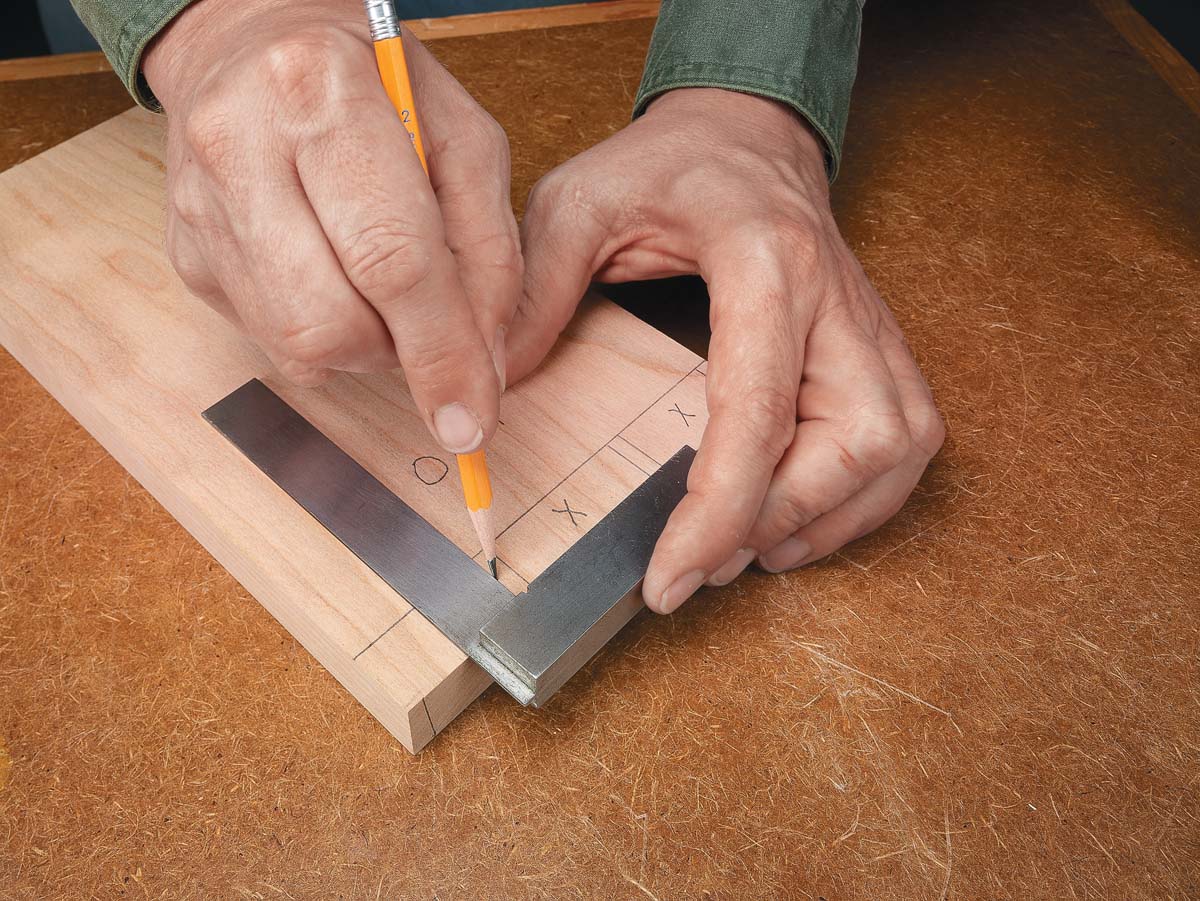
The actual tails, rather than the numbers in the plans, are the guide for marking the pins. Steps 1 and 2 show the process. I clamp the pin board in a vise to hold it steady while I trace the tails. Square those marks down each face of the pin board. Do the same with a test piece to set up the jig and stop. Fine lines are your friends here, so don’t let your pencil get too dull. Remember to mark the waste area between each pin.
THE FIRST PIN.
 |
 |
 |
| Position the stop block so the size of the first pin matches the tail workpiece. Then, make a cut on both ends of all the workpieces. | Sneak up on the final size of the first pin until it matches its mating opening in the tail workpiece. This is the final position of the stop. | After making one cut, flip the workpiece and make a cut for the pin at the opposite corner. Keep the same face against the fence. |
Step 3 picks up the process. Line up the pin board with the waste side of the first pin and slide the stop block in place. Make a cut and compare the placement with its matching tail, as shown in Step 4. The idea is to nibble your way closer to perfect alignment in a few cuts. Be sure to nudge the stop block with each pass.
Once the stop block is dialed in, you’re ready to start making hay. Set one of your project parts in place and make a cut like the one shown in Step 5. Then turn the board around keeping the same face against the fence to make the same cut on the opposite corner. Hold off on the other two corners. They get cut later. Repeat this cut on all of your pin boards. You can see why accurate marking, labeling, and organizing are important here.
SPACER SEQUENCE.
Bring back the spacers to this side of all the remaining pins. The same advice applies for pins as for the tails. Your initial marked workpiece is your standard to gauge your progress. Step 6 shows the results.
| | | |
| ---------- | ---------- | ---------- |
| |
| |
| |
|Add a spacer and make the next set of cuts. With the last spacer in place, cut all the workpieces to complete one angle.|After adjusting the fence to angle forward, reposition the stop block to form a complete pin on the workpiece.|Then, install each spacer in turn to complete the remaining pins, cutting on opposite corners.|
|
|Add a spacer and make the next set of cuts. With the last spacer in place, cut all the workpieces to complete one angle.|After adjusting the fence to angle forward, reposition the stop block to form a complete pin on the workpiece.|Then, install each spacer in turn to complete the remaining pins, cutting on opposite corners.|
A NEW ANGLE.
To cut the other side of the pins, you need to reset the fence to its third position so that it angles forward. You need to reset the stop block and follow the steps we just worked through for this side of the pins. Step 7 highlights the differences in what this looks like. Spacer blocks come next as you work across the pin boards. By now the process should feel second nature.
By the end of the cuts, the pins have been traced by the saw blade. There’s still considerable waste to remove. Do that with a progression of nibbling cuts between each pin. You can see this in Step 9. It takes time, but not as much as you think it might. Pay attention here. You don’t want to cut into the side of the adjacent pin.
| | | |
| ---------- | ---------- | ---------- |
| |
| |
| |
|Remove the spacers the remove most of the waste with a series of cuts between each pin location.|Just as with the tails, so also with the pins, remove the last bits of waste with a chisel, working to the baseline.|The pins should be sized so they just slide into the tails. If they’re too tight, you’ll need to fine-tune the pins.|
|
|Remove the spacers the remove most of the waste with a series of cuts between each pin location.|Just as with the tails, so also with the pins, remove the last bits of waste with a chisel, working to the baseline.|The pins should be sized so they just slide into the tails. If they’re too tight, you’ll need to fine-tune the pins.|
CHISEL TIME.
This stage of cuts leaves small, wedge-shaped waste areas alongside each pin. Back at the bench, trim it away with your chisel, as you can see in Figure 10.
The moment of truth arrives when all the waste is gone. Test the fit of the joint. The steps I’ve outlined err on the side of a too-tight fit, but aim for the parts to come together with firm hand pressure. If you can press the parts halfway, as Step 11 shows, then you’ve made it.
More than that, you’ve learned a new skill and taught your table saw a new trick. Not bad for an afternoon’s work.


