For me, the attraction of cutting dadoes by hand is the slow, quiet pace and the chance to do a machine-quality job with a few basic hand tools. To be honest, it’s not a woodworking skill that’s essential to master, but it is one that comes with a good dose of satisfaction. And as anyone who has ever tried this basic technique can tell you, it really isn’t difficult.
THE TOOLS. You’ll only need a small assortment of tools for the job. Take a look at the photo above and you’ll see the full complement: a combination square, a marking knife, a good-quality back saw, and a sharp chisel or two.
LAYOUT. With your tools gathered on the bench, the first step is to lay out the dado. The drawings along the bottom of the page show how to proceed with this.
I score all of the layout lines with a sharp marking knife, as shown in Figure 1. A scored line is much more distinct and easier to follow than a pencil line. And the bonus is that it can serve as a “starting line” for your saw and chisel cuts.
The mating workpiece is used to size the width of the dado (Figure 2). And since the layout will guide all of your cuts, it needs to be thorough. So along with the top shoulders, mark the edge shoulders and the baseline (Figure 3).


SAW THE SHOULDERS. Once the layout is complete, you’re ready to establish the long shoulders of the dado with a couple of shallow saw cuts. This is best accomplished with help from a guide fence clamped firmly to the workpiece, as shown in the photo above.
The guide is simply a piece of wood with a perfectly straight edge that’s square to the face. Position the guide to the outside of the dado with the edge directly on the layout line. The knife point or edge of a chisel can be placed in the score line to help locate the guide. Then clamp the guide down firmly.
As you saw down to the baseline, concentrate on holding the blade square against the guide. This will give you a kerf that follows the layout line and is perpendicular to the surface. As you near the baseline, go slow and check your progress at both edges. It’s better to stop a hair shy than to cut too deep.
I like to flip the workpiece end-for-end to make the second shoulder cut. This allows me to position the guide and make the cuts in the same comfortable orientation.


PARE AWAY THE WASTE. With the two shoulders cut, you can exchange the saw for a sharp chisel to begin removing the waste. The chisel should be narrower than the dado so that you can work freely without fear of chipping or digging into the crisp shoulders. For a 3 ⁄ 4 "wide dado, I use a 5 ⁄ 8 "- or 1 ⁄ 2 "-wide chisel. You’ll be making mostly light paring cuts, so a mallet to drive the chisel is optional.
The goal is to create a dado with a flat, smooth bottom and a crisp, square baseline defining each end. The quickest way to accomplish this is to tackle the job using an easy-tofollow routine. The sequence of the chisel cuts that I make is shown in the drawings above.
You want to start by establishing the baseline at both ends of the dado. This is done by paring down to the score line with a series of short, “uphill” cuts, as shown in Figure 4. Angling the cuts upward allows you to remove the waste at the edges easily and quickly. The final cut at the baseline can be made with edge of the chisel seated directly in the scored line.
When you’ve completed the bevel at each end of the dado, you can begin to remove the waste from the center. And again, there’s a simple method to this.
I start with careful beveled cuts along each shoulder, as shown in Figure 5. Several shallow cuts will leave a peak of waste through the middle that then be pared away quickly with a flat cut.
With alternating beveled and flat cuts, work down to the bottom. When you approach full depth, finish up the dado with light “planing” cuts, using the back of the chisel for reference (Figure 6). A combination square can be set to gauge the consistency of the depth.
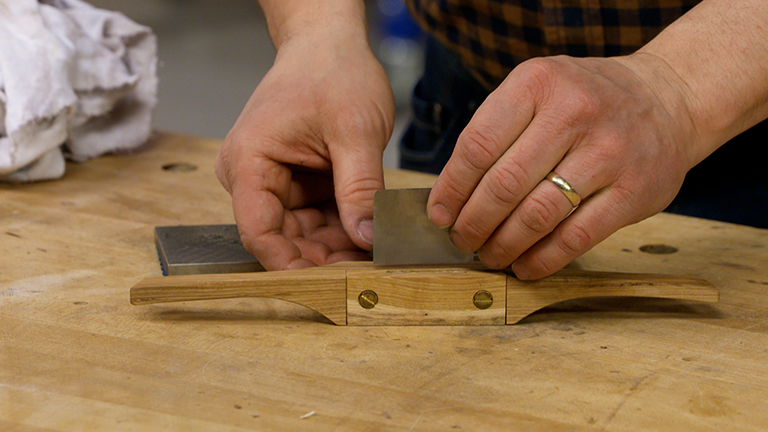
Another way to clean up the bottom of a dado is to use a router plane (photo below). It makes achieving a smooth bottom with a consistent depth fast and foolproof.
You’ll be surprised at how quickly the entire process goes as well as the quality of the result — not table saw speed, but surely a little more satisfying.
Tools: Router Plane


A router plane makes quick work of leveling the bottom of a dado. While the base of the router rides on the surface, the blade skims along the bottom, ensuring a consistent depth and leaving a smooth surface (detail drawing).