Flat, stable, and available with many different species of face veneers, plywood is a fantastic material for building furniture and all sorts of shop projects. The exposed veneer layers on the edges offer a look of basic functionality, which can play into a lively, modern aesthetic, but sometimes those plywood edges aren’t wanted and need to be covered up. Veneer tape is fast but does not produce a durable, high-wearing edge, and no edge profile can be applied. The best answer is often an edge of thick, solid wood. Solid wood can take a hit, it can be profiled with a router for style, and adds the option of contrasting color and grain.
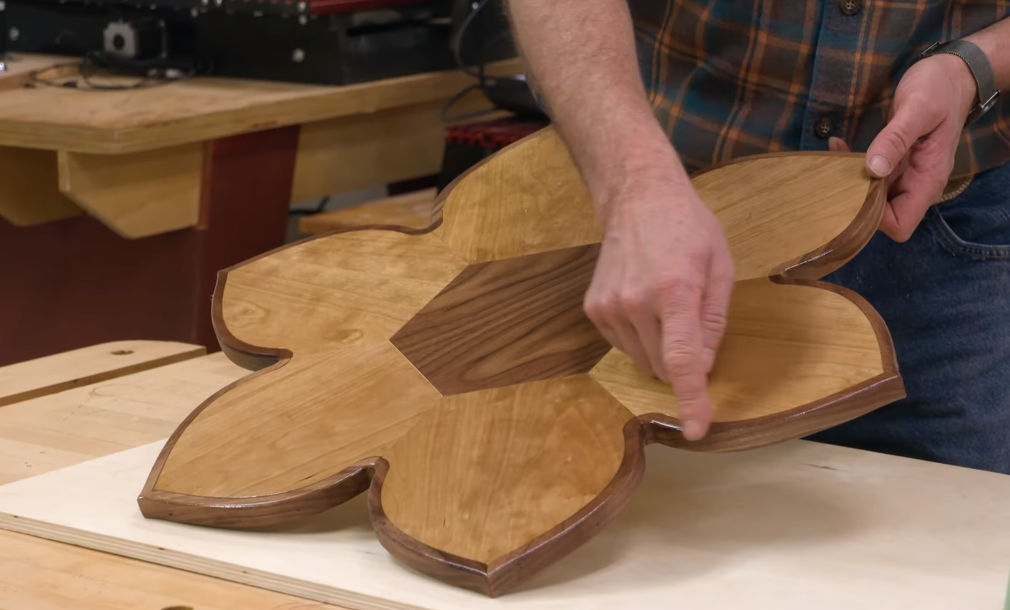
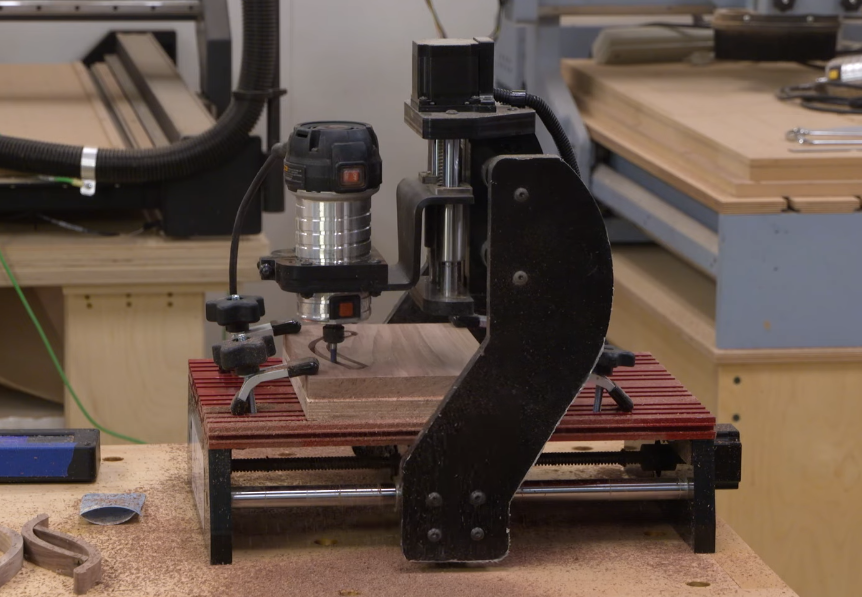
Most projects have straight edges, so ripping edging on the table saw is easy. But what about curves? The round corners of a conference table can be dealt with by turning a ring on the lathe (or with a trammel and router) that has an inside diameter matching the plywood table’s inner form. The ring is cut into four segments, applied, and straight edging fills in between. But what about a table that has a flowing complex shape, such as a flower? The old school way is to laboriously create master templates and pattern route the parts. The new and better way is to use your CNC router.
Creating complex edging starts with your computer and a drawing program. Most drawing programs have a tool that makes creating complex edging easy – the offset tool. Begin by drawing the outline of your project, then highlight the line segments and click on the offset tool. The offset tool creates a copy of the shape which you can make larger or smaller than the original shape by simply dragging it with the mouse. Click to confirm and enter the desired width of the edging. Next, break the edging form into individual segments based on grain direction and strength, and available material size. The individual edging segments can then be saved and cutting files created.
Creating complex plywood shapes with solid wood edging – it’s fast, easy and CNC accurate.