When I started getting serious about woodworking, big routers and big bits were the rage. New 3hp machines the size of a droid came on the market. To go with these behemoths, bit makers introduced everlarger bits. My “favorite” were the panel-raising bits that sound like helicopters from M.A.S.H.
It turns out that what many woodworkers wanted was smaller routers (and the bits to go with them). In the years since, compact or trim routers have comprised most of the new releases, including cordless models.
These small routers only accept 1/4" shank bits. This limit has spurred the creativity of bit makers to produce cutters that make the most of the portability and practicality of small routers.
Hiding in plain sight, dado cleanout bits prove themselves in project after project here at Woodsmith. A search of our back issues revealed dozens of mentions. I feel they deserve a closer look. As you’ll see in the photos, you can certainly use these bits in full-size routers.
DEFINED.
Dado cleanout bits fall within the larger family of pattern bits. These straight-cutting bits have a bearing on the shank end that matches the cutting diameter. Dado cleanout bits branch off from pattern bits with two characteristics. First, they all have a ¼" shank. Perhaps their defining attribute is their short cutters.

For me, a dado cleanout bit has a cutting length no longer than 1/4". Beyond that, and we move into more typical pattern bit territory. The cutting diameter ranges from 7/16" to 3/4".
MIND THE GAP.
When you’re examining a dado cleanout bit, take a look at the gap between the cutting edges and the bearing. Some bits have a large gap. In my opinion, that can limit the bit’s usefulness. A larger gap allows a thin web of uncut wood to get between the bit and bearing. A wider gap can also prevent a bit from following the edge of an existing channel.
DADO CLEANOUT BITS AT WORK.
That’s it for the anatomy lesson: short, straight bit with a bearing. Got it. What’s needed now are some applications to explain why we like them so much — and convince you to pick up one or two for your own router bit kit.
CLEANING OUT DADOES.
Let’s start with the obvious one. It’s in the name, after all. The concept is simple: cut a dado with the brute efficiency of a table saw. Follow up with a router and a dado cleanout bit.
 |
 |
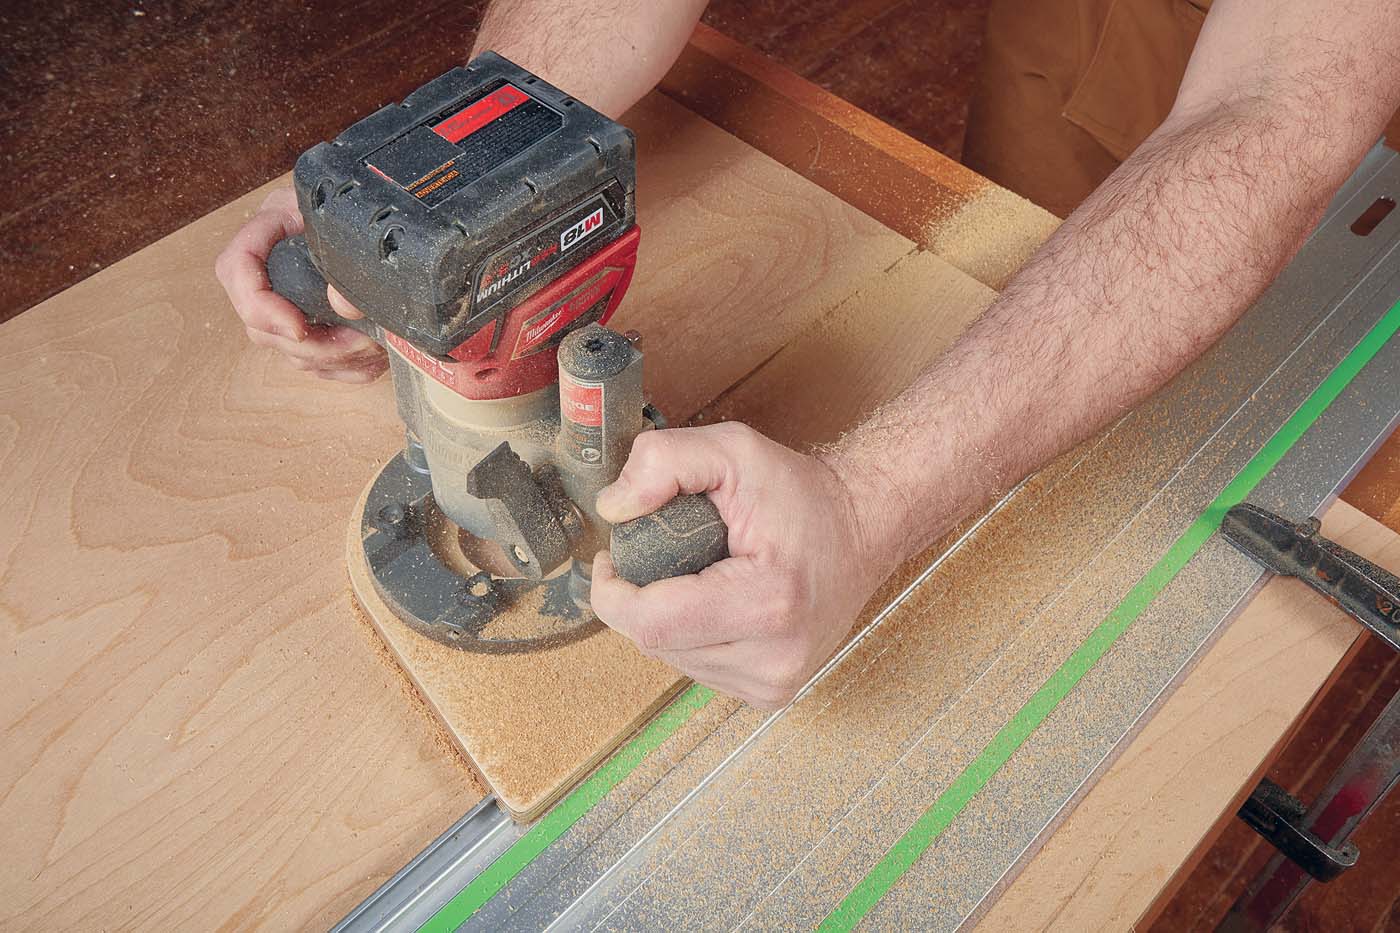
| With stacked dado sets, the outside blades often leave score marks on the sides of the dado. While this doesn’t weaken the joint, it’s still noticeable. | To get the tightest, best looking dado joint, use a dado cleanout bit in a hand-held router. The top-bearing bit is guided by the sides of the existing dado. |
The shallow cutting depth allows you to follow the existing dado. This eliminates the step of setting up a fence to guide the bit. There are two goals: first, to clean up the dado’s bottom. The blades and chippers in a dado stack may leave an irregular surface.
Second, the bit reduces inconsistencies in the dado’s depth. A router rides along minor bowing in a panel, whereas a table saw and dado blade may result in a shallow cut in some areas.
DADO TIPS.
Bits with a 1/8" cutting length work best for this task. Even so, the dado needs to be at least 1/4" deep for the bit’s bearing to engage the side of the dado without the risk of making the dado too deep. If that’s not possible, you’ll need to attach a straightedge.
Also, select a bit that’s narrower than the dado so that the bit doesn’t bind. The approach is to have the bit follow along one edge of the dado, then come back along the opposite edge.
 |
 |
| Setting up and cutting dadoes is easy with a bearing-guided bit. All you need to do a place a straight edge along the cut line. A dado cleanout bit follows the edge to form a shallow, flat-bottomed dado. | A flat bottom and square sides are what’s important in a groove or dado. The bearing doesn’t need to get involved. Control the cut with an edge guide instead. |
MORE THAN A CLOSER.
Sometimes a name creates unnecessary limits in our minds. Dado cleanout bits can do that. If you have a solid dado stack, the resulting dadoes may not need further attention. That doesn’t mean you should skip over these bits. In fact, I’ve added one to my short list of must have bits. To make the case, allow me to share a few other uses.
DADOES, RABBETS & GROOVES.
I’ve already established that a dado cleanout bit leaves a crisp surface in a dado. So why not use them to make the dado in the first place? In my home shop, I use a router to cut nearly all dadoes, grooves, and rabbets.
 |
| Dado cleanout bits can do more than create clean dadoes and grooves. With a shop-made template, the bit makes quick work of creating perfectly sized hinge mortises. |
On many projects, the dadoes are shallow, so a bit with ¼" cutting length is all you need. This is especially true for smaller projects. The benefit is that the shorter bit is less likely to deflect, resulting in a uniform dado.
To cut dadoes, just attach a straightedge to guide the bearing of the bit wherever you want the dado. Don’t let the bearing distract you from the fact that a dado cleanout bit is, at its heart, a straight bit — which means you can use it in other straight bit roles.
With a handheld router, I attach a commercial edge guide to cut grooves and rabbets. For example, we use dado cleanout bits to rout grooves in drawer sides to accept side-mounted guides.
There’s no need to get the bearing involved unless the groove is too far from the edge or runs at an angle. The router table also works well for many rabbets, dadoes, and grooves. I choose this option if the workpieces are small and clamps would get in the way. I also use the router table if I have a lot of parts to rout. With the bit height and fence dialed in, I can pass the pieces across the table faster than with a handheld operation.
POCKETS, RECESSES & MORTISES.
The point I made earlier about dado cleanout bits being the same as straight bits deserves a caveat. The cutting edges on the end of the bit are dialed in to make cuts with jazz level smoothness. Not all straight bits leave a bottom surface this smooth.
With that in mind, it makes sense to employ the bit in other situations where a shallow recess is required. Hinge mortises are the example you’re probably thinking of.
However, other types of hardware sit in custom-shaped recesses. Campaign-style drawer pulls and corner brackets nestle into pockets. Half-mortise cabinet locks require accurately sized stepped mortises. You can even use the bit to form the cavity for decorative inlaid wood patterns.
When consistency, accuracy, and frequency come together, it’s a good idea to make a template. For some one-off needs, I like the control a dado cleanout bit provides when used freehand to remove waste. I can work close to layout lines and complete the recess with a chisel. The flat bottom left by the bit then guides the back of the chisel.
ESTABLISH A BASELINE.
It’s easy to focus on the outer shape or profile of what we’re routing to. Just as important is the bottom of that shape. Smooth, flat, and uniform are key. This takes us back to the original function of cleaning up raggedy dadoes.
 |
| In this setup, a bit is used to establish a flat baseline surface for the hand-cut dovetails. The bearing follows along the pins to avoid miscuts. |
The final example applies the bit to clean up and establish a baseline in hand-cut elements. Take dovetails, for example. I hand-cut the sides of the pins and saw out most of the waste. Then I use the cleanout bit to create a flat baseline. This allows the two parts to join tightly. The surface provides a reference for the remaining clean-up work you’ll do with a chisel.
You can use this when cutting the socket on the top of a leg to house a drawer apron, or perhaps the space between double tenons on shelves and dividers.
Special purpose bits easily fall into niches that make them tough to justify. In our experience, a dado cleanout bit is an exception. It’s a niche bit that keeps finding a role to play.