


Cutting a clean, accurate through mortise doesn't always require drilling, chopping, or a dedicated mortising machine. For projects with thick legs or posts, you can use the table saw to create the mortise before the workpiece is glued together.
The technique is surprisingly simple. Instead of making a solid leg and cutting the mortise afterward, make the leg from two matching blanks. Cut dadoes across the inside faces of both blanks, then glue the pieces together. When the dadoes align, they form a perfectly sized through mortise.
This method is fast and repeatable, and it leaves you with straight, square mortise walls that require little or no cleanup. It's especially useful for projects such as trestle tables, workbenches, sawhorses, and other heavy-duty furniture with large through mortise-and-tenon joints.

Why Cut a Through Mortise on the Table Saw?
Traditionally, I might make a large through mortise by drilling out most of the waste and then cleaning up the sides and corners with chisels.
That method works well, but it can take time. And on a large through mortise, keeping the walls perfectly straight, flat, and square can require careful handwork.
The table saw offers another approach.
Instead of removing material from the middle of a solid leg, you build the mortise into the leg. The workpiece is made from two pieces, and half of the mortise is cut into each one before they're glued together.
Because the mortise is created with dado cuts, its walls are straight and consistent. And if you're making several identical joints, the table saw setup makes the process easy to repeat.

How the Built-Up Mortise Technique Works
The basic idea is shown in the illustration above.
Start with two blanks that will eventually be glued together to form one leg or post. A dado is cut across the inside face of each blank at the mortise location.
When the two pieces are brought together, the matching dadoes create the opening for the through mortise.
The key is accuracy. The dadoes on the two blanks need to line up precisely, and their combined depth needs to equal the finished width of the mortise.
With careful stock selection and a clean glueup, the seam between the two halves can be surprisingly difficult to see in the finished leg.
Step 1: Prepare the Leg Blanks
Start by cutting two blanks to the same length and thickness.
I make the blanks slightly wider than the final dimension of the leg. This gives me some extra material to work with during the glueup.
After the two halves are glued together, the completed leg can be planed or trimmed to its exact finished width.
Select the Blanks for a Nearly Invisible Glue Joint
Because the finished leg is laminated from two pieces, stock selection can make a big difference in its appearance.
Look for blanks with similar grain and color. Pay attention to how the grain flows across the mating edges and arrange the pieces so the glue line blends into the surrounding grain as much as possible.
Done carefully, the finished workpiece can look much like a single piece of solid wood.
Step 2: Lay Out the Through Mortises
With the blanks prepared, mark the locations of the mortises.
Lay out the beginning and end of each mortise carefully. If the project has several mortises at matching locations, mark all the workpieces at the same time so it's easier to keep the layout consistent.
Remember that you're looking at only half of the finished mortise on each blank. The matching dado in the second half completes the opening after glueup.
Step 3: Cut the Mortises as Dadoes
At the table saw, cut a dado across the inside face of each leg blank at every mortise location.
The width of the dado determines the length of the finished mortise, while the depth of the matching dadoes determines its width after the two halves are assembled.
This is where the table saw provides a major advantage. Once the setup is dialed in, you can repeat the same cut accurately across multiple workpieces.
Use One Setup for Matching Mortises
Consistency is critical.
Make all matching cuts using the same setup before changing it. This ensures that the corresponding dadoes in the two halves of the leg line up when they're brought together.
If several legs require mortises in the same locations, cut that dado on every blank before changing the setup for the next mortise location.
This assembly-line approach is faster and reduces the opportunity for small setup differences to creep into the project.

Step 4: Make Alignment Keys for the Mortises
The most important part of the glueup is keeping the dadoes in the two blanks perfectly aligned.
A few simple alignment keys make this easy.
Cut scrap blocks to fit snugly inside the openings created when the two dadoes come together. MDF works well because it's stable, consistent in thickness, and easy to size accurately.
The keys aren't part of the finished joint. They're temporary alignment aids used during the glueup.
Test the Alignment Before Adding Glue
Dry-assemble the two leg halves with the keys inserted into the mortises.
The pieces should come together cleanly, and the keys should keep the dadoes aligned without forcing the two halves apart.
Check each mortise before proceeding. It's much easier to correct a slightly oversized key or other alignment problem now than after glue is applied.
Step 5: Glue Up the Leg
Once you're satisfied with the dry fit, glue the two blanks together.
Apply an even layer of glue to the mating surfaces, then bring the two halves together with the alignment keys positioned in the mortises.
The keys keep the dadoes aligned as clamping pressure is applied.
Add clamps along the length of the leg and check that the two blanks remain properly aligned as you tighten them.
Allow the glue to cure before removing the clamps and alignment keys.

Step 6: Plane the Leg to Final Size
Remember the extra width left on the blanks at the beginning?
Now it comes in handy.
After the glue has cured, plane or trim the assembled leg to its final dimensions. This removes any small alignment differences between the two blanks and leaves the outside faces clean and consistent.
What remains is a solid built-up leg with a clean, square through mortise already formed inside it.
There's no mortise waste left to drill away and very little hand-tool cleanup required.
The mortise is ready for its mating tenon.
Tips for Accurate Table Saw Mortises
This technique is straightforward, but a few details make the results much more predictable.
Cut Matching Dadoes Without Changing the Setup
This may be the most important tip. Whenever two dadoes need to line up, cut both using exactly the same table saw setup.
If you're making several identical legs, cut the same mortise location on all the corresponding blanks before moving to the next setup.
Leave the Blanks Slightly Oversize
Don't try to glue two pieces together and have the resulting leg land perfectly at its finished width.
Leaving the blanks slightly oversize gives you the opportunity to clean up and square the assembled leg after glueup.
Use Snug-Fitting Alignment Keys
The MDF keys do more than make glueup easier. They help preserve the accuracy you established at the table saw.
Size them carefully so they hold the dadoes in alignment without fitting so tightly that they're difficult to remove.
Dry-Fit Before Glueup
As with any woodworking assembly, do a complete dry run before reaching for the glue.
Make sure the blanks close completely, the keys fit correctly, and the resulting mortises are properly aligned.
When to Use This Table Saw Mortising Method
This isn't necessarily the method I'd choose for every mortise.
For a conventional blind mortise in a chair or cabinet frame, a hollow-chisel mortiser, plunge router, mortising jig, or drill press and chisels may be a better option.
But this built-up method really shines when a project calls for large through mortises in thick legs or posts.
It's particularly useful for trestle tables, workbenches, sawhorses, and other heavy-duty projects where the workpieces can naturally be constructed from laminated stock.
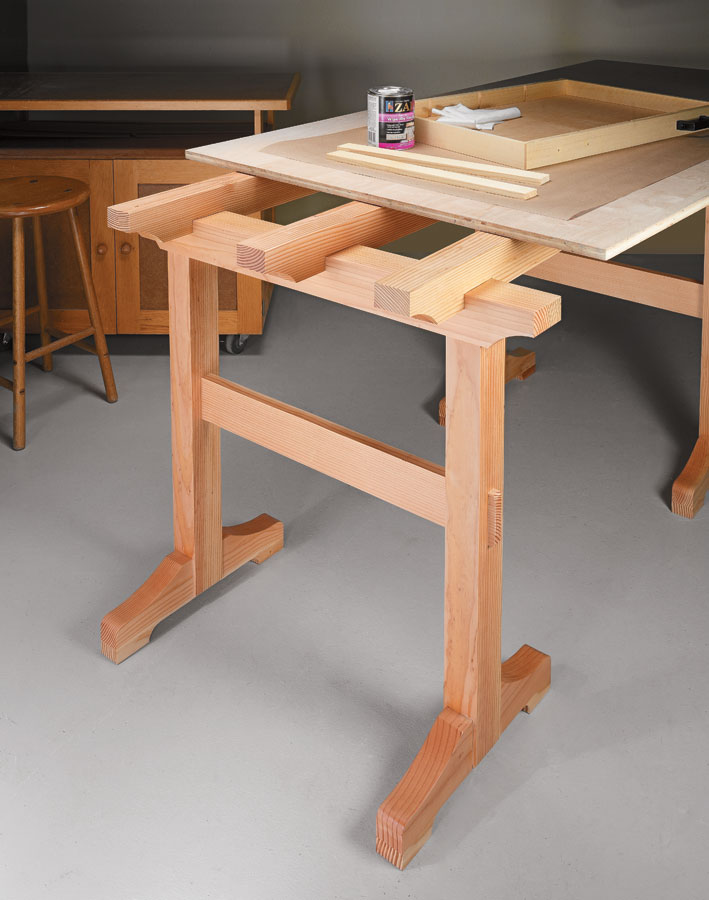
That's exactly how the technique can be used for a project like the Woodsmith Trestle Sawhorses. Instead of spending a lot of time drilling and chopping each large mortise by hand, the table saw does most of the precision work before the legs are even assembled.
The result is a clever combination of machine woodworking and traditional joinery: fast, repeatable through mortises with straight walls, square corners, and very little cleanup.


