


How to Chip Carve Wood: A Beginner's Guide
Chip carving is a simple way to add decorative details to woodworking projects. With just a sharp knife and a little practice, you can transform a plain wooden surface into an attractive carved design.
Unlike other types of wood carving that require several chisels or gouges, chip carving uses a short-bladed knife to remove small chips of wood. Each cut creates a crisp recess that becomes part of a larger pattern.
One of my favorite examples is the decorative carving found on traditional handsaw handles.
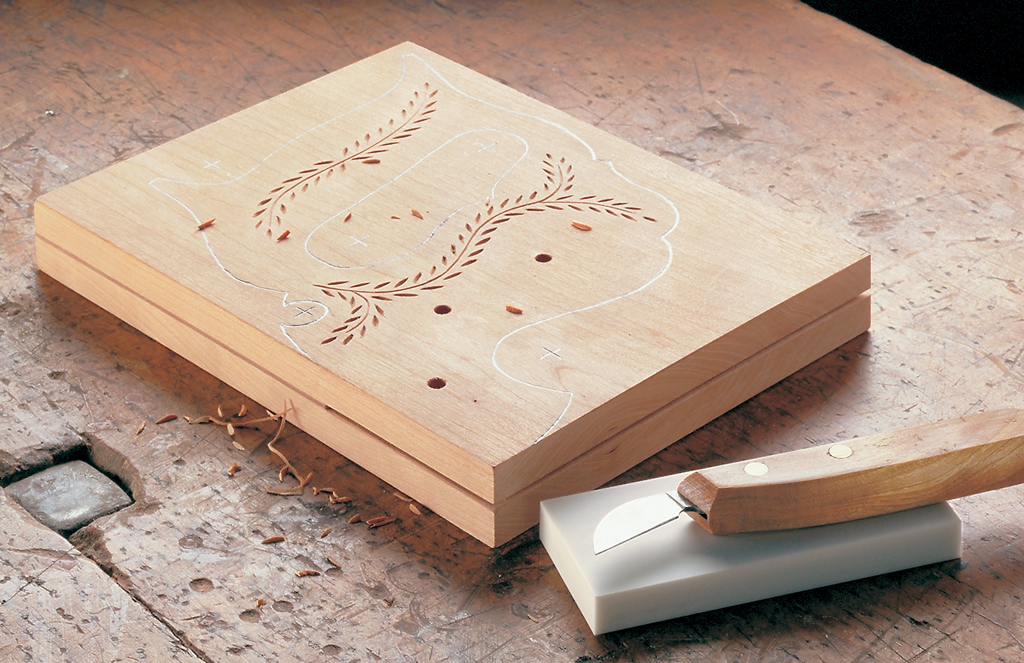
When I made a wooden saw handle, I decided to add a classic wheat pattern. The design combines small, almond-shaped kernels with graceful, curved stems.
Although the finished carving looks intricate, the individual cuts are surprisingly straightforward.
Here's how to get started with chip carving, from selecting a knife to making your first cuts.
What Is Chip Carving?
Chip carving is a decorative woodworking technique that creates patterns by removing small pieces of wood with a knife.
Rather than shaping an entire object, you're carving shallow recesses into a flat surface.
Most chip-carved designs use combinations of straight lines, curves, geometric shapes, and V-shaped grooves.
The wheat pattern shown here uses two basic elements:
- Kernels: Small, almond-shaped recesses formed by removing individual chips.
- Stems: Narrow, curved V-grooves that connect the kernels.
Both are created using two slicing cuts that meet beneath the surface of the wood.
Once you understand this basic technique, you can apply it to many different chip carving patterns.
Choose the Right Chip Carving Knife
You don't need a large collection of carving tools to get started.
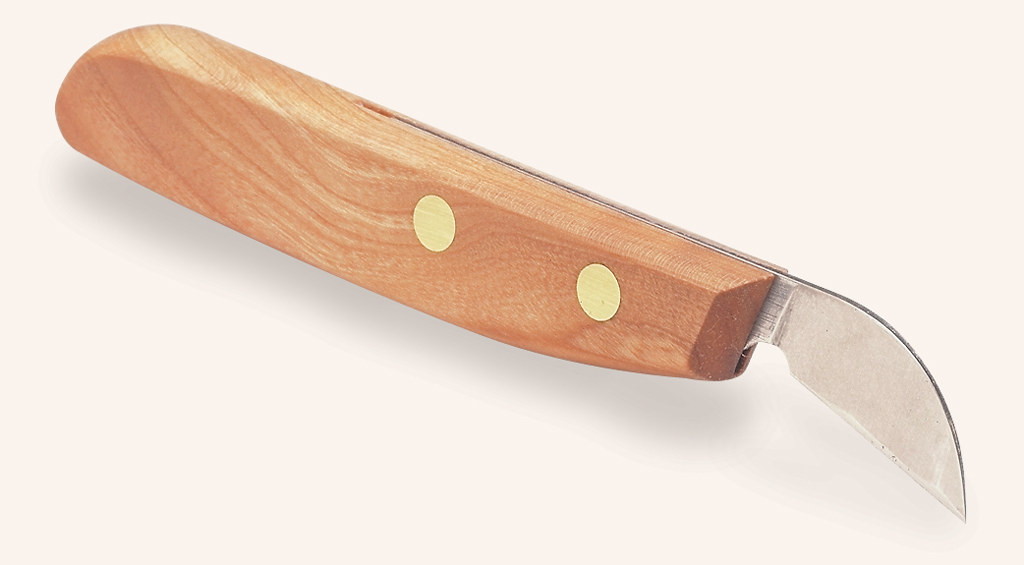
For this wheat pattern, I use a single chip carving knife with a short, stiff blade.
The short blade makes it easier to control the depth and direction of each cut. And because the blade is stiff, it doesn't flex as you remove chips from the wood.
Keep the Blade Sharp
A sharp knife is essential for clean chip carving.
A dull edge tends to crush or tear the wood fibers instead of slicing them cleanly.
This is especially noticeable when carving small details or working in hardwood.
Before beginning a project, sharpen the knife and check that the edge cuts cleanly.
We'll cover sharpening techniques later in the article.
Select Wood for Chip Carving
Basswood is a popular choice for chip carving because its soft, even texture makes it easy to cut.
However, you aren't limited to basswood.
For the saw handle project, I used cherry. It's harder than basswood, but it provides the durability needed for a working tool.
If you're planning to carve a hardwood project, I recommend practicing on scraps of the same species first.
Different woods respond differently to the knife, and practicing on the actual material helps you develop a feel for the cuts.
A Tip for Carving Hardwoods
If the wood fibers seem difficult to cut, lightly dampening the surface can make carving easier.
A little moisture helps soften the fibers so the knife slices through them more readily.
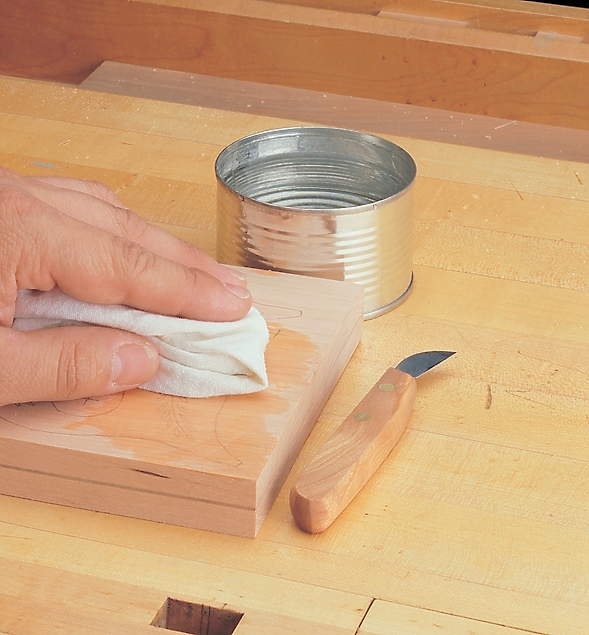
Avoid soaking the wood. A light application of water is all that's needed.
Transfer the Chip Carving Pattern to Wood
Before carving, you'll need to transfer the design to the workpiece.
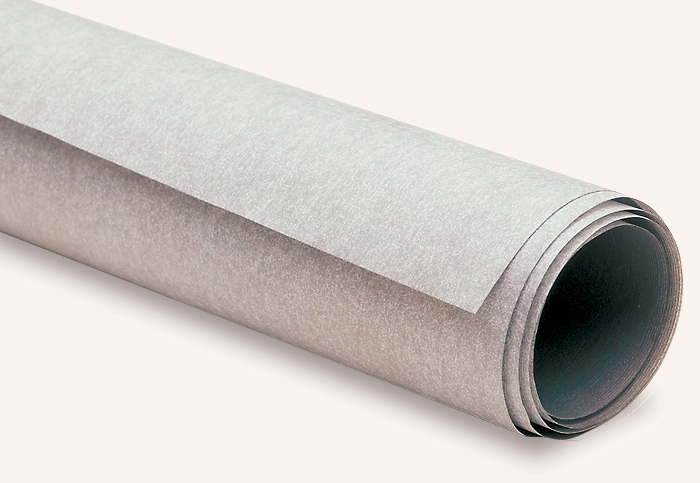
One of the easiest methods is to use transfer paper.
Unlike ordinary carbon paper, transfer paper leaves light, dry lines that can be erased after carving.
How to Transfer a Carving Pattern
Start with a full-size copy of your pattern.
Tape the pattern securely to the wood so it won't shift.
Slip a piece of transfer paper between the pattern and the workpiece, with the dark side facing down.
Then trace the design with a pencil.
The pressure transfers the lines to the wood, providing a guide for the carving knife.
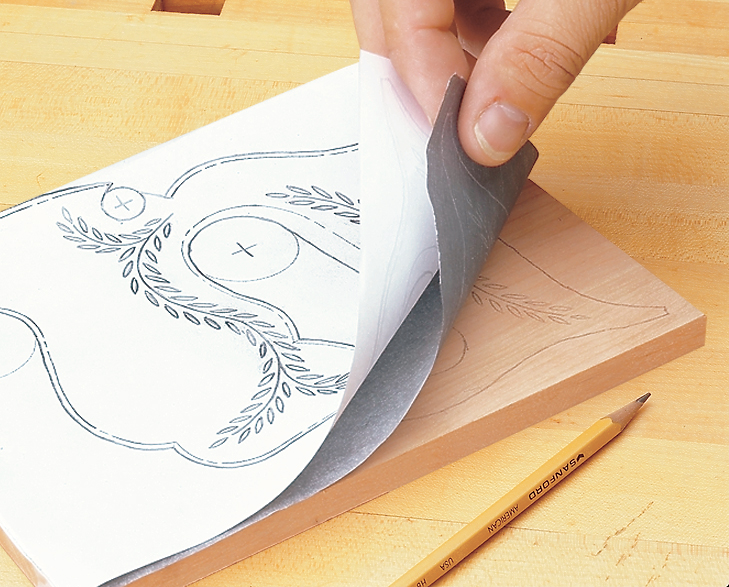
Take your time when transferring the pattern. Clear, accurate lines make it easier to carve a consistent design.
How to Hold a Chip Carving Knife
One of the most important skills in chip carving is learning to hold the knife correctly.
A comfortable, controlled grip helps you maintain the proper cutting angle and produce smooth, consistent cuts.
Establish a Stable Grip
Start by placing the knife in your hand with the cutting edge facing up.
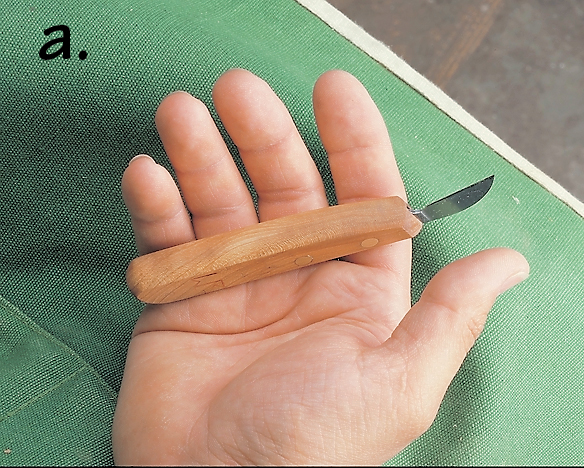
Allow the handle to rest near the base of your fingers, then wrap your fingers around it.
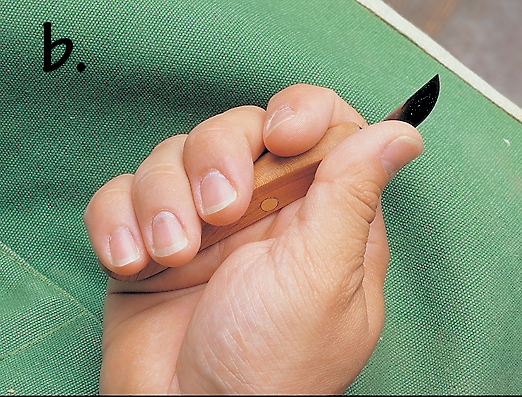
Position the first joint of your thumb near the blade end of the handle to provide support.
The goal is to create a stable grip that allows your hand and knife to move together.
Use Three Points of Contact
For added stability, the original technique uses three points of contact with the workpiece:
- The tip of the thumb
- The knuckle of the index finger
- The point of the knife blade
This forms a tripod that helps control the cutting angle.
The grip may feel awkward at first, but it becomes more natural with practice.
Safety Note: Keep the workpiece securely supported and maintain a cutting path that stays clear of your fingers and body. A bench-mounted carving fixture or other secure support is preferable to holding the workpiece in your lap.
Maintain the Proper Chip Carving Angle
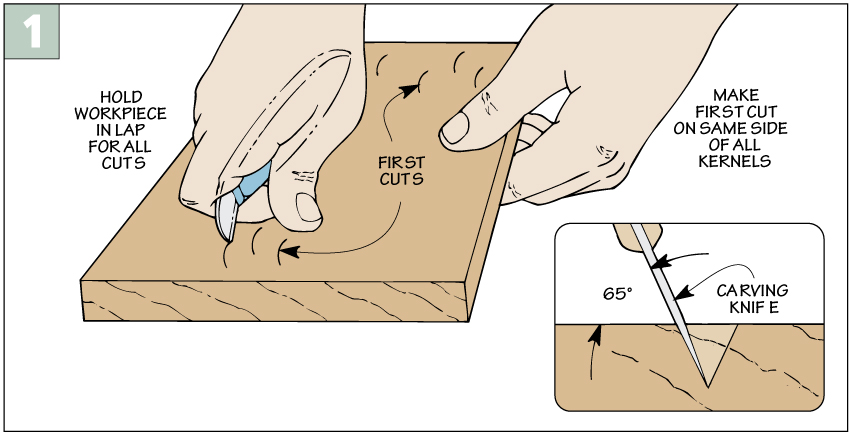
For this style of chip carving, the knife is held at approximately 65° to the wood surface.
Maintaining this angle helps produce consistent V-shaped grooves.
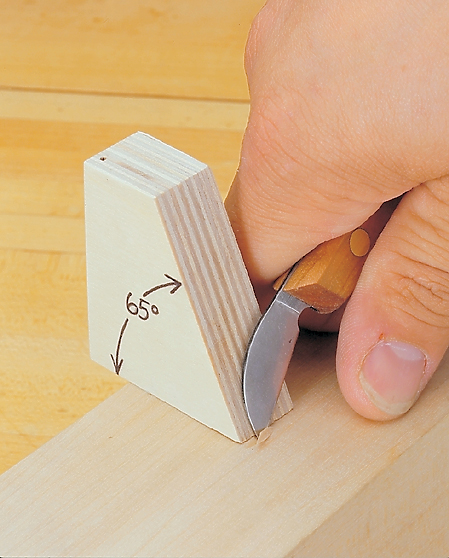
A simple way to check your angle is to cut a scrap block with a 65° face.
Keep the block nearby as a visual reference while practicing.
With experience, you'll develop a feel for the angle and won't need to check it as often.
Practice Making Chip Carving Cuts
The wheat kernels are a good place to begin because each one requires just two cuts.
Draw several almond-shaped kernels on a scrap board and practice removing the chips.
Make the First Slicing Cut
Position the knife tip at one end of the kernel.
Press the blade into the wood and make a smooth slicing cut along one side of the shape.
Move your hand and knife together rather than relying only on wrist movement.
Keep the cut controlled and avoid forcing the blade.
Make the Second Cut to Remove the Chip
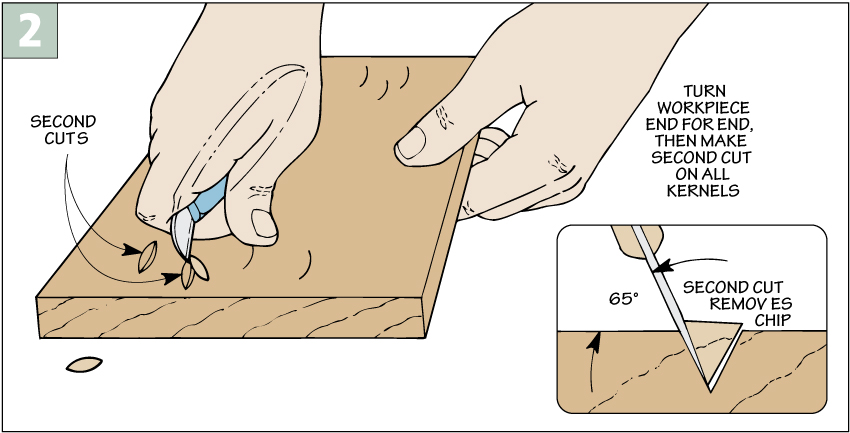
Turn the workpiece so you can approach the opposite side comfortably.
Make a second slicing cut that meets the first cut beneath the surface.
When the cuts meet, the small chip should separate cleanly from the wood.
The result is a crisp, V-shaped recess.
Keep the Cuts the Same Depth
The secret to clean chip carving is making both cuts meet at a consistent depth.
If one cut is deeper than the other, the chip may not release cleanly.
Wider chips require deeper cuts, while narrow details need only shallow cuts.
Try to complete each side with a single smooth slicing motion rather than repeatedly cutting over the same line.
Carve the Wheat Pattern
Once you're comfortable making individual chips, you're ready to carve the wheat design.
The easiest approach is to work through the kernels in a consistent sequence.
Start by carving one side of every kernel.
Then rotate the workpiece and carve the opposite side of each kernel.
This approach reduces the need to change your grip or cutting angle between cuts.
It also helps establish a steady rhythm as you work through the pattern.
Don't worry if every kernel isn't exactly the same.
Small variations give hand-carved details their character.
How to Carve Curved Stems
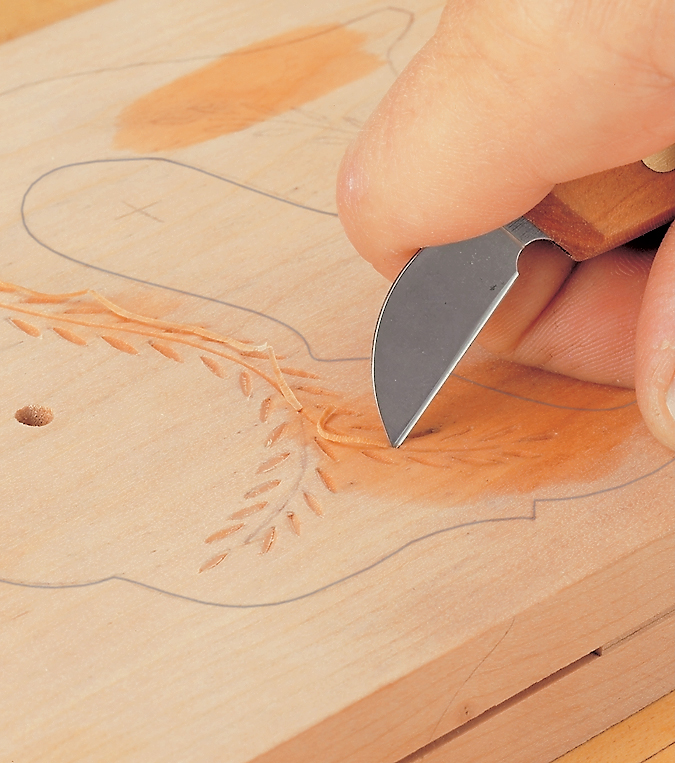
After completing the kernels, the next step is carving the curved stems that connect them.
The basic technique is the same: Two slicing cuts meet to remove a narrow strip of wood.
Cut a Narrow V-Groove
Start by following one side of the curved stem with the knife.
Then rotate the workpiece and make a second cut along the opposite side.
The second cut removes a thin ribbon of wood, leaving a narrow V-shaped groove.
Because the stems are relatively narrow, the cuts only need to be about 1⁄16" deep.
As you carve, look slightly ahead of the blade rather than directly at the cutting edge.
This makes it easier to follow a smooth, flowing curve.
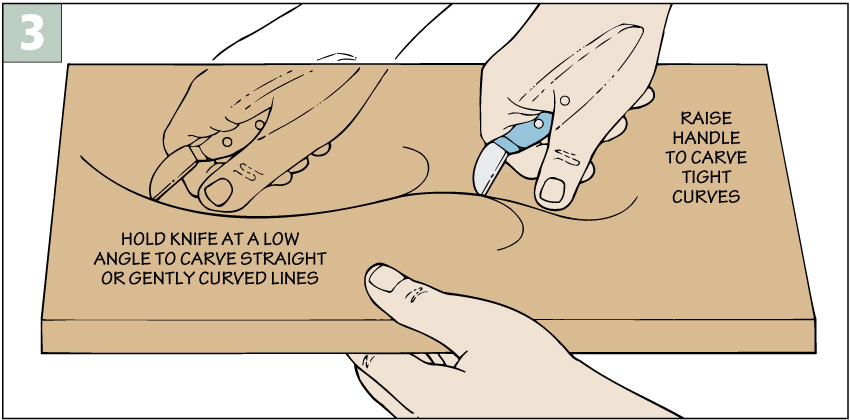
Carving Tight Curves
Tight curves can be challenging because more of the knife's cutting edge may engage the wood.
As you approach a tight curve, slightly raise the knife handle.
This reduces the amount of blade buried in the wood and makes it easier to follow the curve.
Prevent Chipout Where Stems Meet
The small triangular areas where two stems meet are particularly delicate.
If the cuts are made in the wrong sequence, these areas can break away.
I find it best to carve the main stem first.
Then carefully plan the cuts for the shorter stems.
Where a short stem meets the main stem, orient the knife so the cutting edge points away from the main stem whenever possible.
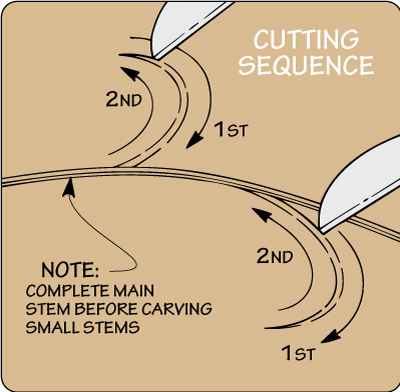
This helps protect the delicate wood between the grooves.
Sharpening a Chip Carving Knife
A sharp knife makes chip carving easier and produces cleaner details.
Fortunately, sharpening a chip carving knife only takes a few minutes.
Maintain the Original Bevel Angle
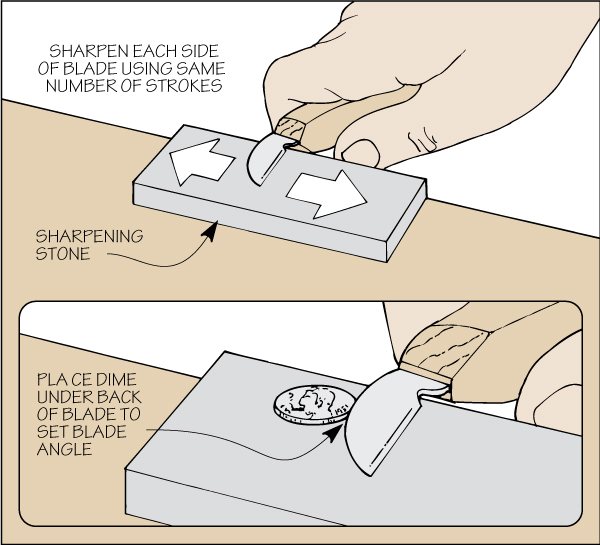
The knife used for this project has a 10° bevel on each side.
When sharpening, the goal is to maintain that angle.
I use a medium-grit ceramic sharpening stone.
Place the bevel against the stone and move the blade back and forth, applying even pressure along the cutting edge.
Count the strokes, then repeat the same number on the opposite side.
This helps remove material evenly from both bevels.
Hone the Cutting Edge
After sharpening, switch to an ultra-fine stone.
Use the same technique to refine the bevels and produce a sharp cutting edge.
The sharper the edge, the easier it will be to carve clean V-grooves without tearing the wood.
A Quick Touch-Up Trick
In a pinch, the unglazed ceramic surface on the bottom of a coffee mug can serve as an improvised honing surface.
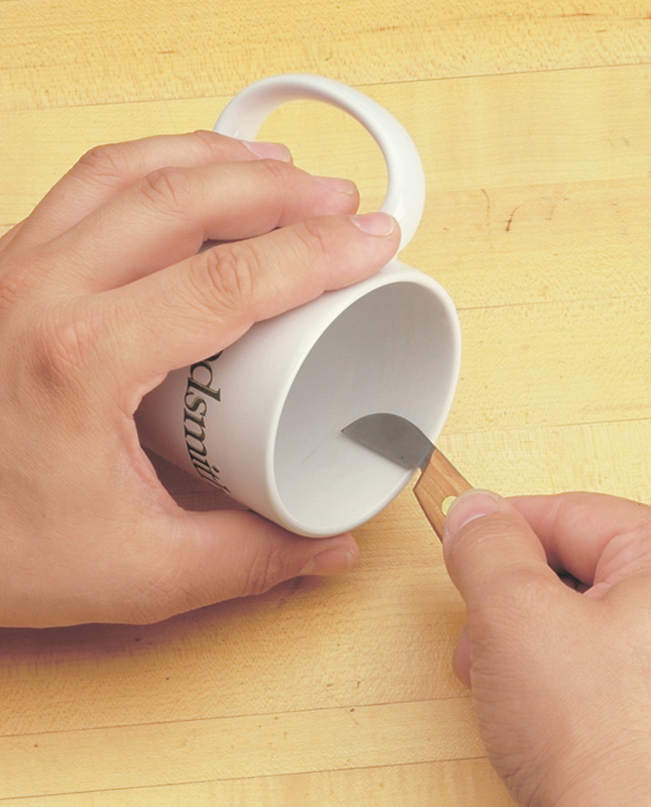
It's no substitute for a proper sharpening stone, but it can be useful for a quick touch-up.
Finishing Your Chip Carving
Once you've completed the kernels and stems, remove any remaining pencil marks.
If necessary, lightly sand the surrounding surface, taking care not to round over the crisp edges of the carving.
The finished wheat pattern adds an attractive decorative detail to the saw handle.
And the same basic chip carving techniques can be used on boxes, furniture, tool handles, and other woodworking projects.
With a sharp knife, a little patience, and some practice, you can add distinctive hand-carved details to almost any project.
Featured Project: Chip-Carved Book Rack
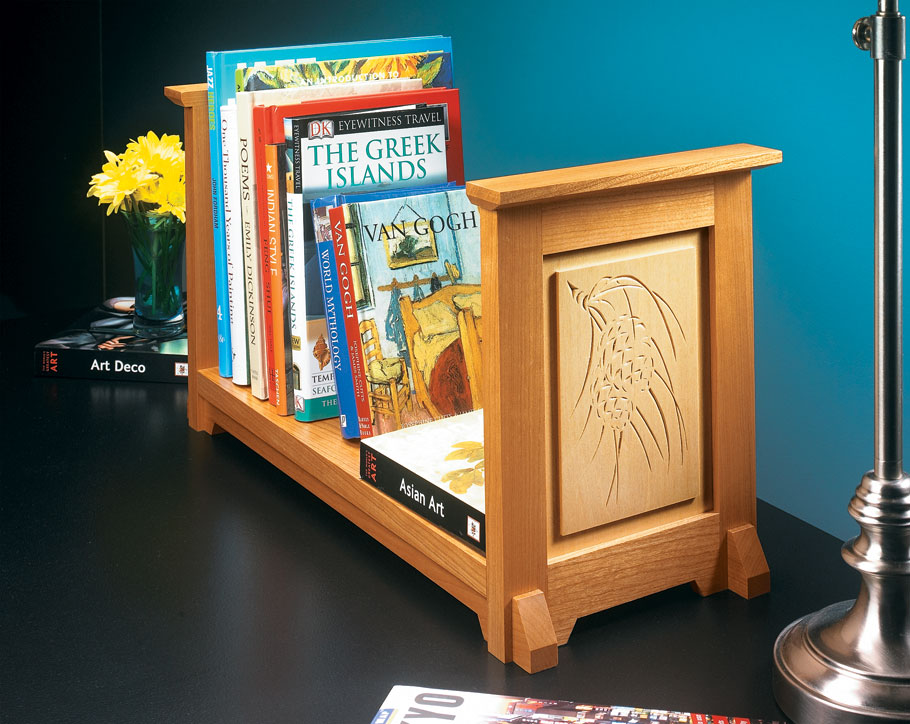
Ready to try chip carving on a woodworking project? This handsome Craftsman-style book rack combines classic lines, straightforward joinery, and decorative chip-carved details. It's a rewarding weekend build that offers the perfect opportunity to practice your carving skills while creating something useful for your home.
GET THE BOOK RACK PLANS → Put Your Chip Carving Skills to Work


