


How to Build a Chip-Carved Wooden Book Rack
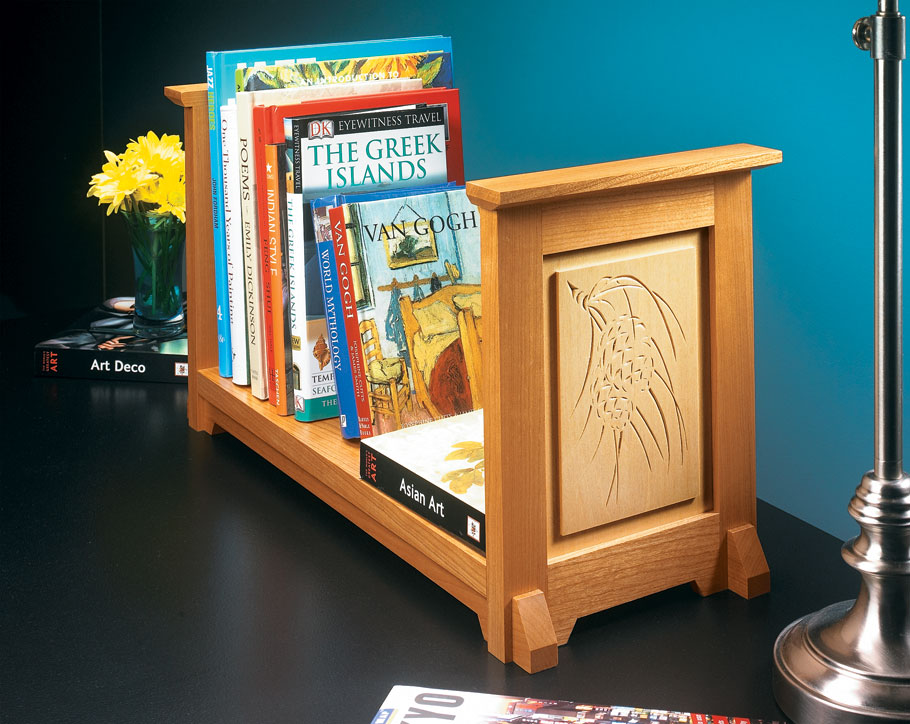
A small woodworking project can offer plenty of opportunities to develop your skills. This Chip-Carved Book Rack combines classic Craftsman-style design, traditional joinery, and decorative hand carving into a project you can complete in a weekend.
With its solid wood shelf, frame-and-panel ends, and distinctive pinecone carvings, this book rack makes an attractive addition to a desk, bookshelf, or tabletop.
Best of all, the construction is straightforward enough to make it an enjoyable project while still offering a few interesting woodworking challenges.
In this excerpt from Woodsmith Shop, Season 6, Episode 602, Book Rack & Mantel Clock, Don demonstrates the construction of the book rack, while Bryan shows how to create the decorative chip-carved panels.
A Craftsman-Style Book Rack with Traditional Joinery
The appeal of this book rack comes from its combination of simple lines and carefully executed details.
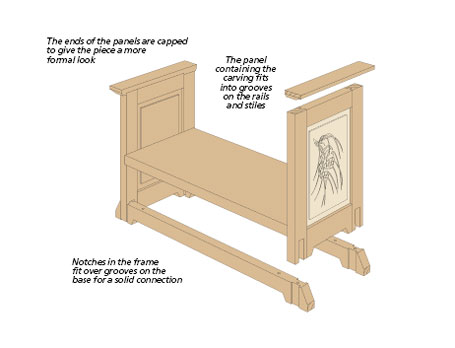
The base consists of two long rails connected by a solid wood shelf. At each end, a frame-and-panel assembly provides support and creates a decorative focal point.
Rather than relying on complicated joinery, the design uses several classic woodworking techniques:
- Saddle joints connect the base rails to the end frames.
- Stub tenon-and-groove joinery holds the end frames together.
- Grooves in the shelf fit over the base rails.
- Decorative cutouts lighten the appearance of the rails.
- Chip-carved panels feature a traditional pinecone-and-needle pattern.
Each technique is manageable on its own. Together, they create a handsome project with plenty of visual interest.
Building the Base of the Wooden Book Rack
Construction begins with the two long base rails.
After cutting the rails to their finished length and width, Don prepares the joinery that will connect them to the end frames.
Cutting the Saddle Joints
The book rack uses a saddle joint to connect each end frame to the base.
The joint begins with shallow dadoes cut on both faces of the base rails near their ends.
Using a dado blade at the table saw, Don makes a shallow cut on one face of a rail, flips it over, and repeats the cut on the opposite face.
The process is repeated at the other end of the rail.
Matching notches cut later in the end-frame stiles complete the saddle joints.
This creates an interlocking connection that positions the frame securely on the base.
Shaping the Decorative Rail Cutouts
The base rails could be left straight, but a long cutout along their lower edges gives the book rack a lighter, more refined appearance.
Don starts by making a 30° bevel cut at each end of the opening.
Next, he draws a straight line connecting the bevel cuts.
At the band saw, he removes most of the waste, staying on the waste side of the layout line.
To clean up the edge, Don attaches a straight hardboard guide to the rail with double-sided tape.
A flush-trim router bit follows the guide, producing a smooth, straight surface.
Finally, a sharp chisel removes the small amount of waste the router bit couldn't reach.
The ends of the rails are then mitered to match the angled cutouts, and countersunk holes are drilled for assembly.
Adding the Solid Wood Shelf
The shelf fits between the dadoes at the ends of the base rails.
Grooves cut along the shelf edges allow it to slip over the rails, creating a clean connection.
With the rails and shelf prepared, the base components are ready for assembly after the end frames are completed.
Making the Frame-and-Panel Ends
The two end assemblies give the book rack its classic Craftsman-style appearance.
Each end is built using traditional frame-and-panel construction.
The frame consists of vertical stiles and horizontal rails, joined with stub tenons and grooves.
Cutting the Stub Tenon-and-Groove Joinery
Don begins by cutting the frame components to size.
The lower rail is made wider than the upper rail to accommodate a decorative cutout that matches the base.
Next, he cuts centered grooves along the inside edges of the frame pieces.
At the table saw, the rip fence is positioned slightly off-center. Making a pass, flipping the workpiece, and making a second pass produces a centered groove.
With the grooves complete, Don switches to a dado blade to form the short stub tenons on the ends of the horizontal rails.
The tenons fit into the grooves, creating a straightforward frame joint.
Completing the Saddle Joint
Before assembling the frames, Don makes two additional cuts.
First, he shapes the decorative cutout along the bottom rail to match the cutouts in the base.
Then he cuts notches in the lower ends of the vertical stiles.
These notches complete the saddle joints that connect the end frames to the base rails.
Using a dado blade and an auxiliary fence attached to the miter gauge, Don makes the cuts with the help of a stop block for consistent positioning.
The resulting joints allow the frames to fit over the prepared ends of the base rails.
Adding Decorative Chip-Carved Panels
With the woodworking joinery complete, it's time to turn to the feature that makes this book rack stand out: the decorative end panels.
The project plans include several panel options, so you don't have to use chip carving if you'd prefer a simpler design.
Options include plain panels with square shoulders, four-piece panels made at the router table, and panels with a traditional coved edge.
But the chip-carved version adds a distinctive handmade detail that complements the book rack's Craftsman-style design.
What Is Chip Carving?
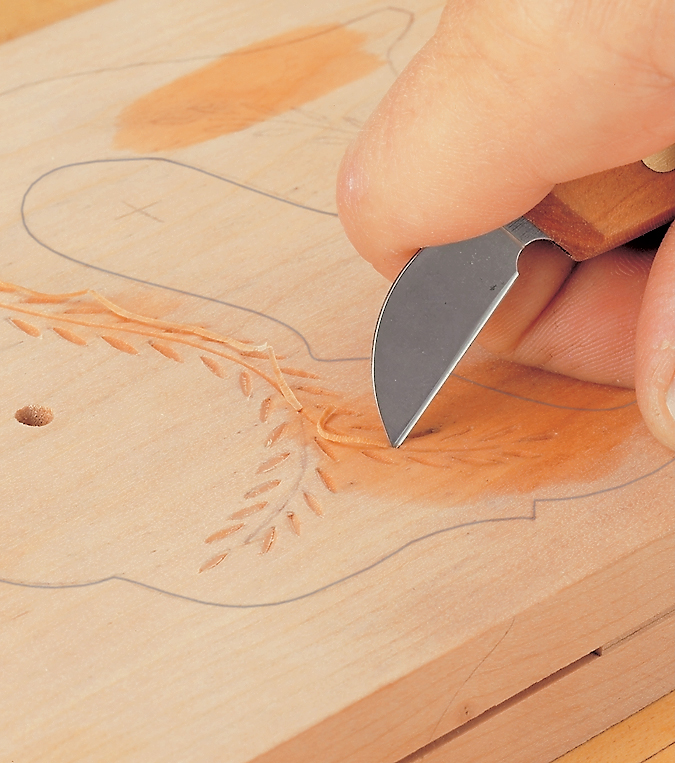
Chip carving is a decorative woodworking technique that uses a knife to remove small, V-shaped chips from the surface of a board.
The basic process involves making two angled cuts that meet beneath the surface.
When the cuts intersect, a small chip of wood lifts out, leaving a clean groove.
Repeating these cuts creates decorative patterns, such as the pinecones and pine needles featured on this book rack.
The technique requires only a few tools and is a great introduction to decorative wood carving.
Preparing the Basswood Panels
For the carved panels, Bryan uses basswoo.
Basswood is an excellent choice for chip carving because it's relatively soft and easy to cut cleanly.
He begins by cutting the panel blanks to size.
Then, at the router table, he cuts rabbets around the edges on both faces of each panel.
This creates the raised center field where the carving will be located.
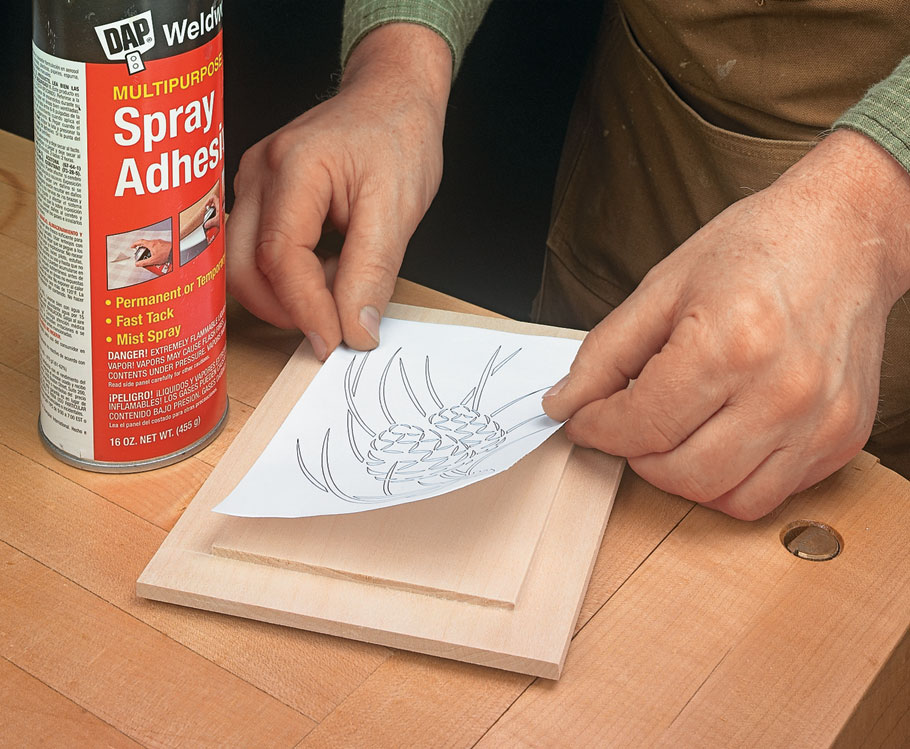
Next, Bryan attaches a paper carving pattern to the panel using spray adhesive.
The paper provides clear, sharp lines that guide the knife during carving.
How to Chip Carve the Pinecone Design
One of the advantages of chip carving is that it doesn't require a large collection of specialized tools.
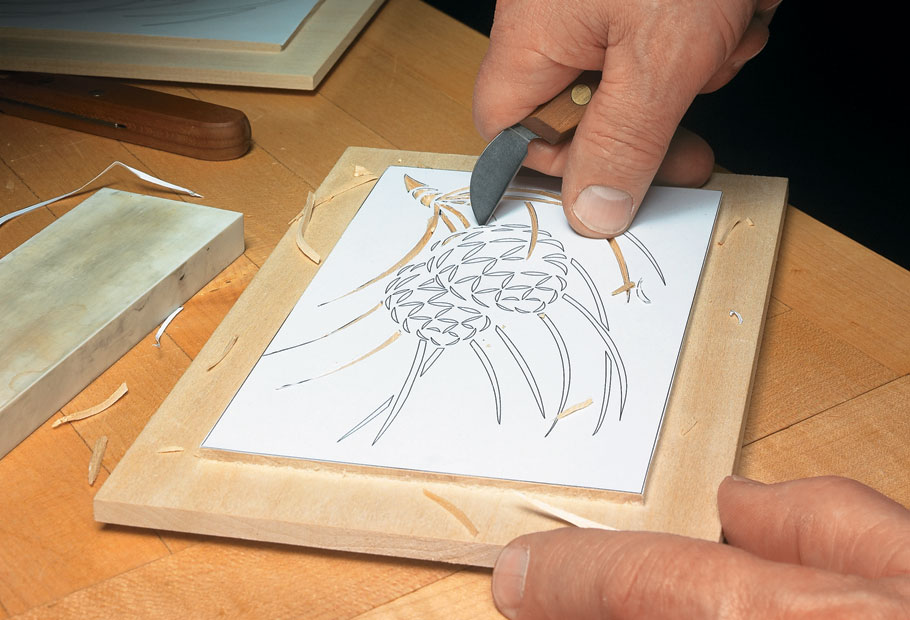
For this project, Bryan uses a single chip carving knife with a thin, stiff blade.
The blade angles inward from the handle, making it comfortable to hold at the proper cutting angle.
He also keeps a ceramic sharpening stone nearby to maintain a sharp cutting edge.
Making the First Carving Cuts
Bryan begins with one of the pine needles in the pattern.
This detail requires three cuts.
First, he makes a shallow plunge cut to define the end of the needle.
Then he repositions the workpiece and makes the first long angled cut.
The cut starts deeper and gradually becomes shallower as it approaches the pinecone.
After rotating the workpiece again, he makes the second long cut from the opposite side.
When the cuts meet, the chip releases, leaving a clean V-shaped recess.
Focus on Smooth, Controlled Cuts
The secret to successful chip carving isn't necessarily making every line perfectly identical.
Instead, concentrate on producing smooth cuts that follow the pattern.
A sharp knife, a comfortable cutting position, and a little practice make a big difference.
Always keep the workpiece securely supported and your fingers clear of the cutting path.
As Bryan demonstrates, a relatively simple series of cuts can produce an attractive decorative pattern.
Assembling the Book Rack
With the base rails, shelf, end frames, and decorative panels complete, the project is ready for final assembly.
The two base rails connect to the solid wood shelf.
The frame-and-panel ends fit over the rails using the saddle joints prepared earlier.
A small cap piece completes the assembly.
Don recommends checking the fit of the components before applying glue and installing the screws.
Once everything fits properly, the frames can be glued together and the base secured.
The result is a sturdy wooden book rack that combines practical storage with attractive handcrafted details.
Get the Chip-Carved Book Rack Woodworking Plans
This project is a great example of how a small woodworking build can incorporate several rewarding techniques.
You'll practice traditional joinery, shape decorative details with the band saw and router, and learn the basics of chip carving.
And because the project is relatively compact, it's a realistic weekend woodworking project.
Whether you choose the carved pinecone panels or one of the simpler options, the finished book rack is a useful accessory that looks great on a desk, table, or bookshelf.
GET THE STEP-BY-STEP WOODWORKING PLANS → Build Your Own Chip-Carved Book Rack
Get the complete step-by-step woodworking plans, including the construction details and decorative panel options.
Chip Carving for Beginners: Tools, Techniques & Tips
Want to add decorative carvings to more of your woodworking projects? Chip carving is a simple technique that uses a single knife to create intricate patterns and details. Learn how to choose the right knife, transfer patterns, make clean V-grooves, and develop the skills to create beautiful hand-carved designs.
LEARN CHIP CARVING → Learn the Basics of Chip Carving


