Combine plentiful storage options, angles, and a sunny paint scheme and you end up with a neo-retro take on a classic furniture form.
Hutch, cupboard, press, standing dresser, Hoosier cabinet — whatever you call it, this type of storage piece has been around for hundreds of years and shows up in many different countries. Each era and region adds a unique twist that’s fun to explore. Creative Director Chris Fitch scooped up inspiration from a not-so-distant time and place for his version.
Post-World War II Southern California was changing dramatically. There was a need to outfit homes with good-quality furniture and avoid high-priced materials. There was also a move away from previous dark, heavy-looking furniture styles. Plywood, paint, and plastic laminate gave folks a change of pace.
History doesn’t always repeat, but sometimes it rhymes. Plywood (along with MDF) is still a great way to build pieces quickly with an eye on your budget. Chris selected alder plywood (and solid wood) because it offers a warm color without being too dark ... or as costly as cherry. A blue and yellow paint scheme complements the wood tones. However, this offers you a chance to personalize the look to suit your tastes.
From a workshop perspective, there’s plenty to hold your interest. The joinery is a masterclass in grooves, dadoes, and rabbets. Throw in some template routing, drawer building, and a clever solution to the sliding doors and you have a lot to look forward to.
 Full-extension drawer slides keep items from getting lost and operate smoothly even when heavily loaded. The drawer fronts overlap to conceal gaps.
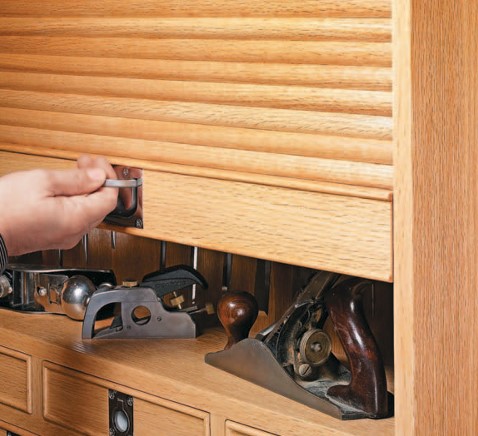
 Painted, sliding doors conceal large storage spaces in the case above and down here at the bottom. A clever solution keeps them running smoothly.
 Angled feet and stretchers lift the hutch off the floor and add to the modernist appeal. The warm, not-too-dark alder provides a calm backdrop to the painted surfaces.
SIMPLE JOINERY, PLYWOOD CASE
 The drawing above shows the starting point, the shell of the lower case and the stand it sits on. There’s a lot going on, so we need to get cracking.
ESSENTIAL JOINERY
This case is proof positive that joinery details like dadoes, rabbets, and grooves take you far in your woodworking. The sides begin with a narrow dado at each end for the top and bottom, as shown in details ‘c’ and ‘f.’
Full-width dadoes allow dividers to slide into place after the main case is glued up (main drawing and detail ‘d’). Take note that the dadoes aren’t the same in each side. The case back is housed in a groove cut along the back edge, as in detail ‘b.’
TOP & BOTTOM
 The top and bottom have a tongue formed on each end to fit (snugly) into the dadoes in the sides, as in Figure 1. Then they go their own way. The top has a centered dado and a groove to hold the back. Pause the joinery to drill some pilot holes for woodscrews.
The bottom is narrower than the top, which allows the back panel to slide into place from below. A pair of grooves run along the front edge (detail ‘e’). These are for the lower set of sliding doors. Cut these at the table saw, as shown in Figure 2. The bottom does have a centered dado to match the one in the top. However, this dado stops short of the grooves.
This calls for a change in tooling. Figure 3 shows a simple frame that guides a hand-held router to make the cut and stop it right where you want. Then glue up the sides, top, and bottom. Take a look at Figure 4 to see the setup for cutting the rabbets on the back panel. The resulting tongue should slide easily in the grooves in the case sides. We need to leave it out of the case for the time being.

FEET
The case stands on a set of feet and stretchers. The ends of the stretchers are angled (detail ‘f’). The stretchers are sized to slip into the recess at the bottom of the case. The feet receive a notch to slip over the stretchers before they’re cut to size, as in Figure 5. The grain on the feet runs side to side to match the stretcher.
I cut the angled sides of the feet at the band saw. Detail ‘a’ on the previous page has the dimensions and angles. Remove the blade marks and smooth the edges with a block plane or edge sander. Glue the feet to the stretchers. The location is shown in the main drawing on the previous page. Then attach the assembled pairs to the case with long woodscrews.
INTERIOR DETAILS
 The inside of the case is divided to organize the space and provide for the different storage solutions. Dadoes do all the work. The pieces slide into place one at a time. I aim for the parts to slide with a firm push.
The first piece to make is the large horizontal divider. It features a set of narrow grooves for doors on the underside that align with those in the bottom. Each face of the divider has a centered dado. The top dado runs through. The one on the bottom face stops before it gets to the grooves, as in detail ‘a.’ Glue this piece into place.
PARTITIONS
The installed divider allows you to determine the size of the lower partition. It’s cut to size based on the depth of the dadoes in the bottom and divider. Because of the stopped dadoes, this one slides into place from the back.
You’ll notice that the parts get simpler as we go along. The upper partition has just one dado. It aligns with the dado in the right side of the case, as shown in the drawing above and in detail ‘b.’
A drawer divider comes last for the panels. All you need to do here is cut it to size. At this point, you can slide the back into place, securing it with glue and screws into the various dividers and partitions. Finally, cover the front edge of the recessed lower partition with edging.
ONTO THE HARDWOOD
 The upper section reveals the split personality of the hutch. Hardwood takes over from the plywood. It also throws in some curves and angles. For pieces this wide, you’ll have to glue up a few panels.
THE SIDES
 The sides define the look of the upper unit. Joinery comes first, though. The upper left drawing indicates the locations for a pair of stopped dadoes. There’s a stopped groove too for the back panel, as in Figure 1. It runs from the top dado down through the bottom end.
The sides’ profile involves a three-step process. First, I made a hardboard template to guide me. Second, I traced the template onto the blank and cut away the waste. I trust my band saw skills more than my jig saw abilities for this. The final step is shown in Figure 2.
FAMILIAR TERRITORY
The work on the cap, shelf, and divider repeats the steps you’ve already taken: more dadoes, rabbets, and grooves (details ‘a,’ ‘b,’ and ‘c’). The cap needs to be trimmed as in Figure 4 in order to join with the sides. Wrap up your work with holes for adjustable shelves and making the back panel, as in detail ‘a. The case can now be glued up.
SET OF BINS.
 Tucked under the shelf sits a bank of bins. These fit into a case of cubbies joined with rabbets and dadoes, as shown in details ‘d’ and ‘f.’ The bins are assembled with a locking rabbet at the front and a tongue and dado at the back (details ‘d’ and ‘e’). Figure 5 has the table saw setup for the front.
Instead of using a purchased pull, which you could do, I made a semicircle pull from MDF. I drew the shape on an oversize blank. I cut the outer profile, sanded it smooth, and rounded the edges. From here, the inside is cut and shaped, as you can see in Figure 6.
TRIM & COUNTER
 A few intermediate steps are necessary before the two sections can be joined. The drawing at right shows the parts that you need to make.
EDGING.
To blend the plywood of the base with the solid wood of the top, conceal the front edges with thin strips of hardwood. The pattern of these strips is arranged how a typical face frame would look. The process works from the outside vertical pieces towards the middle.
COUNTER.
A laminate-covered countertop serves as the transition between sections. To match the look, the edge of the counter features a retro-style metal edging. The width of the edging dictates the thickness of the countertop (including the laminate). I found that a layer of 3⁄4" MDF plus a 1⁄2" layer solved the issue for me.
The edging fits into a narrow slot routed into the edge of the countertop, as in details ‘a’ and ‘b.’ I purchased a slot cutter sized for the task. The edging is mitered at the corners, as in detail ’c.’ Lag screws and washers join the counter to the upper case. Screws attach this assembly to the lower case, as you can see in details ‘a’ and ‘b.’
SLIP SLIDING DOORS
 The advantage of sliding doors is that they don’t take up space when you open them. That makes a big difference in a small or crowded space. The trick is fitting and installing the doors so that they slide smoothly. We have you covered there.
DOOR DETAILS.
Since the doors will be painted, Chris chose MDF (Baltic birch plywood would also work). It’s smooth and stable, ideal for both sliding doors and for accepting paint. The door panels are sized about 1⁄8" shorter than the openings. The forward lean of the upper case means that those panels need to be beveled, as shown in Figure 1 below.
 For motion, the doors ride on acrylic (Plexiglas) runners, as in detail ‘b.’ The runners form a low-friction surface that minimizes wear in the grooves. These fit into grooves cut in the ends of the door panels, as you can see in ‘a,’ ‘c,’ and ‘d.’
Figure 2 shows the accommodation you need to make for the angled upper doors. The lower doors are easier (Figure 3). The runners are secured with a screw from the inside. Drill the pilot hole before you install the doors. Fit a door into place and slip the runners into the groove. Then reach inside to drive the screw to lock it in place. A retro pull completes the look.
DRAWERS

 A set of drawers fills the remaining compartments in the lower case. In the drawing,
you can see the three drawers. There’s a large drawer and a pair of half-size drawers. Feel free to change up this arrangement to suit your needs.
A set of drawers fills the remaining compartments in the lower case. In the drawing,
you can see the three drawers. There’s a large drawer and a pair of half-size drawers. Feel free to change up this arrangement to suit your needs.
The drawers ride on full-extension slides. For this to work, you need to install filler pieces to create a flush surface. This is shown in the drawing and detail ‘e’ on the previous page.
SIMPLE JOINERY.
Tongue and dado joinery connects the drawer sides, fronts, and backs. Details ‘a’ and ‘b’ contain the dimensions you need to set up your table saw or router table. The grooves shown in details ‘c’ and ‘d’ hold the drawer bottom.
FALSE FRONTS.
Each drawer has a false front to hide the slides and create a clean look. The fronts overlap the opening slightly, as you can see in details ‘b’ and ‘c.’ They’re attached with screws and use the same pulls as the doors. It’s a groovy way to wrap up this project.