


I stop getting excited about cool new toys. Over time that changed at some point from toy cars and LEGOs to power tools, chisels, planes, and all kinds of accessories. In the same vein though, there’s a part that never stopped being envious of others’ toys. In this case, it’s the “Pocket Mill Pro” from JessEm that you see above.
This one was a find from Phil that he let me borrow, and I must say, the boyhood envy has kicked in a bit. It’s fun to use, it has a creative design, and it can make a number of operations in the shop considerably more efficient. All in all, I ended up liking this new tool quite a bit.
 The “Pocket Mill Pro” has an optional plywood workstation available, featuring dovetail tracks to work with Microjig’s dovetail track clamps.
LOOSE TENON JOINERY.
To begin, this is a tool for loose tenon joinery. As I’ll discuss a bit more later, loose tenons are an effecient alternatve to classic mortise and tenon joinery (which many may be familiar with from Festool’s “Domino Joiner”). The “Pocket Mill Pro” however offers some benefits beyond the usual routed loose tenon joinery.
SETTING UP THE MILL.
 The base of the mill has a locating guide that slides and locks to accommodate pieces of various thicknesses. It shows the centerpoint and ends of the mortise. Once it’s been set, the carriage slides in overtop.
In the photos you see here, we’re using the workstation that JessEm includes to be used alongside dovetail track clamps (from Microjig). This is an additional product sold alongside the mill, and it was tempting to think of a way to recreate it.
However, I found it was a bit more elaborate than I first thought. Given the price of Baltic birch, the price tag seemed more reasonable when I considered the time investment required to recreate the workstation. Using the mill with the workstation is pretty intuitive.
Dovetail track clamps hold the workpiece in place, while the base locks in and adjusts to the thickness of the workpiece. Etchings allow you to line up the centerpoint and ends of a 1⁄4" mortise with your layout lines. The real draw of this tool is the ratcheting carriage.
RATCHETING CARRIAGE.
 A bit is inserted in the drill guide in the initial position. After starting the drill and driving it in, push the lever to move the carriage across the mortise, clearing away a layer of waste.
 Each time the carriage moves across the mortise, a ratcheting mechanism slightly lowers the drill guide. It takes only a few seconds to create a mortise this way.
There’s a gimmick to this tool, and that’s the ratcheting carriage. When Phil first showed us how it was used, there was a collective nod and sigh of, “Oh, right. Makes sense.” As you push the lever that moves the cutting bit back and forth across the mortise, the carriage ratchets down. The bit removes only a small amount at a time, making for a clean cut. It’s a simple idea executed well.
DRILLED MORTISE
As someone who began with construction and moved into fine woodworking, I appreciate the idea of completing a mortise and tenon joint with only a hand drill. Though the concept is a bit of a novelty, it’s turned out to be an effecient method.
Using the mill only requires you to slide the bit into the drill guide, then move the lever back and forth. As long as you have the mill positioned, the guide will carry the drill across the mortise and drop it to the proper depth.
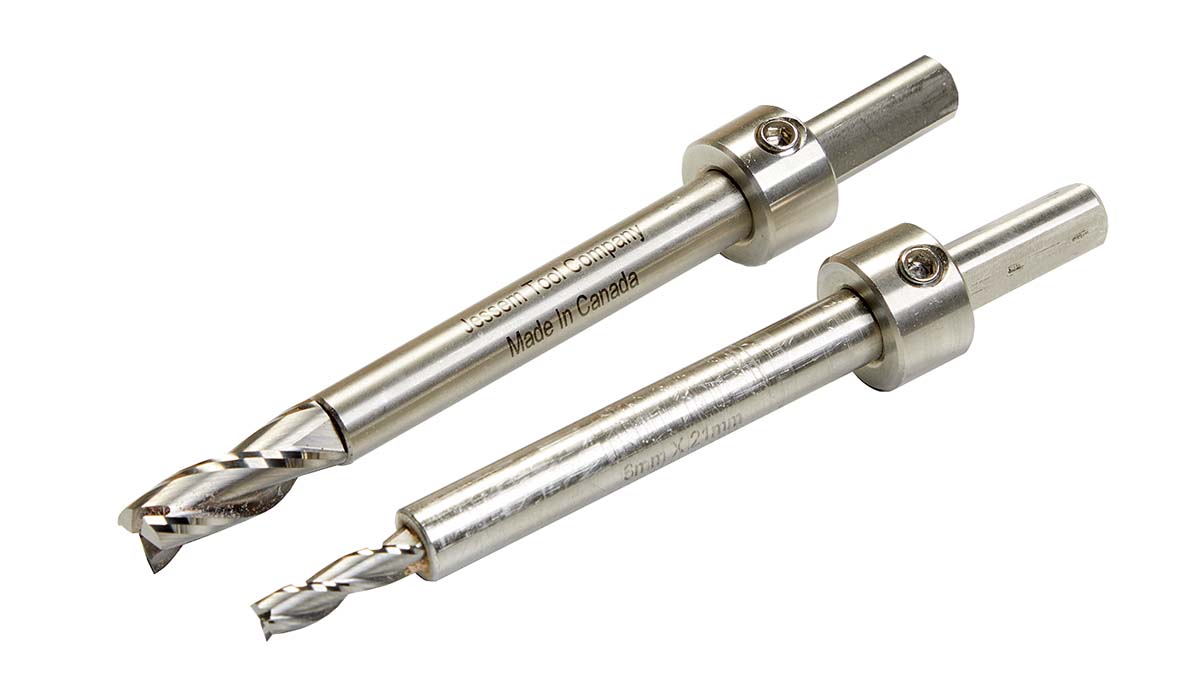
 These bits may look like twist bits, but they have solid carbide cutters like router bits to make mortises.
USING THE MILL.
The “Pocket Mill Pro” comes with the 6mm endmill bit you see above. While the bit looks like a standard twist bit with a long collar, the cutters are actually shaped akin to a straight router bit, giving them the ability to cut both side-to-side and downward. The stop collar can then be adjusted using an Allen wrench.
You won’t need much muscle here. Just as much pressure as you’d use to drive a screw into a pilot hole is sufficienct. As you move the lever back and forth, buttons on either side of the carriage cause the drill guide to ratchet down toward the workpiece. Once the the drill lowers to your stop (whether you set it on the guide or use the stop collar), your mortise is finished. Pressing the release button sends the drill guide back up like a typewriter carriage return.
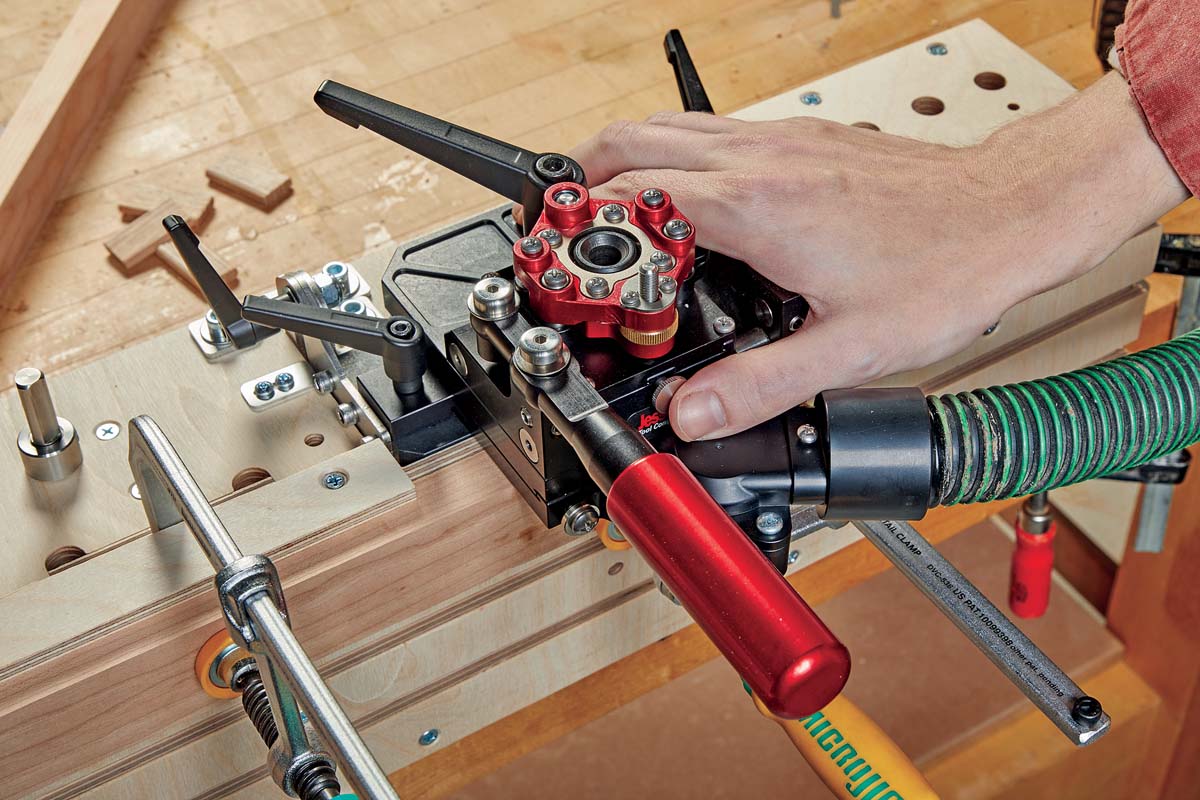
 After making the mortise, press the release button to release the carriage back to the initial position.
OTHER SETUPS.
As you can see, there’s another setup for the mill. The dovetail track clamps from Microjig provide a number of possible setups. Additionally, they allow you to reposition the mill horizontally to cut loose tenons in the ends of longer pieces.
 To make mortises in the end of a long board, you can orient the mill horizontally, then position the workpiece on the workstation above.
 Loose tenons are an efficient option for frames. Rather than needing to shape a tenon, you only need to make sure the mortises are properly aligned.
LOOSE TENON JOINERY
Loose tenons provide a few benefits over regular ones, especially with repeated cuts. They’re easier to set up and cut consistently, making them a great choice for frames. You can cut a number of mortises quickly and use the loose tenons to join them without any fussy fitting.
One particularly nice thing about this mill is that it works with Festool dominoes. While you can certainly make your own loose tenons by routing strips with a 1⁄8" roundover bit (or 1⁄4" for the larger bit), it’s hard to beat the ease and price of simply buying a bag of dominoes.
IMPROVEMENTS.
There is one addendum I would make on the mill having used it enough now, and that is what you see below. Along with the mill, Phil left a simple stop block (shown below) that he made. It’s a piece of plywood with a few pieces of dovetail hardware (shown in issue 268). Take a look to see why it’s so effective.
After a bit of playing around, the “Pocket Mill Pro” proved to be a pretty impressive tool. The ratcheting mechanism is a clever device, and being able to use the mill effectively with only a hand drill makes it an ideal addition for woodworkers of all scope.
POCKET MILL STOP BLOCK
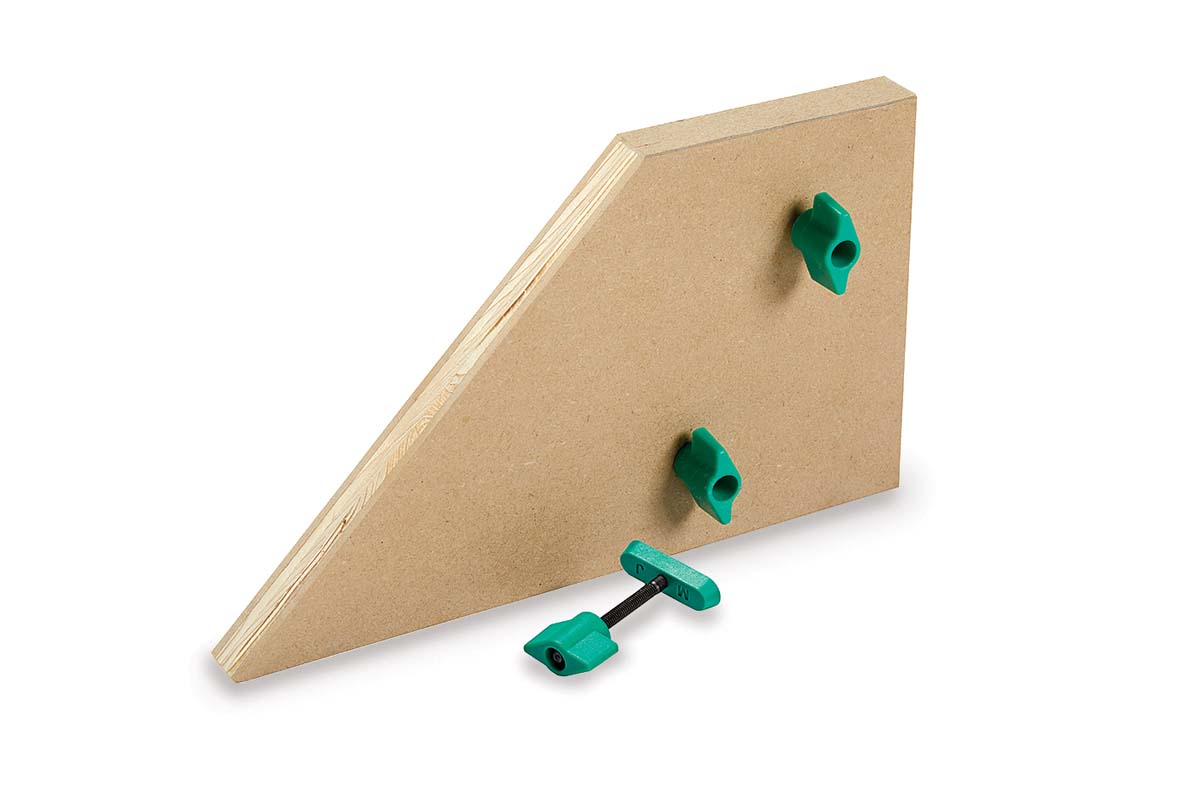

Shop-Made Stop.
One thing this mill needed was a way to make sure multiple pieces could be cut quickly and consistently. The answer was the stop block shown here. Microjig’s dovetail hardware fits the mill’s workstation perfectly, and a mitered edge supports a workpiece when installing loose tenons in a mitered corner.


