

If you’re looking to cut perfect circles with a band saw, building a simple circle jig can save you time and improve accuracy. This DIY band saw circle jig is easy to make using scrap wood and a few basic pieces of hardware that you may already have in your workshop. It's a great addition to any woodworker’s toolkit.
This band saw circle jig design is fully adjustable, allowing you to cut circles of various diameters with precision. While you may need to tweak the dimensions to fit your specific band saw, the following example should give you a solid foundation.
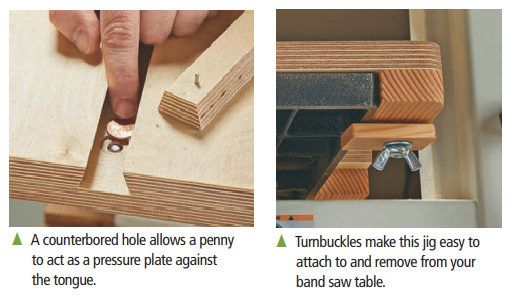
The base of the jig is constructed from two pieces of wood that are bevel-ripped and positioned to form a channel. These pieces are attached to a backboard, and the channel allows a sliding tongue to move back and forth. A small nail is driven into one end of the tongue and trimmed short, creating a pivot point for your material to rotate around.
To set your radius, simply move the tongue until the distance from the blade to the pivot matches your desired circle radius. A thumb screw mounted through the backboard locks the tongue securely in place once adjusted.
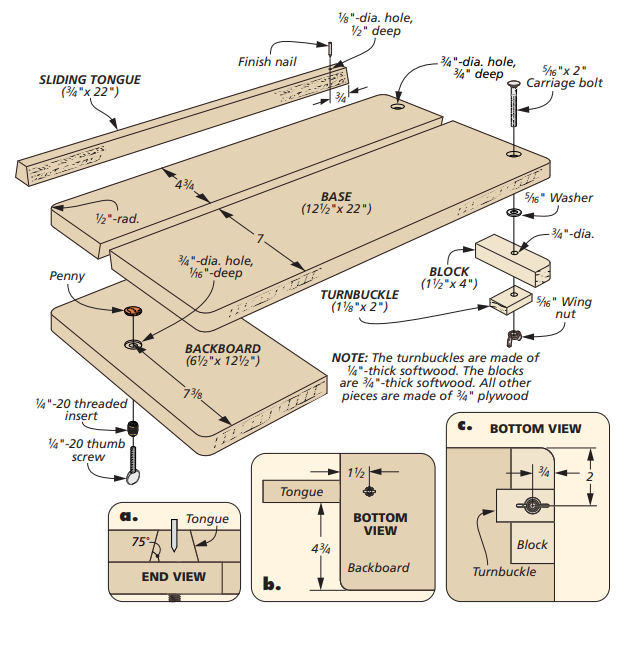
The jig is mounted to the band saw table using a pair of turnbuckles and blocks. Once secured, align the pivot point (the trimmed nail) directly in line with the front of the band saw blade. This ensures the workpiece rotates smoothly and evenly as it contacts the blade.
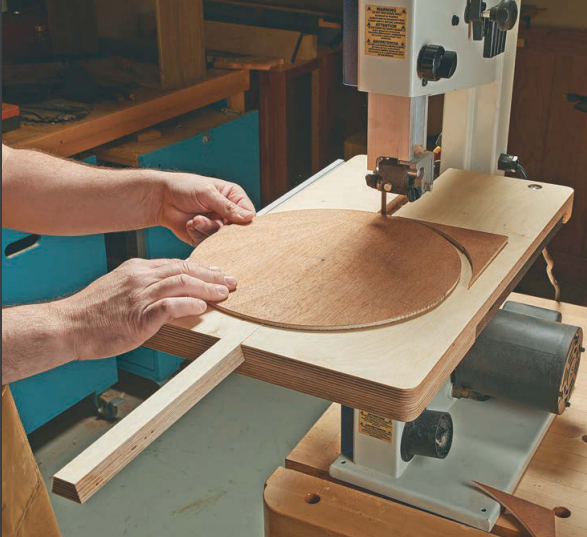
To use the jig, mount your workpiece onto the pivot nail, confirm that the tongue is locked in place at the correct radius, and begin cutting. As the material rotates around the pivot point, the blade will produce a clean, consistent circular cut.
This DIY circle jig for a band saw is a fast, affordable solution for cutting accurate circles in wood. Whether you're building round tabletops, speaker enclosures, or decorative pieces, this jig will make the process smoother and more reliable. For the best performance, make sure your jig is tailored to the size and table configuration of your particular band saw.


