You'll find a miter saw in just about every woodworking shop. It's fast, convenient, and hard to beat when you're breaking long boards down to manageable lengths. But if rough cutting is all you're using it for, you're missing out.
With the right setup, a good blade, and a few simple shop-made upgrades, a miter saw can produce clean, accurate, and repeatable crosscuts that require very little cleanup afterward.
If you're getting rough edges, tearout, cuts that aren't quite square, or pieces that vary slightly in length, don't immediately blame the saw. Work through these five areas first.
1. Tune Up Your Miter Saw
Before upgrading anything, make sure the saw itself is properly adjusted. Even an expensive blade won't produce accurate cuts if the fence, table, and blade aren't aligned.
Start with three basic checks:
- Make sure the fence is flat and square to the table.
- Check that the blade is square to the fence at the 90° miter setting.
- Check that the blade is square to the saw table at the 0° bevel setting.
If anything is out of alignment, follow the adjustment procedure in your saw's owner's manual. Once these basic settings are dialed in, you'll have a reliable reference for the upgrades that follow.
2. Use a Fine-Tooth Crosscut Blade
 One of the easiest ways to improve the quality of a miter saw cut is to install a blade designed specifically for crosscutting.
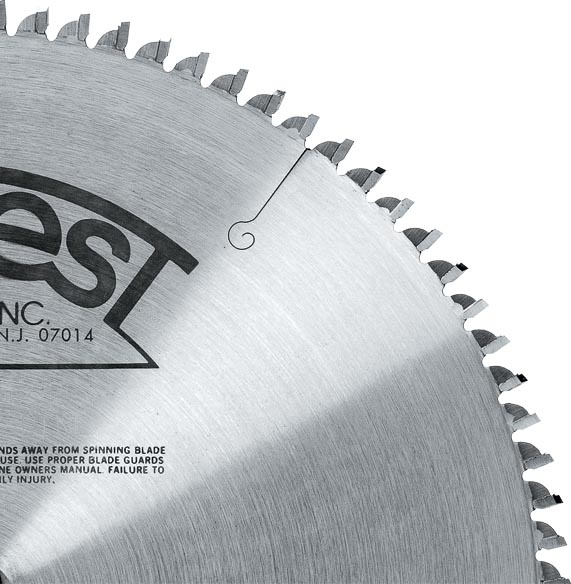
Depending on the blade diameter, a quality crosscut blade may have 60 to 100 teeth. But tooth count isn't the only thing that matters. The shape and angle of those teeth also affect how the blade enters the workpiece.
Look for teeth with beveled cutting edges designed to score the wood fibers cleanly. The hook angle is important as well. A low or negative hook angle makes the teeth less aggressive as they enter the workpiece. This encourages a smooth slicing action and reduces the tendency of the blade to grab the board during a cut.
That's particularly useful on a miter saw, where the blade is moving down into the workpiece.
3. Add Zero-Clearance Support to Reduce Tearout
Tearout occurs where the blade exits the workpiece and the wood fibers don't have enough support. On a miter saw, there are two primary trouble spots: the bottom face and the back edge of the board.
Most factory miter saw tables and fences have fairly large openings around the blade. They're necessary to accommodate different miter and bevel settings, but they don't provide much support for the wood fibers during a standard 90° crosscut.
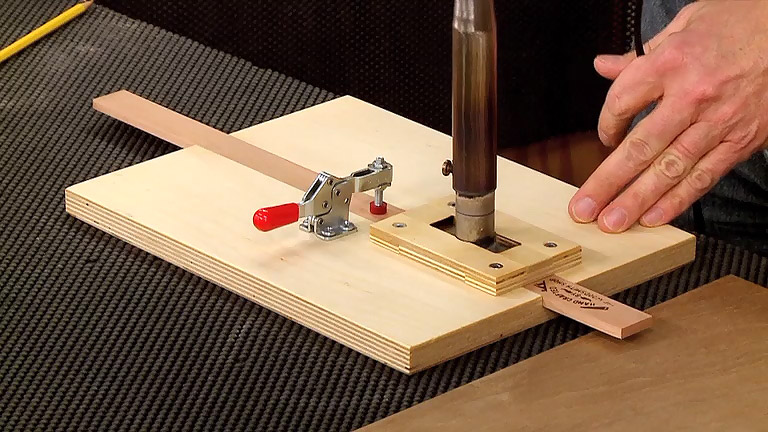
One solution is to make a zero-clearance table insert, similar to one you'd use on a table saw. The blade cuts its own narrow kerf through the insert, leaving support immediately alongside the cut.
Supporting those fibers right up to the blade can noticeably reduce splintering on the bottom of the workpiece.
RELATED VIDEO: How to Make a Zero-Clearance Insert for a Miter Saw
4. Make a Zero-Clearance Auxiliary Fence
You can apply the same zero-clearance idea to the back of the workpiece with an auxiliary fence.
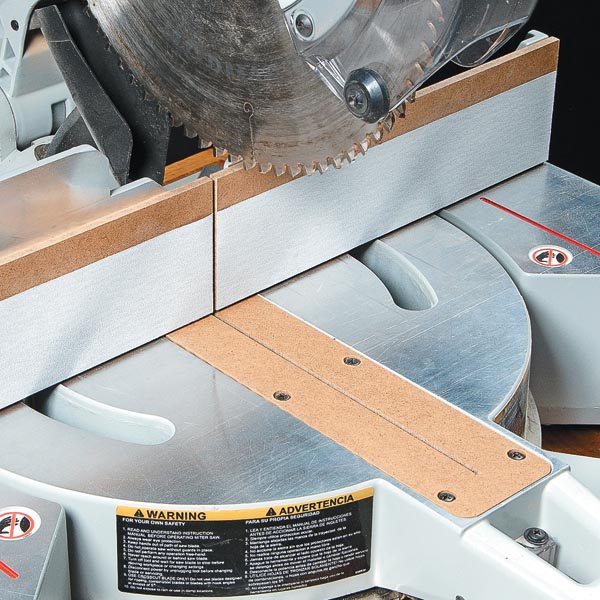
I make mine from 1/4" hardboard and attach it to the existing miter saw fence. After the blade cuts through it, the hardboard supports the back of the workpiece immediately alongside the kerf. That helps reduce tearout where the blade exits the rear edge.
There are two small upgrades that make this simple fence even better.
First, I apply adhesive-backed sandpaper to the face. The added grip helps prevent a workpiece from creeping as the blade enters the cut.
Second, I cut a small dust-relief rabbet along the bottom edge. This gives sawdust somewhere to go instead of collecting between the fence and workpiece and potentially affecting the accuracy of the cut.
Attaching the fence with double-sided tape makes it easy to replace when it gets worn or when you need a fresh zero-clearance kerf.
5. Use a Stop Block for Repeatable Cuts
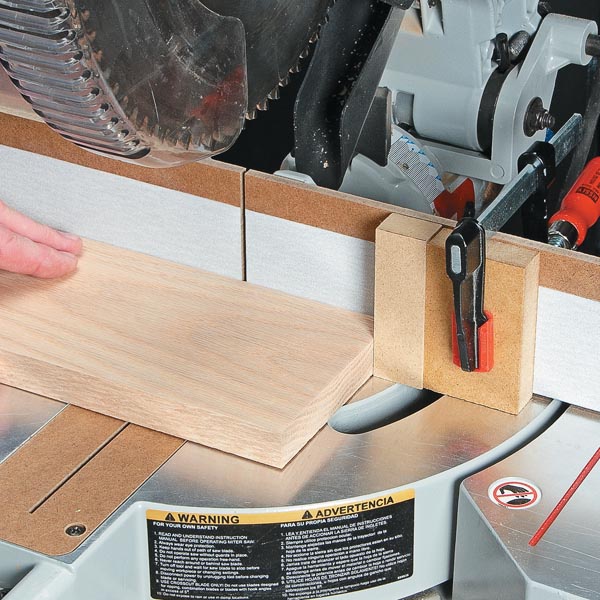
When you need several parts exactly the same length, don't measure and mark each piece individually. A stop block gives you a physical reference and makes repeat cuts faster and more consistent.
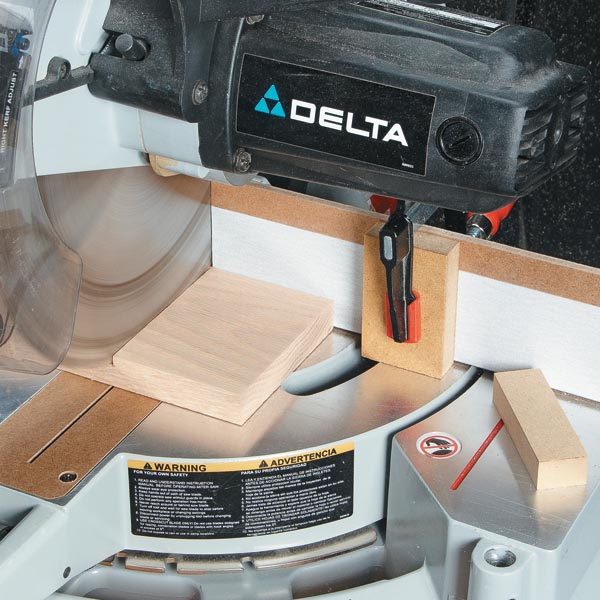
There's an important consideration when cutting short pieces, though. You don't want the cutoff trapped between the spinning blade and a fixed stop. If it binds, the blade can throw the piece.
The solution shown here is to place a removable spacer between the workpiece and stop block while positioning the board. Butt the workpiece against the spacer, then remove the spacer before making the cut.
That leaves an open space beside the finished part so it isn't trapped between the blade and stop.
Just remember that the thickness of the spacer needs to be included when initially positioning the stop.
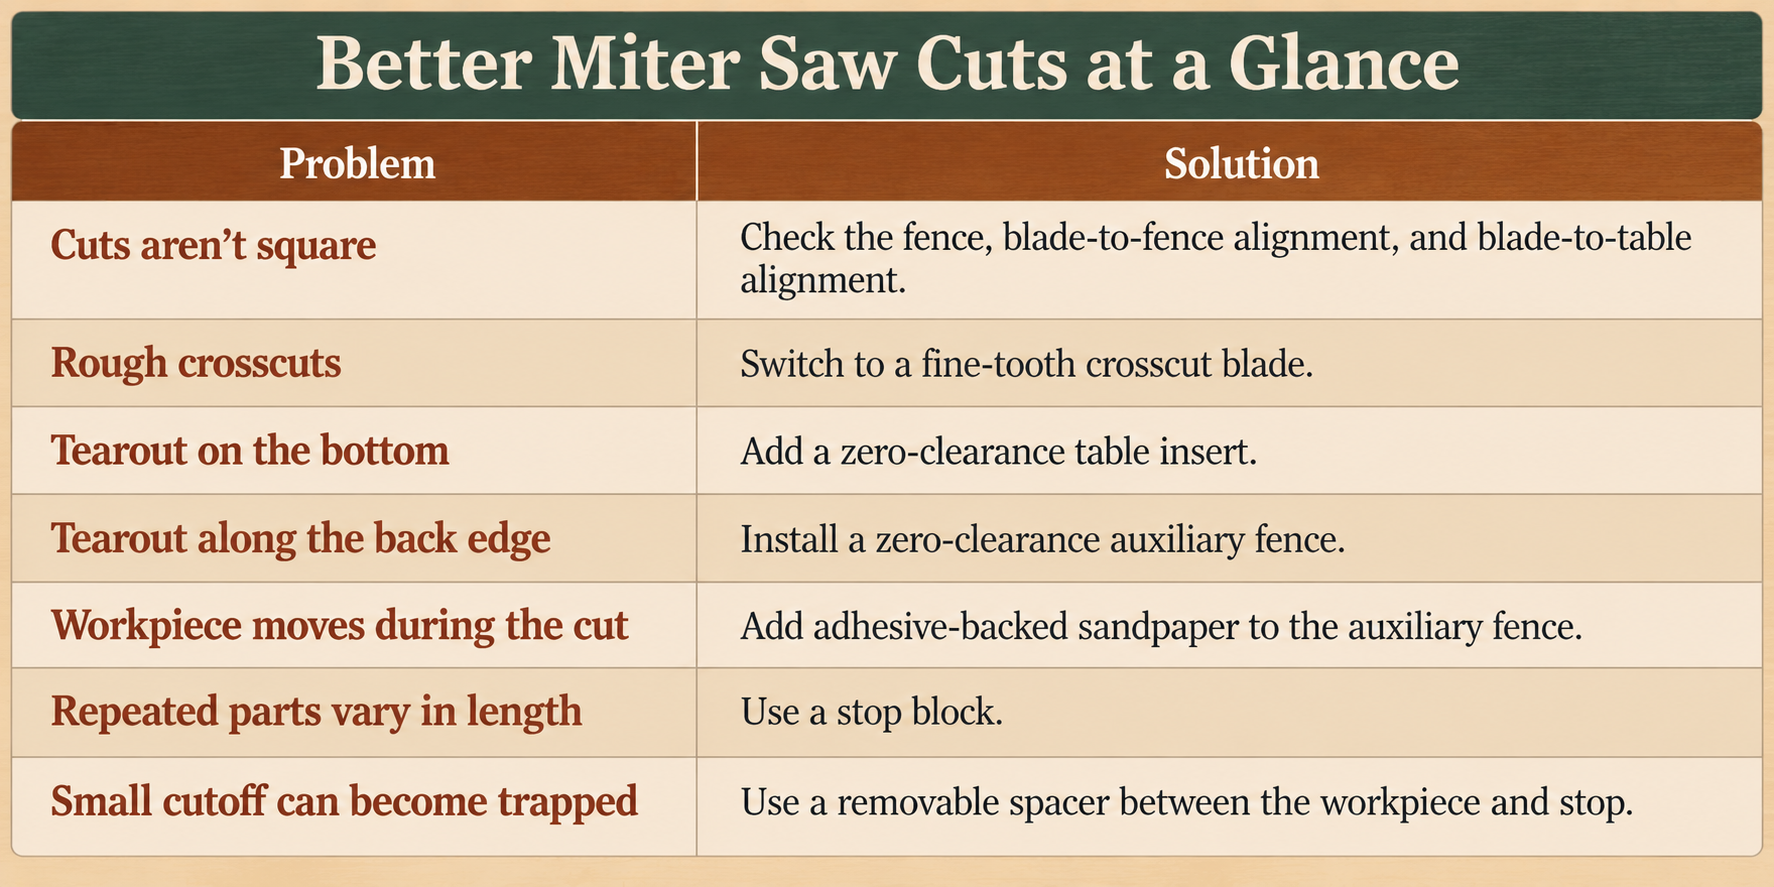
Better Miter Saw Cuts at a Glance
Turn Your Miter Saw Into a Precision Crosscutting Tool
A miter saw doesn't have to be reserved for chopping long boards down to rough length. Start by making sure the saw is accurately adjusted, then pair it with a good crosscut blade. A zero-clearance insert and auxiliary fence provide support where the blade exits the workpiece, while a stop-block setup makes repeated cuts much more consistent.
None of these improvements is particularly complicated or expensive. Put them together, though, and you'll have a miter saw that's capable of cleaner, more accurate, and more repeatable crosscuts — exactly what you want when you're cutting parts for a woodworking project.
Accurate cuts start with accurate layout and setup. See our 5 Essential Woodworking Squares & How to Use Them → for the tools we use to check machines, lay out cuts, and transfer angles.
That gives us another logical connection between the layout/squares cluster and a practical power-tool technique article.