


A block plane is one of those hand tools that may not seem essential until you start using one. Then it has a habit of staying right on the workbench. It’s compact, easy to control, and useful for everything from fitting joinery and trimming edging to shaping profiles and cleaning up saw marks.
If your experience with a block plane is limited, there’s no need to jump immediately into a project. Start with a sharp blade set to take a very thin shaving and spend a little time working on scrap. The goal isn’t to remove a lot of material at once. A block plane works best when you make light, controlled passes and gradually work your way to the finished surface.
In most cases, I also like to skew the plane slightly rather than pushing it straight ahead. Holding the plane at an angle effectively lowers the cutting angle of the blade and can produce a cleaner cut. Once that basic motion feels comfortable, you’re ready to put the plane to work.
1. Trim Dovetails & Box Joints Flush

One of my favorite uses for a block plane is trimming joinery after assembly. When cutting dovetails or box joints, I like to leave the tails or fingers just a little proud of the surface. That gives me some material to work with when it’s time to make the joint perfectly flush.
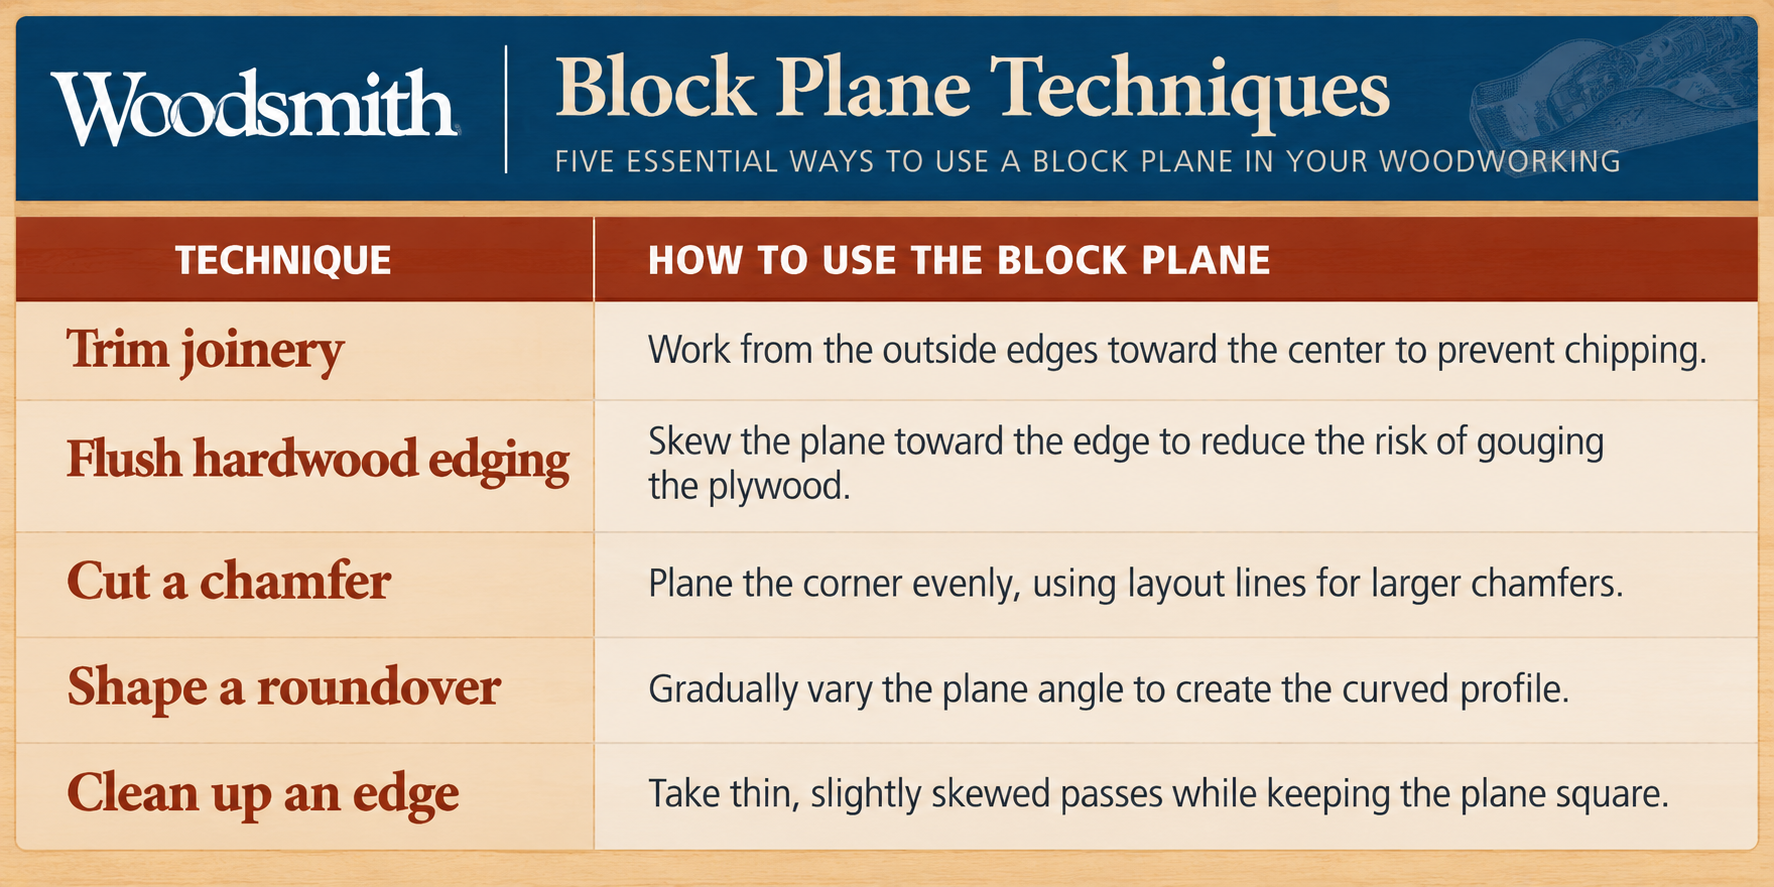
The key is to avoid breaking or chipping the ends of the projecting pieces. Instead of planing all the way across the workpiece from one side, work from the outside edge toward the center. Then turn the workpiece around and approach from the opposite edge. This keeps the plane from exiting unsupported end grain and potentially tearing away a corner.
Take light passes and check your progress frequently. As the joint gets close to flush, make the cuts even finer until the fingers or dovetails blend smoothly into the surrounding surface.
2. Flush-Trim Hardwood Edging on Plywood

There are several ways to trim solid-wood edging flush with a plywood panel, but a block plane can be one of the quickest. It also gives you excellent control because you can remove the edging a shaving at a time rather than risk taking off too much material in one pass.
As you work along the edge, skew the plane toward the outside edge of the panel. This helps minimize the chance of the plane slipping onto the plywood face and gouging the thin veneer.
Don't try to make the edging perfectly flush in a single pass. Take several light shavings, periodically checking the transition between the hardwood and plywood with your fingertips. When you can no longer feel a ridge between the two surfaces, you're there.
3. Cut a Chamfer With a Block Plane

A block plane isn't limited to trimming. It's also a useful shaping tool, and one of the easiest profiles to make is a chamfer.
For a small chamfer — less than about 1/8" — you can usually work by eye. Hold the plane at roughly 45° to the corner and make a few consistent passes along the edge. Watch the width of the chamfer as it develops and adjust the plane as necessary to keep it even.
For a wider chamfer, I prefer to add layout lines to the face and edge of the workpiece first. These give you definite boundaries to work toward. Keep the plane centered on the corner and make successive passes until the chamfer meets both layout lines.
This is particularly useful when you want a hand-worked edge treatment without setting up a router.
4. Shape a Roundover by Hand

You can even use a block plane to create a roundover. The technique is a little different from making a chamfer because you're gradually creating a curve rather than a single flat facet.
Start by drawing the desired profile on the end of the workpiece. Then add layout lines along the face and edge to establish the boundaries of the roundover. These marks provide a visual reference as the shape develops.
Rather than holding the block plane at one angle, vary its angle with each series of passes. Remove more material near the center of the profile, where the curve is deepest, and progressively less as you approach the edges. The center may require several passes while the outer portions may need only one or two.
You're essentially creating a series of very small facets that approximate the curve. As those facets get smaller, the profile becomes smoother and more rounded.
5. Clean Up Saw Marks & Mill Marks

Not every edge needs to go back to a power tool or be sanded smooth. If a sawn or machined edge has light saw marks, burn marks, or milling marks, a block plane can often clean it up with just a few passes.
Again, I like to keep the plane slightly skewed to the direction of travel. Take thin shavings and work along the edge until the machining marks disappear.
The important thing here is to keep the plane flat and avoid rocking it from side to side. You want to remove the marks while maintaining a straight, square edge rather than unintentionally rounding it over.
For a small cleanup job, this can be considerably faster than working through several grits of sandpaper.
Block Plane Techniques at a Glance
Start With a Sharp Blade & Thin Shavings
No matter which of these techniques you're using, the basic setup remains the same. Start with a sharp blade and set the block plane to take a thin shaving. A heavy cut requires more force, makes the plane harder to control, and increases the chance of removing more material than you intended.
RELATED VIDEO: How to Sharpen a Plane Blade: Quick and Easy Method
It’s also worth practicing on scrap before working on your project. Experiment with skewing the plane, changing the direction of the cut, and adjusting the depth until you get consistent, wispy shavings. That short practice session will tell you a lot about how the plane responds.
Once you get comfortable with those basic techniques, a block plane becomes much more than an old-fashioned alternative to a power tool. It becomes the tool you reach for when a joint needs one more shaving, an edge needs cleaning up, or you want to add a quick chamfer without setting up the router.
New to woodworking hand tools? Start with our guide to Essential Hand Tools for Woodworking, where we cover the chisels, planes, saws, and layout tools that make the most useful additions to a power-tool shop.


