


Solid Wood Cabinet Backs: Design & Installation Tips
A cabinet back does more than close off the case. It helps keep the cabinet square and adds rigidity to the assembly. While plywood is a common choice, a solid-wood back can give your project a more traditional, handcrafted appearance.
The key is choosing an attractive arrangement for the boards and installing them in a way that provides stability without restricting seasonal wood movement.
Choose the Right Board Pattern
One of the advantages of a solid-wood cabinet back is the freedom to customize its appearance.
Using boards of equal width creates a consistent, uniform look. For something more informal, you can vary the widths to create a less structured pattern.
Another option is an alternating arrangement of narrow and wide boards. This creates a more formal, balanced appearance that works especially well on traditional furniture.
The joints between boards also contribute to the finished look. Depending on the style of your project, you can minimize the joint lines or emphasize them with a small bevel or decorative bead.
Install the Cabinet Back for Strength
A solid-wood back can help prevent a cabinet from racking, but the way it's attached is important.
Start with the narrow outside boards that fit into rabbets along the cabinet sides. These pieces can be secured firmly with glue and screws along their edges, creating a stable connection between the back and cabinet case.
A snug fit at the top helps tie the cabinet together and improves its overall rigidity.
Allow for Seasonal Wood Movement
Unlike plywood, solid wood expands and contracts across its width as humidity changes throughout the year.
To prevent splitting, avoid fastening the remaining back boards rigidly along their entire width.
Instead, secure each board near its center with a screw, nail, or a small amount of glue, depending on the construction. This allows the edges to move as the wood expands and contracts.
The joints between boards should also accommodate this movement without creating unwanted gaps or binding.
Add a Custom Touch to Your Next Cabinet
A solid-wood back is an opportunity to add craftsmanship to an often-overlooked part of a project.
By choosing the right board widths, adding decorative joint details, and allowing for seasonal movement, you can create a cabinet back that's attractive, durable, and built to last.
Featured Project: Curved-Front Wall Cabinet
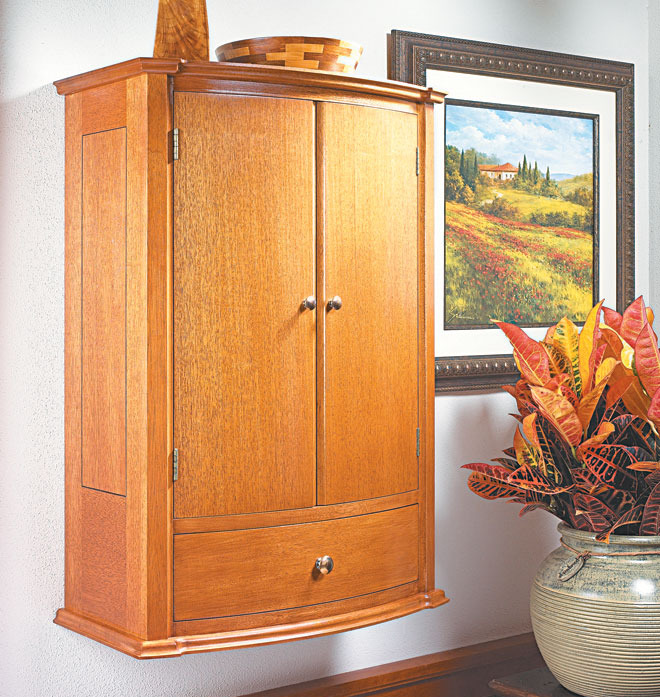
Put your cabinetmaking skills to work with our elegant Curved-Front Wall Cabinet. This distinctive project combines a traditional cabinet case with gently curved doors made using a clever coopered construction technique. While the doors create an impressive look, the rest of the cabinet uses familiar woodworking methods, making it a rewarding project for building your skills. Get the step-by-step plans and create a beautiful wall cabinet that showcases your craftsmanship.
GET THE STEP-BY-STEP WOODWORKING PLANS → Build a Curved-Front Wall Cabinet


