


Build a Space-Saving Fold-Down Router Table
A router table is one of the most useful additions to a woodworking shop. It makes routing edges, cutting joinery, and shaping small parts easier and more accurate. But there's one drawback: A conventional router table takes up valuable floor space, even when you're not using it.
That's a particular problem in a small garage workshop where woodworking equipment has to share space with the family car.
This fold-down router table offers a practical solution.
It provides a large worksurface for supporting workpieces during routing operations. When the job is finished, the table folds up against the wall, freeing up floor space for other activities.
Best of all, the design uses a straightforward combination of hinges, folding support wings, and wall-mounted cleats.
How the Fold-Down Router Table Works
The design consists of a wall-mounted support frame, a hinged router table top, and two folding support wings.
When the table is lowered into its working position, the wings swing outward to support the top.
When you're finished routing, the wings fold inward, allowing the tabletop to pivot up against the wall.
A pair of screen door hooks holds the top in its stored position.
The entire assembly stays attached to the wall, so there's no need to move or store a separate router table stand.

Size the Frame to Fit Your Router Table
The support structure can be sized to fit your existing router table top.
The upper and lower wall cleats should match the width of the tabletop.
The remaining dimensions depend on the size of your top and the space available in your shop.
Before starting construction, determine the desired working height and make sure there's enough wall clearance for the top to fold into its stored position.
Build the Wall-Mounted Support Frame
Start with the back panel of the support structure.
Attach the two side pieces that will carry the folding support wings.
These sides provide the mounting surfaces for the hinges and help establish the position of the wings beneath the tabletop.
The frame needs to be securely fastened to the wall structure so it can support the weight of the router table and the forces created during use.
Add the Folding Support Wings
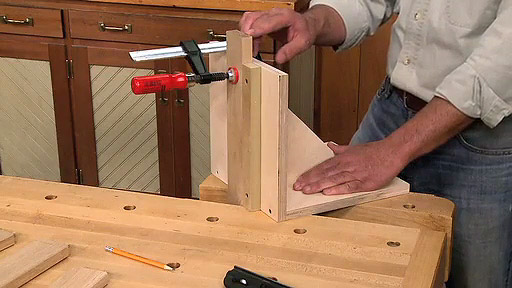
The two support wings are attached to the sides of the frame with continuous hinges, also known as piano hinges.
These hinges allow the wings to swing outward to support the tabletop and fold inward when the table is stored.
One important detail is that the hinges are staggered.
This allows the two wings to fold flat, one over the other, without interfering with each other.
It's a simple detail that makes the entire assembly more compact.

Install the Hinged Router Table Top
Once the support frame and wings are assembled, attach the lower cleat to the back and sides of the frame.
The router table top is then connected to the lower cleat with a continuous hinge.
This hinge allows the top to pivot between its horizontal working position and its vertical storage position.
With the wings opened, the tabletop rests on the supports.
When the wings are folded inward, the top can swing up against the wall.
Before proceeding, check that the tabletop moves freely and that the folding wings provide firm, even support.
Add the Upper Cleat and Storage Hooks
The upper wall cleat helps secure the router table when it's folded up.
To locate it, raise the tabletop into its vertical storage position against the wall.
Use this position to determine where the upper cleat should be mounted.
Then install the screen door hooks that hold the tabletop in its folded position.
These simple hooks prevent the table from swinging down unexpectedly while it's stored.

Level the Router Table
With the upper cleat installed, lower the tabletop into its working position.
The final step is to locate and drill the counterbores underneath the top for the leveling hardware.
This hardware allows you to fine-tune how the tabletop rests on the folding support wings.
A flat, level worksurface is important for accurate router table operations.
Check that both wings provide solid support and that the tabletop doesn't rock or shift when pressure is applied.
A Few Tips for Safe Router Table Use
A folding router table needs to be just as stable as a conventional stationary table.
Before using it, verify that the wall-mounted frame is securely anchored and that both support wings are fully opened.
Make sure the tabletop rests firmly on the supports and that the leveling hardware is properly adjusted.
The folding structure must be able to resist the downward and sideways forces produced while routing.
Also, check that the router, power cord, dust collection hose, and any accessories have enough clearance throughout the folding motion.
Disconnect power before folding the table for storage, and make sure the router and accessories are safely secured.
Finally, confirm that the screen door hooks fully engage and securely retain the tabletop in its stored position.
A Practical Router Table for Small Shops
You don't need a large workshop to enjoy the benefits of a full-size router table.
This wall-mounted design provides a generous worksurface when you need it, then folds neatly out of the way when you don't.
The hinged tabletop, staggered folding wings, and simple storage hooks make it a practical solution for garage workshops and other spaces where every square foot counts.
If you're looking for a way to add router table capabilities without sacrificing permanent floor space, this fold-down design is worth considering.
Build a Fold-Down Tool Stand for Your Workshop

Need room for a grinder, sharpening machine, or other benchtop tool? This clever wall-mounted workstation provides a sturdy worksurface when you need it, then folds against the wall when the job is done. It's a practical way to make the most of limited shop space.
BUILD THE FOLD-DOWN TOOL STAND → More Workstation Space Without the Clutter